Advertisement
Quick Links
INNOVATORS OF TECHNOLOGY
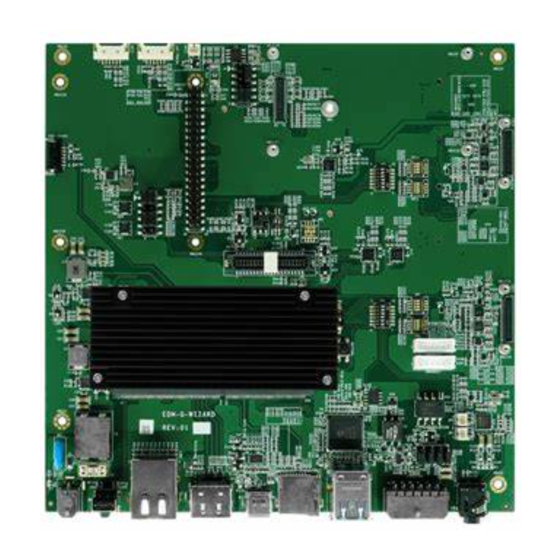
FLEX-WIZARD-IMX8M-MINI
Quickstart Guide
Safety Precauions
1
Thank you for purchasing a TechNexion FLEX series evaluaion kit based on NXP i.MX8M applicaions processor. This installaion guide will be helpful in the installaion,
wiring and inspecion of your TechNexion evaluaion kit. Before using the product, please read this guide to ensure correct use. You should thoroughly understand all
safety precauions before proceeding with the installaion, wiring, and operaion. Place this instrucion sheet in a safe locaion for future reference.
Storage and Installaion
1.1
• Keep the device dry. Precipitaion, humidity, and all types of liquids or moisture can contain minerals that will corrode electronic circuits. If your device does get wet,
allow it to dry completely.
• Do not use or store the device in dusty or dirty areas. Its parts and electronic components can be damaged.
• Do not store the device in hot areas. High temperatures can shorten the life of electronic devices, damage bateries, and warp or melt certain plasics.
• Do not store the device in cold areas. When the device returns to its normal temperature, moisture can form inside the device and damage electronic circuit boards.
!
• This product is designed for specific applicaions and needs to be installed by qualified personnel.
• Do not drop, knock, or shake the device. Rough handling can break internal circuit boards and fine mechanics.
• Do not paint the device. Paint can clog the parts and prevent proper operaion.
• Unauthorized modificaions or atachments could damage the device and may violate regulaions governing radio devices.
1.2
Wiring
• Make sure that the available power source matches the required input power of the device. Failure to observe this cauion may result in electric shock or fire.
Maintenance and Inspecion
1.3
• Do not touch any internal or exposed parts of the device as electrical shock may result.
• Do not open the device while power is on. Otherwise electrical shock may result.
• Do not use harsh chemicals, cleaning solvents, or strong detergents to clean the device.
• Be sure the venilaion holes are not obstructed during operaion. Otherwise malfuncion may result due to bad venilaion or overheaing.
These suggesions apply equally to your device, batery, charger, or any enhancement. If any device is not working properly, take it to the nearest authorized service
facility for service.
Dimensions
2
170
Unit : mm
1
163.83
1.6
4
3PCS- 2.75
16.41
163.83
Installaion Instrucions
3
This installaion guide will help you to assemble your development kit using step-by-step instrucions to make sure all parts (development board, display, camera module
and Wi-Fi antenna) are working.
3.1
Connect the parts
Connect the parts in the following order. Note that some versions of the FLEX-WIZARD-IMX8M-MINI evaluaion kit do not include the muli-touch display, camera /
HDMI capture module and/or HDMI expander card.
Tips: Do not power your board during the installaion process.
Standoffs (opional)
3.2
Let's prepare four standoffs It only takes a few minutes.
Step 1: Prepare evaluaion board and standoffs.
Step 2: Locate four standoffs holes on the evaluaion board.
Step 3: Locate a screw and insert it into the hole. Screw a standoff on the underside. Atach the standoffs for the remaining three holes.
Tips: Remove FLEX compuing module before the standoffs installaion.
1
Camera module / HDMI capture card (opional)
3.3
Please follow the steps below to properly install the camera module.The same steps can be applied to the installaion of the HDMI capture card.
Step 1: Prepare camera module, FPC cable and evaluaion board.
Step 2: Turn the camera module over to reveal a white connector near the edge of the module. Swivel the black retaining clip upward.
Step 3: Insert either end of the camera module cable into the white connector. Make sure that the blue side of the ribbon is facing up and is aligned straight with the
connector. The silver pins on the FPC cable should be facing down.
Step 4: Swivel the retaining clip back down to hold the FPC cable in place.
Steps 5 and 6: Repeat these same steps with the other end of the cable and the connector on the board.
Tips: Ater installaion remove the protecive blue film from the camera lens.
1
52.6
6.35
4
6.35
2
3
2
3
5
6
2
Advertisement

Related Manuals for TechNexion FLEX Series


Summary of Contents for TechNexion FLEX Series
- Page 1 Safety Precauions Thank you for purchasing a TechNexion FLEX series evaluaion kit based on NXP i.MX8M applicaions processor. This installaion guide will be helpful in the installaion, wiring and inspecion of your TechNexion evaluaion kit. Before using the product, please read this guide to ensure correct use. You should thoroughly understand all safety precauions before proceeding with the installaion, wiring, and operaion.
- Page 2 • No warranty of accuracy is given concerning the contents of the informaion contained in this publicaion. To the extent permited by law no liability (including liability to any person by reason of negligence) will be accepted by TechNexion Ltd., its subsidiaries or employees for any direct or indirect loss or damage caused by omissions from or inaccuracies in this document.
Need help?
Do you have a question about the FLEX Series and is the answer not in the manual?
Questions and answers