
Related Manuals for DirecTV HIRD-B4


Summary of Contents for DirecTV HIRD-B4
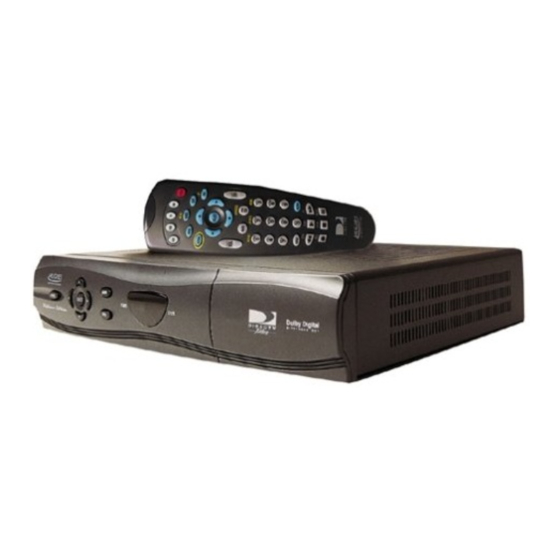
- Page 1 Model HIRD-B4 shown Models: HIRD-B2 HIRD-B3 HIRD-B4 HIRD-C2...
- Page 2 WatchWord, PreSelect, LogoBelt, TurboTune, and OneLine Guide are trademarks of Hughes Network Systems. DIRECTV and DIRECT TICKET are trademarks of DIRECTV, Inc., a Hughes Electronics Company and are used with permission. USSB and USSB Entertainment Plus are registered trademarks of United States Satellite Broadcasting Company, Inc.
-
Page 3: Important Safety Instructions
IMPORTANT SAFETY INSTRUCTIONS For your safety and protection, read this entire Owner’s Manual before you attempt to install or use the DIRECTV System. In particular, read this safety section carefully. Keep this safety information where you can refer to it if necessary. - Page 4 SERVICE Servicing—Do not attempt to service this product yourself as opening or removing covers may expose you to dangerous voltage or other hazards. There are no user serviceable parts inside. Refer all servicing to qualified service personnel. Conditions Requiring Service—Unplug this product from the wall outlet and refer servicing to qualified service personnel under the following conditions: When the power supply cord or plug is damaged.
-
Page 5: Regulatory Information
FEDERAL COMUNICATIONS COMMISSION (FCC) REGULATORY INFORMATION Federal Communications Commission (FCC)—The system complies with both Part 15 and Part 68 of the FCC rules. Part 15 compliance— This equipment has been tested and found to comply with the limits for a Class B digital device, pursuant to Part 15 of the FCC rules. -
Page 7: Table Of Contents
What You Should Do First...1-1 How Does All This Work?...1-1 DIRECTV S YSTEM OMPONENTS The Satellite Antenna...1-2 The Digital Satellite Receiver ...1-2 The Remote Control...1-5 SETTING UP YOUR DIRECTV SYSTEM...1-1 NSTALLING ATTERIES IN ...2-1 ONTROL HOOSING THE ONNECTION FOR ...2-2... - Page 8 Cable Test... 7-16 VCR S ...7-16 ETUP Brand... 7-16 Code... 7-17 Test... 7-17 ...7-17 ATCH Word buttons... 7-17 USING D-VHS FEATURES ON THE HIRD-B4 RECEIVER ...7-1 A/V C ONNECTING THE IGITAL VCR S ...8-1 ETUP Recording Type...8-1 Recording Speed...8-2 Test D-VHS Status...8-2 ...8-2...
-
Page 9: The Hughes-Brand Directv System
What You Should Do First Your DIRECTV System is both a complicated technical miracle and an easy to operate source of entertainment. You should complete the following steps to achieve the greatest performance from your system: Read the included guides and manuals to familiarize yourself with the system. -
Page 10: Directv System Components
HUGHES-BRAND DIRECTV SYSTEM OWNER’S MANUAL DIRECTV System Components There are three main components of your DIRECTV System. They are the satellite antenna, the digital satellite receiver, and the remote control. Take a few minutes to read about each of these components. - Page 11 This card should not be removed except to protect your digital satellite receiver from unauthorized use or to replace the card when your service provider (DIRECTV or USSB) supplies a new one. The power key ( The power light (located in the center) will illuminate when the unit is on. Any...
- Page 12 VCRs to record selected programs automatically. The D-VHS jack, found only on the HIRD-B4 model receiver, is for connecting a digital A/V cable (not included) for use with a D-VHS VCR. When this cable is connected and a functioning D-VHS...
-
Page 13: The Remote Control
Please refer to “Controlling the Digital Satellite Receiver” for more remote control capabilities and “Programming Your Remote Control” for teaching your remote control about your other audio/video components. THE HUGHES-BRAND DIRECTV SYSTEM The Remote Control The remote control is available in two models. The basic model (HRMC-2) can control your digital satellite receiver and most TV brands. - Page 14 HUGHES-BRAND DIRECTV SYSTEM OWNER’S MANUAL...
-
Page 15: Watching Satellite Programming
SETTING UP YOUR DIRECTV SYSTEM Setting up your new DIRECTV System is much easier than assembling a train set or a bicycle. You should be watching satellite programming in a very short time! This chapter provides step-by-step instructions for setting up your DIRECTV System and connecting it to your television or entertainment system. -
Page 16: Choosing The Best Connection For Entertainment System
HUGHES-BRAND DIRECTV SYSTEM OWNER’S MANUAL Choosing the Best Connection for Your Entertainment System There are a number of ways to connect your digital satellite receiver, depending on the other audio/video equipment you wish to use. We will show you the simplest hookups. -
Page 17: Hook Up The Audio/S-Video Signals
VIDEO output to the video input on your VCR. Also connect the pair of the digital satellite receiver’s audio outputs (Left and Right) to the audio inputs on your VCR. SETTING UP YOUR DIRECTV SYSTEM... -
Page 18: Hook Up The Rf Signals
HUGHES-BRAND DIRECTV SYSTEM OWNER’S MANUAL If your TV has a video input… connect an audio/video cable from the VIDEO output (either from the digital satellite receiver if available or the VCR) to the video input on the TV. Also connect the left and right audio outputs from the same device that the video is coming from and connect them to the TV. -
Page 19: Finishing Up
Note: If you have connected a VCR into your entertainment system in a way that routes the cables from your DIRECTV System to your VCR before the signal reaches the TV, you could experience a distorted picture if you attempt to record a copy-protected program. These programs are identified by a “Can’t Tape”... -
Page 20: Remote Control Extender
VCR operation. Remote Control Extender Some DIRECTV Systems may include a Remote Control Extender. Even if it is not included with your system, they are also sold separately. You would need to purchase the HRCE-10 that you can add to your remote control that came with your system. -
Page 21: Battery Replacement
If so, this is good! If not, try pressing the key while the remote control is in SAT mode or check all of the connections. You’re well on your way to enjoying your DIRECTV System. - Page 22 HUGHES-BRAND DIRECTV SYSTEM OWNER’S MANUAL...
-
Page 23: Controlling The Digital Satellite Receiver
CONTROLLING THE DIGITAL SATELLITE RECEIVER Now it is Time for You to Take Control! You are the master of your digital satellite receiver. It does what you tell it to do. Take a few minutes to read through this chapter to begin to understand how to “drive”... - Page 24 HUGHES-BRAND DIRECTV SYSTEM OWNER’S MANUAL call in status reports to the service providers, start and stop a VCR for programs you have scheduled, receive messages, and perform other background activities. The only apparent changes that occur in the standby condition are that the video goes black, the IN FROM ANTENNA connector signals are passed through to the OUT TO TV connector, and the power light is off.
-
Page 25: Installing And Pointing Your
If you do not feel comfortable about performing these tasks or complying with installation requirements, contact your dealer for information on having your system installed by an authorized professional installer. The warranty covering your DIRECTV System assumes professional installation. The warranty may not apply in self installation situations since improper installations could damage the various components or cause undesired operation. -
Page 26: The Installation Screen
The results provided for HIRD-C2 receivers are for the DIRECTV Plus antenna only. Contact the Customer Care Center at 1-800-274-8995 for the proper coordinates if you should choose to use the HIRD-C2 receiver with a DIRECTV System 18” satellite antenna. -
Page 27: Choosing The Antennai
INSTALLING AND POINTING YOUR SATELLITE DISH Choosing the Antenna Installation Site For your own safety, follow these important safety rules: Perform as many functions as possible on the ground. Do not install the antenna on a rainy or windy day. If you start to drop the antenna or mast assembly, get away from it and let it fall. - Page 28 MODEL HIRD-C2 OWNERS PLEASE NOTE If you have the model HIRD-C2 receiver and are utilizing the DIRECTV Plus satellite antenna, please refer to the installation instruction included with the dish. The following instructions are for the 18” satellite antenna only. After installing the dish, continue with this manual starting at the section titled “Authorizing Your Service”...
-
Page 29: Selecting A Mounting Option
Selecting a Mounting Option Now that you have chosen where you want to install your antenna, you need to select the appropriate mounting. Use the options described below to determine the section of this chapter that you should advance to. All installations require grounding per NEC 810-15 and NEC 820-33. -
Page 30: Installation Procedure
HUGHES-BRAND DIRECTV SYSTEM OWNER’S MANUAL Installing the Antenna onto a Wooden Surface The satellite antenna can be installed onto several types of wooden surfaces. This section describes installing the antenna base plate and mast onto the side of your house or on a deck rail or floor. - Page 31 INSTALLING AND POINTING YOUR SATELLITE DISH 3) Using a carpenter’s level, plumb the antenna mast in at least two different locations on the side of the mast, as shown. These two measurements should be at right angles to each other. If the mast is plumbed (aligned vertically with the bubble level), go to step 5.
-
Page 32: Installation Procedure
HUGHES-BRAND DIRECTV SYSTEM OWNER’S MANUAL Installing the Antenna onto a Brick Surface The satellite antenna can be installed onto brick surfaces. This section describes installing the antenna base plate and mast onto the side of your brick house or on a chimney. -
Page 33: Installing The Antenna Onto A
INSTALLING AND POINTING YOUR SATELLITE DISH 8) Install the mast assembly onto the mounting surface using a 3-inch x ¼-20 machine screw (see diagram). Tighten the screw enough to secure the base plate, but leave it loose enough to enable you to adjust the base plate. 9) Verify that the mast is still plumb and adjust if necessary. - Page 34 HUGHES-BRAND DIRECTV SYSTEM OWNER’S MANUAL 4) Using a carpenter’s level, plumb the antenna mast in at least two different locations on the side of the mast, as shown. These two measurements should be at right angles to each other. If the mast is plumb (aligned vertically with the bubble level), go to step 5.
-
Page 35: I Nstalling The A Ntenna Onto A M Etal P Ole
INSTALLING AND POINTING YOUR SATELLITE DISH 13) Install the mast assembly onto the cinder block surface using a 3-inch x ¼-20 machine screw (see diagram). Tighten the screw enough to secure the base plate, but leave it loose enough to enable you to adjust the base plate. 14) Verify that the mast is still plumb and adjust if necessary. -
Page 36: Attaching The Reflector Onto The Support Arm
Attaching the Reflector onto the LNB Support Arm There are two possible antenna models that may have been included with your DIRECTV System. Refer to the section that applies to your antenna model. If you don’t know which model number you have, you should be able to identify it by the associated diagram. -
Page 37: Assembling The Hant-3_ Or Hant-4_ Antenna
INSTALLING AND POINTING YOUR SATELLITE DISH Assembling the HANT-3_ or HANT-4_ Antenna If you have antenna model HANT-4_, proceed to step 4. 1) Insert a flat-head screw into one of the holes in the face of the reflector, as shown. 2) For the model HANT-3_ antenna only, install a spacer onto the screw. -
Page 38: Attaching The Antenna Assembly To The Mast Or Pole
HUGHES-BRAND DIRECTV SYSTEM OWNER’S MANUAL Attaching the Antenna Assembly to the Mast or Pole Now that you have assembled the antenna you are ready to mount it on your previously installed mast or pole. While the diagrams may show an antenna model that differs from the one you have, the same procedures apply. -
Page 39: Installation Procedure
INSTALLING AND POINTING YOUR SATELLITE DISH Installation Procedure 1) Approximately 1 foot from the pole’s cement pier foundation, use a sledge hammer to drive the ground rod 8 feet into the ground. 2) Install the grounding clamp approximately 1 foot from the base of the pole. -
Page 40: I Nstalling And R Outing The Lnb C Oaxial C Able
HUGHES-BRAND DIRECTV SYSTEM OWNER’S MANUAL Installing and Routing the LNB Coaxial Cable This section describes routing and installing the coaxial cable between the LNB and the grounding block. Depending on the routing of the coaxial cable, you may choose to use a cable that can be buried. When normal coaxial cable is buried, its outer cover decays in the soil, and the cable’s life is... -
Page 41: Connecting The Coaxial Cable To The Lnb
INSTALLING AND POINTING YOUR SATELLITE DISH Connecting the Coaxial Cable to the LNB Installation Procedure 1) If you installed the antenna assembly onto a metal pole, go to step 2. Otherwise, route the coaxial cable(s) through the mast and LNB support arm. Now continue on to step 3. -
Page 42: Onnecting The Atellite Ish
HUGHES-BRAND DIRECTV SYSTEM OWNER’S MANUAL 2) Connect one end of the cable to the ground block. Repeat this step if you are routing two cables. 3) Form a 3-inch to 5-inch drip loop in the cable(s) before inserting it in the access hole. -
Page 43: The Installation Screen
INSTALLING AND POINTING YOUR SATELLITE DISH The INSTALLATION Screen The INSTALLATION screen shows the quality of the signal that you are receiving. Because you The INSTALLATION screen (HIRD-B model receiver screen shown) Pointing the Dish Using the “Box” Method The easiest way to find the satellite signal is by scanning the sky in the general direction that the Pattern of scanning the sky much more rapid. - Page 44 HUGHES-BRAND DIRECTV SYSTEM OWNER’S MANUAL when the indicator is aligned with the correct tick mark. Make sure that the dish doesn’t slip out of position while you are tightening the bolts. Next, we’ll adjust the azimuth. For this part of the procedure, a compass (such as the one included in the Do-It-Yourself Installation Kit) will make it possible to point in the proper direction.
-
Page 45: Uthorizing Your Service
The antenna is now installed and properly adjusted to receive signals. To confirm this, you should be able to receive promotional channels from both DIRECTV and USSB. If you can receive promotional channels, you can now arrange to receive your satellite programming 24 hours a day, 7 days a week, at the following numbers: DIRECTV offers a variety of programming packages to fit most any budget. - Page 46 HUGHES-BRAND DIRECTV SYSTEM OWNER’S MANUAL 4-22...
-
Page 47: Watching Satellite
The first thing that you should know is that channels in the DIRECTV System world are arranged differently than you have probably experienced before. The lowest channel number is 100; the highest can be 9999. You may find that the highest channel on your receiver is 999. -
Page 48: The Information Banner
This is called the Information Banner. Either of these banners will go away after a few seconds, or you can press the key to clear it on demand. Models HIRD-C2, HIRD-B3 and HIRD-B4 receiver also offers the small menu across the bottom of the screen. The OneLine™ Guide Sometimes you’d just like to know if there’s something better on another channel, but you don’t want... -
Page 49: Turbotune
WATCHING SATELLITE PROGRAMMING TurboTune™ The TurboTune feature provides access to nine of your preferred channels right over video. The The TurboTune panel Alternate Services Your digital satellite receiver can support alternate audio and data reception. To determine if the The Alternate Services panel occasion an audio track may be offered that is not being broadcast. - Page 50 HUGHES-BRAND DIRECTV SYSTEM OWNER’S MANUAL...
-
Page 51: The On-Screen Guides
GUIDE (SM.CELL), the PROGRAM GUIDE (LG. CELL), the TITLE GUIDE and the LOGO GUIDE. Additionally, both of the PROGRAM GUIDE cell-styles provides a CHANNEL GUIDE pop-up list associated with each of them. HIRD-C2, HIRD-B3 and HIRD-B4 receivers also include a guide style called WATCHWORD. -
Page 52: General On-Screen Guide Features
While there are eight different ways that the on-screen guide can appear (four guide styles, each with or without descriptions), there are some things that they have in common. The HIRD-B4 receiver also offers the WATCHWORD guide, as a ninth style. -
Page 53: T He Program Guide (Sm. Cell)
When using the Schedule To Tape feature the following steps must be completed for the digital satellite receiver to perform unattended recording: Attached the VCR Control cable as described in the chapter, “Setting Up Your DIRECTV System.” You need to have used the VCR SETUP screen as described in the chapter, “Your Receiver’s Menu System.”... -
Page 54: T He Program Guide (Lg. Cell)
HUGHES-BRAND DIRECTV SYSTEM OWNER’S MANUAL When the highlight is in the grid, you can use the highlight onto the channel tags, they will temporarily change to the opposite of what they were before (either channel numbers or call signs). Move the highlight to the right to move the grid area to reveal later time periods. Sometimes, after scrolling a few hours into the future, there may be a brief delay while more information is received from the satellite. -
Page 55: T He Title Guide
The TITLE GUIDE The TITLE GUIDE without descriptions The TITLE GUIDE displays up to twelve program titles at any one time. This quantity is reduced to nine if the program description option is enabled. Let’s look at the elements that make up the TITLE GUIDE. The first column displays the program titles in alphabetical order. -
Page 56: Program Guide (Sm. Cell)
The WATCHWORD Guide (Available on receiver models HIRD-C2, HIRD-B3 and HIRD-B4 only) The WATCHWORD guide list programs that have been determined to match one of the eight words you have specified on the WATCHWORD screen accessed from the SETUP MENU. -
Page 57: Theme Filters
Theme Filters Let’s begin with the Theme Filters button. When this button is highlighted and The Category pop-up menu The Types pop-up menu enables you to further refine your desired program list by different types of The Types pop-up menu Channel List The Lists pop-up menu enables you to filter the guide to display only channels from the selected list. -
Page 58: Guide Times
HUGHES-BRAND DIRECTV SYSTEM OWNER’S MANUAL Guide Times For the most part, the Guides drop-down menu provides easy access to future time periods in the guide. Simply select one of the hour offsets from the current time. After a few seconds, the selected guide will appear. -
Page 59: Done
(The 'taping' feature described here are available on receiver models HIRD-B3 and HIRD-B4 only. Other PreSelect features apply to all models.) Owners of HIRD-B4 model receivers and D-VHS recorders should also refer to the chapter, “Using D-VHS Features On the HIRD-B4 Receiver.”... -
Page 60: Cancel Preselect
HUGHES-BRAND DIRECTV SYSTEM OWNER’S MANUAL Cancel PreSelect Once a program has been scheduled for viewing, previewing, or taping, you have the option of canceling the action. Schedules can also be canceled directly from the on-screen guide by highlighting a scheduled program and pressing the key. -
Page 61: Menu Overview
RECEIVER’S MENU SYSTEM Your digital satellite receiver offers much more than fantastic audio and video. The Main Menu is the primary location where you can access system management functions. From the MAIN MENU you can branch in any direction including the on-screen guide, customize system features, read incoming messages, lock and unlock your system, and more. -
Page 62: Setup Menu
GUIDE MENU followed by selecting the Main Menu button. The HIRD-B4 model receiver can also access the MAIN MENU by way of the VIDEO MENU when watching video. -
Page 63: Lock/Unlock
YOUR RECEIVER’S MENU SYSTEM Lock/Unlock This button is labeled either Lock or Unlock depending on the current status of the digital satellite receiver’s lock. If the receiver is locked, you will see a small lock icon just below the date and time at the top of the screen. -
Page 64: Vcr Setup
(The 'taping' feature described here are available on receiver models HIRD-B3 and HIRD-B4 only. Other Scheduler features apply to all models.) Owners of HIRD-B4 model receivers and D-VHS recorders should also refer to the chapter “Using DVHS Features on the HIRD-B4 Receiver.”... -
Page 65: Editing An Event
YOUR RECEIVER’S MENU SYSTEM Set your VCR to match the output of your digital satellite receiver. This could be either RF (channel 3 or 4) or A/V (phono or S-video). Insert a recordable videotape of sufficient length in the VCR. Leave the VCR turned ON. -
Page 66: Check Mail
HUGHES-BRAND DIRECTV SYSTEM OWNER’S MANUAL Check Mail The CHECK MAIL feature of your digital satellite receiver enables service providers to notify you about important information, upcoming special events, offers, and other promotional programming. When new messages are received, a “new mail” icon appears at the top of all menu screens. -
Page 67: Purchase History
YOUR RECEIVER’S MENU SYSTEM Conversely, if you are viewing upcoming the PURCHASES screen, then you will have the History button offered in the Places To Go area. Things to do on the PURCHASES screen Purchase History The Purchase History displays recently viewed pay per view events that you have been or will be billed for. -
Page 68: Locking Procedure
HUGHES-BRAND DIRECTV SYSTEM OWNER’S MANUAL Locking Procedure When you select the Lock button, the LOCK SYSTEM pop-up panel is displayed. Use the keys or the remote control number keys to enter a four-digit passcode of your choosing. If you enter the code using the number keys, you will not see the numbers appear on the screen. -
Page 69: Preferences
YOUR RECEIVER’S MENU SYSTEM There are times that you may wish to access a program or channel which exceeds the spending limit, rating limit or family approved channels while your digital satellite receiver is locked. You can do this without unlocking your digital satellite receiver. When you press OVERRIDE pop-up will be displayed. -
Page 70: Scheme
HUGHES-BRAND DIRECTV SYSTEM OWNER’S MANUAL NOTE: If you should sort the channels by name, please take note. The use of the keys to step through the channels will appear to change channels a random order when, in fact, the channels are sorted and tuned to in alphabetical order. -
Page 71: Screen Ratio
The LIMITS screen Places to go from the LIMITS screen TV Allow (Available on receiver models HIRD-C2, HIRD-B3 and HIRD-B4 only) When you select TV Allow, the TV ALLOWANCE screen will be presented. If your receiver is The TV ALLOWANCE screen programming. -
Page 72: Max Rating
HUGHES-BRAND DIRECTV SYSTEM OWNER’S MANUAL Things to do on the LIMITS screen Max Rating Program ratings indicate the suitability of a program’s content for a given audience. For families with younger children, a lower rating limit may be desirable. Other families may choose to allow viewing of more sophisticated programming. -
Page 73: Rename
YOUR RECEIVER’S MENU SYSTEM Family list to include all channels or those channels that you deem acceptable. Locking is described earlier in this chapter. Places to go from the CHANNEL LISTS screen Rename When you highlight the Rename button and press the key a Rename List pop-up menu appears. -
Page 74: Turbotune
Things to do on the INSTALLATION screen The quality of the signal that your DIRECTV System is receiving is automatically displayed. In addition to using this at installation time, you may also want to check it when you are experiencing loss of signal, momentary video freezing, or similar problems. -
Page 75: Transponder
"Satellite 1 Signal Strength” or “Satellite 2 Signal Strength.” System Test Any time you experience a problem with your DIRECTV System, you can use the SYSTEM TEST screen, which runs a series of internal diagnostics that will provide you with basic information about the health of your system. -
Page 76: Vcr Setup
VCR Setup (Available on receiver models HIRD-B3 and HIRD-B4 only.) Owners of HIRD-B4 model receivers and D-VHS recorders should refer to the chapter “Using D-VHS Features on the HIRD-B4 Receiver.” The VCR SETUP screen provides access to the settings that will allow your digital satellite receiver to communicate the record and stop commands to your VCR. -
Page 77: Word Buttons
YOUR RECEIVER’S MENU SYSTEM Things to do on the WATCHWORD screen Word buttons Highlighting one of the eight and pressing search word. Some examples include “CAGNEY” and “ALIEN”. The “CAGNEY” search word may find movies in which James Cagney performed in, as well as the TV series “Cagney and Lacey”. The “ALIEN”... - Page 78 HUGHES-BRAND DIRECTV SYSTEM OWNER’S MANUAL 7-18...
-
Page 79: Using D-Vhs Features On The Hird-B4 Receiver
FEATURES ON THE HIRD-B4 RECEIVER The HIRD-B4 model receiver has the added advantage of being compatible with D-VHS video recorders. These recorders allow you to record satellite programming in the highest quality possible. This is because the D-VHS records the actual digital signal, rather than a converted analog signal. The advantage to this is that every time you play the tape back, you will be able to enjoy it in the same fidelity in which it was originally broadcast. -
Page 80: Recording Speed
HUGHES-BRAND DIRECTV SYSTEM OWNER’S MANUAL Recording Speed The Recording Speed setting is for specifying the default speed for analog recording. See your D-VHS owner’s manual to determine the benefits of the two recording speed options. Test D-VHS Status The Test D-VHS Status field displays the current tape transport activity. -
Page 81: Status Displays
YOUR RECEIVER’S MENU SYSTEM Status Displays There are several status displays that can occur when utilizing the D-VHS features of the digital satellite receiver. Take a moment to familiarize yourself with these displays and how they may differ when in the D-VHS mode from normal satellite programming. -
Page 82: Scheduling To Record
HUGHES-BRAND DIRECTV SYSTEM OWNER’S MANUAL Scheduling to Record Scheduling for unattended recording is very much the same whether you have a D-VHS VCR or not. With a D-VHS VCR, however, you are given additional options as to whether you want to record in digital or analog mode. -
Page 83: Programming Your Remote Control
PROGRAMMING YOUR REMOTE You can use the remote control that came with your digital satellite receiver to control other The basic remote control (HRMC-2) on the left. The universal remote control (HRMC-3) on the right. during this process. The remote control will send out the “power” command for the device being programmed. -
Page 84: Code Entry
HUGHES-BRAND DIRECTV SYSTEM OWNER’S MANUAL Code Entry First, look up the device type and brand in the following charts. You will find a list of numbers, one or more of which should operate your device. There may be more than one code, so you will need to try each of them to find the one that works best. - Page 85 PROGRAMMING YOUR REMOTE CONTROL Brand VCRs 012, 045 Harman Kardon 004, 018, 026, 034, 043, 047, Hitachi 063, 137 031, 033 Instant Replay 031, 033 012, 013, 015, 031, 040 J.C. Penney Jensen 012, 039, 043, 048, 050, 130 014, 039, 043, 048 Kenwood Lloyd 013, 014, 034, 101...
-
Page 86: Using The Remote Control
HUGHES-BRAND DIRECTV SYSTEM OWNER’S MANUAL Using the Remote Control Once you have your codes entered, you are ready to start using your universal remote control. The device keys allow you to switch from one device to another. Some keys behave in a special way. They control one device while you are actually in another device mode. - Page 87 PROGRAMMING YOUR REMOTE CONTROL Once you perform these steps, whenever your remote control is in AUX mode the VCR function keys will continue to control the VCR. In the event that you reprogram the AUX key to control a different component that need use of the keys, simply repeat these two steps.
- Page 88 HUGHES-BRAND DIRECTV SYSTEM OWNER’S MANUAL...
- Page 89 ANSWERS Questions? Did we forget to tell you something? Many people, over time, have questions about their DIRECTV System. We have compiled the most common of these questions and the answers in this appendix. We hope they help! I had a signal but now I am getting a message “Searching for satellite signal. To access related utilities, press .”...
- Page 90 OUT TO TV connector. If I have questions about my DIRECTV System or need to have it serviced, who should I call? For issues regarding your equipment, contact us directly at 1-800-274-8995. If you would like, call your dealer first.
-
Page 91: Limited Warranty
LIMITED WARRANTY Hughes Network Systems (HNS) provides the following limited warranty on your HNS digital satellite equipment. This limited warranty is in lieu of all other warranties, whether express, implied, or statutory, including, without limitation, the implied warranties of merchantability and fitness for a particular purpose. HNS shall not be liable for damages in excess of the purchase price of the product less reasonable amount for use and wear, or for any incidental, special, punitive, or consequential damages of any nature whatsoever, or for any delays, loss of use, time, profits, revenue or savings, any commercial loss, inconvenience, damage to buyer's or to other person's property, arising from the use or... - Page 92 Part # 1026005-0001 (Revision: B)
Need help?
Do you have a question about the HIRD-B4 and is the answer not in the manual?
Questions and answers