
Related Manuals for Gaia Baby Complete Sleep + Co-Sleeping crib


Summary of Contents for Gaia Baby Complete Sleep + Co-Sleeping crib
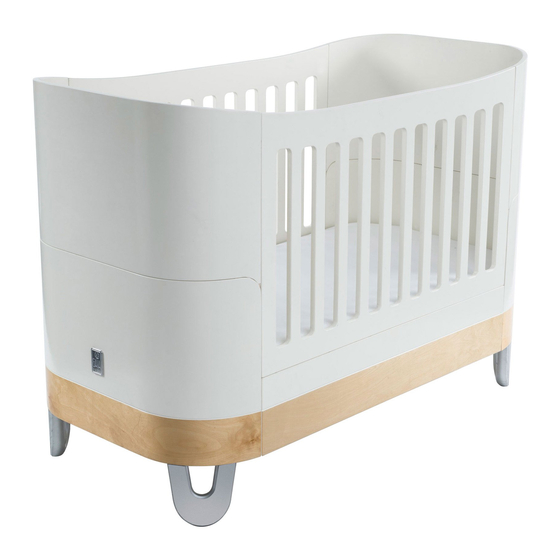
- Page 1 c0-sleeping crib 0 to 6 months Maxi cot 0 to 3 year + Toddler 3 to 4 year + First 4 to 5 year + Complete Sleep+/Co-Sleeping crib IMPORTANT: Please read carefully and retain for Assembly instructions future reference...
- Page 2 Co-sleeping crib safety information IMPORTANT: READ THESE INSTRUCTIONS CAREFULLY • The product must always be placed on a horizontal surface. Never leave the product on an inclined surface with the child inside of it. · AND RETAIN FOR FUTURE REFERENCE • Children must not be permitted to play without supervision near the INSTRUCTIONS FOR SAFE USE product.
- Page 3 parts of the body or clothing (e.g. strings, necklaces, ribbons for babies’ to form a loop. Repeat this operation on the other side. For easier dummies, etc.), which would pose a risk of strangulation. installation, during fixing of the buckles, we suggest that the crib is kept at a short distance from the parent’s bed.
- Page 4 • Please ensure that all fittings are tightened properly before use. Fittings should be checked and tightened regularly every 2 to 3 weeks. and use only spare parts approved by Gaia baby. • WARNING: Do not leave anything in the cot or place the cot next to • Your cot and bed may be cleaned with a damp cloth.
- Page 5 Maxi cot co-Sleeping crib Age range: 0 to 3 years + Age range: 0 to 6 months+ Assembly: Pages 17 to 25 Assembly: Pages 6 to 13 First bed Toddler bed Age range: 4 to 5 years + Age range: 3 to 4 years + Assembly: Pages 28 to 29 Assembly: Pages 26 to 27...
- Page 6 To complete assembly you will need to have the below tools, components and fittings ready Tools Co-sleeper crib Fittings Co-sleeping crib Components A x 4 B x 22 1 x 2 2 x 2 Allen key 30 mm 20 mm (found in box 1/3) (found in box 1/3) Supplied...
- Page 7 Assembling the co-sleeping crib CRIB end information Note: Crib ends are from BOX 1. IMPORTANT: Please ensure that parts 4a & 4b are always kept together and used as a pair. Failure to do so will result in potential damage and miss alignment.
- Page 8 co-sleeping crib 3 co-sleeping crib 2 co-sleeping crib 4 co-sleeping crib 5...
- Page 9 Using barrel nuts co-sleeping crib 6 Barrel nut The barrel nuts come in two parts the barrel and the grub screw. Insert the grub screw into the end of the barrel and Grub turn clockwise. screw Before inserting the barrel nuts into the holes in the component, ensure the end of the barrel nut stud will fit into...
- Page 10 co-sleeping crib 9 co-sleeping crib 10 E x 1 G x 2 co-sleeping crib 11 co-sleeping crib 12 E x 1 G x 2...
- Page 11 co-sleeping crib 13 co-sleeping crib 14 co-sleeping crib 15 co-sleeping crib 16 10 cm 4 inches Crib base position IMPORTANT: Before fitting the base supports (Parts 8 & 9) to the inside of the crib, ensure they are a minimum of 10cm (4 inches) below the upper surface of the beds mattress.
- Page 12 co-sleeping crib 17 co-sleeping crib 18 co-sleeping crib 19 co-sleeping crib 20...
- Page 13 co-sleeping crib 21 co-sleeping crib 22 Assembly complete...
- Page 14 Attaching to your bed 1. (For easier installation, during fixing of the buckles, we suggest that the crib is kept at a short distance from the parent’s bed). Wrap the strap (L) around the front legs of the crib as shown in diagram A. Note: The straps used to attach the crib to the bed can be fitted in two different ways according to the bed you want to attach the crib to.
- Page 15 Raising and lowering the front panel 1. To lower the textile side, firstly lower the zips on both sides of the front panel (A). 2. Slide the release catches inwards to release the locking bolts as shown (B), now lower the front panel down (C). 3.
- Page 16 Tools Maxi cot Fittings Maxi cot Components 2 x 4 A x 12 B x 36 1 x 4 Allen key 30 mm 20 mm Supplied 3 Box 2 4 Box 1 C x 6 D x 6 5 x 4 8 x 2 Cross head screwdriver Not supplied...
- Page 17 Maxi cot Assembly Dismantle the crib IMPORTANT: After dismantling the crib, keep the components shown in grey to build the cot and store the other components in a safe place. Crib end IMPORTANT: Do not dismantle parts 16a & 16b as they are required when building the cot and.
- Page 18 CRIB end information Maxi cot 1 IMPORTANT: Please ensure that parts 3a & 3b are always kept together and used as a pair. Failure to do so will result in potential damage and miss alignment. Maxi cot 2 Maxi cot 3...
- Page 19 Maxi cot 4 Maxi cot 5 Using barrel nuts Maxi cot 6 Barrel nut The barrel nuts come in two parts the barrel and the grub screw. Insert the grub screw into the end of the barrel and turn clockwise. Before inserting the barrel Grub nuts into the holes in the...
- Page 20 Maxi cot 8 Maxi cot 7 Maxi cot 9 Maxi cot 10...
- Page 21 Maxi cot 11 Maxi cot 12 Maxi cot 13 Maxi cot 14 E x 2 G x 1...
- Page 22 Bottom Base position Bottom Base position Bottom base position Top base position Use the top base position for Use the bottom base position for when your baby can push newborn babies. itself up on its hands or starts Once the baby can push its to pull itself up on the sides of self upwards on its hands or the cot.
- Page 23 Maxi cot 17 Maxi cot 18 Top base Top base position position G x 1 B x 6 Maxi cot 19 Maxi cot 20 Top base position Top base position x 12 E x 2...
- Page 24 Maxi cot 21 Assembly complete Top base position Maxi cot 23 Maxi cot 24 Bottom base Bottom base position position B x 16...
- Page 25 Maxi cot 25 Maxi cot 26 Bottom base Bottom base position position Assembly complete...
- Page 26 Toddler bed 1 Toddler bed conversion Toddler bed 2 E x 2...
- Page 27 Toddler bed 3 Toddler bed 4 Assembly complete...
- Page 28 First bed conversion First bed 1 E x 2 G x 1 First bed 2 Step 2 Step 1 Step 3...
- Page 29 First bed 3 First bed 4 Step 2 Step 1 Step 3 Assembly complete...
- Page 30 Notes...
-
Page 31: Manufacturer Warranty
‘first-bed’ suitable up until the age of 5 years. colour may occur. While every attempt is made to colour match This can be extended further with the use of the ‘Gaia Baby Junior Bed replacement parts, colour matching cannot be guaranteed. - Page 32 Gaia Baby Limited Web: #2, Kinsealy Business Park, Malahide www.gaia-baby.com Email: Dublin K36 DK81 Ireland customercare@gaia-baby.com...
Need help?
Do you have a question about the Complete Sleep + Co-Sleeping crib and is the answer not in the manual?
Questions and answers