Table of Contents
Advertisement
Available languages
Available languages
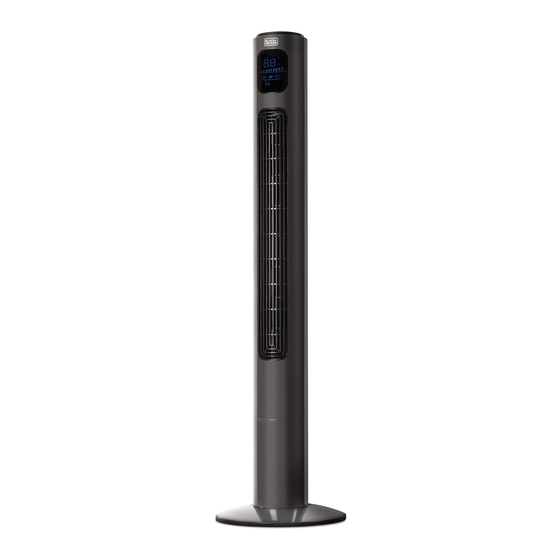
38" DIGITAL TOWER FAN
46" DIGITAL TOWER FAN
VENTILADOR TORRE
DIGITAL DE 38" (97 CM)
VENTILADOR TORRE
DIGITAL DE 46" (117 CM)
INSTRUCTION MANUAL
MANUAL DE INSTRUCCIONES
CATALOG NUMBER
NÚMERO DE CATÁLOGO
BFTR138
BFTR146
Thank you for choosing BLACK+DECKER!
¡Gracias por elegir BLACK+DECKER!
PLEASE READ BEFORE RETURNING THIS PRODUCT FOR
ANY REASON.
POR FAVOR, LEA ESTE MANUAL ANTES DE DEVOLVER
ESTE PRODUCTO POR CUALQUIER MOTIVO.
If you have a question or experience a problem with your BLACK+DECKER
purchase, go to www.blackanddecker.com/instantanswers
If you can't find the answer or do not have access to the Internet, call
844-299-0879 from 10:30 a.m. to 6:30 p.m. EST Mon. - Fri. to speak with an
agent. Please have the catalog number available when you call.
Si tiene una pregunta o sufre un problema con su compra de
BLACK+DECKER, diríjase a www.blackanddecker.com/instantanswers
Si no puede encontrar la respuesta o no tiene acceso a Internet, llame al
844-299-0879 desde 10:30 a.m. a 6:30 p.m. EST, de lun. a vie. para hablar
con un agente. Tenga el número de catálogo a mano cuando llame.
SAVE THIS MANUAL FOR FUTURE REFERENCE.
GUARDE ESTE MANUAL PARA SU REFERENCIA EN EL FUTURO.
Advertisement
Table of Contents
Troubleshooting

Related Manuals for Black+Decker BFTR138


Summary of Contents for Black+Decker BFTR138
- Page 1 POR FAVOR, LEA ESTE MANUAL ANTES DE DEVOLVER ESTE PRODUCTO POR CUALQUIER MOTIVO. If you have a question or experience a problem with your BLACK+DECKER purchase, go to www.blackanddecker.com/instantanswers If you can’t find the answer or do not have access to the Internet, call 844-299-0879 from 10:30 a.m.
-
Page 2: Table Of Contents
Parts & Features ..................................6 Assembly Instruction ................................7 Battery Instruction ..................................8 WARNING Operation Instruction ............................9-11 BFTR138 LED Display ............................10 When using electrical appliances, basic safety precautions BFTR146 LED Display ............................11 should be followed, including the following Replacing the Fuse ..............................12 CLEANING &... -
Page 3: Electrical Requirements
• Remove the battery if the remote is not used for a long period of time. pulled on by children or tripped over unintentionally. NOTE: Neither BLACK+DECKER nor the dealer can accept any liability for damage to the product or personal injury resulting from failure to observe the electrical connection procedures. -
Page 4: Set Up & Use
SET UP & USE SET UP & USE ASSEMBLY INSTRUCTIONS PARTS & FEATURES Control Panel The base of the tower fan comes with 2 parts. The rear base has a space for the power cord. 1. Attach the front half of the base, aligning the holes in the base with the screw holes in the base of the tower fan. -
Page 5: Battery Instruction
SET UP & USE SET UP & USE OPERATION INSTRUCTIONS BATTERY INSTRUCTIONS Batteries not included The remote control requires a CR2025 Lithium Battery to operate. Battery is not CONTROL PANEL included. CONTROL PANEL 1. Push the button at the base of the battery cover to release the cover. Pull out the FIGURE 1 battery cover as shown in the diagram. -
Page 6: Bftr138 Led Display
SET UP & USE SET UP & USE BFTR138 LED DISPLAY BFTR146 LED DISPLAY POWER: Turn the FAN on by pressing the POWER: Turn the FAN on by pressing the ‘POWER’ button; Turn the FAN off by pressing ‘POWER’ button; Turn the FAN off by pressing the ‘POWER’... -
Page 7: Replacing The Fuse
The fuse cover may be open Disconnect the plug from outlet and close the cover of the fuse. SPECIFICATIONS BFTR138 BFTR146 • Unit Dimensions (W x D x H): • Unit Dimensions (W x D x H): 12.4” x 12.4” x 38.2”... -
Page 8: Troubleshooting
TROUBLESHOOTING & WARRANTY TROUBLESHOOTING & WARRANTY This device complies with part 15 of the FCC rules. Operation is subject to the LIMITED WARRANTY following two conditions: 1) This device may not cause harmful interference, and 2) This device must accept any interference received, including interference that may Any repair, replacement, or warranty service, REPAIR OR REPLACEMENT AS PROVIDED UNDER cause undesired operation. - Page 9 Partes y Características ............................... 20 Instrucciones de Armado ..............................21 SEGURIDAD Instrucciones de Batería ...............................22 Instrucciones de Operación .......................... 23-25 BFTR138 Pantalla LED .............................24 ADVERTENCIA BFTR146 Pantalla LED .............................25 Remplazar el Fusible ............................26 Cuando se usen aparatos eléctricos, se deben tomar precauciones de seguridad básicas, incluidas las siguientes...
- Page 10 él o que alguien se tropiece accidentalmente. NOTA: Ni BLACK+DECKER ni el distribuidor pueden aceptar ningún tipo de responsabilidad por daños al producto o daños personales que resulten del fallo de respetar los procedimientos de conexión eléctrica.
- Page 11 SPANISH CONFIGURACIÓN Y USO CONFIGURACIÓN Y USO INSTRUCCIONES DE ARMADO PARTES Y FUNCIONALIDADES Panel de Control La base del ventilador torre viene con 2 partes. La base trasera tiene un espacio para el cable de alimentación. 1. Una la mitad frontal de la base, alineando los orificios en la base con los agujeros de los tornillos en la base del ventilador torre.
- Page 12 SPANISH CONFIGURACIÓN Y USO CONFIGURACIÓN Y USO INSTRUCCIONES DE OPERACIÓN INSTRUCCIONES DE BATERÍA Baterías no incluidas PANEL DE CONTROL El control remoto requiere una Batería de Litio CR2025 para operar. La batería no está incluida. PANEL DE CONTROL 1. Presione el botón de la base de la tapa de la batería para liberarla. Quite la tapa Fig.
- Page 13 SPANISH SET UP & USE SET UP & USE BFTR138 PANTALLA LED BFTR146 PANTALLA LED MODE: Presionar el botón de ENCENDIDO: Encienda el “MODO” colocará el VENTILADOR en los VENTILADOR presionando el botón de modos NORMAL, NATURAL, o DORMIR. “ENCENDIDO”; Apague el VENTILADOR presionando el botón de “ENCENDIDO”...
- Page 14 Desconecte el enchufe de la toma y cierre la cubierta estar abierta. del fusible ESPECIFICACIONES BFTR138 BFTR146 • Dimensiones de la unidad (AN x • Dimensiones de la unidad (AN x P x AL): 12.4” x 12.4” x 38.2” P x AL): 12.4” x 12.4” x 46.2”...
- Page 15 SPANISH SOLUCIÓN DE PROBLEMAS Y GARANTÍA SOLUCIÓN DE PROBLEMAS Y GARANTÍA Este dispositivo cumple con la parte 15 de las reglas de la FCC. La operación está GARANTÍA LIMITADA sujeta a estas dos condiciones siguientes: 1) Este dispositivo no deberá causar interferencias perjudiciales, y 2) Este dispositivo debe aceptar cualquier interferencia Cualquier reparación, recambio, o servicio LA REPARACIÓN O EL REMPLAZO COMO SE...
- Page 16 BLACK & DECKER, BLACK+DECKER, y los logos y nombres de productos de BLACK & DECKER y BLACK+DECKER y el esquema de colores naranja y rojo son marcas registradas de The Black & Decker Corporation, usados bajo licencia. Todos los derechos reservados.
Need help?
Do you have a question about the BFTR138 and is the answer not in the manual?
Questions and answers