Table of Contents
Advertisement
Available languages
Available languages
Advertisement
Table of Contents

Related Manuals for Black+Decker FD1620


Summary of Contents for Black+Decker FD1620
- Page 1 FD1620 FW1620 FS1620 FS1620R www.blackanddecker.ae...
- Page 2 ENGLISH (Original instructions) FD1620 Desk Fan FW1620 Wall Fan...
- Page 3 ENGLISH (Original instructions) FS1620 FS1620R Pedestal fan Pedestal fan & Remote...
-
Page 4: Safety Instructions
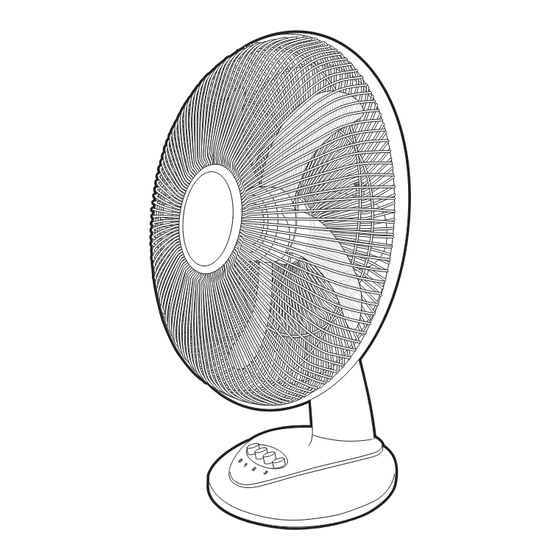
Intended use Warning! Never allow the back of the fan to be covered with curtains or other obstructions. Your BLACK+DECKER FD1620 desk fan, FW1620 wall fan, FS1620 Pedestal fan and FS1620R Pedestal fan with Safety of others remote control have been designed to create a flow of air. - Page 5 Warning! The above section on mains plug replacement is for authorized service centre persons. Switching on and off • Your fan has three speed control to keep the desired air FD1620 Desk Fan flow through your room. • 0 - Off Features •...
- Page 6 ENGLISH (Original instructions) FW1620 Wall Fan • Close the bottom clip. Tighten the bottom clip screw by turning it clockwise. Features 1. Front guard Warning! Never use the fan without the guard in place or if 2. Blade cap the guard is damaged. 3.
- Page 7 ENGLISH (Original instructions) Assembly Oscillation Note: Make sure your fan is switched off before connecting • The fan can be set to oscillate by pushing Oscillating to or disconnecting frompower supply. Knob downwards.To stop the oscillating feature, pull up the Oscillation Knob. Warning! Never use the fan without the guard in place or if the guard is damaged.
-
Page 8: Switching On And Off
ENGLISH (Original instructions) • Place the fan unit onto the top of the support tube. Switching on and off Re-insert the screw into the fan unit. Tighten the screw Your fan has three speed control to keep the desired air flow by turning it clockwise. -
Page 9: Protecting The Environment
NAT Mode (the NAT mode indicator lights up red.) • If the HIGH speed is selected, the speed switches Should you find one day that your Black+Decker product between high-medium-slow-off. needs replacement, or if it is of no further use to you, do not •... -
Page 10: Warranty
ENGLISH (Original instructions) Warranty Black+Decker is confident of the quality of its products and offers an outstanding warranty. This warranty statement is in addition to and in no way prejudices your statutory rights. If a Black+Decker product becomes defective due to faulty... -
Page 11: Consignes De Sécurité
• Débranchez l’appareil de l’alimentation électrique en cas de non-utilisation et avant de le nettoyer. Vos ventilateur de bureau BLACK+DECKER FD1620, Avertissement ! Les cheveux longs et les vêtements amples ventilateur mural FW1620, ventilateur sur pied FS1620 et peuvent être aspirés à l'arrière du ventilateur. -
Page 12: Sécurité Électrique
fiche électrique s’adresse au personnel Mise sous et hors tension des centres de service agréés. • Votre ventilateur dispose d'une commande à trois Ventilateur de bureau FD1620 Composition vitesses pour conserver la ventilation désirée dans la pièce. 1. Protection avant •... -
Page 13: Fixation Murale
FRANÇAIS (Traduction des instructions d'origine) Oscillation de positionnement de l'unité de ventilateur. Assurez-vous que la protection arrière se trouve dans le bon sens. • Il est possible de faire osciller le ventilateur en appuyant • Fixez la protection sur l'unité de ventilateur en replaçant sur le bouton d'oscillation. - Page 14 FRANÇAIS (Traduction des instructions d'origine) 3. Lame de ventilateur • Fixez la lame de ventilateur sur l'arbre du moteur en installant le capuchon de lame. Serrez le capuchon de 4. Écrou de protection lame en le tournant dans le sens inverse des aiguilles 5.
-
Page 15: Mise Sous Et Hors Tension
FRANÇAIS (Traduction des instructions d'origine) 3. Lame de ventilateur • Fixez la lame de ventilateur sur l'arbre du moteur en installant le capuchon de lame. Serrez le capuchon de 4. Écrou de protection lame en le tournant dans le sens inverse des aiguilles 5. - Page 16 FRANÇAIS (Traduction des instructions d'origine) • Pour mettre sous tension, appuyez sur le bouton « • Appuyez sur le bouton MODE le nombre de fois ON/SPEED » le nombre de fois nécessaire pour régler nécessaire pour régler le MODE. la vitesse souhaitée. Le ventilateur se met en marche. •...
-
Page 17: Protection De L'environnement
Utilisez un chiffon humide pour nettoyer la partie Garantie extérieure du corps (1) et la cavité interne. BLACK+DECKER est confiant dans la qualité de ses produits • Gardez le cordon d’alimentation et le panneau de et vous offre une garantie très étendue. -
Page 18: Uso Previsto
Desligue o aparelho da corrente elétrica quando não o estiver a utilizar e antes de o limpar. A ventoinha de mesa FD1620 da BLACK+DECKER, a Aviso! Os cabelos compridos e as peças de roupa largas ventoinha de parede FW1620, a ventoinha de pé FS1620 e podem ficar presas na parte de trás da ventoinha. -
Page 19: Segurança Elétrica
• Não tente reparar o aparelho. Leve-o ao Centro de Montagem Assistência da BLACK+DECKER mais perto de si ou a Nota: Certifique-se de que a ventoinha está desligada antes um Centro de Assistência Técnica autorizado. de colocar ou retirar a ficha da tomada. - Page 20 PORTUGUÊS (Tradução das instruções originais) Ajustar o ângulo da ventoinha • Fixe a hélice da ventoinha ao veio do motor, encaixando o tampão-fêmea da hélice. Aperte o tampão-fêmea da É possível ajustar o ângulo da ventoinha para cima e para hélice, rodando-o no sentido oposto ao dos ponteiros do baixo.
- Page 21 PORTUGUÊS (Tradução das instruções originais) 7. Manípulo de oscilação sobre a proteção posterior garantindo um encaixe apertado a toda a volta. 8. Parafuso da proteção • Lacre o fecho inferior. Aperte o parafuso do fecho inferior, 9. Corpo da ventoinha rodando-o no sentido dos ponteiros do relógio.
- Page 22 PORTUGUÊS (Tradução das instruções originais) 11. Tampa da base Utilização 12. Base redonda Aviso! Nunca utilize a ventoinha se a proteção não estiver 13. Base colocada no lugar ou se estiver danificada. 14. Arruela Nota: É possível controlar todas as funções tanto na ventoinha como através do comando.
- Page 23 PORTUGUÊS (Tradução das instruções originais) Temporizador • No modo velocidade BAIXA a velocidade alterna entre baixa-desligada. Pode utilizar o temporizador para determinar o tempo de • Modo SUSP (o indicador luminoso do modo SUSP fica funcionamento da ventoinha. vermelho.) Símbolo Botão •...
-
Page 24: Proteção Do Ambiente
O produto for utilizado para fins comerciais, profissionais ou de aluguer; Se considerar que o seu produto da BLACK+DECKER O produto for sujeito a má utilização ou negligência; necessita ser substituído ou se já não lhe for útil, não o O produto tiver sido danificado por objetos, substâncias... -
Page 25: Black+Decker
áfÉ«°üdG AÓch ÒZ ¢UÉî°TC G ᣰSGƒH èàæŸG ìÓ°UE G ádhÉfi ºàj ácöûd ™HÉàdG áfÉ«°üdG ≥jôa hC G øjóªà©ŸG BLACK+DECKER AGöûdG π«dO Ëó≤J ¤E G êÉà– ±ƒ°S ,¿Éª°†dG ÖLƒÃ áÑdÉ£e Ëó≤àd ÜôbC G ™bƒe ≈∏Y ±ô©àdG ∂æµÁh .óªà©ŸG áfÉ«°üdG π«ch hC G ™FÉÑ∏d Öàµe ≈∏Y ∫É°üJ’G ∫ÓN øe óªà©e áfÉ«°U π«ch... - Page 26 .LOW áYöùdG §Ñ°V ≈∏Y "NAT áYöùdG ÚH ∫óÑàà°S :LOW áYöùdG §Ñ°V QÉ«àNG ” GPE G • á«æØdG äÉfÉ«ÑdG ™°Vh" ‘ ∫É◊G ƒg ɪc áMhôŸG 𫨰ûJ ±É≤jE G h á°†ØîæŸG ."NAT FD1620 240 - 220 OOÎe QÉ«J âdƒa πNódG ó¡L áMhôŸG ájhGR §Ñ°V äGh...
- Page 27 ﺍﻟـﻌـﺮﺑـﻴـﺔ ()ﺍﻟﺘﻌﻠﻴﻤﺎﺕ ﺍﻟﺮﺋﻴﺴﻴﺔ äGôŸG OóY Ö°ùM “ON/SPEED” QR ≈∏Y §¨°VG ,𫨰ûà∏d • Ö«côJ ᣰSGƒH ∑ôëŸG ¿GQhO OƒªY ≈∏Y áMhôŸG á°ûjQ ø q eC G • .πª©dG ‘ áMhôŸG C G óÑà°S .áHƒZôŸG áYöùdG Ú«©àd áHƒ∏£ŸG √ÉŒG ¢ùµY √ôjhóJ ᣰSGƒH á°ûjôdG AÉ£Z §HQ ºµMC G .á°ûjôdG AÉ£Z .áYÉ°ùdG ÜQÉ≤Y .“OFF”...
- Page 28 ﺍﻟـﻌـﺮﺑـﻴـﺔ ()ﺍﻟﺘﻌﻠﻴﻤﺎﺕ ﺍﻟﺮﺋﻴﺴﻴﺔ √ÉŒÉH √ôjhóJ ᣰSGƒH º«YóàdG OƒªY ≈∏YC G ‘ »ZÈdG §HQ ºµMC G • óYC G .º«YóàdG OƒªY øe …ƒ∏©dG Aõ÷G ≈∏Y áMhôŸG IóMh ™°V • .áYÉ°ùdG ÜQÉ≤Y ᣰSGƒH »ZÈdG §HQ ºµMC G .áMhôŸG IóMh ‘ »ZÈdG ∫ÉNOE G .áYÉ°ùdG ÜQÉ≤Y √ÉŒÉH √ôjhóJ ºµ–...
- Page 29 ﺍﻟـﻌـﺮﺑـﻴـﺔ ()ﺍﻟﺘﻌﻠﻴﻤﺎﺕ ﺍﻟﺮﺋﻴﺴﻴﺔ ™«ªéàdG .” 0 ” ≈∏Y QõdG QOC G ,𫨰ûàdG ±É≤jE ’ • ójõJ ±ƒ°S .øÁC ’ G πÑ◊G Öë°S ᣰSGƒH É k °†jC G áYöùdG §Ñ°V øµÁ • øY ∫É°üJ’G ™£b hC G ∫É°üJ’G πÑb áØbƒàe áMhôŸG ¿C G ócC É J :á¶MÓe áMhôŸG Oƒ©J ≈àM IóMGh áLQO Qó≤H áYöùdG øe πÑë∏d áÑë°S πc .ábÉ£dG Ohõe .±É≤jE ’...
- Page 30 𫨰ûàdG ±É≤jE G h 𫨰ûàdG .Ióªà©ŸG áeóÿG õcGôe OGôaC É H ܃∏£ŸG AGƒ¡dG ≥aóàH ®ÉØàMÓd ∂dPh äÉYöS çÓK ∂àMhôe ∂∏“ • .∂àaôZ ‘ FD1620 ÖൟG áMhôe ¢üFÉ°üN 𫨰ûàdG ±É≤jE G - 0 • á«eÉeC ’ G ájɪ◊G áµÑ°T .1 á°†Øîæe áYöS - 1 •...
- Page 31 ΩGóîà°S’G øe ¢Vô¨dG ájó°ù÷G äGQó≤dG hhP ¢UÉî°TC ’ G ¬eóîà°ù«d ºª°üe ÒZ RÉ¡÷G Gòg • FW1620 §FÉ◊G áMhôeh FD1620 ÖൟG áMhôe ⪪ o °U ∂dP ‘ ÉÃ) á∏«∏≤dG áaô©ŸGh IÈÿGh áæjóàŸG á«∏≤©dGh á«°ù◊Gh RÉ¡éH IOhõŸG ájOƒª©dG áMhôŸGh FS1620 ájOƒª©dG áMhôŸGh øe FS1620R ó©H øY ºµ–...
- Page 32 N a m e s & A d d r e s s e s f o r B L A C K + D E C K E R S e r v i c e C o n c e s s i o n a r i e s ALGERIA: Sarl Outillage Corporation, DW, B&D Pet, HHD, 08, Rue Med Boudiaf (ex TELLA Achen) Cheraga, Alger, Tel: 00213-0-21375130/ 00213-0-21375131,...
-
Page 34: Warranty Registration Card
« ∞ d POSTCODE « ¡ « ∞ ¥ a ¢ U ¸ DATE OF PURCHASE « ∞ ∂ U « Ê ´ M u r Ë ≈ ß DEALER'S NAME & ADDRESS/ PRODUCT MODEL NO. FD1620, FW1620, FS1620, FS1620R...
Need help?
Do you have a question about the FD1620 and is the answer not in the manual?
Questions and answers