Table of Contents
Advertisement
Quick Links
Advertisement
Table of Contents

Related Manuals for Eisco CH0814


Summary of Contents for Eisco CH0814
- Page 1 WATER STILL CAT NO. CH0814 Instruction Manual...
-
Page 2: Mounting & Placement
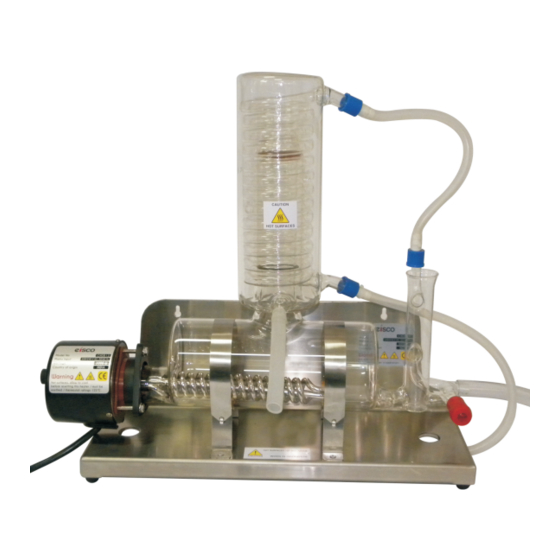
Impairment statement :- If the equipment is not used in the manner described in the manual the protection provided by the equipment may be impaired. Please read the manual carefully before installation or operating the unit. © EISCO SCIENTIFIC www.eiscolabs.com... - Page 3 Metal Flange Stainless Steel Bolt for Heater Rubber Collar Insert Stainless Steel Boiler Straps with Springs PVC drain Tube Silicon Tubing with threaded plastic connector Silicon Tubing with plastic connector Self Tapping Screw Plastic Gitti Spanner © EISCO SCIENTIFIC www.eiscolabs.com...
-
Page 4: Installation
Hose Kit (Part No. 12, 13, 14) PH/HK Gasket Kit (Part No. 5, 6, 7, 8, 9, 10) PH/GK Place the S.S. Stand (Part No. 1) at a suitable location, bench top ro wall mounted using the two key holes provided. © EISCO SCIENTIFIC www.eiscolabs.com... - Page 5 Place the Glass Boiler (Part No. 2) and Heater assembly in the cradle of the powder coated stand (Part No. 1) It plug not installed connect the Metal Heater (Part No. 4) cables to the pins of the 13 amps connector as per circuit diagram page. 9. © EISCO SCIENTIFIC www.eiscolabs.com...
- Page 6 When the boiling commences and the distillate emerges from th Glass condenser (Part No. 3) start collecting in the reservoir. © EISCO SCIENTIFIC www.eiscolabs.com...
-
Page 7: Safety Cut-Out
10% formic acid (mechanic acid or Kettle descale) is used for removing scale deposits. Do not use strong acids such as hydrochloric acid, because it can damage the metal heating element. © EISCO SCIENTIFIC www.eiscolabs.com... - Page 8 The still can be restarted when the Glass Boiler (Part No. 2) is filled with water. The still should be allowed to run for around 10 minutes before collecting the distillate. REGULAR CLEANING WILL KEEP YOUR STILL RUNNING AT OPTIMUM CONDITION. © EISCO SCIENTIFIC www.eiscolabs.com...
-
Page 9: Troubleshooting
Replace fuse Faulty thermostat Replace thermostat Faulty thermostat Replace thermostat Metal Heater (Part No.4)repeatedly cycles On & Off Thermostat not operating Reset Warning :- Please ensure that electrical connections are disconnected before opening the Heater cup. © EISCO SCIENTIFIC www.eiscolabs.com... -
Page 10: Circuit Diagram
Metal Heater (Part No. 4) to the Glass Boiler (Part No. 2) The new Metal Heater is fitted to the Glass Boiler by following the installation instructions - 3 The still is reassembled by following the installation instructions 4 - CIRCUIT DIAGRAM GREEN BLACK © EISCO SCIENTIFIC www.eiscolabs.com... -
Page 11: Thermostat Replacement
ENVIRONMENTAL CONDITIONS 1. Pollution Degree: 2 2. Installation Category: 2 3. Altitude: 2000 meters Max. 4. Electrical Supply: 220V - 240V AC, 50Hz 5. Equipment is meant for Indoor use only 6. Ambient Temperature: 40°C Max. -10- © EISCO SCIENTIFIC www.eiscolabs.com... - Page 12 Manufactured by : U.S. Distributor: Eisco Scientific 788 Old Dutch Road, Victor, NY 14564 www.eiscolabs.com Website: www.eiscolabs.com EISCO SCIENTIFIC instructions, content and design is intellectual property of EISCO...
Need help?
Do you have a question about the CH0814 and is the answer not in the manual?
Questions and answers