Advertisement
Quick Links
Quick Installation Guide
1. Introduction
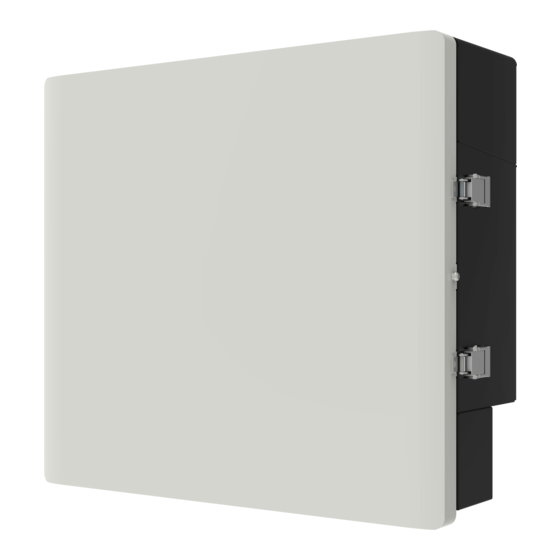
X3-Matebox is a critical part for SolaX all in one energy storage
system, which integrates the DC breaker/AC breaker/switch unit/CT
and so on, it can easily be installed compare to the traditional
separate system, this unit can be used with SolaX X3-Hybrid G4 and
X3-Fit G4 series inverters.
There are 2 wiring diagrams for your system connection reference,
please follow your local policy to chose which one is suitable for
your side.
Diagram A: N line and PE line separate wiring, M series inverters;
(For most countries)
PV 1
PV 2
X3-Hybrid G4
CT
Main Breaker/RCD
Off-grid
BAT
Grid
N
X3-Matebox
E-BAR
Battery
Loads
off-grid loads
N-BAR for loads
N-BAR for off-grid loads
2. Overview
533cm
482cm
Object
Name
Description
PV
PV connection port (PVarray)
A
Load connection port
Load
B
Gridconnection port (to local grid)
Grid
C
Grid(INV)
Grid output portof the inverter
D
Off-grid (INV)
Off-grid output portof the inverter
E
BAT
Battery connection port(tobatterypack)
F
PV connection port of the inverter
PV (INV)
G
BAT(INV)
Battery connection port of the inverter
H
I
DC Switch
DC switch
3. Preparation
3.1 Check Packing List
Prior to installation, ensure that nothing inside the package is damaged.Open the package and check the
materials and accessories according the follow list.
Bracket B *1
Bracket A *1
Bracket C *1
10AWG Battery
power line
10AWG
OT
(negative*1,positive*1)
terminal
*1
3.2 Tools
The following tools need to be prepared before installation:
Diagonal Plier
Philips Screwdriver
Hexagon keys
Crimping Tool
4. Mounting
The bracket of the X3-Matebox is composed of three parts.
,
Bracket
B is used to fix the bracket position of the inverter , and
position of T-BAT-SYS-HV-(3.0) .
The bracket can be installed in two ways:
1)With T-BAT-SYS-HV-(3.0) battery, the installation method is as follows:(
2)With other batteries, the installation method is as follows:(
1)
Inverter bracket
Bracket B
Bracket A
Bracket C
Battery bracket
Note :When installing the bracket, be sure to use a
the horizontal plane.
Bracket A should be installed at a distance of 200mm(at least) from the earth.
X3-Matebox
Matebox
Grid
Diagram B: N line and PE line together, M series inverters;
( Applicable to Australia)
PV 1
PV 2
X3-Hybrid G4
CT
CT 1
Off-grid
BAT
Grid
CT 2
CT 3
N
E-BAR
Grid
X3-Matebox
Battery
off-grid loads
Loads
N-BAR for off-grid loads
N-BAR for loads
204cm
A
B
C
D
E F
G
H
(Expansion bolt ,
Flange nut *4
Gasket ,Self-tapping
10AWG European
bolt) *2
terminals *16
N-terminal adjacent
Earthing conductor
bridge *1
*1
(for AU market)
Crimping Plier
Monkey Wrench
Φ10 Drill
Inner hexagonal
Spirit level
Rubber hammer
wrench
Marker Pen
Bracket
A is used to install the X3-Matebox
Bracket
C is used to fix the bracket
)
2)
Inverter bracket
Bracket B
Bracket A
>200.00mm
level to test and keep the bracket parallel to
spirit
Step 1: Splicing bracket
First splice the inverter bracket, bracket A, bracket B, and battery bracket according to the following
steps, and then fasten them to the wall.
Fix the inverter bracket on
the bracket B;
Load
Monkey Wrench
Torque: 1.5±0.2N·m
Then set the bracket C on
the bracket A ;
Main Breaker/RCD
N
E-BAR
Grid
Monkey Wrench
Torque: 1.5±0.2N·m
Step 2: Then install the T-BAT-SYS-3.0 battery bracket ;(Please refer to
T-BAT-SYS-3.0 battery quick installation guide)
Step 3: Mounting bracket A
The mounting method of the X3-Matebox bracket is as follows:
a) Use the bracket as a template to mark the two holes on the
wall with a marker pen.
I
c) Insert expansion bolt into the hole, use rubber hammer to
knock the expansion screw bolt into the wall.
Rubber hammer
Torque :2.5±0.2N·m
Step 4: Finally, install X3-Hybrid G4 inverter bracket ;(Please refer to
X3-Hybrid G4 inverter quick installation guide).
Step 5. Install the X3-Matebox on the wall and lock the screws.
Use a level first to ensure that the brackets (battery bracket, bracket A, bracket B, bracket C, inverter
bracket) in the system are firmly installed and level. Then follow the steps below to hang X3-Matebox.
a)Before install the inverter, connect the ground wire
firstly,and remove the "DONGLE" waterproof cover (for
the installation of communication accessories; (Please
refer to the pocket dongle( WiFi) quick installation guide)
X3-Hybrid G4 inverter
C) open the upper cover of X3-Matebox and remove the baffle; (open the button by hand, open the cover and slide
upwards, and remove the isolation plate)
)
d ) Mount X3-Matebox on bracket A and tighten the screws.
Inverter bracket
Bracket B
Bracket A
Bracket C
Battery bracket
Note :The position of the T-BAT-SYS-HV-(3.0)
battery base mounting
screws are two
positions on the inner
side, refer to the
following figure:
b) Drill holes at marked spots with depth of 80mm.
a)
d ) The bracket is aligned with the screw uses the inner
hexagonal wrench to screw the tapping screw until the
expansion bolt "bang" is heard.
Expansion
bolts
c)
b) Firstly install the battery and inverter on the wall,
and then install the X3-Matebox on the wall;
Philips
Screwdriver
torque:1.5±0.2N·m
Then set the bracket B on the
bracket A and fix it with screws;
Monkey Wrench
Torque: 1.5±0.2N·m
Then the bracket C is fixed on
the battery bracket and the
screws are locked ;
Monkey Wrench
Torque: 1.5±0.2N·m
Φ10 drill
b)
Screw
Inner
hexagonal
wrench
d)
X3-Hybrid G4
inverter
T-BAT-SYS-3.0
battery
Philips Screwdriver
Torque: 1.5±0.2N·m
Advertisement

Related Manuals for SolaX Power X3-Matebox


Summary of Contents for SolaX Power X3-Matebox
- Page 1 Crimping Plier Monkey Wrench X3-Hybrid G4 inverter Φ10 Drill C) open the upper cover of X3-Matebox and remove the baffle; (open the button by hand, open the cover and slide upwards, and remove the isolation plate) Inner hexagonal Spirit level...
- Page 2 Diagonal Plier Crimping Tool 7. Technical Parameters 3) Pass the Load line through the Load port of the X3-Matebox, then find the Load (R/S/T/N) ports in the DC Input/Output LOAD Input/Output X3-Matebox, insert each line accordingly, and use the screwdriver to lock the screws.
Need help?
Do you have a question about the X3-Matebox and is the answer not in the manual?
Questions and answers