Table of Contents
Advertisement
Available languages
Available languages
Quick Links
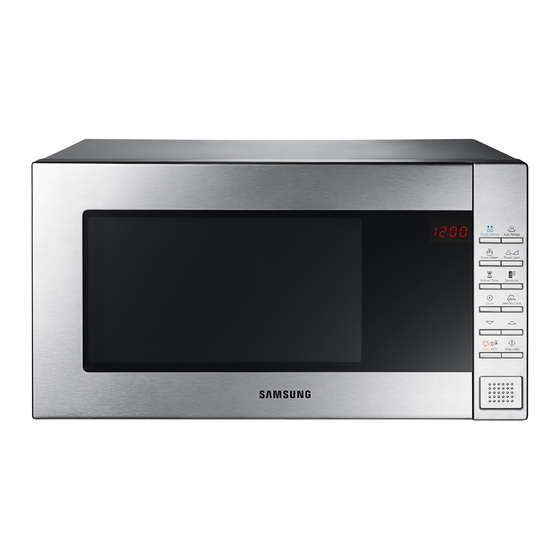
B2310
فر مایکروویو
را تصور كنيد
امكانات
دستورالعمل نصب و استفاده
. را خريداري كرديد متشكرميSamsung از اينكه اين محصول
، متاس های خدماتی برای توضیح در مورد عملکرد محصولSamsung لطف ا ً توجه کنید که گارانتی
.نصب صحیح یا اجنام متیز کردن یا حفظ و نگهداری عادی را پوشش منی دهد
DE68-03132Z-02
B2310_HC_DE68-03132Z-02_FA.indd 1
2017-12-06
4:34:05
Advertisement
Table of Contents

Related Manuals for Samsung B2310


Summary of Contents for Samsung B2310
- Page 1 . را خريداري كرديد متشكرميSamsung از اينكه اين محصول ، متاس های خدماتی برای توضیح در مورد عملکرد محصولSamsung لطف ا ً توجه کنید که گارانتی .نصب صحیح یا اجنام متیز کردن یا حفظ و نگهداری عادی را پوشش منی دهد...
- Page 2 فهرست مندرجات 21 ................................کباب کردن 3 ............................دستورالعمل های ایمنی 21 ..........................ترکیب مایکروویو و کباب پز 11 ................................... نصب 22 ............................... خاموش کردن بیپر 11 ................................ملحقات 22 ............................قفل ایمنی فر مایکروویو 11 ..............................نصب فر مایکروویو 22 ............................راهنمای ظروف خوراکپزی 12 ..............................حفظ...
- Page 3 این دستگاه صرف ا ً برای استفاده در محیط منزل است و برای استفاده در محل هائی از دستورالعمل های ایمنی :این قبیل نیست دستورات ایمنی مهم محیط آشپزخانه کارکنان در فروشگاه ها، دفاتر و سایر محیط های کاری؛ خانه های روستائی؛ .با...
- Page 4 .این دستگاه را نباید با متیز کننده بخاری متیز کرد محتویات بطری های تغذیه کودک یا شیشه های غذای کودک بایستی هم زده شده یا تکان داده شوند و بایستی دما را قبل از .این دستگاه را نباید با جت آبی متیز کرد .استفاده...
- Page 5 دستورالعمل های نصب فر مایکروویو این دستگاه باید امکان قطع برق را بعد از نصب از منبع برق داشته باشد. قطع برق ممکن است توسط دسترسی به دوشاخه این دستگاه از مقررات احتادیه ارویا پیروی می کند یا با استفاده از یک سویچ در سیم کشی ثابت براساس مقرارت دوراندازی...
- Page 6 ابعاد توسازی • اگر قرار است فر مایکروویو در نزدیکی فر مرسوم نصب شود، باید فاصله کافی بین آنها مراعات شود تا از زیاد گرم شدن پیشگیری شود، چون محیط اطراف ممکن است با دمای بسیار زیادی احاطه شود. بی شک این نکته اهمیت...
- Page 7 1. از مته 3 میلی متر برای سوراخ کردن استفاده کنید. پیچ ها )1 را در بست نصب محکم کنید. (منودار )2 2. فر مایکروویو را وارد قفسه کنید. (منودار 3. از شابلون برای قرار دادن پایه بست به فاصله 17 میلی )3 "...
- Page 8 فقط عملکرد فر - انتخابی ،هشدار: هنگامیکه از دستگاه در حالت ترکیبی استفاده می شود 3 Ø به واسطه دمائی که ایجاد می شود، کودکان بایستی صرف ا ً حتت سرپرستی یک بزرگسال از فر استفاده کنند دستگاه در حین استفاده داغ می شود. در هنگام دست زدن به املنت های .حرارتی...
- Page 9 و موارد نگهداری توسط کاربر نباید توسط کودکان اجنام شود مگر از دوشاخه برق، سیم برق آسیب دیده یا پریز شل استفاده نکنید. برای دوشاخه یا سیم برق آسیب دیده، با . متاس بگیریدSamsung مرکز خدمات محلی .اینکه به سن باالی 8 بوده و حتت نظارت و سرپرستی باشند...
- Page 10 .همیشه از دستکش فر در هنگام برداشنت ظرف استفاده کنید متاس حاصل منوده یا کمک و اطالعات آنالین را در آدرسSamsung سوال یا دغدغه ای دارید، با مرکز خدمات محلی مایعات را در نیمه کار یا بعد از خامته گرم کردن هم بزنید و به مایع اجازه بدهید که حداقل 02 ثانیه بعد از...
- Page 11 نصب فر مایکروویو نصب .1. همه مواد بسته بندی را از داخل فر بردارید. حلقه گردنده و صفحه گردان را نصب کنید ملحقات .کنترل کنید که صفحه گردان به طور آزاد گردش می کند .2. این فر مایکروویو بایستی طوری قرار داده شود که دوشاخه قابل دسترسی باشد بستگی...
- Page 12 اگر دریچه به طور روان باز و بسته منی شود، ابتدا پلمب های دریچه را برای ایجاد آلودگی کنترل کنید. از یک پارچه نرم در آب و صابون برای متیز کردن سطوح داخلی و خارجی فر استفاده کنید. خوب آبکشی و خشک . متاس بگیرید. خودتان آنرا تعویض نکنیدSamsung اگر می خواهید المپ را تعویض کنید، با مرکز محلی خدمات •...
- Page 13 صفحه کنترل ویژگی های فر فر 7. صفحه گردان 1. روزنه های هواگیر 8. حلقه گردنده 2. کباب پز 9. نقطه اتصال 3. چراغ 7. گزینش دوباره گرم کردن خودکار 1. دکمه یخ زدائی پرقدرت خودکار 01. روزنه های چفت و بست ایمنی 4.
- Page 14 پخنت گرم کردن مجدد استفاده از فر .روش زیر نحوه پخنت یا گرم کردن مجدد غذا را توصیف می کند .همیشه قبل از اینکه فر را به حال خود رها کنید، تنظیمات آشپزی را کنترل کنید تنظیم زمان .ابتدا غذا را در مرکز صفحه گردان قرار دهید. سپس دريچه را ببنديد فر...
- Page 15 توقف آشپزی درجات نیرو .می توانید در هر زمان آشپزی را برای سر زدن به غذا متوقف کنید .می توانید از بین درجات نیروی زیر، یکی را انتخاب کنید 1. برای متوقف کردن موقت؛ خروجی میزان نیرو .دريچه را باز کنید کباب...
- Page 16 استفاده از ویژگی های گرم کردن دوباره خودکار استفاده از متیز کردن با بخار .ویژگی گرم کردن دوباره خودکار چهار مدت آشپزی از قبل برنامه ریزی شده دارد .بخار ایجاد شده توسط سیستم متیز کردن با بخار سطح داخلی را خیس می کند .لزومی...
- Page 17 استفاده از عملکرد آشپزی کراستی خودکار .حدول زیر برنامه های گرم کردن دوباره خودکار، مقادیر و دستورات مربوطه گوناگون را نشان می دهد با ویژگی آشپزی کراستی خودکار، مدت آشپزی به طور خودکار تنظیم می شود. می توانید تعداد وعده های .غذایی...
- Page 18 استفاده از عملکرد آشپزی کراستی به طور دستی جدول زیر برنامه های خودکار گوناگون برای عملکرد برشته، تعداد و دستورالعمل های مربوطه را نشان می بشقاب کراستی به شما امکان می دهد تا نه تنها روی غذا را با کباب پز برشته کنید، بلکه زیر غذا نیز ترد .دهد...
- Page 19 .توصیه می کنیم که بشقاب کراستی را مستقیم ا ً روی صفحه گردان پیش گرم کنید مدت آشپزی مدت پیش گرم نيرو اندازه خوراک خوراک .بشقاب کراستی را با عملکرد 006 وات + کباب پز برای 3 تا 5 دقیقه پیش گرم کنید )(دقیقه...
- Page 20 انتخاب ملحقات جدول زیر منایشگر برنامه ها، مقادیر و دستورالعمل های مناسب برای برنامه های مختلف یخ زدائی پرقدرت از ظروف مناسب برای مایکروویو استفاده کنید؛ از محفظه ها، ظروف .خودکار می باشد پالستیکی، فنجان، حوله کاغذی و غیره استفاده نکنید همه...
- Page 21 ترکیب مایکروویو و کباب پز کباب کردن می توانید برای آشپزی سریع و در آن واحد برشته کردن، از آشپزی ترکیبی با مایکروویو و کباب پز نیز .کباب پز به شما امکان می دهد تا غذا را بدون استفاده از مایکروویو، بطور سریع گرم و برشته کنید .استفاده...
- Page 22 خاموش کردن بیپر راهنمای ظروف خوراکپزی .هر وقت که خواستید می توانید بیپر را خاموش کنید برای پخنت غذا در فر مایکروویو، اشعات مایکروویو بایستی بدون اینکه توسط ظرف استفاده شده .منعکس یا جذب شوند، بتوانند به غذا رسوخ کنند ثانیه) را...
- Page 23 راهنمای آشپزی نظرات مناسب برای مایکروویو ظرف خوراکپزی مایکروویو فلز .انرژی مایکروویو در واقع به غذا نفوذ کرده، توسط آب، چربی و محتوای قندی آن جذب می شود .ممکن است موجب قوس برقی یا آتشسوزی شوند ظروف • .امواج مایکروویو موجب حرکت سریع مولکول های غذا می شوند ✗...
- Page 24 راهنمای آشپزی برای سبزیجات تازه راهنمای آشپزی برای سبزیجات یخ زده از یک کاسه پیرکس شیشه ای مناسب با درپوش استفاده کنید. 03 تا 54 میلی لیتر (2 تا 3 قاشق از یک کاسه پیرکس شیشه ای مناسب با درپوش استفاده کنید. برای حداقل مدت به صورت پوشیده بپزید غذاخوری) برای...
- Page 25 راهنمای آشپزی برای برجن و پاستا از یک کاسه پیرکس شیشه ای بزرگ با درپوش استفاده کنید - حجم برجن در حین آشپزی دو برابر می شود. با : برجن )زمان (دقیقه نيرو اندازه خوراک خوراک .سرپوش بپزید 5-4/5 008 وات 052 گرم...
- Page 26 دوباره گرم کردن غذای کودک دوباره گرم کردن :غذای کودک فر مایکروویو در مدت بسیار کوتاه تری از مدتی که فرهای متعارف معمو ال ً صرف می کنند، غذا را دوباره گرم خواهد در یک بشقاب سرامیک عمیق خالی کنید. روی آن یک در پالستیکی قرار دهید. پس از دوباره گرم کردن خوب .کرد...
- Page 27 دوباره گرم کردن غذا و شیر کودک .از میزان نیرو و مدت درج شده در این جدول به عنوان رهنمودهای دوباره گرم کردن استفاده کنید )زمان (دقیقه نيرو اندازه خوراک خوراک زمان نيرو اندازه خوراک خوراک 6/5- 5/5 006 وات 053 گرم...
- Page 28 یخ زدائی )زمان (دقیقه نيرو اندازه خوراک خوراک مایکروویو کردن روش ایده آلی برای یخ زدائی غذای منجمد است. اشعه های مایکروویو به طور مالیم غذای منجمد را در .مدت کوتاهی یخ زدائی می کنند. این موضوع می تواند مزیت خوبی باشد اگر مهمان های غیرمنتظره پیدایشان شود ماهی...
- Page 29 راهنمای کباب پز برای غذای تازه کباب پز .کباب پز را توسط عملکرد کباب پز برای 3 تا 4 دقیقه پیش گرم کنید املانت گرم کردن کباب پز در زیر سقف دستگاه قرار دارد. این املانت هنگامی کار می کند که دریچه بسته .از...
- Page 30 راهنمای کباب پز برای غذای یخ زده .از میزان نیرو و مدت درج شده در این جدول به عنوان رهنمودهای کباب کردن استفاده کنید )2 مرحله (دقیقه )1 مرحله (دقیقه نيرو اندازه خوراک غذای تازه )2 مرحله (دقیقه )1 مرحله (دقیقه نيرو...
- Page 31 006 گرم میوه (برای مثال انواع توت) را در یک کاسه پیرکس شیشه ای با درپوش به اندازه مناسب قرار .دهید. 003 گرم شکر را اضافه کرده و خوب هم بزنید متاسSamsung المپ به دالیل ایمنی نباید شخص ا ً تعویض شود. لطف ا ً با نزدیکترین مرکز مجاز مراقبت از مشتریان •...
- Page 32 .برای اینکه بو زودتر از بین برود، می توانید چند برش لیمو یا آب لیمو در داخل فر مایکروویو گذاشته و روشن کنید منبع نيرو متاسSAMSUNG اگر رهنمودهای فوق به شما در حل و فصل مشکل کمک منی کنند، با مرکز محلی خدمات مشتریان 032 ولت ~ 05 هرتز...
- Page 33 یادداشت یادداشت 33 - فارسی B2310_HC_DE68-03132Z-02_FA.indd 33 2017-12-06 4:34:17...
- Page 34 یادداشت یادداشت B2310_HC_DE68-03132Z-02_FA.indd 34 2017-12-06 4:34:17...
- Page 35 یادداشت یادداشت B2310_HC_DE68-03132Z-02_FA.indd 35 2017-12-06 4:34:17...
- Page 36 سواالت یا نظرات؟ یا از ما به آدرس آنالین زیر دیدن کنید تماس بگیرید کشور یا از ما به آدرس آنالین زیر دیدن کنید تماس بگیرید کشور 0860 SAMSUNG (726 7864) SOUTH AFRICA 08000-7267864 www.samsung.com/eg/support EGYPT 16580 3434 ZAMBIA www.samsung.com/iran/support...
- Page 37 Thank you for purchasing this Samsung product. Installation and Operating Instruction Please be advised that the Samsung warranty does NOT cover service calls to explain product operation, correct improper installation, or perform normal cleaning or maintenance. B2310_HC_DE68-03132Z-02_EN.indd 1...
-
Page 38: Table Of Contents
contents Safety instructions ..................3 Switching the beeper off ...............22 Safety-locking your microwave oven .............22 Installation ....................11 Cookware guide ..................22 Accessories ..................11 Installing your microwave oven..............11 Cooking guide ..................23 Maintenance ..................12 Troubleshooting and error code ............31 Cleaning ....................12 Troubleshooting ..................31 Replacement (repair) ................12 Error code ....................32 Care against an extended period of disuse ...........12 Technical specifications ...............32... -
Page 39: Safety Instructions
safety instructions • staff kitchen areas in shops, offices and other working environments; iMPortant safety instructions • farm houses; READ CAREFULLY AND KEEP FOR FUTURE • by clients in hotels, motels and other residential REFERENCE. environments; • bed and breakfast type environments. MicroWaVe function onLy Only use utensils that are suitable for use in microwave WARNING: If the door or door seals are damaged, the... - Page 40 This appliance is not intended for use by persons Eggs in their shell and whole hard-boiled eggs should not be heated in microwave ovens since they may (including children) with reduced physical, sensory explode, even after microwave heating has ended. or mental capabilities, or lack of experience and knowledge, unless they have been given supervision or The oven should be cleaned regularly and any food...
- Page 41 If the supply cord is damaged, it must be replaced by INSTALLATION INSTRUCTIONS MICROWAVE OVEN the manufacturer, its service agent or similarly qualified This appliance complies with the EU persons in order to avoid a hazard. regulations. This oven should be positioned proper direction and Disposal of packaging and appliance.
- Page 42 Building-in dimensions • Where a microwave oven is to be installed next to a conventional oven, sufficient space between them should be allowed to prevent overheating, as the surround can wrap with excessively high temperatures, Obviously, it is important to adherent strictly to the conventional oven manufacturer’s installation instruction.
- Page 43 1. Use the 3 mm drill to make holes. Fix screws into BKT-Install. (Fig1) 2. Insert the microwave oven into the cabinet. (Fig2) 3. Use the template to place the BKT-Base 71 mm away from “A” side of the cabinet. (Fig3) 4.
- Page 44 oVen function onLy - oPtionaL WARNING: When the appliance is operated in the combination mode, children should only use the oven under adult supervision due to the temperatures generated. During use the appliance becomes hot. Care should be BKT-Install taken to avoid touching heating elements inside the oven. Fig1 Fig2 WARNING: Accessible parts may become hot during...
- Page 45 Do not insert fingers or foreign substances. If foreign substances enter the oven, unplug the power cord and contact a local Samsung service centre. This appliance can be used by children aged from 8 Do not apply excessive pressure or impact to the oven.
- Page 46 Limited warranty Remove wire twist ties. Electric arcing may occur. Samsung will charge a repair fee for replacing an accessory or repairing a cosmetic Do not use the oven to dry papers or clothes. defect if the damage to the unit or accessory was caused by the customer. Items this Use shorter times for small amounts of food to prevent overheating or burning.
-
Page 47: Installation
installation INSTALLING YOUR MICROWAVE OVEN 1. Remove all packing materials inside the oven. Install the roller ACCESSORIES ring and turntable. Check that the turntable rotates freely. Depending on the model that you have purchased, you are supplied with several accessories that can be used in a variety of ways. 2. -
Page 48: Maintenance
If the door won’t open or close smoothly, first check if the door seals have built up • If you want to replace the light bulb, contact a local Samsung service centre. Do impurities. Use a soft cloth in soapy water to clean both the inner and outer sides of the not replace it yourself. -
Page 49: Oven Features
oven features CONTROL PANEL OVEN VENTILATION HOLES TURNTABLE GRILL ROLLER RING LIGHT COUPLER DISPLAY 10. SAFETY INTERLOCK HOLES AUTO POWER DEFROST BUTTON AUTO REHEAT SELECTION DOOR LATCHES 11. OPEN DOOR PUSH BUTTON CRUSTY COOK SELECTION POWER LEVEL MODE SELECTION DOOR 12. -
Page 50: Oven Use
oven use COOKING/REHEATING The following procedure explains how to cook or reheat food. SETTING THE TIME ALWAYS check your cooking settings before leaving the oven unattended. First, place the food in the centre of the turntable. Then, close the door. Your microwave oven has an inbuilt clock. -
Page 51: Power Levels
POWER LEVELS STOPPING THE COOKING You can choose among the power levels below. You can stop cooking at any time to check the food. Output 1. To stop temporarily; Power level Open the door. GRILL Result: Cooking stops. To resume cooking, close the HIGH 800 W door and press the Start / +30s button again. -
Page 52: Using The Steam Cleaning
USING THE STEAM CLEANING USING THE AUTO REHEAT FEATURES The steam provided by steam clean system will soak the cavity surface. The Auto Reheat features has four pre-programmed cooking time. After using steam clean function, you can easily clean the cavity of oven. You do not need to set either the cooking times or the power level. -
Page 53: Using The Auto Crusty Cook Function
USING THE AUTO CRUSTY COOK FUNCTION The following table presents the various Auto Reheat Programmes, quantities and With the Auto Crusty Cook feature, the cooking time is set automatically. You can adjust appropriate instructions. the number of servings by pressing the Up and Down buttons. First, place the crusty plate in the centre of the turntable and close the door. -
Page 54: Using The Manual Crusty Cook Function
USING THE MANUAL CRUSTY COOK FUNCTION The following table presents the various Auto Programmes of the Crisp function, This crusty plate allows you to brown food not only on the top with the grill, but also the quantities and appropriate instructions. bottom of the food turns crispy and brown due to the high temperature of the crusty These Programmes are running with a combination of microwaves and grill. -
Page 55: Choosing The Accessories
We recommend to preheat the crusty plate directly on the turntable. Preheating Cooking Food Serving Size Power Preheat crusty plate with 600 W + Grill function for 3-5 minutes. Time (min.) time (min.) Follow the times and instructions in the table. frozen Mini- 9 x 30 g 9-10... -
Page 56: Using The Auto Power Defrost Features
USING THE AUTO POWER DEFROST FEATURES The Auto Power Defrost features enables you to defrost meat, poultry, fish and bread/ The following table presents the various Auto Power Defrost programmes, quantities and cake. The defrost time and power level are set automatically. appropriate instructions. -
Page 57: Grilling
GRILLING COMBINING MICROWAVES AND THE GRILL The grill enables you to heat and brown food quickly, without using microwaves. You can also combine microwave cooking with the grill, to cook quickly and brown at the To this aim, a grill rack is supplied with your microwave oven. same time. -
Page 58: Switching The Beeper Off
cookware guide SWITCHING THE BEEPER OFF You can switch the beeper off whenever you want. To cook food in the microwave oven, the microwaves must be able to penetrate the food, without being reflected or absorbed by the dish used. 1. -
Page 59: Cooking Guide
cooking guide Cookware Microwave-safe Comments MICROWAVES • Fine glassware Can be used to warm foods or ✓ Microwave energy actually penetrates food, attracted and absorbed by its water, fat and liquids. Delicate glass may break or sugar content. crack if heated suddenly. The microwaves cause the molecules in the food to move rapidly. - Page 60 cooking Guide for fresh vegetables cooking Guide for frozen vegetables Use a suitable glass pyrex bowl with lid. Cook covered for the minimum time – see table. Use a suitable glass pyrex bowl with lid. Add 30-45 ml cold water (2-3 tbsp.) for every Continue cooking to get the result you prefer.
- Page 61 cooking Guide for rice and pasta Rice: Use a large glass pyrex bowl with lid - rice doubles in volume during Food Serving Size Power Time (min.) cooking. Cook covered. Leeks 250 g 800 W 4½-5 After the cooking time is over, stir before standing time and salt or add Instructions herbs and butter.
- Page 62 REHEATING REHEATING BABY FOOD Your microwave oven will reheat food in a fraction of the time that conventional ovens BABY FOOD: hobs normally take. Empty into a deep ceramic plate. Cover with plastic lid. Stir well after reheating! Let stand Use the power levels and reheating times in the following chart as a guide.
- Page 63 reheating Baby food and Milk Use the power levels and times in this table as guide lines for reheating. Food Serving Size Power Time (min.) Food Serving Size Power Time Pasta with 350 g 600 W 4½ -5½ sauce (chilled) Baby food 190 g 600 W...
- Page 64 DEFROSTING Microwaves are an excellent way of defrosting frozen food. Microwaves gently defrost Food Serving Size Power Time (min.) frozen food in a short period of time. This can be of great advantage, if unexpected Poultry guests suddenly show up. Chicken Pieces 500 g (2 pcs) 180 W...
- Page 65 GRILL Grill Guide for fresh food Preheat the grill with the grill-function for 3-4 minutes. The grill-heating element is located underneath the ceiling of the cavity. It operates while Use the power levels and times in this table as guide lines for grilling. the door is closed and the turntable is rotating.
- Page 66 Grill Guide for frozen food Use the power levels and times in this table as guide lines for grilling. Fresh food Serving Size Power 1 step (min.) 2 step (min.) Frozen food Serving Size Power 1 step (min.) 2 step (min.) Lamb chops/ 400 g (4 pcs) Grill only...
-
Page 67: Troubleshooting And Error Code
• The Light bulb should not be replaced in person for safety reasons. Please contact Cook covered for 10-12 minutes using 800 W. nearest authorised Samsung customer care, to arrange for a qualified engineer to Stir several times during cooking. Empty directly into small jam glasses with twist-off lids. -
Page 68: Error Code
SAMSUNG strives to improve its products at all times. Both the design specifications and these user instructions are thus subject to change without notice. • It’s a temporary condition by new component heating. Smoke and smell will disappear completely after 10 minutes operation. - Page 69 memo memo English - 33 B2310_HC_DE68-03132Z-02_EN.indd 33 2017-12-06 4:34:41...
- Page 70 memo memo B2310_HC_DE68-03132Z-02_EN.indd 34 2017-12-06 4:34:41...
- Page 71 memo memo B2310_HC_DE68-03132Z-02_EN.indd 35 2017-12-06 4:34:41...
- Page 72 QUESTIONS OR COMMENTS? country caLL or Visit us onLine at country caLL or Visit us onLine at 08000-7267864 SOUTH AFRICA 0860 SAMSUNG (726 7864) EGYPT www.samsung.com/eg/support 16580 ZAMBIA 3434 IRAN 021-8255 www.samsung.com/iran/support MAURITIUS 800 2550 www.samsung.com/support Israel *6963 www.samsung.com/il/support/ ANGOLA 917 267 864 www.samsung.com/sa/home...
Need help?
Do you have a question about the B2310 and is the answer not in the manual?
Questions and answers