Advertisement
Available languages
Available languages
Quick Links
Thank you for purchasing this inno product.
Read instruction thoroughly before use for correct usage.
Keep this manual in a safe place to avoid being lost.
1
Check enclosed parts
Affix the specification sticker
11
in the relevant language
on the stay.
1
2
2
Prepare to install the crossbars
The distance between the front and rear crossbar should be at least
24 inch (600 mm).
Widen the crossbar as need until both binding fit between them.
Recommendation 29 ½ inch (750 mm)
At least 24 inch (600 mm)
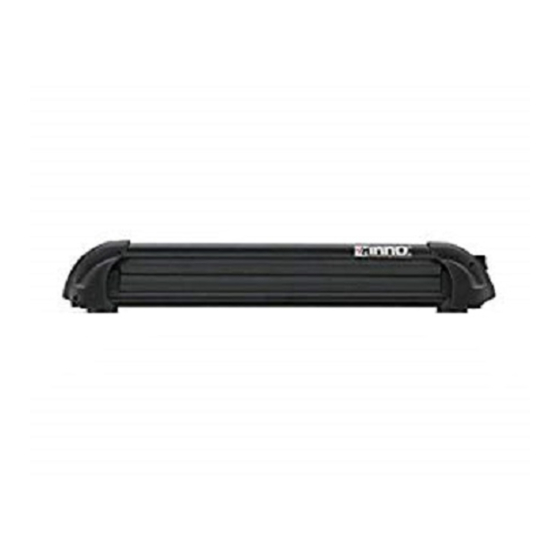
Front carrier / Crossbar
4
Attach mounting clamps
Insert the key and turn
left to unlock.
Lock
Unlock
5
Mount carrier on car
①
If the cover is attached, remove to allow insertion into T slot on the bar.
②
Set the square bolt to the T slot.Use the square bolt (long) for high position and the square bolt (short) for low position.
Insert the square bolt into the mounting hole of the carrier main body to set temporarily.
③
①
Cover
・
XA927 928
3
5
4
6
Binding
Rear carrier / Crossbar
While pressing the button, lift the
upper arm up to open.
Upper Arm
Button
②
Square Bolt
Installation Instructions
Falling of carrier parts or loads may cause potentially serious accidents
Caution
involving vehicles and individuals following behind result in severe injury or
death.
Check strength of the crossbar before mounting the carrying system.
Do not install this carrying system to a Crossbar of strength poverty.
The distance between the front and rear crossbar should be at least 24 inch (600 mm).
Make sure that all bolts and nuts are securely tighten before driving.
Do not exceed a speed of 80 mph (130 km/h) when carrying ski or snowboard. And
observe legal speed limit. When the bindings do not fit between the front and rear
crossbars, it is recommended not to exceed the speed limit over 50 mph (80 km/h).
Always lock and secure the carrier with a key before driving.
Attention
May cause injury to individuals or damage to the product, vehicle and loads
being carried.
The lock on this rack is not guaranteed to prevent theft.
7
9
No.
1
2
3
4
8
10
5
6
3
Mountable bar
This product can be attached not only to the INNO aero bar but also to
the factory crossbar whose T slot fits the dimensions below.
W : 21 〜 22mm
A
A : 10.5 〜 11.5mm
Height of this product is adjustable in accordance with the load.
Product comes packed in the high position.To change to the low
position, pull the spacer straight down to remove.Be sure to mount
product at the same height on both the left and right sides.
High Position
③
Specification Sticker
Mounting Hole
Square Bolt
- 1 -
Parts
Q'ty
No.
2
7
Flat Washer
Carrier Main Body
8
Spacer
4
Hex Wrench
9
Square Bolt (Short)
4
Key
Square Bolt (Long)
10
4
Installation Instructions
Long Nut
4
11
Specification Sticker
Spring Washer
4
Caution
Check vehicle or carrier base product
instructions to confirm that the carrier
base to which this product is to be
installed has sufficient strength to
support this product. If the carrier
base does not have sufficient
H : 5mm 〜
strength to support this product, do
not install.
It cannot be mounted on the stay
cover.
Low Position
Spacer
Mounting Holes for Square Bolts
5572546A
EN
Parts
Q'ty
4
1
2
1
1
Advertisement

Related Manuals for INNO XA927


Summary of Contents for INNO XA927
- Page 1 Mountable bar The distance between the front and rear crossbar should be at least This product can be attached not only to the INNO aero bar but also to 24 inch (600 mm). the factory crossbar whose T slot fits the dimensions below.
-
Page 2: Load Capacity
Stacked skis should not exceed See following table to see carrying capacity. to 2.0 inch (50 mm). Use thicker ski towards the opening side. the thickness is up to 2.0 inch (50 mm) XA927 XA928 50mm 40mm Skis Skis+Ski poles... -
Page 3: Safe Driving
Avoid drive-thru-carwash while INNO Carriers are mounted on the roof . Use caution when handling ski or snowboard around the tailgate and or truck lid area. - Page 4 Barre installable La distance entre les traverses avant et arriére doit être d'au moins Ce produit peut être fixé non seulement à la barre aérienne INNO mais 24 po (600 mm). également aux barres transversales d'usine dont la rainure à T Elargissez la traverse autant que nécessaire jusqu' à...
- Page 5 Voir le tableau ci-après pour le nombre de paires de skis et attachés est à 2.0 po (50 mm). snowboards transportables. Chargez les skis épais côté Epaisseur de 2.0 po (50 mm) fermoir. XA927 XA928 50mm 40mm Skis Skis+Bâtons 4 paires 2 paires...
- Page 6 Vérification de sécurité boulons et écrous Prudence Prudence Ne pas utiliser d'étui ou de SConsignes pour rouler housses à skis en toute sécurité Ne pas utiliser d'étuis ou de protection en Eviter toute accéleration trop plastique pour skis / snowboards lors de puissante et des tournants trop leur transport avec le porte-skis / brusques.
- Page 7 Barra montable La distancia entre las barras transversales delantera y trasera Este producto se puede acoplar no solo a la barra aérea INNO sino deberá ser de 24 plug (600 mm) por lo menos. también a la barra cruzada de fábrica cuya ranura en T se adapta a las Separe las barras transversales hasta que las dos ataduras dimensiones de abajo.
- Page 8 Con respecto a la capacidad de transporte, consulte la tabla apilados es a 2.0 pulg (50 mm). siguiente. Cargue los esquís más gruesos Grosor a 2.0 pulg (50 mm) cerca de las puertas. XA927 XA928 50mm 40mm Esquís Esquís+Bastones 4 pares 2 pares...
-
Page 9: Conducción Segura
Comprobación de seguridad Cautera Cerciórese de que todas las pernos y las tuercas estén apretadas con seguridad antes de conducir. Reapriete cualquier palanca o perilla floja. Bloquee siempre con llave antes de conducir. No haga alteraciones en este producto. Attención El cierre de esta parrilla no tiene protección antirrobo. - Page 10 5572546A XA927 ・ 928 取扱説明書 製品や積載物の脱落など、 後続車や人を巻き込み、 このたびは、 INNO製品をお買い上げいただきましてありがと 死亡や重傷に至る重大な事故を起こすおそれがあります。 うございます。 ご使用の前に取扱説明書をよくお読みください。 本品を装着するベースキャリア/クロスバーは、 十分な強度があることを確認し、 確実に取り 読んだ後はなく さないように保管してください。 付けてください。 キャリアの前後間隔は600mm以上とってください。 走行前に、 ボルト/ナッ ト等にユルミがないか確認してください。 キャリア積載時は100km/h以下で走行してください。 また法定速度を守ってください。 前後のクロスバーの間にバインディングが入らない場合は、 80km/h以下で走行してくだ さい。 走行時は必ずキーをロックしてください。 ケガを負ったり、 製品 ・ 車両 ・ 積載物が損傷するおそれがあります。 本品は盗難防止を保証するものではありません。 積載物を長時間放置しないでください。 部品内容の確認 部品 数量 部品...
- Page 11 ⑤ 車が揺れるく らいゆすっても、 キャリア 2.2ft-lb 2.2ft-lb がずれなければOKです。 アッパーアーム スプリングワッシャ スプリングワッシャ 平ワッシャ 平ワッシャ 最大積載量 合わせて厚さ50mmの板まで積 本品に積載できるスキー/スノーボードの数量は以下の通りです。 載できます。 厚い板は手前(開閉側) に積載してください。 厚さ50mmまで XA927 XA928 50mm 40mm スキー スキー+ストック 4セッ ト 2セッ ト スノーボード スノーボード+スキー 最大積載量は車によって異なります。 車のクロ スバーの耐荷重を確認してください。 スキーの幅や厚み、 バインディングの 奥のヒンジ側には合計板厚40mm スキー/ストック/スノーボード以外は積載しな 大きさによって積載量が減少する場合 いでください。...
- Page 12 警告 直射日光の当たらない乾燥した場所に保管してください。 キーやボルトへの給油はしないでください。 シンナー、 ワックス等、 プラスチックを侵す溶 剤は使用しないでください。 補修部品 本製品には下記の補修部品があります。 お求めの際は販売 キー 店にご注文ください。 クッション キー番号を確認 本品と補修部品の外観 ・ 仕様は予告なく変更することがあり してください ます。 ISP 869 ISP 870 取扱説明書 クッション お問合わせ 商品についてのお問い合わせ ・ 補修パーツのご注文は、 サービスセンターへ お問い合わせください。 なお、 誤った取付けや使用、 改造しての使用、 台風等 の天災による事故の責任は一切負いかねます。 http://www.carmate.co.jp/support/ XA927 XA928 - 12 -...
Need help?
Do you have a question about the XA927 and is the answer not in the manual?
Questions and answers