
Related Manuals for LG WT17DSBP


Summary of Contents for LG WT17DSBP
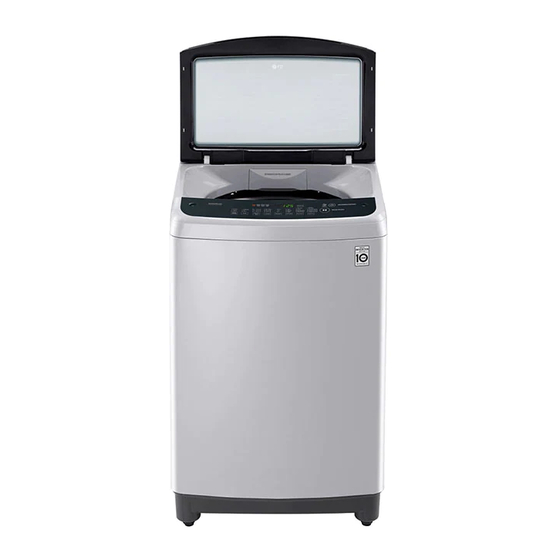
- Page 1 WASHING MACHINE SERVICE MANUAL CAUTION Before servicing the washer, Read the safety precautions in the manual. MODELS: WT17DSBP / WT17WSBP / WT19DSBP WT19WSBP / WT18DSBP / WT18WSBP...
-
Page 2: Table Of Contents
SAFETY PRECAUTION! DISASSEMBLE POWER CORD BEFORE SERVING RECONNECT ALL GROUNDING DEVICES IMPORTANT SAFETY NOTICE ! This service information is intended for individuals possessing adequate backgrounds of electrical, electronic and mechanical experience. Any attempt to repair this appliance may result in personal injury or property damage. -
Page 3: Specifications
LID INTERLOCK Magnet Sensor SWITCH CHILD LOCK Applied LINT FILTER Single / Double SOFTENER Applied DISPENSER DETERGENT Applied DISPENSER BLEACH INLET Applied AUTO POWER OFF Applied Copyright © 2017 LG Electronics Inc. All rights reserved. Only training and service purposes. -
Page 4: Installation Instructions
2. INSTALLATION INSTRUCTIONS 2-1. HOW TO ADJUST LEVEL Installation area • Install the washer on flat and firm surface. Checking level • Open the lid, and check if the washer is correctly leveled by looking down from the top. Adjustable leg Turn the adjustable legs to set the washer horizontal (2 EA). - Page 5 Checking slope Confirming level • If installation surface is tilted, the • Place the washer to original position washer will be shaken. and confirm the level. Horizontal setting Distance between drain hose and the wall • Lift up the front of the washer and •...
- Page 6 2-2. CONNECTING WATER SUPPLY HOSE Before connecting Water Supply Hose to water tap, check your hose type and choose correct instruction. Water Supply Hose may vary according to the country. Make sure connect blue inlet hose to COLD water tab, and orange inlet hose to HOT water tab. Connecting Water Supply Hose to water tap Normal Type {Normal tab without thread &...
- Page 7 One Touch Type (NORMAL TAB WITHOUY THREAD & ONE TOUCH TYPE INLET HOSE.) Separate Middle connector from Water Supply Hose Separate Middle connector from the Water Middle connector Conector Etiqueta Fija Fixed Stiicker Supply Hose by pulling the Pressing Rod and Medio Manija de Presión Pressing Handle...
- Page 8 Screw Type Attach the water supply hose to the tap. Push the water supply hose up so that the rubber packing within the hose can adhere completely Water to the tap. Water Supply Hose Rubber Packing Connect the water supply hose to the tap. Connect the water supply hose to the tap and then tighten it by screwing it to the right.
- Page 9 2-3. CONNECT THE DRAIN HOSE For pump model • Connect the drain hose to the • Attach the clip to the drain hose. • Check that the drain hose is outlet of the drain pump located And then push it toward the body hung up over the edge of the at the rear of the washing of the washing machine as...
-
Page 10: Operating Instructions
3. OPERATING INSTRUCTION 3-1. IDENTIFICATION OF PARTS LINT FILTER Clean regularly to stop linting on the clothes load. Copyright © 2017 LG Electronics Inc. All rights reserved. Only training and service purposes. -
Page 11: Before Starting To Wash
Use nylon nets for long, DELICATE items. For laundry with long strings or long length , a net will prevent tangling during washing. Fasten zippers, hook, and strings to make sure that these items don't snag on other clothes. Nylon net is not supplied by LG. - Page 12 At the end of the cycle, you may see water in the compartments. This is part of the normal operation of the washer. NOTE : Do not use bleach in the dispenser drawer. Copyright © 2017 LG Electronics Inc. All rights reserved. Only training and service purposes.
- Page 13 Detergent usage may need to be adjusted for water temperature, water hardness, size and soil level of the load. Avoid using too much detergent in your washer, as it can lead to oversudsing and detergent residue being left on the clothes. Copyright © 2017 LG Electronics Inc. All rights reserved. Only training and service purposes.
- Page 14 5th wash should be at least a warm one. Fabric softener of thinner consistency is less likely to leave residue on the dispenser and contribute to a build-up. Copyright © 2017 LG Electronics Inc. All rights reserved. Only training and service purposes.
- Page 15 SPECIAL GUIDE FOR STAIN REMOVAL WARNING Do not use or mix liquid chlorine bleach with other household chemicals such as toilet cleaners, rust removers, acid or products containing ammonia. These mixtures can produce dangerous fumes which can cause serious injury or death. To reduce the risk of fire or serious injury to persons or property, comply with the basic warnings listed below: •...
- Page 16 • The process lamp will remain prior to it beginning. The process lamp will blink during that process, and the lamp will then turn off when that process has completed. Copyright © 2017 LG Electronics Inc. All rights reserved. Only training and service purposes.
-
Page 17: Washing Programs
• In order to avoid damage to laundry, the spin cycle may appear slow. This also avoids wrinkles and clothing may still contain some water. This is normal. Copyright © 2017 LG Electronics Inc. All rights reserved. Only training and service purposes. - Page 18 Use this programme to pretreat immediate stain without handwash. It is necessary for clothes which could smell bad without prompt laundry. Copyright © 2017 LG Electronics Inc. All rights reserved. Only training and service purposes.
- Page 19 Power button to turn off indicated on the control panel. and on power. • Water level can be changed when operation is paused. Copyright © 2017 LG Electronics Inc. All rights reserved. Only training and service purposes.
- Page 20 • If Rinse only is selected, the process will start from the inlet water being supplied. • If you do not choose anything for Water Level, the water level is set automatically. Copyright © 2017 LG Electronics Inc. All rights reserved. Only training and service purposes.
- Page 21 3-5. OTRAS FUNCIONES 5) DELAY START (RESERVATION) Wash Copyright © 2017 LG Electronics Inc. All rights reserved. Only training and service purposes.
-
Page 22: Other Functions
Press and hold the Rinse and Beeper buttons for three seconds. • A beeper will sound and the remaining time for the current programme will reappear on the display. Copyright © 2017 LG Electronics Inc. All rights reserved. Only training and service purposes. -
Page 23: Care And Maintenance
3-6. CARE AND MAINTENANCE When there is a fear of freezing If frozen Wash Inner-tub Inlet Hoses Exterior Long Vacations Cleaning the Inside of your Washer Copyright © 2017 LG Electronics Inc. All rights reserved. Only training and service purposes. -
Page 24: Wiring Diagram
WIRING DIAGRAM Copyright © 2017 LG Electronics Inc. All rights reserved. Only training and service purposes. -
Page 25: Program Time Chart
PROGRAM TIME CHART Copyright © 2017 LG Electronics Inc. All rights reserved. Only training and service purposes. -
Page 26: Adjustmen
CAUTION When the V-belt is not properly adjusted, the motor will not be running or the belt will be slipping. Copyright © 2017 LG Electronics Inc. All rights reserved. Only training and service purposes. -
Page 27: Disassembly Instruction
Remove 4 screw from the front panel. Remove the PCB Assembly. Fuse is located in the Noise lter For fuse use the following rated fuse * Rating of fuse - 250V 6.3A Copyright © 2017 LG Electronics Inc. All rights reserved. Only training and service purposes. - Page 28 ⑤ Remove the inlet valve. ⑥ Disconnect the leads & the pressure tube from the BP sensor. ⑦ Remove the BP sensor. Inlet Valve Copyright © 2017 LG Electronics Inc. All rights reserved. Only training and service purposes.
- Page 29 Damper assembly shall not be disassembled. Replace damper as assembly. For assembly, keep the following.(Location & color) Location P/No. PIVOT(Color) K101 NATURAL K102 BLUE Copyright © 2017 LG Electronics Inc. All rights reserved. Only training and service purposes.
-
Page 30: Test Running Without Water
UB No sense Spin Check and ‘dE’ Before 500RPM: Max emission value/ Error check RSt: UB value Current RPM is displayed in the units of 2 sec. Copyright © 2017 LG Electronics Inc. All rights reserved. Only training and service purposes. -
Page 31: Trouble Shooting Against Common Washing Problems
Fasten zippers, hooks, and buckles. hooks, buckles Remove objects in pockets. See page 11 for caring before Ribs, tears and broken threads loading. Overloading the washer overload the washer. Copyright © 2017 LG Electronics Inc. All rights reserved. Only training and service purposes. - Page 32 0.9 ~ 1.2 m (36 FLOODING message is displayed. and 48 inches) above the ERROR Floor. switch When water is objects in pressure sensor switch air hose. Copyright © 2017 LG Electronics Inc. All rights reserved. Only training and service purposes.
- Page 33 Test the stator to determine it if Necessary is not defective. ( When there is a problem with the Turn the drum to verify the motor ) bearings are not locked. Copyright © 2017 LG Electronics Inc. All rights reserved. Only training and service purposes.
-
Page 34: How To Diagnose And Repair By Symptom
If supply voltage is 120% higher than rating the varistar in the controller may be broken. Check supply voltage. Copyright © 2017 LG Electronics Inc. All rights reserved. Only training and service purposes. - Page 35 3. Check whether a transfomerlent Explain it is a problem of power cut happens. electric supply (Fluorescent lamp is environment. transfomeriently blinked.) Copyright © 2017 LG Electronics Inc. All rights reserved. Only training and service purposes.
- Page 36 A connector is Reconnect it or remove the causes to make poor connection. connection. Coil is open 2) Check resistance of the inlet valve. Change the inlet valve. Copyright © 2017 LG Electronics Inc. All rights reserved. Only training and service purposes.
- Page 37 Change the inlet valve. valve. Controller Short circuit of the Change the controller. triac of the power switch turns on before pushing controller. the START/PAUSE button. Copyright © 2017 LG Electronics Inc. All rights reserved. Only training and service purposes.
- Page 38 2) Check resistance of the motor if Change the motor. Motor coil is open. there is no motor-working sound. Normal Remove the causes. Contact defect of the leads. resistance. Copyright © 2017 LG Electronics Inc. All rights reserved. Only training and service purposes.
- Page 39 Re-install so that it can’t higher than Defect of hose submerged into water or be submerged or not required. installation. higher than required. higher than required. (For non-pump model) Copyright © 2017 LG Electronics Inc. All rights reserved. Only training and service purposes.
- Page 40 Change the controller if Contact defect in Resistance is there is no defects in the connection parts normal. connection parts. or defect of the controller. Copyright © 2017 LG Electronics Inc. All rights reserved. Only training and service purposes.
- Page 41 1. Check generation frequency of the Sensor(Pressure (Pressure Swtich) Ball Pressure Sensor Switch). (Pressure Switch) without water. Change the controller. 26.3~27.1 kHz Defect of the controller. Copyright © 2017 LG Electronics Inc. All rights reserved. Only training and service purposes.
- Page 42 The gap is normal Defect of the clutch. Change the clutch. (2.0~3.5mm) Copyright © 2017 LG Electronics Inc. All rights reserved. Only training and service purposes.
- Page 43 1. Check whether the PV asm, the objects. drain pump & the drain hose are blocked by foreign objects so that it makes water-splashing noise in the tub. Copyright © 2017 LG Electronics Inc. All rights reserved. Only training and service purposes.
- Page 44 1. Check whether the outer tub cover damper hit the top cover without load simultaneously. during spin. (In assembling, check the position to damper asm) noise during spin and accumulately service experiance. Copyright © 2017 LG Electronics Inc. All rights reserved. Only training and service purposes.
- Page 45 1. It is mostly caused by noise from (It happens specially mains or transfomerient power cut. when a high frequency equipment is a used around the washer or in the case voltage Copyright © 2017 LG Electronics Inc. All rights reserved. Only training and service purposes.
- Page 46 Copyright © 2017 LG Electronics Inc. All rights reserved. Only training and service purposes.
- Page 47 A020 A030 A010 A040 A051 A052 A240 A200 A060 A080 A190 A163 A165 A241 A151 A101 A230 A163 A100 A165 A101 A270 A181 A271...
- Page 48 : Non-Service Part F070 F001 F000 F001 F080 F090 F021 F020 F027 F040...
- Page 49 : Non-Service Part K000 K090 K010 K020 K063 K040 K050 K200 K140 K110 K250 K064 K230 NATURAL K101 BLUE K102 K130 K170 K180 K280 K190 K260...
- Page 50 Apr 2019 PRINTED IN THAILAND P/No. MFL70581515...
Need help?
Do you have a question about the WT17DSBP and is the answer not in the manual?
Questions and answers