Table of Contents
Advertisement
Advertisement
Table of Contents

Related Manuals for TC Electronic G-Force


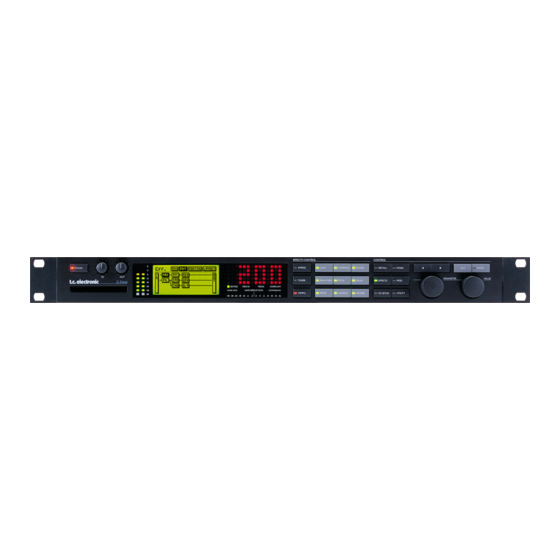
Summary of Contents for TC Electronic G-Force
-
Page 2: Table Of Contents
Power On Sequence........................13 LED Error Codes..........................15 Jumper settings..........................15 1st Edition Software Changes .........................17 © Copyright 2000, TC Electronic A/S. All rights reserved. Filename: GFOSMAN1.DOC Technical Specifications......................18 Stock number: 605 0310 11 Cable Specifications ........................19 Appendix list: Service notes, Schematics, Part lists, PCB Lay-out........20... -
Page 3: Introduction
The Block diagram for the signal flow in the G-Force shows the order of all the effects. Part lists contain a column called TCcode. Use this code when ordering spare parts. -
Page 4: Quick Trouble Shooting
Try with other cables or read section "Built-in Test program". Digitech pedals are incompatible. External Control In fails Try with other cables or read section "Built-in Test program". More hints to solve setup problems can be found in the G-Force Users manual. Check also FAQ on TCs web site: www.tcelectronic.com ______________________________________________________________________________________________________________________________________________________________________________ __________________... -
Page 5: Software Boot Menu
Reset Master Reset. Run this command and all global and preset settings are reset!!! Info Display the Device type, the Serial no. and software version Start Start the loaded software ______________________________________________________________________________________________________________________________________________________________________________ __________________ TC Electronic A/S G-Force Service manual page 5... -
Page 6: Built-In Test Program
Built-in Test Program The G-Force has a Built-in Test Program. To run the program; Press the BYPASS button while powering on. Select RUN TEST PROGRAM and Press ENTER. Follow the instructions on the display. To leave the Built-in Test Program; turn off the power. -
Page 7: Disassembly Procedure For Main Board
Desolder the seven wires from power supply. main board Power Supply Top view Fig. 3: Screws at back panel. MIDI / RS485 PROFESSIONAL AUDIO EQUIPMENT LISTED 5D83 2 nuts 2 nuts 1 screw Jack nut ______________________________________________________________________________________________________________________________________________________________________________ _________________ TC Electronic A/S G-Force Service manual page 7... -
Page 8: Disassembly Procedure For Front Section
Opening up the profile a little will lighten the pressure at the PCB guides, see fig. 5. Note: All push buttons are loose in the profile after removing the guides. ______________________________________________________________________________________________________________________________________________________________________________ __________________ TC Electronic A/S G-Force Service manual page 8... -
Page 9: Exchange Of Power Supply Module
Dismount the power supply by removing the screw, just below the mains plug at the back panel, see fig. 6. Mount the new power supply with the screw at the back panel. ______________________________________________________________________________________________________________________________________________________________________________ _________________ TC Electronic A/S G-Force Service manual page 9... -
Page 10: Exchange Of Battery Exchange Procedure
Lithiumbatteri. Eksplosionsfare ved fejlagtig håndtering. Må kun udskiftes med batteri af samme fabrikat og type. Lever det brugte batteri tilbage til leverandøren. Recommended battery type: CR2032-FT-4-2. TC stock no. (TCcode) for battery: 342 0000 11 ______________________________________________________________________________________________________________________________________________________________________________ _________________ TC Electronic A/S G-Force Service manual page 10... -
Page 11: Block Diagram
Block Diagram The block diagram in figure 7 gives a quick view of the signal flow in the G-Force. As the block diagram shows the input and output sections will always be active, even in Bypass mode. Effects (routing example) -
Page 12: Circuit Description
Circuit Description The G-Force consist of a front, a digital, an analog and a power supply section. Here is a brief description of the sections: Front section consist of three boards and a display, all placed in the front profile. The Analog section is placed mainly on the right side of the main board. -
Page 13: Power On Sequence
Power On Sequence The table below shows the Power On Sequence for main board version PC13002-2, when the G-Force is switched on by using the power switch at the back panel. Equal sequence numbers mean that the events are independent of each other. The column named Trouble Shooting has hints about what to check if the event fails. - Page 14 IC15 + soldering TP71, DA1_DATA starts up IC24 TP73, AD_DATA starts up IC39 Picture with "G-Force" and software version appears on the display. Front connection, display, Picture with "Pitch Technology" appears on the display. Application software RECALL picture appears on the display.
-
Page 15: Led Error Codes
Main board version PC13002-4: J12 and JTAG are unused. JP3, JP4, JP5 & JP6 controls boot mode: Boot from PCMCIA Boot from Flash (only used at factory) (one valid setting only) (normal mode) ______________________________________________________________________________________________________________________________________________________________________________ __________________ TC Electronic A/S G-Force Service manual page 15... - Page 16 ______________________________________________________________________________________________________________________________________________________________________________ __________________ TC Electronic A/S G-Force Service manual page 16...
-
Page 17: Software Changes
26. Drive above 80% sounds incorrect. Verify. No action taken ADSR not properly initalized at power-up. Corrected. 27. Formant bagpibes noise. Verify. No action taken Added support for multiple CARD banks to support G-Card. Corrected ______________________________________________________________________________________________________________________________________________________________________________ __________________ TC Electronic A/S G-Force Service manual page 17... -
Page 18: Technical Specifications
PCMCIA Type 1 cards Standards: PCMCIA 2.0, JEIDA 4.0 Card Format: Supports up to 2 MB SRAM Control Interface MIDI: In/Out/Thru: 5 Pin DIN External control: ¼" jack socket General ______________________________________________________________________________________________________________________________________________________________________________ __________________ TC Electronic A/S G-Force Service manual page 18... -
Page 19: Cable Specifications
SHIELDED CABLE ( 3 or 5 wires + shield ) see note see note Note: Pin 1 and 3 are reserved for optional RS485 interface Therefore, use only 3-wires if the G-Force is connected to other equipment that use these pins EXTERNAL CONTROL CABLE PEDAL SWITCH EXPRESSION PEDAL... -
Page 20: Appendix List: Service Notes, Schematics, Part Lists, Pcb Lay-Out
Schematic for PLL board ver. PC12903-3 3 pages Part list for PLL board ver. PC12903-3 2 pages PCB lay-out for PLL board ver. PC12903-3 1 page Part list for mechanical parts in G-Force pages ______________________________________________________________________________________________________________________________________________________________________________ __________________ TC Electronic A/S G-Force Service manual...
Need help?
Do you have a question about the G-Force and is the answer not in the manual?
Questions and answers