Table of Contents
Advertisement
Available languages
Available languages
Quick Links
Advertisement
Chapters
Table of Contents

Related Manuals for Steren WR-057


Summary of Contents for Steren WR-057
- Page 2 VHF. Por favor revise el manual completamente para estar seguro de instalar y poder operar apropiadamente este producto. Para apoyo, compras y todo lo nuevo que tiene Steren, visite nuestro sitio Web en: www.steren.com...
-
Page 3: Table Of Contents
INDICE 1. CARACTERÍSTICAS 2. CONTENIDO 3. CONTROLES 3.1 Panel frontal 3.2 Panel trasero 3.3 Transmisor 3.4 Micrófono 4. INSTALACIÓN DE BATERÍAS 5. CONEXIONES 6. CONOCIMIENTOS BÁSICOS ACERCA DEL MICRÓFONO 6.1 Operación 7. ESPECIFICACIONES... - Page 4 IMPORTANTE • No use ni almacene este equipo en lugares donde existan goteras o salpicaduras de agua. • Siempre utilice un paño suave, limpio y seco para limpiar el equipo. • No golpee ni deje caer el micrófono • No utilice el micrófono cuando esté expuesto a la luz del sol de forma directa, o en ambientes calurosos, o cuando esté...
- Page 5 2. Guarde las instrucciones – Las instrucciones de seguridad y operación deben ser almacenadas para futuras referencias. 3. Atienda las advertencias – Todas las advertencias del equipo y las instrucciones de seguridad deben ser atendidas cuidadosamente. 4. Siga las instrucciones – Todas las instrucciones de operación y uso deben ser seguidas.
- Page 6 12. Protección de cables de energía - Los cables de energía deben ser colocados de tal forma que no sean maltratados al caminar o que sean dañados por otros equipos. 13. Limpieza – Desconecte esta unidad del contacto antes de limpiarlo. No utilice líquidos limpiadores o limpiadores en aerosol.
- Page 7 DISFRUTANDO LA MÚSICA POR MUCHO TIEMPO Seleccionado un equipo de audio como esta unidad es únicamente el inicio para disfrutar la música. Ahora es tiempo de considerar cómo puede maximizar la diversión y el entretenimiento que su equipo le ofrece. El sonido puede ser engañoso.
- Page 8 El receptor tiene interruptor de encendido/apagado, control de volumen independiente e indicador luminoso de micrófono encendido así como recepción de señal del mismo. El micrófono de mano incluye interruptor de encendido / apagado, indicador de batería baja, y silencio. • Amplio rango de frecuencias. •...
-
Page 9: Controles
3. CONTROLES 3.1 Panel frontal CH B CH A VOLUME POWER VOLUME 1. Interruptor de encendido 2. LED indicador de encendido 3. Control de volumen canal 1 4. LED indicador de micrófono encendido canal 1 5. LED indicador de picos canal 1 6. -
Page 10: Panel Trasero
3.2 Panel trasero Salida balanceada mezclada 6,3mm 10. Entrada de corriente 11. Antena A 12. Antena B 3.3 Transmisor 1. Control de ganancia Ajusta la ganancia de volumen. 2. Conector de micrófono Conecte el micrófono de diadema o de solapa 3. -
Page 11: Micrófono
3.4 Micrófono 1. Rejilla Protege el cartucho del micrófono y ayuda a reducir los ruidos provocados por el viento o el aliento. 2. Interruptor de encendido Permite encender o apagar el micrófono. 3. Compartimiento de baterías Permite instalar dos baterías AA. 4. -
Page 12: Conexiones
DC IN 254.60MHz ANT -A 12-15 VDC OUTPUT 400mA 227.70MHz WR-057 2. Conecte el adaptador de corriente al conector DC IN del receptor, luego conecte el adaptador a un tomacorriente. AC 12V MEZCLADORA 3. Conecte el receptor a un sistema de sonido, mezcladora o amplificador a través... -
Page 13: Conocimientos Básicos Acerca Del Micrófono
6. CONOCIMIENTOS BÁSICOS ACERCA DEL MICRÓFONO El micrófono es ideal para situaciones de voz cercana y puede sostenerse en la mano o montado en una base para micrófono. Recuerde que la técnica de uso de un micrófono dependen mucho de gustos personales y no existe una posición “correcta”... -
Page 14: Operación
6.1 Operación 1. Presione el botón de encendido del receptor. El LED indicador de energía se enciende. 2. Ajuste el nivel de volumen de los micrófonos. CH A POWER VOLU 3. Encienda el micrófono y/o el transmisor. 4. Extienda las antenas del receptor y colóquelas en una posición que reciban la señal de los micrófonos de forma adecuada CH B CH A... -
Page 15: Especificaciones
7. ESPECIFICACIONES Micrófono Alimentación (micrófono de mano): 3V - - - (2xAA) Alimentación (micrófono de diadema / solapa): 9V- - - (batería cuadrada) Rango en frecuencia: 180MHz – 270MHz Estabilidad: 50PPM (-10° ~ 50°C) Poder de transmisión: 10dBm Máximo nivel de entrada: 0dBV Temperatura de operación: -10 ~ 50°C... - Page 16 1.- Para hacer efectiva la garantía, presente ésta póliza y el producto, en donde fue adquirido o en Electrónica Steren S.A. de C.V. 2.- Electrónica Steren S.A de C.V. se compromete a reparar el producto en caso de estar defectuoso sin ningún cargo al consumidor. Los gastos de transportación serán cubiertos por el proveedor.
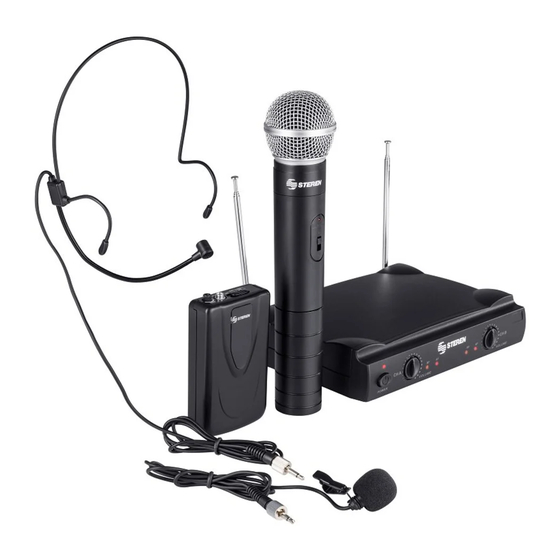
- Page 19 VHF wireless hand, lapel and headset microphone system. Please review this manual thoroughly to ensure proper installation and operation of this product. For support, shopping, and everything new at Steren, visit our website: www.steren.com...
- Page 20 CONTENTS 1. FEATURES 2. CONTENT 3. CONTROLS 3.1 Front panel 3.2 Rear panel 3.3 Transmitter 3.4 Microphone 4. BATTERY INSTALLATION 5. CONNECTIONS 6. MICROPHONE BASICS 6.1 Operations 7. SPECIFICATIONS...
- Page 21 IMPORTANT • Do not use or store the equipment near wet places. • Clean only with a soft, dry cloth. • Do not bump or drop the microphone • Do not use the microphone if it is exposed to direct sun light, extreme heat, dust or moisture.
- Page 22 3. Heed Warnings - All warnings on the appliance and in the operating instructions should be adhered to. 4. Follow Instructions - All operating and use instructions should be followed. 5. Attachments - Do not use attachments not recommended by the product manufacturer as they may cause hazards.
- Page 23 12. Power-Cord Protection - Power-supply cords should be routed so that they are not likely to be walked on or pinched by items placed upon or against them, paying particular attention to cords at plugs, convenience receptacles, and the point where they exit from the appliance. 13.
-
Page 24: Features
LISTENING FOR A LIFETIME Selecting fine audio equipment such as the unit you’ve just purchased is only the start of your musical enjoyment. Now it’s time to consider how you can maximize the fun and excitement your equipment offers. Sound can be deceiving. Over time your hearing “comfort level” adapts to a higher volume of sound. - Page 25 The receiver has on / off switch, independent volume control and luminous power on indicator light and signal reception. The hand microphone includes on / off switch, low battery indicator and mute. • Wide frequency range. • Low battery indicator in hand microphone. •...
-
Page 26: Controls
3. CONTROLS 3.1 Front panel CH B CH A VOLUME VOLUME POWER 1.- On / Off 2.- Power LED indicator 3. Volume control channel 1 4.- Microphone on LED indicator channel 1 5.- Peak LED indicator channel 1 6. Volume control channel 2 7.- Microphone on LED indicator channel 2 8.- Peak LED indicator channel 2... -
Page 27: Rear Panel
3.2 Rear panel 9.- Non-balanced mixer output 10.- AC IN 11.- Antenna A 12.-. Antenna B 3.3 Transmitter 1. Gain Control Adjust the gain of the volume. 2. Microphone connector Connect the headset microphone or lapel. 3. Power switch/ MUTE Turns on or off the microphone. -
Page 28: Microphone
3.4 Microphone 1.- Grill Protects the microphone cartridge and helps reduce “breathy” and wind noise pick-up. 2.- Power switch Used to turn the microphone power ON and OFF. The mic power is ON when the switch is in the ON position and the power is OFF when the switch is in the OFF position. -
Page 29: Connections
ANT -A OUTPUT 12-15 VDC 227.70MHz 400mA WR-057 2. Connect the AC power adapter to the receiver’s DC IN connector, then plug the adapter into a compatible AC electrical outlet. AC 12V 3. Connect the receiver to a sound system, MIXER mixer or amplifier’s microphone input(s) -
Page 30: Microphone Basics
6. MICROPHONE BASICS The mic is ideal to close voice situations and may be used in the hand or in a stand. Remember that the microphone use technique is according to the user’s likes and needs, and doesn’t exists a “correct ” way to use it. Proximity Effect When the sound source is less than ¼”... -
Page 31: Operations
6.1 Operations 1.- Press the power button on the receiver’s front panel. The power LED on the receiver will be on. 2.- Adjust the receiver’s volume controls to approximately 50%. CH A POWER VOLU 3.- Switch the microphone’s or/and transmitter’s power button to the ON position. -
Page 32: Specifications
7. SPECIFICATIONS Microphone Input (hand microphone) 3V - - - (2xAA) Input (tie and headset microphone): 9V - - - (square battery) Frequency Range: 180MHz - 270MHz Stability: 50PPM (-10° ~ 50°C) Transmission power: 10dBm Maximum input level: 0dBV Operating Temperature: -10 ~ 50°C Dimensions: 265x56x56mm... - Page 33 Product: VHF wireless hand, lapel and headset microphone system Part number: WR-057 Brand: Steren WARRANTY This Steren product is warranted under normal usage against defects in workmanship and materials to the original purchaser for one year from the date of purchase. CONDITIONS 1.- This warranty card with all the required information, invoice, product...
- Page 34 Este instructivo puede mejorar con tu ayuda, llámanos a: Help us to improve this instruction manual, call us to: 01800 500 9000 Centro de Servicio a Clientes Customer Service Center...
Need help?
Do you have a question about the WR-057 and is the answer not in the manual?
Questions and answers