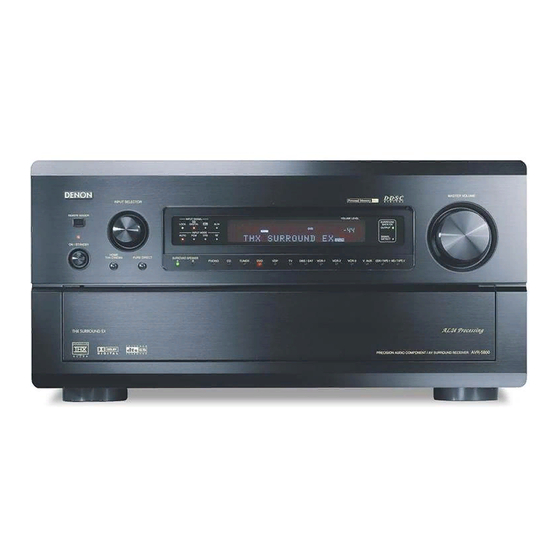
Denon AVR-5800 Upgrade Operating Instruction
Denon avr-5800: operating instruction
Hide thumbs
Also See for AVR-5800:
- Operating instructions manual (67 pages) ,
- Brochure & specs (2 pages) ,
- Setup manual (5 pages)
Table of Contents
Advertisement
Available languages
Available languages
AVR-5800/AVC-A1SE UPGRADE OPERATING INSTRUCTION
Thank you for using the AVR5800/AVC-A1SE Upgrade Service.
When using the amplifier after upgrading it, please refer to these instructions as well as the operating instructions
included with the AVR5800/AVC-A1SE.
4
FEATURES
This upgrade adds the following functions and specifications:
1. Lucasfilm THX Ultra2 Certified
Home THX is the unique collaboration between
Lucasfilm
Ltd.
and
audio
equipment
manufacturers. THX Ultra2 certification is the
highest performance level, and provides a
rigorous set of performance standards, along with
proprietary surround sound post-processing
technologies, designed to enhance the surround
soundtrack playback experience in the home
theater.
In addition to improvements to the power
amplifier with respect to previous THX Ultra
standards, two surround modes have been added:
the THX Ultra2 Cinema mode and the THX Music
mode.
2. DTS 96/24 compatibility
The AVR-5800/AVC-A1SE Upgrade is compatible with
sources recorded in DTS 96/24, a new multi-channel
digital signal format developed by Digital Theater
Systems Inc.
DTS 96/24 sources can be played in the multi-channel
mode on the AVR-5800/AVC-A1SE Upgrade with high
sound quality of 96 kHz/24 bits or 88.2 kHz/24 bits.
3. Dolby Pro Logic II decoder
Dolby Pro Logic II is a new format for playing
multichannel
audio
signals
that
improvements over conventional Dolby Pro Logic.
It can be used to decode not only sources
recorded in Dolby Surround but also regular stereo
sources into five channels (front left/right, center
and surround left/right). In addition, various
parameters can be set according to the type of
source and the contents, so you can adjust the
sound field with greater precision.
4. Dolby Headphone Compatibility
This is a three-dimensional sound technology
developed jointly by Dolby Laboratories and Lake
Technoligy Ltd. of Australia for achieving surround
sound using regular headphones.
5. DENON Link
This terminal can be used to connect a Denon
DVD player for high quality digital multichannel
playback.
6. Digital Ext. In
This is a function for future system expansion
when using digital multichannel connections.
7. Auto Surround Mode
This function stores the surround mode last used
for an input signal in the memory and
automatically sets that surround mode the next
time that signal is input.
8. Audio Delay
This is a function for delaying the audio signal with
respect to the video signal. (0 to 200 msec)
9. Setup Lock
This is a function that locks the system setup and
surround parameter settings, etc., so that they
cannot be changed.
10. Delay Time
The maximum settable value has been changed
from 15 feet to 20 feet, the setting steps from 1
foot to 0.1 feet.
offers
7
SETTING UP THE SYSTEM
• System setup items and default values (set upon shipment from the factory)
System setup
Input the combination of speakers in your system and their
Speaker
corresponding sizes (Small for regular speakers, Large for full-
Configuration
size, full-range) to automatically set the composition of the
signals output from the speakers and the frequency response.
Use this function when using multiple surround
Surround
speaker combinations for more ideal surround
sound. Once the combinations of surround
Surround
speakers to be used for the different surround
q
Speaker Setting
modes are preset, the surround speakers are
Surround
selected automatically according to the surround
mode.
Crossover
Set the frequency (Hz) below which the bass sound of the
Frequency
various speakers is to be output from the subwoofer.
Subwoofer
This selects the subwoofer speaker for playing deep bass
mode
signals.
This parameter is for optimizing the timing with which the
w
Delay Time
audio signals are produced from the speakers and subwoofer
according to the listening position.
This adjusts the volume of the signals output from the speakers
e
Channel Level
and subwoofer for the different channels in order to obtain
optimum effects.
When using a THX Ultra2 compatible
Boundary Gain
subwoofer, set the subwoofer's frequency
compensation
THX Audio
r
response.
Setup
Surround Back
When using two surround back speakers,
Speaker Position
set the distance of the two speakers.
This parameter is for detecting the maximum level of the low
Subwoofer
bass signals output from the subwoofer channel in order to
t
Peak Limit Lev
protect the subwoofer from damage and prevent unpleasant
distorted sounds from being produced.
Digital In
This assigns the digital input jacks for the different
y
Assignment
input sources.
u
Audio Delay
Adjust the time delay of the video and audio signals.
Multi Zone-1
This sets the output level for the multi-zone
Vol. Level
1 output jacks.
Multi Zone
i
Control
Set this to switch the surround back
Power AMP
channel's power amplifier for use for multi-
Assignment
zone 2.
Auto Surround
o
Auto surround mode function setting.
Mode
Digital Multi Ch
!0
Digital multichannel input setting.
In
This sets whether or not to display the on-screen display that
On Screen
appears on the monitor screen when the controls on the remote
!1
Display
control unit or main unit are operated (from MONITOR 1 outputs
only).
Auto Tuner
Presets
FM stations are received automatically and stored in the
!2
memory.
(AVR-5800
only)
Set whether or not to lock the system setup settings so that
!3
Setup Lock
they cannot be changed.
ENGLISH
Default settings
Front Sp.
Center Sp.
Sub Woofer
Surround Sp.
Small
Small
Yes
Small
DOLBY/
THX/
WIDE
5CH/7CH
DSP
DTS
EXT. IN-1
mode
THX 5.1
SCREEN
STEREO
SIMULATION
SURROUND
A
A
A
A
A
speaker
FIXED —THX—
LFE —THX—
Front L & R
Center
Sub Woofer
Surround L & R
12 ft (3.6 m)
12 ft (3.6 m)
12 ft (3.6 m)
10 ft (3.0 m)
Surround
Surround
Surround
Front L
Center
Front R
R
Back R
Back L
0 dB
0 dB
0 dB
0 dB
0 dB
0 dB
THX Ultra2 Subwoofer = NO
The Distance Between SBL/SBR = 0 ft to 1 ft (0 m to 0.3 m)
Peak Limitter = OFF
Input
DBS/
CD
DVD
VDP
TV
VCR-1
VCR-2
VCR-3
source
SAT
Digital
COAXIAL
COAXIAL
COAXIAL
OPTICAL
OPTICAL
OPTICAL
COAXIAL
OPTICAL
Inputs
1
2
3
1
2
3
4
4
Audio Delay = 0 ms
Variable
Surround back
Auto Surround Mode = ON
DENON Link = OFF, Digital Ext. In = OFF
On Screen Display = ON
A1 ~ A8
87.5/89.1/98.1/107.9/90.1/90.1/90.1/90.1 MHz
B1 ~ B8
520/600/1000/1400/1500/1710 kHz/90.1/90.1 MHz
C1 ~ C8
90.1 MHz
D1 ~ D8
90.1 MHz
E1 ~ E8
90.1 MHz
Setup Lock = OFF
Surround Back Sp.
Small / 2spkrs
EXT. IN-2
—
A
A
—
SBL & SBR
10 ft (3.0 m)
Surround
Subwoofer
L
0 dB
0 dB
V. AUX
TAPE-1
TAPE-2
—
COAXIAL
OPTICAL
OPTICAL
—
5
5
6
1
Advertisement
Table of Contents

Related Manuals for Denon AVR-5800


Summary of Contents for Denon AVR-5800
-
Page 1: Setting Up The System
5. DENON Link Lucasfilm Ltd. audio equipment This terminal can be used to connect a Denon manufacturers. THX Ultra2 certification is the DVD player for high quality digital multichannel highest performance level, and provides a playback. rigorous set of performance standards, along with 6. -
Page 2: Setting The Crossover Frequency
ENGLISH Setting the Crossover Frequency • Set the crossover frequency according to the speaker system being used. • Select “Speaker Configuration” on the System Setup Menu screen, then press jog stick “ENTER” twice or three times. Select the “Crossover Frequency” mode. Select the Frequency. - Page 3 “OFF” if you do not want to use it. When set to “ON”, also set the playback input when there is no digital signal. ANALOG: The analog input of the input source assigned to Denon Link is played. EXT.-1: The EXT.IN-1 input is played.
-
Page 4: Playing Modes For Different Sources
SURROUND Playing modes for different sources The AVR-5800/AVC-A1SE Upgrade is equipped with many surround modes. We recommend using the surround modes as described below in order to achieve the maximum effect for the specific signal source. is a 6.1-channel/7.1-channel surround mode. - Page 5 This is displayed when the auto surround mode is set to “ON” and the input mode is set to “Auto”. It is not displayed when the input mode is set to “Analog” or “EXT. IN-1,-2”. OSD-3 ~ 7: AVR-5800 only. [2] To play in the THX Surround EX/Home THX Cinema Surround mode for sources Press SURR.PARA.
- Page 6 ENGLISH Dolby Digital mode (only with digital input) and DTS Surround (only with digital input) Select the input source. Playback with digital input q Select an input source set to digital (COAXIAL/OPTICAL). INPUT SELECTOR (Main unit) (Remote control unit) w Set the input mode to “AUTO”. INPUT MODE (Main unit)
-
Page 7: Dolby Headphone
q Select the various surround parameters. w Adjust the parameter setting. (Remote control unit) (Remote control unit) • DEFAULT setting Select “Default Yes 0“ then parameters set to default setting. (Remote control unit) Press the SURR.PARA. button to complete the setting. (Remote control unit) Surround parameters e NOTE:... -
Page 8: Adjusting The Audio Delay
System Setup Menu screen. Digital transfer and multi-channel playback of DVD audio discs and other multi-channel sources is possible by connecting the AVR5800/AVC-A1SE to a Denon DVD player equipped with a DENON Link connector using Press the SYSTEM SETUP button to complete the connection cable included with the DVD player. - Page 9 AVR-5800/AVC-A1SE UPGRADE-BEDIENUNGSANLEITUNG Wir danken Ihnen für die Inanspruchnahme des AVR-5800/AVC-A1SE Upgrade-Services. Beziehen Sie sich nach dem Upgrade des Verstärkers bezüglich der Benutzung sowohl auf diese als auch auf die mit dem AVR-5800/AVC-A1SE mitgelieferte Bedienungsanleitung. AUSSTATTUNGSMERKMALE Dieses Upgrade bietet Ihnen zusätzlich die folgenden Funktionen und technischen Daten: 1.
-
Page 10: Einstellung Der Überschneidungsfrequenz
DEUTSCH Einstellung der Überschneidungsfrequenz • Stellen Sie die Überschneidungsfrequenz entsprechend des verwendeten Lautsprechersystems ein. • Wählen Sie im Systemsetup-Menübildschirm “Speaker Configuration” aus, drücken Sie anschließend am Joystick “ENTER” zwei- oder dreimal. Wählen Sie den “Crossover frequency”-Modus. Wählen Sie die Frequenz. Geben Sie die Einstellung ein. - Page 11 Wählen Sie für die Einstellung “Yes” und drücken Sie “ENTER”. DENON Link-Einstellung: Führen Sie diese Einstellung aus, wenn Sie einen Denon DVD-Player über die Denon-Verbindungsbuchse anschließen wollen. Stellen Sie auf “ON”, wenn Sie diese Buchse benutzen möchten, oder wählen Sie “OFF”, wenn Sie sie nicht benutzen möchten.
-
Page 12: Wiedergeben Von Modi Für Verschiedene Tonquellen
DEUTSCH SURROUND Wiedergeben von Modi für verschiedene Tonquellen Der AVR-5800/AVC-A1SE Upgrade ist mit vielen Surround-Modi ausgestattet. Wir empfehlen Ihnen die Anwendung der Surround-Modi wie nachfolgend beschrieben, um für die jeweilige Signalquelle den maximalen Effekt zu erzielen. ist ein 6,1-Kanal/7,1-Kanal-Surround-Modus. THX SURROUND EX In Dolby Digital Surround EX •... - Page 13 “Auto” gestellt wird. Dies wird nicht angezeigt, wenn der Eingangsmodus auf “Analog” oder “EXT. IN-1,-2” gestellt wird. OSD-3 ~ 7: Nur AVR-5800 [2] Wiedergabe im THX Surround EX/Home THX Cinema Surround-Modus für in Dolby Drücken Sie die Taste SURR.PARA., um die Digital oder DTS aufgenommene Tonquellen Einstellung abzuschließen.
- Page 14 DEUTSCH Dolby Digital-Modus (nur mit Digital-Eingang) und DTS-Surround (nur mit Digital-Eingang) Wählen Sie die Eingangsquelle an. Wiedergabe mit einem Digital-Eingang q Wählen Sie eine auf digital eingestellte Eingangsquelle (COAXIAL/OPTICAL) INPUT SELECTOR (Hauptgerät) (Fernbedienungsgerät) w Stellen Eingangsmodus “AUTO”. INPUT MODE (Hauptgerät) (Fernbedienungsgerät) Wählen Sie den Surround-Modus an.
- Page 15 q Wählen Sie die verschiedenen Surround-Parameter aus. (Fernbedienungsgerät) (Fernbedienungsgerät) • Einstellung DEFAULT Wählen “Default Yes 0”, um die Parameter auf die Standardeinstellung zu setzen. (Fernbedienungsgerät) Drücken Sie die Taste SURR.PARA., um die Einstellung abzuschließen. (Fernbedienungsgerät) HINWEIS: • Beim Durchführen der Parametereinstellungen kehrt die Anzeige einige Sekunden, nachdem die letzte Taste (Hauptgerät) gedrückt worden ist, zur regulären Displayanzeige zurück und die Einstellung wird abgeschlossen.
- Page 16 Die digitale Übertragung und Multikanal-Wiedergabe von DVD-Audiodiscs und anderen Multikanal-Quellen ist Einstellung abzuschließen. möglich, indem der AVR-5800/AVC-A1SE mit Hilfe des mit dem DVD-Player mitgelieferten Anschlusskabels an einen Denon DVD-Player angeschlossen wird, der mit einem Denon Link-Anschluss ausgestattet ist. Bei der Verwendung von Discs, auf denen spezielle Urheberrechtsmaßnahmen getroffen worden sind, werden die digitalen Signale möglicherweise jedoch nicht vom DVD-Player ausgegeben.
- Page 17 MODE D’EMPLOI DE LA MISE A JOUR POUR AVR-5800/AVC-A1SE Nous vous remercions d’utiliser le Service de mise à jour pour AVR-5800/AVC-A1SE. Avant d’utiliser l’AVR-5800/AVC-A1SE après mise à jour, veuillez vous référez aux instructions de ce document ainsi qu’à celles du Manuel d’utilisation livré avec l’appareil. CARACTERISTIQUES Cette mise à...
- Page 18 FRANCAIS Réglage de la fréquence de croisement • Régler la fréquence de croisement en fonction du système d'enceintes utilisé. • Sélectionnez “Speaker Configuration” dans l’écran de menu de réglage du système, puis appuyer sur la manette “ENTER” deux ou trois fois. Sélectionner le mode “Crossover frequency”...
-
Page 19: Réglage Du Mode Auto Surround
Pour régler, sélectionnez “Yes” et appuyez sur “ENTER”. FRANCAIS Réglage du raccordement “DENON Link” : Effectuez ce réglage pour connecter un lecteur DVD Denon qui utilise la borne “DENON Link”. Sélectionnez “ON” si vous souhaitez utiliser cette borne, “OFF” si vous ne souhaitez pas l’utiliser. - Page 20 AMBIANCE Modes de lectures pour sources différentes La mise à jour pour AVR-5800/AVC-A1SE est équipé de plusieurs modes d’ambiance. Nous vous recommandons d’utiliser les modes d’ambiance d’après les indications ci-après pour obtenir le meilleur effet pour chacun des différents types de signaux de source.
- Page 21 Ce message ne s’affiche pas si le mode d’entrée est réglé sur “Analog” ou sur “EXT. IN-1,-2”. OSD-3 ~ 7: AVR-5800 uniquement. [2] Pour effectuer une lecture en mode THX Surround EX/Home THX Cinema pour des Appuyer sur la touche SURR.
- Page 22 FRANCAIS Mode Dolby Digital (uniquement avec entrée numérique) et ambiance DTS (uniquement avec entrée numérique) Sélectionner la source d’entrée. Reproduire avec une entrée numérique q Sélectionner une source d’entrée réglée à numérique (COAXIAL/ OPTICAL). INPUT SELECTOR (Unité principale) (Unité de télécommande) w Régler le mode d’entée à...
- Page 23 q Sélectionnez les différents paramètres surround. (Unité de télécommande) • Réglage DEFAULT Sélectionnez “Default Yes 0” puis des paramètres réglés par défaut. (Unité de télécommande) Appuyer sur la touche SURR. PARA. pour terminer le réglage. (Unité de télécommande) REMARQUE: • Pendant le réglage des paramètres, l’affichage va revenir à son état d’origine plusieurs secondes après que le dernier bouton (de l’unité...
- Page 24 Le transfert numérique et la lecture multi-canaux de disques DVD audio et d’autres sources multi-canaux sont possibles si l’on connecte le AVR-5800/AVC-A1SE à un lecteur de DVD Denon équipé d’un connecteur de Appuyer sur le levier de sélection “ENTER”...
Need help?
Do you have a question about the AVR-5800 and is the answer not in the manual?
Questions and answers