Oxygen X-Air C250 Installation And Operation Manual
Heat recovery unit
Hide thumbs
Also See for X-Air C250:
- Installation manual (18 pages) ,
- Installation, operation and maintenance manual (38 pages)

Related Manuals for Oxygen X-Air C250


Summary of Contents for Oxygen X-Air C250
- Page 1 INSTALLATION AND OPERATION MANUAL OXYGEN X-Air C250 Heat Recovery Unit Rev 1.2 2021.04...
-
Page 3: Table Of Contents
Ventilation boost activation ........................26 9.1.6. Away ............................... 26 9.1.7. Filter menu ............................. 27 9.1.8. Resetting OXYGEN WiFi controller to factory defaults ................27 9.2. Control panel with touchscreen display ..................... 28 9.2.1. Standby mode............................28 9.2.2. Main screen ............................29 9.2.3. -
Page 4: Transportation And Storage Of Equipement
1. TRANSPORTATION AND STORAGE OF EQUIPEMENT Heat Recovery Unit (hereinafter – the Unit) is prepared for transportation and storage. Packaging materials ensure protection against exposure to environment, dust and humidity. The Unit must be properly secured during transportation to protect it against possible housing deformation or other mechanical damage. -
Page 5: Unit Package
2. UNIT PACKAGE Heat Recovery Unit OXYGEN X-Air C250 1 pc Control panel (10m connection cable included) or WiFi adapter 1 pc Fastening elements: L-shaped horizontal installation bracket 4 pcs Bolt (type M5), 8 mm 8 pcs Spring washer (type M5) 8 pcs Condensate drain nozzle, Ø32... -
Page 6: Safety Requirements
3. SAFETY REQUIREMENTS Carefully read and follow safety requirements provided below before installing and while operating the Unit: Do not discard the Installation and operation manual, keep it for future reference. The Unit should be installed and operated in compliance with this Installation and operation manual, following the requirements of effective legislation and standards. -
Page 7: Eu Declaration Of Conformity
Sviezias oras, JSC Birzelio 23-osios g. 23G 50220 Kaunas LITHUANIA confirm, that heat recovery ventilation device OXYGEN X-Air C250 conforms to Europe Union standarts, directives and regulations: 2009/125/EC – eco-design requirements for energy-related products ES 1253/2014 2010/30/EU – labelling and standard product information of the consumption of energy and other... -
Page 8: Technical Data
5. TECHNICAL DATA 5.1. Product information sheet. Delegated Regulation (EU) 1254/2014 Supplier's name or trade mark OXYGEN X-Air C250 Model identifier Specific energy consumption (SEC), SEC class -84.5 Cold climate kWh/m -41.6 Average climate kWh/m -17.0 Warm climate kWh/m Declared typology... -
Page 9: Performance Curves
5.2. Performance curves Performance curves 100% Air flow, m3/h Graph. 1. Ventilation power dependence on the resistance of installed ventilation system 5.3. Performance and power consumption Power setting Resistance, Pa Air flow, m El. outlay, W 100% Measured according to EN13141-7 with G4 class filters installed. -
Page 10: Sound Characteristics
5.4. Sound characteristics Sound power level (L Power Air duct Octave band, Hz Total setting 1000 2000 4000 8000 Suppply 34.1 42.8 42.2 41.7 40.9 30.6 17.5 48.2 Extract 13.3 35.6 26.8 22.4 14.8 12.6 38.8 Outside 15.1 36.7 32.1 26.9 21.8 14.4... -
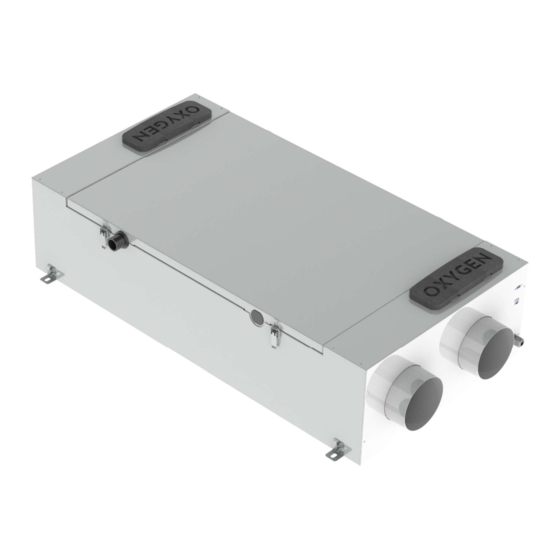
Page 11: Dimensions And Weight
5.5. Dimensions and weight OXYGEN X-Air C250 left-side version OXYGEN X-Air C250 right-side version Figure 1. Unit dimensions Body dimensions and weight Length, mm Width, mm Height, mm Weight, kg OXYGEN X-Air C250 1015... -
Page 12: Functionality
6. FUNCTIONALITY Control panel LCD control Function with a rotary panel / WiFi switch controller Ventilation Efficient EC fans Stepless ventilation intensity adjustment within 30-100% range Ventilation intensity setting at 5% steps within 30-100% range ... -
Page 13: Installation Of The Unit
7. INSTALLATION OF THE UNIT 7.1. Selecting the mounting location The Unit should be installed in a heated room such as bath, storage room, boiler room or an attic. Make sure, that there is sufficient space to install not only the Unit itself, but also auxiliary ventilation system components –... -
Page 14: Connecting Ducts
OXYGEN X-Air C250 left-side version OXYGEN X-Air C250 right-side version Figure 2. Horizontal installation diagram 7.3. Connecting ducts It is recommended to install outside air supply and exhaust ducts as far as possible from each other to prevent the ingress of contaminated air back to premises. Please refer to local construction regulations. -
Page 15: Installing The Maintenance And Service Hatch
IMPORTANT! Both outside air intake and exhaust ducts should be covered with a layer of thermal insulation of sufficient thickness to prevent condensation of humidity on their walls due to difference between outdoor and indoor air temperatures. IMPORTANT! Avoid using duct grille with dense mesh – it can quickly become clogged with dust and will prevent fresh air supply. -
Page 16: Connecting The Condensate Drain
7.5. Connecting the condensate drain The Unit condensate drain should be connected to building's indoor sewerage system. If condensate drain is installed in non-heated premises or directed outdoors, it must be thermally insulated or equipped with electric heater. Install a round rubber gasket into the condensate drain socket, then firmly screw the condensate drain nozzle in by hand. -
Page 17: Ventilation System Balancing
IMPORTANT! Ensure that condensate drain pipe can be easily disconnected from the drain nozzle if it is necessary to open the service maintenance and service hatch of the Unit, when fixing drain pipe in the wall or ceiling. IMPORTANT! Condensate will start accumulating within the Unit when dew-point conditions occur if necessary incline of condensate drain pipe is not observed or siphon with non-return valve is not installed or not functional. -
Page 18: Connection Of The Unit
8. CONNECTION OF THE UNIT Mains supply, control panel cable and, if necessary, comfort function connector should be connected to the Unit, according to the following diagram: - Control panel connector (USB) - Comfort functions connector (RJ-45) - Mains cable (230V, 3x1.5mm L+N+PE) Figure 7. -
Page 19: Installation Of The Control Panel
Power supply 230V, 50Hz, 5A Maximum electric power consumption – fans 106W Maximum electric power consumption – preheater 800W IP protection class 8.2. Installation of the control panel It is recommended to install control panel of the Unit in a living space (for example, in a corridor or hall) at 1.5 –... -
Page 20: Connector Of Comfort Functions
8.3. Connector of comfort functions The Unit supports following external functionality: Fire alarm – emergency shutdown of the Unit upon activation of fire alarm; Boost – ventilation boost activation by external switch; CO2 sensor – ventilation power increase based on readings of auxiliary CO2 or humidity ... -
Page 21: Control Board Electrical Wiring Diagram
8.4. Control board electrical wiring diagram Figure 11. Control board electrical wiring diagram IMPORTANT! Make sure that the Unit is disconnected from mains supply before connecting or disconnecting system components. -
Page 22: Description Of Control Board Contacts
8.5. Description of control board contacts Exhaust fan control 0-10V Not used Supply fan control 0-10V Not used Exhaust air temperature sensor Supply air temperature sensor Outside air temperature sensor Extract air temperature/ humidity sensor DI2 function – "Away" DI3 function – "CO2 sensor" Not used DI1 function –... -
Page 23: Operation Of The Unit
Unit or WiFi controller caused by improper connection will void the warranty. 9.1.1. Downloading the app Download the OXYGEN WiFi app for your smartphone or tablet from the App store or Google Play store: By downloading or using the app or WiFi controller, you agree that Sviezias oras, JSC collects and... -
Page 24: Wifi Connection Set-Up
9.1.2. WiFi connection set-up Plug in the OXYGEN WiFi controller then power-up the Unit. Connect WiFi controller to your home WiFi network first: Figure 13. WiFi connection set-up Locate and connect to unprotected WiFi network OXYGEN_xxxxxx IMPORTANT! WiFi controller will only broadcast unprotected WiFi network for 2 minutes. If You fail to connect while it is active, broadcasting will stop. - Page 25 Change it by connecting to management console using browser. Broadcasting of secure WiFi network OXYGEN_xxxxxxs will then become permanent. IMPORTANT! App will only access the Unit if both OXYGEN WiFi controller and device are connected to the same home WiFi network.
-
Page 26: App Home Screen
9.1.3. App home screen Home screen of control app: inside air temperature and relative humidity set the desired ventilation intensity set the desired room air temperature by maintaining supply air flow temperature* or controlling external heating device** * availability of feature depends on device configuration, to be selected prior ordering the Unit ** requires additional ventilation system components to be purchased... -
Page 27: Ventilation Boost Activation
9.1.5. Ventilation boost activation Activate selected (increased) ventilation intensity for selected time: set time of operation set ventilation intensity activate selected ventilation intensity by clicking "START" Figure 17. Ventilation boost activation After the selected time, previously set or scheduled ventilation intensity will be activated. 9.1.6. -
Page 28: Filter Menu
Figure 19. Filter menu 9.1.8. Resetting OXYGEN WiFi controller to factory defaults If it is necessary to reset WiFi controller to factory defaults, click and hold the hidden button through the small hole of WiFi controller body with thin screwdriver (safety-match, toothpick) until the yellow light will fade away. -
Page 29: Control Panel With Touchscreen Display
9.2. Control panel with touchscreen display Control panel with touchscreen display screen makes it possible to use the enhanced Unit functionality. Figure 20. Control panel with touchscreen display 9.2.1. Standby mode Touchscreen display of control panel will only display the time of day in standby mode if the Unit is switched off. -
Page 30: Main Screen
9.2.2. Main screen Date TIme ON / OFF button Desired room air temperature Settings menu Ventilation boost button Desired ventilation intensity Bypass valve state Outside air temperature Extract air temperature and relative humidity Preheater state indicator Exhaust filter lifetime Supply air filter lifetime Exhaust air temperature Supply air temperature Exhaust fan state... -
Page 31: Settings Menu
If outside air temperature is below 0° C and preheater is on, the temperature after preheater is being displayed. Preheater state: preheater on green sign is being displayed preheater off white sign is being displayed IMPORTANT! Higher than usual electricity consumption is expected when preheater is on! 9.2.2.2. -
Page 32: Setting Up Weekly Operation Program
9.2.4. Setting up weekly operation program Up to 4 different ventilation modes can be set for each day of week. After selecting the week day, set: operating mode start time selected ventilation intensity desired room air temperature Day of the week Operating mode start time Desired ventilation intensity... -
Page 33: Control Panel With A Knob
Press the RESET button. The Unit will restart and if the failure was resolved, will continue to operate. If the problem with failed component will persist after the Unit reset procedure has been performed and RESET button will reappear, contact manufacturer of the Unit or its local representative. You may control the Unit by app installed on smartphone or tablet by purchasing the WiFi controller. -
Page 34: Air Filter Replacing / Anti-Frost Protection Indicator
9.3.2. Air filter replacing / anti-frost protection indicator Flashing yellow led indicates: flashing consistently it is necessary to replace filters yellow and green leds flash in turns anti-frost protection is on Control panel indicates the necessity to replace filters after 6 months of uninterruptable Unit operation by consistent flashing of yellow led. -
Page 35: Reset Procedure
9.3.4. RESET procedure Gently press and release the hidden button S1 through the small hole on the side of control panel with thin screwdriver (safety-match, toothpick) twice, until all three color leds switch on. Then immediately press and hold S1 button again for about 3 seconds, until all leds switch off. - reset button S1 Figure 27. -
Page 36: Additional System Settings
9.3.6. Additional system settings Controllers for additional settings of ventilation system are installed inside the control panel: boost mode time setting boost mode power setting supply fan power adjustment exhaust fan power adjustment reset button switches for disabling (OFF) or activating (ON) boost (1) and away (2) functions Figure 28. -
Page 37: Replacing Air Filters
Replacing air filters: Shut down the Unit by control panel, make sure that fans have completely stopped Open the lid of the filter, that you intend to change, marked by "OXYGEN" by firmly gripping it and pulling out Use fabric handle to remove a filter ... - Page 38 It is recommended to replace air filters at least: Filtering class, acc. Filtering class, acc. Recommended replacing frequency EN 779:2012 ISO 16890 Coarse 65% every 6 months G4 Carbon every 4 months every 4 months every 2 months IMPORTANT! The fouled air filters can result in ventilation power decrease and higher than usually power consumption.
-
Page 39: Mainteinance And Warranty
MAINTEINANCE AND WARRANTY Heat recovery Unit OXYGEN X-Air C250 is granted 24 months warranty. Make sure to have the section below properly filled in to confirm the installation date. Have the proof of purchase handy before contacting service department. Product OXYGEN X-Air C250 Serial No. -
Page 40: Contacts
CONTACTS Sviezias oras, JSC Company code: 304288834 VAT code: LT100010366918 Bank account: LT42 7044 0600 0810 3886 SWIFT: CBVILT2X " bank AB "SEB Address: Birzelio 23-osios g. 23G 50220 Kaunas Lithuania Phone No.: +370 627 26666 oxygenvent www.oxygenvent.com...
Need help?
Do you have a question about the X-Air C250 and is the answer not in the manual?
Questions and answers