Table of Contents
Advertisement
Quick Links
Advertisement
Table of Contents

Related Manuals for NEFF C18FT28.0


Summary of Contents for NEFF C18FT28.0
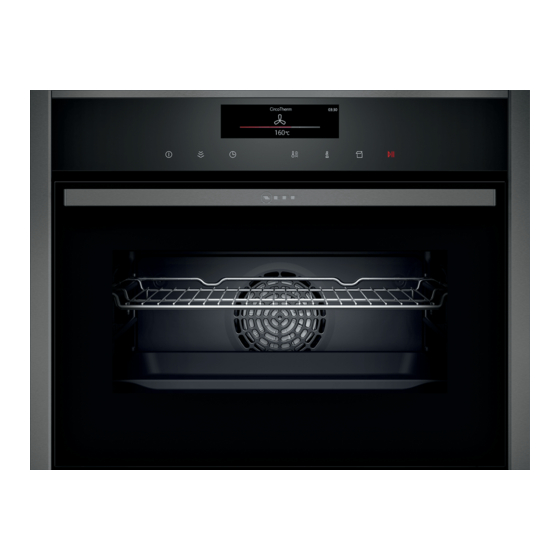
- Page 1 Oven [en] User manual and installation instructions C18FT28.0...
-
Page 2: Table Of Contents
en Safety ¡ Keep the instruction manual and the Table of contents product information safe for future refer- ence or for the next owner. ¡ Do not connect the appliance if it has been USER MANUAL damaged in transit. Safety .............. 2 1.2 Intended use Preventing material damage ....... -
Page 3: Safety
Safety en on the oven door, as they may scratch the Loose food remnants, fat and meat juices surface. may catch fire. The hinges on the appliance door move when ▶ Before using the appliance, remove the the door is opened and closed, which could worst of the food residues and remnants trap your fingers. -
Page 4: Preventing Material Damage
en Preventing material damage Hot liquid may spill over the sides of the ac- WARNING ‒ Risk of suffocation! cessory when it is removed from the cooking Children may put packaging material over compartment. their heads or wrap themselves up in it and ▶... -
Page 5: Environmental Protection And Saving En- Ergy
Environmental protection and saving energy en Never operate the appliance if the seal is damaged Dripping liquids make the cooking compartment floor ▶ or missing. dirty. Sitting or placing objects on the appliance door may When steaming with a perforated cooking container, ▶... - Page 6 en Familiarising yourself with your appliance 4 Familiarising yourself with your appliance 4.1 Control panel You can use the control panel to configure all functions of your appliance and to obtain information about the operat- ing status. Display Buttons 4.2 Buttons The buttons are touch-sensitive areas. To select a function, press the corresponding button. Symbol Name On/off...
-
Page 7: Familiarising Yourself With Your Appliance
Familiarising yourself with your appliance en 4.3 Display Direction Navigate to the left Swipe right on the display You can configure all the functions on your appliance with your finger via the display. To adjust a setting, touch the appropriate place on the Navigate to the right Swipe left on the display display with your finger. - Page 8 en Familiarising yourself with your appliance Symbol Heating function Temperature Slow cooking 70 - 120 °C For gentle, slow cooking of seared, tender pieces of meat in ovenware without a lid. Heat is emitted evenly from above and below at a low temper- ature. Dough proving 2 settings For proving dough and culturing yoghurt.
-
Page 9: Accessories
Accessories en Water tank ATTENTION! Do not cover the ventilation slot above the appliance You need the water tank for the types of steam heating. door. The appliance overheats. The water tank is behind the control panel. Ensure that the ventilation slots are unobstructed. → "Filling the water tank", Page 14 ▶... - Page 10 en Accessories Accessories Perforated steam container, ¡ Steaming vegetables. size S ¡ Juicing berries. ¡ Defrosting. Place the steam container on the wire rack. Perforated steam container, Steaming large quantities of food. size XL Meat thermometer High-precision roasting or cooking. → "Meat probe", Page 19 5.1 Information on accessories Wire rack Insert the wire rack with the open...
-
Page 11: Before Using For The First Time
You will find a comprehensive range of products for 5.4 Removing accessories from the cooking your appliance in our brochures and online: compartment www.neff-international.com Accessories vary from one appliance to another. When Pull out the accessory on the telescopic shelf as far purchasing accessories, always quote the exact as the notch ... - Page 12 en Before using for the first time Setting Water hardness in German hardness in French hardness °fH mmol/l °dH 3 (hard) 2.5-3.8 14-21.3 25-38 4 (very hard) Above 3.8 Above 21.3 Above 38 Only set this if you will be using solely softened water. Also set for mineral water.
-
Page 13: Basic Operation
Basic operation en Press to switch off the appliance after Note: The appliance retains the calibration settings, 30 minutes. even in the event of a power cut or disconnection from → "Switching off the appliance", Page 13 the mains. Allow the appliance to cool down. Tip: To ensure that the calibration settings are updated Clean the smooth surfaces with soapy water and a to accommodate the conditions at the new location... -
Page 14: Steam
en Steam 8 Steam Food can be cooked particularly gently using steam. Fill the water tank with water up to the "max" You can use the special types of steam heating, or use mark. steam assistance with certain types of heating. WARNING ‒ Risk of scalding! Hot steam may escape when you open the appliance door. - Page 15 Steam en Steam Sous-vide With the "Steam" heating function, the food is envel- "Sous-vide" is a type of low-temperature cooking during oped by hot steam, which helps to retain the nutrients. which vacuum-sealed food is cooked at temperatures This cooking method also helps to retain the shape, between 50 and 95 °C and with 100% steam.
- Page 16 en Steam Press to save your settings. ¡ "Circo-roasting" Press to select the defrosting time. ¡ "Bread-baking setting" Swipe left or right to select the required defrosting ¡ "Keep warm" time. Switching on steam assistance Press to save your settings. Fill the water tank. Press to start the defrosting process.
- Page 17 Steam en to open the control panel. ATTENTION! Remove the water tank. If there is water on the cooking compartment floor Carefully remove the lid of the water tank. when operating the appliance at temperatures above Empty the water tank, clean it with detergent and 120 °C, this will damage the enamel.
-
Page 18: Time-Setting Options
en Time-setting options 9 Time-setting options Your appliance has different time-setting options, with Press . which you can control its operation. Swipe left or right to select the required cooking time. Once the cooking time has been set, press 9.1 Overview of the time-setting options start. -
Page 19: Meat Probe
Meat probe en a The end time corresponds to the current time plus a The appliance will start heating using the set cook- the set cooking time. ing time. 10 Meat probe Cook with precision by inserting the meat probe into Thick Insert the meat probe diagonally into the the food and setting a core temperature on the appli-... - Page 20 en Meat probe 10.3 Core temperatures of different foods 10.4 Setting the oven temperature and core temperature Here you can find the suggested core temperatures of various different foods. The meat probe measures the temperature inside the These suggestions depend on the quality and the size/ food between 30 °C and 99 °C.
- Page 21 Baking and roasting assistant en 11 Baking and roasting assistant The baking and roasting assistant helps you to use Requirement: The cooking compartment must have your appliance to cook various dishes by suggesting cooled down. the optimal settings. Press to switch the appliance on. The baking and roasting assistant helps you to make Press ...
- Page 22 en Childproof lock Keep children at a safe distance. ¡ Fillet of beef, fresh, medium ▶ ¡ Sirloin, fresh, medium Fill the water tank and insert it. ¡ Sirloin, fresh, rare Press to switch the appliance on. ¡ Chicken, whole, fresh Press ...
- Page 23 Rapid heat-up en Swipe left or right to select "MyProfile" . Press the top row. Press the bottom row. Swipe left or right to select the "Automatic childproof Swipe left or right to select the "Automatic childproof lock". lock". Press the bottom row. Press the bottom row.
-
Page 24: Baking And Roasting Assistant
en Sabbath mode Use the button to deactivate the "PowerBoost" 14.5 Deactivating the "PowerBoost" ▶ function early. function 15 Sabbath mode You can set a cooking time of up to 74 hours using Swipe left or right to select the temperature. Sabbath mode. You can use top/bottom heating to Press to save your setting. - Page 25 Home Connect en ¡ Circo-roasting 16.2 Changing MyProfile ¡ Full-surface grill Press to switch the appliance on. Press to switch the appliance on. Press . Press . Swipe left or right to select "MyProfile" . Swipe left or right to select "MyProfile" . Press the bottom row.
- Page 26 en Home Connect Basic setting Possible settings Explanation Wi-Fi Switch on If Wi-Fi is activated, you can use Home Connect. Switch off In networked standby mode, the appliance requires a max- imum of 2 W. Network Connect to network If you disconnect the appliance from the network, all network Disconnect from network information will be deleted.
-
Page 27: Cleaning And Servicing
¡ The current software and hardware version of your 17.7 Declaration of Conformity appliance. Constructa Neff Vertriebs-GmbH hereby declares that ¡ Status of any previous reset to factory settings. the appliance with Home Connect functionality meets This initial registration prepares the Home Connect... -
Page 28: Rails
en Cleaning and servicing Appliance door Area Suitable cleaning agents Information Door panels ¡ Hot soapy water Do not use a glass scraper or a stainless steel wool. Tip: Remove the door panels in order to clean them thoroughly. → "Appliance door", Page 32 Door cover ¡... - Page 29 Cleaning function en faces no longer clean themselves adequately during 18.2 Cleaning the appliance operation, heat up the cooking compartment specific- In order to avoid damaging the appliance, you must ally to the right temperature. clean your appliance only as specified, and with suit- ATTENTION! able cleaning products.
- Page 30 en Cleaning function ¡ Second rinse cycle (approx. 9–12 minutes) ATTENTION! Distilled water in the cooking compartment leads to For reasons of hygiene, the descaling programme must corrosion. be run in full. Do not use distilled water. ▶ If descaling is interrupted, you can no longer set any Mix 0.4 litres water with a drop of washing-up liquid operation.
- Page 31 Rails en a The rinse cycle will start. The duration will count a Once the rinse cycle has run through to the end, an down on the display. audible signal will sound. Empty and dry the water tank. → "Emptying the water tank", Page 16 20 ...
- Page 32 en Appliance door Attaching the rails Push the rail into the front socket until the rail also rests against the cooking compartment wall, Note: The rails only fit on the right or left and must be and then press this downwards . pulled out towards the front.
- Page 33 Appliance door en Close the appliance door fully . Grab hold of the Close the locking levers on the left- and right-hand appliance door with both hands (on the left and hinges . right) and pull it upwards and out . a The locking levers are closed.
- Page 34 en Appliance door Lift out the inner pane and set it down carefully 21.4 Fitting the door panes on a flat surface. Lift out the intermediate pane and set it down WARNING ‒ Risk of injury! carefully on a flat surface. The hinges on the appliance door move when the door is opened and closed, which could trap your fingers.
-
Page 35: Troubleshooting
Troubleshooting en Open the appliance door and attach the door seal. Push the inner pane upwards until it is in the left- and right-hand retainers . Slide the inner pane into the left- and right-hand retainers . Put the door cover in position and push down on it until you hear it click into place. - Page 36 en Troubleshooting Fault Cause and troubleshooting The appliance cannot be Automatic childproof lock or childproof lock is activated switched on; appears on the Press and hold the button until "Childproof lock deactivated" appears on ▶ display. the display. Appliance will not start or cuts Different causes are possible.
-
Page 37: Disposal
Next time, set lower or higher values. ▶ Tip: A lot of information about the food preparation and corresponding set- ting values can be found on our website www.neff-international.com. 23 Disposal Find out here how to dispose of old appliances cor- Information about current disposal methods are rectly. -
Page 38: Customer Service
en Customer Service This appliance is labelled in accord- ance with European Directive 2012/19/EU concerning used elec- trical and electronic appliances (waste electrical and electronic equip- ment - WEEE). The guideline determines the frame- work for the return and recycling of used appliances as applicable throughout the EU. - Page 39 How it works en ¡ Place the food to be grilled directly onto the wire 25.3 Roasting, braising and grilling tips rack. ¡ The recommended settings are for fridge-temperat- ¡ To catch any liquids that drip down, place the uni- ure food and unstuffed, oven-ready poultry. versal pan into the cooking compartment at least ¡...
- Page 40 en How it works 25.7 List of foods Recommended settings for a variety of foods, sorted into food categories. Recommended settings for various types of food Food Accessories/cook- Shelf pos- Heating Temperature in Steam in- Cooking time ware ition function °C tensity in mins → Page 7 Sponge cake, delicate...
- Page 41 How it works en Food Accessories/cook- Shelf pos- Heating Temperature in Steam in- Cooking time ware ition function °C tensity in mins → Page 7 Quiche Tart dish or tin 190–210 35–55 Black tray Quiche Tart dish or tin 190–210 30–45 Black tray Tarte flambée Universal pan 260 - 280...
- Page 42 en How it works Food Accessories/cook- Shelf pos- Heating Temperature in Steam in- Cooking time ware ition function °C tensity in mins → Page 7 Fish, baked, whole, Universal pan 1. 170–180 Medium 1. 15–20 300 g, e.g. trout 2. 160–170 2. 5–10 Fish, steamed, whole, Steaming tray 80 - 90 15 - 25...
- Page 43 How it works en Requirement: The cooking compartment must be cold. 25.8 Special cooking methods and other applications Use fresh, clean, hygienic meat without bones. Place the cookware onto the wire rack at level 1 in Information and recommended settings for special the cooking compartment. cooking methods and other applications, e.g.
- Page 44 en How it works Tip: You can intensify the natural flavours of high- To ensure that the heat is distributed evenly among quality food simply by adding a small knob of butter the food, do not place the vacuum-sealed food and a little salt to the vacuum-sealing bag. items on top of one another or close together on the Different ingredients affect how the food cooks: wire rack.
- Page 45 How it works en Food Cooking tips Food Cooking tips Fish ¡ Season the fish and coat with hot Vegetables ¡ Sear the vegetables briefly to give butter. them the flavours you would ex- ¡ To give the fish a nice crust and pect from frying.
- Page 46 en How it works Start the "Sterilise" program. Dry the bottles with a clean cloth. Wipe down the appliance interior after sterilising. Recommended settings for hygiene Food Accessories/cook- Shelf pos- Heating Temperature in Steam intens- Cooking ware ition function °C time in → Page 7 mins Prepare jam jars or pre-...
- Page 47 How it works en Recommended settings for reheating Food Accessories/cook- Shelf pos- Heating Temperature in Steam intens- Cooking ware ition function °C time in → Page 7 mins Pizza, cooked Wire rack 170 - 180 5 - 15 Bread rolls, baguette, Wire rack 160 - 170 10 - 20 baked...
-
Page 48: General Installation Instructions
en Installation instructions Food Accessories/cook- Shelf pos- Heating Temperature in Steam intens- Cooking ware ition function °C time in → Page 7 mins Hot water sponge cake Springform cake 160 - 170 25 - 35 tin, diameter 26 cm Hot water sponge cake Springform cake 1. - Page 49 Installation instructions en tronic implants, e.g. pacemakers or insulin ¡ Check the appliance for damage after un- pumps. packing it. Do not connect the appliance if ▶ Wearers of electronic implants must stay at it has been damaged in transit. least 10 cm away from the control panel or ¡...
- Page 50 en Installation instructions ¡ Observe any available installation instructions for the hob. 26.4 Installation underneath a hob If the appliance is installed under a hob, the following minimum dimensions must be adhered to (including substructure, if applicable). The minimum worktop thickness a is based on the required minimum clearance ...
- Page 51 Installation instructions en ¡ The fuse protection must correspond to the power Centre the appliance. rating specified on the appliance's rating plate and to local regulations. ¡ The appliance must be disconnected from the power supply whenever installation work is being carried out.
- Page 52 en Installation instructions If required, the gap between the appliance door and the side panels can be adjusted using the screws at the top left and right. Note: The gap between the worktop and the appliance must not be closed by additional battens. Thermal insulation strips must not be fitted to the side panels of the surround unit.
- Page 56 Valid within Great Britain: Imported to Great Britain by BSH Home Appliances Ltd. Grand Union House Old Wolverton Road Wolverton, Milton Keynes MK12 5PT United Kingdom *9001613834* 9001613834 Constructa-Neff Vertriebs-GmbH Carl-Wery-Straße 34 010415 81739 München GERMANY...
Need help?
Do you have a question about the C18FT28.0 and is the answer not in the manual?
Questions and answers