Advertisement
Available languages
Available languages
Quick Links
MANUAL DE INSTRUCCIONES
OPERATING INSTRUCTIONS
MANUEL D'INSTRUCTIONS
ESPAÑOL ............................... 2
ENGLISH ................................ 8
FRANÇAIS ............................ 14
DRAWING / DEPEÇAGE ...... 20
ELECTRIQUE ........................ 29
GARANTIA / GUARANTEE /
GARANTIE ........................... 31
MAQUINA ROSCADORA / PIPE THREADING
MACHINE / FILIERE ELECTRIQUE
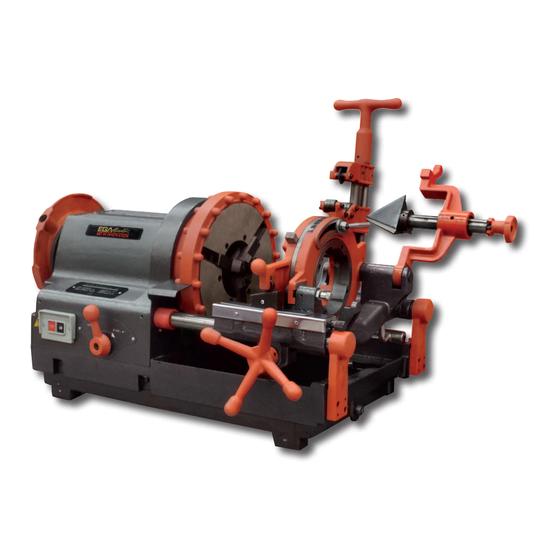
R O S C A M A T I C 1 0 0 - 4
220V-240V
110-130V
COD. 56960
COD. 56962
COD. 56961
COD. 56963
Advertisement

Related Manuals for Ega Master ROSCAMATIC 100-4

Summary of Contents for Ega Master ROSCAMATIC 100-4
-
Page 1: Table Of Contents
MANUAL DE INSTRUCCIONES OPERATING INSTRUCTIONS MANUEL D’INSTRUCTIONS MAQUINA ROSCADORA / PIPE THREADING MACHINE / FILIERE ELECTRIQUE R O S C A M A T I C 1 0 0 - 4 ESPAÑOL ....... 2 ENGLISH ........ 8 FRANÇAIS ......14 220V-240V 110-130V DESPIECE / SPARE PARTS... -
Page 2: Español
ESPAÑOL Según la directiva sobre residuos eléctricos de aparatos eléctricos y electrónicos (RAEE), éstos deberán recogerse y tratarse por separado. Si en el futuro tiene que deshacerse de este producto, no se deshaga de él junto con la basura doméstica. Póngase en contacto con su distribuidor para proceder a su reciclaje de manera gratuita cuando sea posible. - Page 3 - 2 destornilladores (5,5x25 y PH-2). - Juego de 4 llaves Allen (4mm, 5mm, 6mm y 8mm). IMPORTANTE Para el pedido de repuestos indique el código de éstos y el número de serie de la máquina. CARACTERÍSTICAS TÉCNICAS Capacidad de la máquina 1/2÷4"...
- Page 4 B) SOLTAR EL TUBO Mediante acción de golpe abrir ambos platos. C) PREPARACIÓN PARA ROSCAR C1- Seleccionar tanto la terraja como los peines a utilizar. C2- Introducir los peines en la terraja teniendo en cuenta el orden de numeración, haciendo coinci- dir la huella del peine con la bola posicionadora de la terraja, hasta oir “clic”.
- Page 5 D6- La terraja realizará automaticamente la apertura de los peines cuando la longitud de roscado sea la que habiamos seleccionado mediante el mando selector de longitud de rosca. D7- Detenga la máquina. D8- Retire el carro nuevamente a la posición de inicio. CORTE Y ESCARIADO DEL TUBO E) CORTE E1- Tanto la terraja como el escariador se situaran retirados en posición de abatidos.
- Page 6 F) ESCARIADO F1- Retirar tanto la terraja como el cortatubos a la posición de reposo o abatida. F2- Abatir el escariador a la posición de trabajo hasta que éste descanse en el carro. F3- Avanzar hacia el tubo e inmovilizarlo en sentido de giro mediante el enclavamiento que dispo- ne el cuerpo del escariador.
- Page 7 L) CARRO Mantener limpias las barras donde ha de deslizarse el carro, engrasándolas frecuentemente. Engrasar el piñón y cremallera por donde se acciona el movimiento del carro. Cuide que tanto la dentadura de la barra como la de la plantilla de copia se encuentren en buen estado, reemplazándolas cuando se desgasten ya que si no es así, podrían ambas deslizarse sin clavarse y no se produciría el copiado del roscado.
-
Page 8: English
ENGLISH According to Waste Electrical and Electronic Equipment directive (WEEE), these ones must be collected and arranged separately. If you have to throw them out, please, do not use the usual rubbish. Please, contact your distributor for free recycling. SAFETY INSTRUCTIONS Attention! Be careful. - Page 9 - 1 automatic die head 2½-4" - 3 set of dies (1/2-3/4"), (1-2"), (2½-4") BSPT or NPT. - 1 set of legs. - 1 oil can of 5 litres maker’s. - Conection for foot pedal - 2 screwdrivers (5,5x25 and PH-2). - Set of 4 Allen keys (4mm, 5mm, 6mm and 8mm).
- Page 10 B) LOOSE THE PIPE A sharp jerk in clockwise direction will release the pipe. C) PREPARATION FOR THREADING C1- Select the correct die head and dies as required. C2- Insert the set of dies in the die head as numbered and make the die thread coincide with the positioning ball of the die head, until a “klick”...
- Page 11 D6- The die head will automatically open the dies when the threading length is the selected by the dial threading length. D7- Stop the machine. D8- Retract carriage to the initial position. CUTTING AND REAMING E) CUTTING E1- Raise reamer and die head out of the pipe. E2- Lower the cutter to work position and by turning cutter handle open up cutter guide wider than the width of the pipe.
- Page 12 F) REAMING F1- Raise die head and cutter out of the way. F2- Lower reaamer to work position onto the carriage. F3- Feed the reamer into the pipe and lock it by the reamer interlock. F4- Move the carriage until the reamer makes contact to the pipe, pressing it until the bevel is completed.
- Page 13 Lubricate the gear and rack that make the carriage drive. Be carefull that bar and profiling board teeth are in good condition, replace them when they will not lock and the profiling will not be produced. M) HAMMER CHUCK Keep the chuck-jaws clean so that they swing and they are not blocked. Replace the chuck-jaws when their theeth is damaged or worn out and the don’t make correctly the pipe turning retention.
-
Page 14: Français
FRANÇAIS Selon la directive des déchets d’appareils électriques et électroniques (DEEE), ces derniers devront se ramasser et suivre un traitement séparé. Si dans l’l’avenir vous devez vous débarrasser de ce produit, ne le faites pas avec le reste d’ordures ménagères. Merci de vous adresser à... - Page 15 - 1 bidon de 5 litres d’huile du fabricat. - Branchement de pédale. - 2 tournevis (5,5x25 et PH-2). - Set de 4 clés héxagonales (4mm, 5mm, 6mm et 8mm). IMPORTANT Pour la commande de piéces détachées, indiquer la référence et le numéro de série de la machine. CARACTERISTIQUES TECHNIQUES Capacité...
- Page 16 B) SORTIR LE TUYAU En agissant d’un coup sur le disque extérieur dans le sens des aiguilles d’une montre. C) PREPARATION POUR FILETER C1- Choisir suivant le cas les têtes ou les peignes á utiliser. C2- Introduire les peignes sur la filière en suivant la numérotation, en faisant coïncider l’empreinte du peigne avec la boule de positionnement de la filière, jusqu’à...
- Page 17 D6- La tête de filière réalisera automatiquement l’ouverture des peignes quand la longueur de fileta- ge sera conforme à celle désirée grâce à la mannette sélection de longueur du filet. D7- Stopper la machine. D8- Remettre le charriot á son positionnement initial pour répéter l’opération. COUPE ET ALESAGE DU TUBE E) COUPE E1- La filiére et l’alésoir devront être en position de retrait.
- Page 18 F) ALESAGE F1- Retirer aussi bien la tête de filiére que le coupe tube (position arriére). F2- Rabattre l’alésoir en position de travail jusqu’á qu’il soit sur le charriot. F3- Avancer jusqu’au tuve, l’immobiliser á l’aide d’une fixation située sur le corps de l’alésoir. F4- Avancer le charriot jusqu’á...
- Page 19 Graisser le pignon et la crémaillére qui actionnent le mouvement du charriot. Attention à ce que les dents de la barre et celles du modèle du reproducteur soient en bon état et les remplacer quand elles sont usées car si ce n’est pas le cas, les deux pourraient glisser sans se fixer et le reproducteur du filetage ne se feraient pas.
-
Page 20: Despiece / Spare Parts Drawing / Depeçage
DESPIECE / SPARE PARTS DRAWING / DEPEÇAGE CUERPO PRINCIPAL / MAIN BODY / CORPS PRINCIPAL DENOMINACION DESCRIPTION DESCRIPTION ITEM CANT / QTY / QTÉ ESPÁRRAGO SCREW CLOU 88144 CABEZAL HEAD STOCK TÊTE 88145 BANDEJA TRAY PLATEAU 88146 BANDEJA CON REJILLA FILTER TRAY PLATEAU AVEC GRILLE 88147... - Page 21 CARRO / CARRIAGE / CHARIOT DENOMINACION DESCRIPTION DESCRIPTION ITEM CANT / QTY / QTÉ TUBO CURVADO CURVED PIPE TUBE COURBE 88160 CUERPO DE LA VÁLVULA VALVE BODY CORP DE LA VALVE 88161 CARRETE SPOOLS BOBINE 88162 MUELLE SPRING RESSORT 88163 TORNILLO SCREW 88164...
- Page 22 SISTEMA DE COPIADO DE ROSCA / NOTCH PROFILING DIE HEAD. COPPY SYSTEM / ENTAILLE DENOMINACION DESCRIPTION DESCRIPTION ITEM CANT / QTY / QTÉ PLACA SUPERIOR COVER PLATE PLAQUE SUPPORT 88301 COPIA REPRODUCTEUR CUBIERTA DE PROFILING BOARD COUVERCLE DU 88302 COPIA COVER REPRODUCTEUR ANILLO DE...
- Page 23 CAJA REDUCTORA / GEAR BOX / CAISSE REDUCTRICE...
- Page 24 DENOMINACION DESCRIPTION DESCRIPTION ITEM CANT / QTY / QTÉ MOTOR 110V MOTOR 110V MOTEUR 110V 87871 MOTOR 230V MOTOR 230V MOTEUR 230V 87872 PASADOR GOUJON 88195 ENGRANAJE DEL MOTOR GEAR ENGRENAGE MOTEUR 88196 CUERPO CAJA GEAR BOX CORPS CAISSE 88197 REDUCTORA HOUSING REDUCTRICE...
- Page 25 PLATO DELANTERO Y TRASERO / FRONT AND REAR CHUCK / PLATEAU AVANT ET ARRIÈRE DENOMINACION DESCRIPTION DESCRIPTION ITEM CANT / QTY / QTÉ CUERPO PLATO FRONT CHUCK CORPS PLATEAU 88177 DELANTERO PLATE AVANT JGO. 3 GARRAS FRONT CHUCK JEU 3 CROCHETS 82655 PLATO DELANTERO JAWS SET...
- Page 26 TERRAJA ( 1/2 ÷ 2") / DIE HEAD ( 1/2 ÷ 2") / FILIERE ( 1/2 ÷ 2") DENOMINACION DESCRIPTION DESCRIPTION ITEM CANT / QTY / QTÉ CUERPO DE APOYO SUPPORT BODY CORPS DE SOUTIEN 88240 DISCO DE LEVAS CAN PLATE DISQUE DE LEVÉE 88241 EJE DE AMARRE...
- Page 27 TERRAJA ( 2.1/2 ÷ 4”) / DIE HEAD ( 2.1/2 ÷ 4”) / FILIERE (2.1/2 ÷ 4”) DENOMINACION DESCRIPTION DESCRIPTION ITEM CANT / QTY / QTÉ CUERPO DE APOYO SUPPORT BODY CORPS DE SOUTIEN 88259 DISCO DE LEVAS CAN PLATE DISQUE DE LEVÉE 88260 EJE DE AMARRE...
- Page 28 CORTATUBOS / PIPE CUTTER / COUPE-TUBES DENOMINACION DESCRIPTION DESCRIPTION ITEM CANT / QTY / QTÉ MANILLA HANDLE POIGNÉE 88286 RODAMIENTO BEARING ROULEMENT 88287 HUSILLO SPINDLE BROCHE 88288 CARRO CARRIAGE CHARIOT 88289 PORTA-CUCHILLA PORTE-LAME PASADOR GOUJON 88290 CUCHILLA CUTTING WHEEL LAME 64104 EJE CUCHILLA CUTTING WHEEL AXLE...
- Page 29 ESCARIADOR / REAMER / ALESOIR DENOMINACION DESCRIPTION DESCRIPTION ITEM CANT / QTY / QTÉ CABEZA ESCARIADOR REAMER HEAD TETE ALESOIR 88278 EJE DEL ESCARIADOR SPINDLE AXE DE L’ALESOIR 88279 EJE DE GIRO AXLE AXE DE ROTATION 88280 CUERPO DEL BODY CORPS DE 88281 ESCARIADOR...
-
Page 30: Esquema Eléctrico / Electric Diagram / Schema Electrique
ESQUEMA ELÉCTRICO / ELECTRIC DIAGRAM / SCHEMA ELECTRIQUE ALMACENAJE Guardar en un lugar seco para evitar humedades y descargas eléctricas. STORAGE Store the threader in a dry place to avoid humidity and electric shock. STOCKAGE Guarder dans un endroit sec pour eviter l’humidite et les décharges electriques. -
Page 31: Garantie
GARANTIA NO CUBRE AQUELLAS PIEZAS QUE POR SU USO NORMAL TIENEN UN DESGASTE. PARA OBTENER LA VALIDEZ DE LA GARANTIA , ES ABSOLUTAMENTE IMPRESCINDIBLE QUE COMPLETE Y REMITA ESTE DOCUMENTO A EGA MASTER , DENTRO DE LOS SIETE DIAS A PARTIR DE LA FECHA DE COMPRA. - Page 34 C/ ZORROLLETA 11, POL. IND. JUNDIZ 01015 VITORIA, SPAIN P.O.B. APTDO. 5005 FAX. 34 - 945 290 141 TEL. 34 - 945 290 001 info@egamaster.com www.egamaster.com...
Need help?
Do you have a question about the ROSCAMATIC 100-4 and is the answer not in the manual?
Questions and answers