
Subscribe to Our Youtube Channel
Related Manuals for Charder MS5440


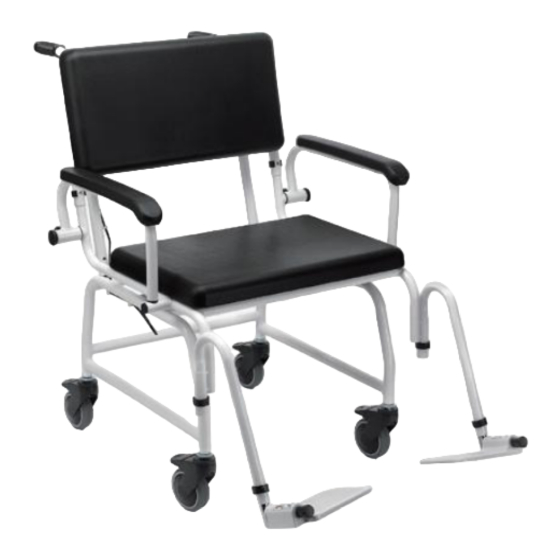
Summary of Contents for Charder MS5440
- Page 1 USER MANUAL MS5440 Chair Scale Please keep the instruction manual at hand all the time for future reference.
- Page 2 Explanation of Graphic Symbols on Label/Packaging Caution, consult Authorized accompanying documents representative in the before use European Community Manufacturer of medical Indicates that device device conforms to International Organization of Legal Metrology (Class III) requirements Manufacturing year of Indicates that device medical device conforms to 2014/31/EU Non...
- Page 3 This user manual is protected by international copyright law. All content is licensed, and usage is subject to written authorization from Charder Electronic Co., Ltd. (hereinafter Charder) Charder is not liable for any damage caused by a failure to adhere to requirements stated in this manual.
-
Page 4: Table Of Contents
CONTENTS I. Safety Notes ................5 A. General Information ............. 5 B. EMC Guidance and Manufacturer's Declaration ......9 II. Installation ................13 A. Unpacking ................. 13 B. Assembling/Adjusting Device ..........14 C. Inserting Batteries ............. 24 D. Using Adapter ..............27 III. -
Page 5: Safety Notes
I. Safety Notes A. General Information Thank you for choosing this Charder Medical device. It is designed to be easy and straightforward to operate, but if you encounter any problems not addressed in this manual, please contact your local Charder service partner. - Page 6 If results are inaccurate, please contact local distributor. Warranty/Liability If Charder is responsible for a fault or defect present upon receipt of the unit, Charder shall either repair the fault, or supply a replacement unit.
- Page 7 Charder service partner, using original Charder accessories and spare parts. Charder is not liable for any damages arising from improper maintenance or usage. Dismantlement of the device will void the warranty. Disposal This product is not to be treated as regular household waste, but ...
- Page 8 Incident Reporting Any serious incident that has occurred in relation to the device should be reported to the manufacturer, EU representative (if device is used in EU member state), and competent authority of user/subject's member state.
-
Page 9: Emc Guidance And Manufacturer's Declaration
B. EMC Guidance and Manufacturer's Declaration Guidance and manufacturer’s declaration-electromagnetic emissions The MS5440 Chair Scale is intended for use in the electromagnetic environment specified below. The customer or the user of the device should assure that it is used in such an environment. - Page 10 Guidance and manufacturer’s declaration-electromagnetic immunity The MS5440 Chair Scale is intended for use in the electromagnetic environment specified below. The customer or the user of the device should assure that it is used in such an environment. IEC 60601 Compliance...
- Page 11 Guidance and manufacturer’s declaration-electromagnetic immunity The MS5440 Chair Scale is intended for use in the electromagnetic environment specified below. The customer or the user of the device should assure that is used in such an environment. IEC 60601 test Compliance...
- Page 12 Over the frequency range 150 kHz to 80 MHz, field strengths should be less than 3 V/m. Recommended separation distance between portable and mobile RF communications equipment and the MS5440 Chair Scale The device is intended for use in an electromagnetic environment in which radiated RF disturbances are controlled.
-
Page 13: Installation
II. Installation A. Unpacking Remove top cover from shipping box... -
Page 14: Assembling/Adjusting Device
B. Assembling/Adjusting Device Attach Backrest 1. Remove E-type clip from backrest bar 2. Insert backrest bar into device frame... - Page 15 3. Insert E-type clips into hole to secure backrest Attach Handle 1. Remove L-handle screws from device frame (turn counter-clockwise to loosen)
- Page 16 2. Insert handle frame into device frame 3. Fasten L-handle screws, securing handle frame with device frame (turn clockwise to tighten)
- Page 17 Rotate Footrest to Front 1. Raise footrest (do not remove entirely from frame) 2. Rotate to front...
- Page 18 3. Press footrest down until footrest is steady Adjust Footrest Length 1. Remove E-type clip from footrest...
- Page 19 2. Adjust footrest height as needed 3. Insert E-type clip into footrest bar and tighten screw to secure footrest...
- Page 20 Adjust Wheel Height 1. Place device on flat surface, apply wheel brakes Brakes 2. To tighten wheel castor, loosen counternut slightly. After loosening, turn wheel frame clockwise to tighten. Counternut Wheel frame 3. Adjust wheel height until air bubble on level indicator is level NOTE: Be careful not to lose wheels during adjustment...
- Page 21 Raise Armrests 1. Locate knob switch for armrest 2. Pull knob switch to allow armrest to move freely...
- Page 22 3. Armrest is now free to release Relocate Indicator 1. Release cable from cable clips. Remove screws securing indicator to frame from device.
- Page 23 2. Relocate indicator 3. Secure cables in cable clips. Tighten screws securing indicator to device frame. Secure cables using cable clips...
-
Page 24: Inserting Batteries
C. Inserting Batteries 1. Open battery housing cover 2. Accessing batteries Take out the battery housing 3. Use either rechargeable battery pack, or AA batteries... - Page 25 4. Ensure batteries are installed into the housing correctly Rechargeable Battery Housing AA-size Battery Housing 5. Install the battery housing into the compartment, and make sure the right side of housing pin is facing towards inside of the connecting position...
- Page 26 6. Slide back the cover to close the battery housing compartment. Turn on power to confirm that battery is correctly installed. Using Rechargeable Battery (optional) The rechargeable battery should be recharged at least once every 3 months, regardless of if the device has been used. Battery can be charged by plugging device's exclusive adapter into AC Connector Port.
-
Page 27: Using Adapter
D. Using Adapter 1. Connect adapter to indicator before connecting to mains power supply 2. Disconnect adapter from mains power supply before unplugging adapter pin from indicator. AC Connector Port... -
Page 28: Indicator
III. Indicator A. Indicator and Key Functions (Wireless functionality optional) Key Function 1. ON/OFF: Power on or power off. 2. ZERO: Reset display to 0.0 kg display (can be used if within ±2% of full capacity). Press and hold for 3 seconds to enter device settings. 3. -
Page 29: Display Layout
B. Display layout Definitions Stable symbol: Indicate that weight is stable. Zero symbol: Weight is at zero Minor weight: Weight under zero. Low battery: Battery needs to be charged or replaced. -
Page 30: Using Device
IV. Using Device A. Basic Operation Switch on the device using [ON/OFF] key. The device will automatically perform self-calibration, displaying software version. Once "0.00 kg" appears on indicator, device is ready for measurement. Note: If "0.00 kg" does not display on indicator, press [ZERO] key to zero the device. -
Page 31: Tare
E. Pre-Tare The Pre-Tare function is used to subtract the known weight of a substance prior to weighing. The MS5440 can store 5 sets of pre-tare values. Pre-tare values can be stored using two different methods: "Load Weight", or "Input Manually". - Page 32 A. Load Weight DESCRIPTION EXAMPLE Press M1-5 key after loading weight on the platform; the indicator will display blinking "m" symbol. Press numeral key 1 ~ 5 to assign this number with the current pre-tare weight. Press [ENTER] key to store pre-tare weight;...
- Page 33 B. Input Manually DESCRIPTION EXAMPLE Press [PRE-TARE] key. Left-most digit will begin blinking. If no further action is taken within 6 seconds, indicator will return to normal mode While digit is blinking: Enter pre-tare weight using 0~9 keys. Ex: to pre-tare 5.0 kg of weight, press 0-0-5-0.
- Page 34 Press numeral key 1 ~ 5 to assign this number with the current pre-tare weight. Press [ENTER] key to store pre-tare weight; the indicator will make a beep sound. C. Recall Pre-Tare Weight DESCRIPTION EXAMPLE Press and hold [PRE-TARE] key for 3 seconds.
-
Page 35: Print
Press [CLEAR] key to return to Normal Mode NOTE: Pre-tare weight must be under max capacity, otherwise screen will show 0.00 after [ENTER] key is pressed, and the operator will have to re-input pre-tare settings. F. Print If thermal printer is connected to indicator, results can be printed by pressing [PRINT] key. -
Page 36: Device Setup
V. Device Setup A. Setting Time & Date Press and hold [HOLD] key for 3 seconds to enter Time Setting mode. Example: Inputting 2008, Dec 25, 8:00am Year Setting Enter year using numeral keys 0-9. Press [HOLD] key once completed to proceed to month &... -
Page 37: Device Setup
B. Device Setup When the device is switched on, press and hold the [ZERO] key for about 3 seconds, until the display shows the "SETUP”, followed by "A.OFF” (first option in setting menu). In device setup menu: [TARE] to toggle next menu option [ZERO] to toggle previous menu option [HOLD] to confirm selection / enter submenu Auto Power-Off: Instruct device to shut off automatically after a certain... - Page 38 Language: Set thermal printer language Press [HOLD] to toggle between English, Italian and Polish. Press [TARE] key to confirm selection. Font size: Set thermal printer font size. Press [HOLD] to toggle between normal and double (larger). Press [TARE] key to confirm selection. Bluetooth (optional): If device has Bluetooth module installed, Bluetooth function can be turned on or off.
-
Page 39: Setup Usb Connection To Pc
USB 2.0 or above. Operators should select a USB cable length that is most suitable to the operating environment. 1. Charder Smart Data Manager can be used to connect the device to a PC. The software program can be downloaded from the Charder website: [LINK URL] https://www.chardermedical.com/download.htm... - Page 40 Conducting Measurement 1. Input subject's first name, last name, patient ID, date of birth (DD/MM/YYYY), gender, and height (for BMI calculation) into software if needed. Press [Clear] to clear all input. NOTE: information can also be input after weight measurement. 2.
- Page 41 Saving & Printing Results 1. Press [Save as] to save measurement results as .csv file on PC. Default file name is same as user ID. (ex: 20190201.csv) To track changes and multiple measurements for the same subject, we recommend not changing the default file name. 2.
-
Page 42: Wireless Connection
3. Press the printer icon to print out result using a printer connected to the PC. VII. Wireless Connection If the device has the wireless or bluetooth module installed, the indicator can transmit measurement results wirelessly. Please see Charder wireless or bluetooth software instructions for details. -
Page 43: Troubleshooting
Warranty Program & Return Policy. 1. If Charder is responsible for a fault or defect present upon receipt of the unit, Charder shall either repair the fault, or supply a replacement unit. - Page 44 Ensure printer is supplied with power. Ensure PC software is set up properly as indicated in this manual Distributor support required If the following errors occur, we recommend contacting your local Charder distributor for repair or replacement services: 1. Device will not power on Faulty on/off key ...
- Page 45 Error Messages Error Message Reason Action Low battery warning Replace batteries, or Voltage of battery is too plug in adapter low to operate device Overload Reduce weight on Total load exceeds measurement device's maximum platform and try again capacity Counting Error (too Error normally caused high) by faulty loadcell or...
-
Page 46: Product Specifications
IX. Product Specifications A. Device Information Model MS5440 Display DP3710 Weight Capacity 300 kg x 0.1 kg Measurement Accuracy ± 0.15 kg OIML Class III LCD Screen 1.0-inch LCD screen (5 1/2 digits) Dimensions Overall 690(W) x 1235(D) x 945(H) mm... -
Page 47: Power Adapter Standards
B. Power Adapter Standards Warning The device is only compatible with the power adapters specified in the dashed block below. -
Page 48: Declaration Of Conformity
Non-automatic Weighing Instruments Directive Please see separate document showing on sticker of device for above CE marking. Authorized EU Representative: Manufactured by: Charder Electronic Co., Ltd. No.103, Guozhong Rd., Dali Dist., Taichung City, 412 Taiwan (R.O.C.) CD-IN-1262 REV XXX 06/2020...
Need help?
Do you have a question about the MS5440 and is the answer not in the manual?
Questions and answers