
Related Manuals for Vermont Castings VANGUARD G54005


Summary of Contents for Vermont Castings VANGUARD G54005
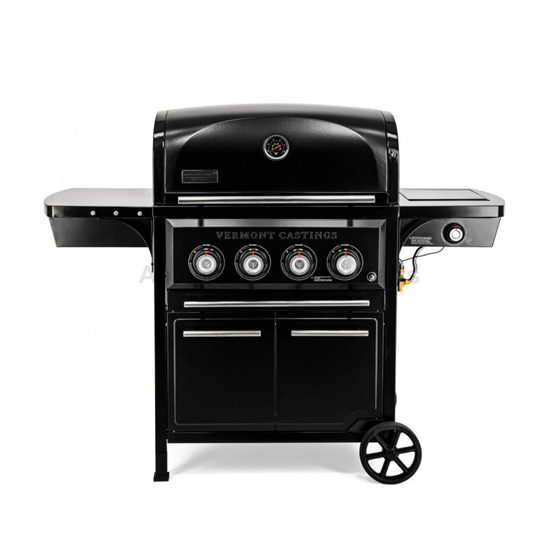
- Page 1 SERIAL NO./ N° DE SÉRIE VERMONT CASTINGS VANGUARD TM/MC 4 – BURNER BARBECUE G54005 ASSEMBLY MANUAL YOUR FEEDBACK IS IMPORTANT TO US SHARE YOUR EXPERIENCE BY WRITING A REVIEW AT WWW.CANADIANTIRE.CA LAST UPDATE: SEP 25, 2020...
- Page 2 Vermont Castings continues the promise of unwavering quality and purposeful design. Vermont Castings barbecues do more than just grill. They let you create enduring connections around food and flame. ANS Z21.58-2018 / CSA1.6-2018 ANS Z21.58-2018 / CSA1.6-2018...
- Page 3 HEAVY ARTICLE NEEDS 2 TO LIFT THIS MANUAL MUST REMAIN WITH THE PRODUCT AT ALL TIMES To ORDER non-warranty replacement parts or accessories, please visit us on the web at www.vermontcastingbbq.com CAUTION DANGER Sharp edges. Wear gloves when 1. If you smell Gas: assembling your grill.
- Page 5 TOOLS REQUIRED Mallet Screwdrivers Wrench 4 People HARDWARE PACK PART NO. DESCRIPTION PHOTO ¼"-20UNC x 38 Screw ¼"-20UNC x 13 Screw NO.10-24UNC x 13 Screw ST4.8 x 10 Tapping Screw Wheel Bushing Pin, Wheel Spacer, Door Handle Pin, Main Burner Wing Nut, Side Burner NO.10-24UNC x 23 Screw ¼"-20UNC x 18 Screw...
- Page 6 PARTS ITEM QTY. DESCRIPTION PART NO. ITEM QTY. DESCRIPTION PART NO. Top Lid Assembly G540-4000-02 Tool Hooks G366-0041-01 Side Burner Fascia, Right G540-4700-01 Lid Handle G540-0017-02 Thermometer G366-0035-01 Side Burner Drip Pan G515-0083-03 Top Lid screw & hitch pin G539-0024-02 Side Burner Lid G518-0036-01 Lid Bumper, Top Lid...
- Page 7 EXPLODED PARTS Hardware Pack CONTACT US: 1-844-586-4660 www.vermontcastingsbbq.com...
- Page 8 BUILD IT STEP 1A Assemble on a FLAT and SOFT surface to avoid damage. MODEL No. 085-3156-0/G54005...
- Page 9 BUILD IT STEP 1B STEP 1C CONTACT US: 1-844-586-4660 www.vermontcastingsbbq.com...
- Page 10 BUILD IT STEP 1D MODEL No. 085-3156-0/G54005...
- Page 11 BUILD IT STEP 2A The door stopper should be on the left side. CONTACT US: 1-844-586-4660 www.vermontcastingsbbq.com...
- Page 12 BUILD IT STEP 2B MODEL No. 085-3156-0/G54005...
- Page 13 BUILD IT STEP 3A Mallet STEP 3B CONTACT US: 1-844-586-4660 www.vermontcastingsbbq.com...
- Page 14 BUILD IT STEP 4A BACK PANEL ASSEMBLY MODEL No. 085-3156-0/G54005...
- Page 15 BUILD IT STEP 4B BACK PANEL ASSEMBLY Tighten top screw. CONTACT US: 1-844-586-4660 www.vermontcastingsbbq.com...
- Page 16 BUILD IT STEP 4C BACK PANEL ASSEMBLY Tighten all screws. MODEL No. 085-3156-0/G54005...
- Page 17 BUILD IT STEP 4D Assemble ground wire. CONTACT US: 1-844-586-4660 www.vermontcastingsbbq.com...
- Page 18 BUILD IT STEP 5 VIEW FROM INSIDE MODEL No. 085-3156-0/G54005...
- Page 19 BUILD IT STEP 6A PROPANE CUSTOMERS PROCEED TO STEP 6B FOR NATURAL GAS CONVERSION CUSTOMERS ONLY You will need a Convertible Valve System Kit (Model 085-2261-4) in this step. STOP CONTACT US: 1-844-586-4660 www.vermontcastingsbbq.com...
- Page 20 BUILD IT STEP 6B Ensure ignition switch wires are pushed in firmly. MODEL No. 085-3156-0/G54005...
- Page 21 BUILD IT STEP 6C CONTACT US: 1-844-586-4660 www.vermontcastingsbbq.com...
- Page 22 BUILD IT STEP 6D MODEL No. 085-3156-0/G54005...
- Page 23 BUILD IT STEP 6E CONTACT US: 1-844-586-4660 www.vermontcastingsbbq.com...
- Page 24 BUILD IT STEP 7 MODEL No. 085-3156-0/G54005...
- Page 25 BUILD IT STEP 8 CONTACT US: 1-844-586-4660 www.vermontcastingsbbq.com...
- Page 26 BUILD IT STEP 9 Bend brace upward to enter locater hole in lower back panel MODEL No. 085-3156-0/G54005...
- Page 27 BUILD IT STEP 10 CONTACT US: 1-844-586-4660 www.vermontcastingsbbq.com...
- Page 28 BUILD IT STEP 11 MODEL No. 085-3156-0/G54005...
- Page 29 BUILD IT STEP 12A 3 x3 STEP 12B CONTACT US: 1-844-586-4660 www.vermontcastingsbbq.com...
- Page 30 BUILD IT STEP 12C MODEL No. 085-3156-0/G54005...
- Page 31 BUILD IT STEP 13A CONTACT US: 1-844-586-4660 www.vermontcastingsbbq.com...
- Page 32 BUILD IT STEP 13B MODEL No. 085-3156-0/G54005...
- Page 33 BUILD IT STEP 13C 1 x3 CONTACT US: 1-844-586-4660 www.vermontcastingsbbq.com...
- Page 34 BUILD IT STEP 13D MODEL No. 085-3156-0/G54005...
- Page 35 BUILD IT STEP 13E CONTACT US: 1-844-586-4660 www.vermontcastingsbbq.com...
- Page 36 BUILD IT STEP 13F 1 x3 MODEL No. 085-3156-0/G54005...
- Page 37 BUILD IT STEP 13G Remove hardware from the valve. CONTACT US: 1-844-586-4660 www.vermontcastingsbbq.com...
- Page 38 BUILD IT STEP 13H MODEL No. 085-3156-0/G54005...
- Page 39 BUILD IT STEP 13I 9 x1 CONTACT US: 1-844-586-4660 www.vermontcastingsbbq.com...
- Page 40 BUILD IT STEP 13J MODEL No. 085-3156-0/G54005...
- Page 41 BUILD IT STEP 14 CONTACT US: 1-844-586-4660 www.vermontcastingsbbq.com...
- Page 42 BUILD IT STEP 15A Locate burners with the electrode wires labeled BE MODEL No. 085-3156-0/G54005...
- Page 43 BUILD IT STEP 15B Electrode wires The valve must be fed through the orifice must enter Burner Box (BA) and the burner tube, the Control Panel Heat as shown. shield (CB) in this step. VALVE CONTACT US: 1-844-586-4660 www.vermontcastingsbbq.com...
- Page 44 BUILD IT STEP 15C 8 x4 MODEL No. 085-3156-0/G54005...
- Page 45 BUILD IT STEP 15D Electrode wire clip Ensure all electrode wires are inserted into the correct terminal as shown in diagram TIP: Firmly grasp wires between your Side burner electrode - EJ thumb and index finger. Insert wire 2, 4 Main electrode, 650 mm - BD into the appropriate terminal until a positive...
- Page 46 BUILD IT STEP 16A MODEL No. 085-3156-0/G54005...
- Page 47 BUILD IT STEP 16B CONTACT US: 1-844-586-4660 www.vermontcastingsbbq.com...
- Page 48 BUILD IT STEP 16C MODEL No. 085-3156-0/G54005...
- Page 49 BUILD IT STEP 16D CAUTION Ensure all electrode wires are clipped firmly to the electrode wire clips as shown in STEP 15D. Before installing the grease drawer assembly, make sure the ignition wires are secure to the right cart side panel, to avoid obstructing the grease drawer during installation.
- Page 50 BUILD IT STEP 17A MODEL No. 085-3156-0/G54005...
- Page 51 BUILD IT STEP 17B CONTACT US: 1-844-586-4660 www.vermontcastingsbbq.com...
- Page 52 BUILD IT STEP 18 MODEL No. 085-3156-0/G54005...
- Page 53 BUILD IT STEP 19 CONTACT US: 1-844-586-4660 www.vermontcastingsbbq.com...
- Page 54 BUILD IT STEP 20 STEP 21 MODEL No. 085-3156-0/G54005...
- Page 55 BUILD IT STEP 22 NATURAL GAS CONVERSION CUSTOMERS STOP PROCEED TO STEP 23. CONTACT US: 1-844-586-4660 www.vermontcastingsbbq.com...
- Page 56 BUILD IT STEP 23 NATURAL GAS CONVERSION CUSTOMERS ONLY. STOP You will need the natural gas hose included with the Wrench Convertible Valve System Kit (Model 085-2261-4) in this step. See Step 9A in manual included with this kit. MODEL No. 085-3156-0/G54005...
- Page 57 BUILD IT STEP 24 CONNECTING YOUR BARBECUE TO THE NATURAL GAS SOURCE. Coat pipe nipple with gas–resistant teflon tape or pipe dope. Tighten quick-disconnect coupling onto pipe nipple that leads to natural gas supply (FIGURE A). FIGURE A Natural gas Supply Pipe 5/8”...
- Page 58 BUILD IT WARNING! HOT SURFACES. WARNING: EXTERIOR SURFACES WILL BECOME VERY HOT. TO PREVENT BURNS, ALWAYS WEAR INSULATED PROTECTIVE BARBECUE GLOVES WHEN USING THE BARBECUE. • KEEP AWAY FROM COMBUSTIBLE MATERIALS. • KEEP CHILDREN AND PETS AWAY FROM THIS GAS-FIRED BARBECUE. •...
- Page 59 BEFORE YOU BEGIN DON’T TAKE RISKS, READ THE USER MANUAL. KNOWING HOW YOUR BARBECUE WORKS IS KEY TO USING IT SAFELY. CHECKING FOR LEAKS GRILL SAFETY PAGE 10 CHECKLIST PAGE 6 REGULATOR FLOW LIMITING DEVICE BLOCKED PAGE 11 BURNER VENTURI IF YOU FLASH BACK FIRE ONLY READ...
- Page 60 CONTACT US 1-844-586-4660 WWW.VERMONTCASTINGSBBQ.COM...
Need help?
Do you have a question about the VANGUARD G54005 and is the answer not in the manual?
Questions and answers