Table of Contents
Advertisement
Available languages
Available languages
Quick Links
Advertisement
Table of Contents

Related Manuals for EuroLite AKKU Dot 1


Summary of Contents for EuroLite AKKU Dot 1
-
Page 2: Table Of Contents
Battery status ............................... 26 OPERATION ..............................27 Stand-alone mode ............................27 Master/Slave operation via QuickDMX ......................27 Control Board ............................... 28 EUROLITE IR-35 remote control ......................... 30 DMX-controlled operation ..........................31 Addressing ..............................31 DMX protocol ............................... 32 CLEANING AND MAINTENANCE ......................... 34 PROTECTING THE ENVIRONMENT ...................... - Page 3 3/36 00129135, Version 1.0...
-
Page 4: Einführung
Geschwindigkeit, Weißabgleich • Dimmergeschwindigkeit (Sprungantwort) einstellbar • Adressierung und Einstellung über Steuereinheit mit OLED-Anzeige • Bequeme Fernsteuerung per mitgelieferter IR-Fernbedienung EUROLITE IR-35 • Musiksteuerung über eingebautes Mikrofon mit einstellbarer Mikrofonempfindlichkeit • 3, 4, 6, 8 oder 11 DMX-Kanäle wählbar • Schaltnetzteiltechnologie für Netzspannung zwischen 100 und 240 Volt •... -
Page 5: Sicherheitshinweise
SICHERHEITSHINWEISE WARNUNG! Lesen Sie aufmerksam die Sicherheitshinweise und benutzen Sie das Produkt nur wie in dieser Anleitung beschrieben, damit es nicht versehentlich zu Verletzungen oder Schäden kommt. Verwendungszweck • Bei diesem Gerät handelt es sich um einen Scheinwerfer, mit dem sich dekorative Lichteffekte erzeugen lassen. - Page 6 Warnung vor Verbrennung und Brand • Der zulässige Umgebungstemperaturbereich (Ta) beträgt -5 bis +45 °C. Verwenden Sie das Gerät niemals außerhalb dieses Temperaturbereichs. • Die Gehäusetemperatur (Tc) kann im Betrieb bis zu 65 °C betragen. Vermeiden Sie den Kontakt mit Personen oder Gegenständen.
-
Page 7: Gerätebeschreibung
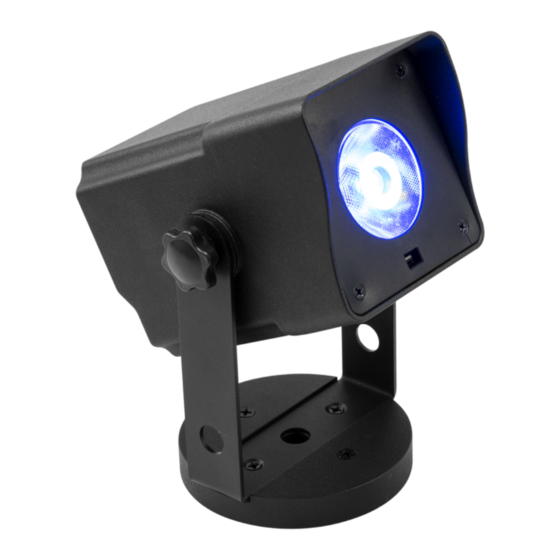
GERÄTEBESCHREIBUNG (1) Gehäuseschraube (2) Linse/LED (3) Gehäuse (4) Infrarotsensor für die Fernbedienung (5) Feststellschraube (6) Montagebügel (7) Loch zur Sicherung mit einem Fangseil (8) Montageloch (9) Magnetfuß (10) Ein-/Ausschalter (11) Display (12) Menu-Taste (13) Up-Taste (14) Down-Taste (15) Enter-Taste (16) Anschluss Ladenetzteil (bei Nichtverwendung immer verschlossen halten) (17) QuickDMX-Statusanzeige 7/36... -
Page 8: Installation
INSTALLATION WARNUNG! Verletzungsgefahr durch Herabfallen Über Kopf installierte Geräte können beim Herabstürzen erhebliche Verletzungen verursachen! Stellen Sie sicher, dass das Gerät sicher installiert ist und nicht herunterfallen kann. Die Montage darf nur durch eine Fachkraft erfolgen, die mit den Gefahren und den einschlägigen Vorschriften hierfür vertraut ist. -
Page 9: Dmx512-Ansteuerung
DMX512-ANSTEUERUNG Via QuickDMX Schließen Sie die Sender an das DMX-Steuergerät an. Nehmen Sie die Sender und das Gerät in Betrieb. Stellen Sie über die Tasten des Control Boards die Funktion „WIRELESS“ - „POWER“ auf „ON“. Die QuickDMX-Statusanzeige leuchtet kurz rot, grün und blau auf. Danach leuchtet sie kontinuierlich gemäß dem eingestellten Übertragungskanal. -
Page 10: Ladevorgang
LADEVORGANG Bevor das Gerät zum ersten Mal netzunabhängig betrieben werden kann, muss der Akku vollständig geladen werden. Sie können das Gerät mit dem Netzteil laden. Zum Aufladen des Akkus schließen Sie das Gerät über das beiliegende Netzteil an eine geerdete Schutzkontaktsteckdose (100 und 240 Volt) an. -
Page 11: Bedienung
UP, DOWN auswählen. Das Gerät hat zwei Betriebsarten. Es kann entweder im Standalone-Modus über das Control Board und die EUROLITE IR-35 Fernbedienung oder im DMX-gesteuerten Modus über einen handelsüblichen DMX- Controller und QuickDMX, mit einem geeigneten Funksender, drahtlos betrieben werden. -
Page 12: Control Board
Control Board Das Control Board bietet mehrere Möglichkeiten: so lassen sich z. B. die DMX-Startadresse eingeben, das vorprogrammierte Programm abspielen oder der DMX-Kanal Modus auswählen. Drücken Sie die Menu-Taste, um das Hauptmenü aufzurufen. Durch Drücken der Up/Down-Tasten können Sie sich im Hauptmenü bewegen. Zur Auswahl des gewünschten Menüpunktes drücken Sie die Enter-Taste. Durch Drücken der Up/Down-Tasten können Sie die Auswahl verändern. - Page 13 Interne Programme / Blackout Black Blackout Blau dunkel Pty 1 Rot Grün Blau Blau Gelb Pty 2 Cyan Magenta Gelb Blau Cyan Rot Grün Blau Cyan Pty 3 Blau Magenta Magenta Gelb Pty 4 Rot Grün Blau Weiß Blau Weiß Rainbow Rot, Gelb, Grün, Weiß...
-
Page 14: Fernbedienung Eurolite Ir-35
Fernbedienung EUROLITE IR-35 Die IR-Fernbedienung steuert die folgenden Funktionen: Tasten Funktion Steuerung über IR-Fernbedienung ein/aus Pty1 Pty2 Dimmerintensität der LED-Farben / stufenlose RGBW-Farbmischung, Pty3 Helligkeit mit + und - Pty4 FADE STROBE COLOR JUMP WHITE FLASH Farbvoreinstellungen/Preset colors *, Helligkeit mit + und - Preset color R<255>,G<121>,B <000>,W <000>... -
Page 15: Dmx-Gesteuerter Betrieb
DMX-gesteuerter Betrieb Über Ihren DMX-Controller können Sie die einzelnen Geräte individuell ansteuern. Dabei hat jeder DMX- Kanal eine andere Belegung mit verschiedenen Eigenschaften. Die einzelnen DMX-Kanäle und ihre Eigenschaften sind unter DMX-Protokoll aufgeführt. Bitte beachten Sie: Damit das Gerät DMX-/WDMX-Signale empfangen kann, muss das Gerät als Slave- Gerät eingestellt sein. -
Page 16: Dmx-Protokoll
DMX-Protokoll 3-Kanal-Modus Kanal Wert Eigenschaft 0-255 Rot, Grün und Blau Farbmischung 0-255 Weiß, 0 - 100 % zunehmend 0-255 Dimmer, 0 - 100 % zunehmend 4-Kanal-Modus Kanal Wert Eigenschaft Rot, 0 - 100 % zunehmend 0-255 0-255 Grün, 0 - 100 % zunehmend 0-255 Blau, 0 - 100 % zunehmend 0-255... - Page 17 11-Kanal-Modus Kanal Wert Eigenschaft Dimmer, Dimmerintensität von 0 bis 100 % 0-255 0-255 Rot, 0 - 100 % zunehmend 0-255 Grün, 0 - 100 % zunehmend Blau, 0 - 100 % zunehmend 0-255 0-255 Weiß, 0 - 100 % zunehmend 0-14 Keine Funktion Strobe-Effekt mit zunehmender Geschwindigkeit...
-
Page 18: Reinigung Und Wartung
165-171 WD - Weiß dunkel 172-178 WY - Weiß Gelb 179-185 WC - Weiß Cyan 186-192 WM - Weiß Magenta 193-199 YD - Gelb dunkel 200-206 YC - Gelb Cyan 207-213 YM - Gelb Magenta 214-220 YW - Gelb Weiß 221-227 CD - Cyan dunkel 228-234... -
Page 19: Technische Daten
Fernbedienung Batterie: 1 x Knopfzelle 3,0 V CR2032 Lithium-Mangan eingebaut Zubehör EUROLITE QuickDMX Funksender/Empfänger Best.-Nr. 70064703 EUROLITE Ladenetzteil 4x Akku Flat Light Serie Best.-Nr. 41700055 EUROLITE Sicherungsseil A 3x600mm bis 5kg, schwarz Best.-Nr. 58010341 EUROLITE TPC-10 Klammer, schwarz Best.-Nr. 59006858 Technische Änderungen ohne vorherige Ankündigung und Irrtum vorbehalten. -
Page 20: Introduction
• Dimmer speed (step response) adjustable • Addressing and setting via control panel with OLED display • Convenient wireless control via included IR remote control EUROLITE IR-35 • Sound-control via built-in microphone with adjustable microphone sensitivity • 3, 4, 6, 8 or 11 DMX channels selectable •... -
Page 21: Safety Instructions
SAFETY INSTRUCTIONS WARNING! Please read the safety warnings carefully and only use the product as described in this manual to avoid accidental injury or damage. Intended use • This device is a spotlight for creating decorative lighting effects. This device is designed for professional use in the field of event technology, e.g. - Page 22 Warning – risk of burns and fire • The admissible ambient temperature range (Ta) is -5 to +45°C. Do not operate the device outside of this temperature range. • The housing temperature (Tc) can be up to 65°C during use. Avoid contact by persons and materials. •...
-
Page 23: Description Of The Device
DESCRIPTION OF THE DEVICE (1) Housing screw (2) Lens/LED (3) Housing (4) Infrared sensor for the remote control (5) Fixation screw (6) Mounting bracket (7) Hole for securing with a safety bond (8) Mounting hole (9) Magnetic base (10) ON/OFF switch (11) Display (12) Menu button (13) Up button... -
Page 24: Installation
INSTALLATION WARNING! Risk of injury caused by falling objects Devices in overhead installations may cause severe injuries when crashing down. Make sure that the device is installed securely and cannot fall down. The installation must be carried out by a specialist who is familiar with the hazards and the relevant regulations. The device easily attaches to metal surfaces with its magnetic base or fastened to a truss or similar rigging structure. -
Page 25: Dmx512 Control
DMX512 CONTROL Via QuickDMX Connect the transmitters to the DMX controller. Put each transmitter and the device into operation. Use the buttons of the control board to set the function "WIRELESS" - "POWER" to "ON". The QuickDMX status indicator shortly flashes red, green and blue. Afterward, it lights up permanently according to the selected transmission channel. -
Page 26: Charging
CHARGING Prior to operating the device off mains for the first time, the rechargeable battery must be fully charged. You can charge the product using the charging adapter. For charging the battery, connect the device to a grounded mains socket (100 und 240 Volt) via the enclosed power unit. -
Page 27: Operation
MENU, ENTER, UP, DOWN. The device has two operating modes. It can be operated in stand-alone mode via the control board and the EUROLITE IR-35 remote control or in DMX-controlled mode via a standard DMX controller and QuickDMX with suitable wireless transmitter. -
Page 28: Control Board
Control Board The Control Board offers several features: you can easily set the starting address, run the pre-programmed program or select a DMX channel mode. The main menu is accessed by pressing Menu. Browse through the menu by pressing Up or Down. Press Enter in order to select the desired menu. - Page 29 Internal programs / blackout Black Blackout Blue Dark Pty 1 Red Green Blue Blue Yellow Pty 2 Cyan Magenta Yellow Blue Cyan Red Green Blue Cyan Pty 3 Blue Magenta Magenta Yellow Pty 4 Red Green Blue White Blue White Rainbow Red, Yellow, Green, Cyan,...
-
Page 30: Eurolite Ir-35 Remote Control
EUROLITE IR-35 remote control The IR remote control has the following functions: Buttons Function IR remote control onoff Pty1 Pty2 Dimmer intensity of the LED colors / stepless RGBW color mixture, Pty3 brightness with + and - Pty4 FADE COLOR... -
Page 31: Dmx-Controlled Operation
DMX-controlled operation You can control the device individually via your DMX-controller. Every DMX-channel has a different occupation with different features. The individual channels and their features are listed under DMX-protocol. Please note: To enable the device to receive DMX/WDMX signals, it must be set as a slave device. You will find this setting option in the Control Board under the menu item "Master/Slave". -
Page 32: Dmx Protocol
DMX protocol 3-channel mode Channel Value Feature 0-255 Red, Green and Blue color mixing 0-255 White, 0 - 100 % increasing 0-255 Dimmer, 0 - 100 % increasing 4-channel mode Channel Value Feature 0-255 Red, 0 - 100 % increasing 0-255 Green, 0 - 100 % increasing Blue, 0 - 100 % increasing... - Page 33 11-channel mode Channel Value Feature 0-255 Dimmer, dimmer intensity from 0 to 100 % 0-255 Red, 0 - 100 % increasing 0-255 Green, 0 - 100 % increasing 0-255 Blue, 0 - 100 % increasing 0-255 White, 0 - 100 % increasing 0-14 No function Strobe effect with increasing speed...
-
Page 34: Cleaning And Maintenance
165-171 WD - White Dark 172-178 WY - White Yellow 179-185 WC - White Cyan 186-192 WM - White Magenta 193-199 YD - Yellow Dark 200-206 YC - Yellow Cyan 207-213 YM - Yellow Magenta 214-220 YW - Yellow White 221-227 CD - Cyan Dark 228-234... -
Page 35: Technical Specifications
EUROLITE QuickDMX Wireless Transmitter/Receiver No. 41700055 EUROLITE Charger 4x Akku Flat Light Series No. 58010341 EUROLITE Safety Bond A 3x600mm up to 5kg, black No. 59006858 EUROLITE TPC-10 Coupler, black All information is subject to change without prior notice. © 14.04.2020 35/36 00129135, Version 1.0... - Page 36 Eurolite is a brand of Steinigke Showtechnic GmbH Andreas-Bauer-Str. 5 97297 Waldbüttelbrunn Germany D00125583 Version 1.0 Publ. 14/04/2020...
Need help?
Do you have a question about the AKKU Dot 1 and is the answer not in the manual?
Questions and answers