Table of Contents
Advertisement
Quick Links
Advertisement
Table of Contents

Related Manuals for Durafit WALTZ


Summary of Contents for Durafit WALTZ
- Page 1 DURAFIT WALTZ (DFIEBS01) USER MANUAL IMPORTANT! Please read all instructions carefully before using this product. Retain this manual for future reference. The specifications of this product may vary slightly from the illustrations and are subject to change without notice.
- Page 2 14.Maximum user’s weight is 100KGS. If you still can’t solve the problems after taking the solutions above, please contact our Customer Care @ contactus@durafit.in or 6383151885/7806811343 to resolve the issue through our Pan- India Service Network. - 1 -...
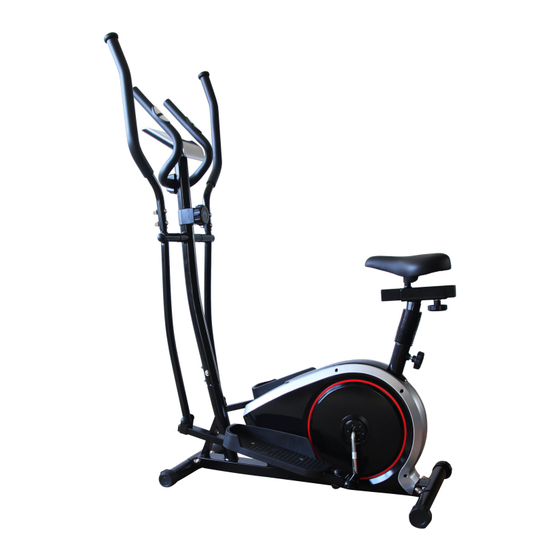
- Page 3 EXPLODED DIAGRAM NOTE: Most of the listed assembly hardware has been packaged separately, but some hardware items have been preinstalled in the identified assembly parts. In these instances, simply remove and reinstall the hardware as assembly is required. Please reference the individual assembly steps and make note of all preinstalled hardware.
- Page 4 PARTS LIST DESCRIPTION DESCRIPTION Main frame Axle bushing Φ24 X20XΦ16.1 Handlebar post 40L/R Connecting joint (L/R) 1pr. Front stabilizer Spring washer Φ13 XB2 Rear stabilizer 42L/R Nylon nut (L/R) 1pr. 5L/R Pedal support (L/R) 1pr. Nut cap S19 6L/R Swing bar(L/R) 1pr.
- Page 5 ASSEMBLY INSTRUCTION Step 1: Fix the Front stabilizer (3) and Rear stabilizer (4) to the Main frame (1) with Carriage bolt (12), Spring washer (66), Arc washer (13) and Acorn nut (14) Step 2: Connect the Sensor wire (20) well with Extension wire (18) and then connect the Tension cable (19) well with wire of Tension controller (17) as shown.
- Page 6 Step 3: A: Fix the Swing bar (6L) on the long axle of the Handlebar post (2) with Hex bolt (24), Spring washer (52), Flat washer (25), Waved washer (54) and Long axle (27) as shown. Please do not tighten them this time. B: Attach the connecting joint together with Pedal Support (5L) to the Crank (22) using Pedal support bolt (38L), Waveform washer (62), Spring washer (41) and Nylon nut (42L) as shown.
- Page 7 Connect the Pulse sensor wire (50) and Extension wire(18) with the wires coming from the Computer (9), and then fix the Computer (9) onto the computer bracket of the Handlebar post (2) with Cross screw (55). Step 6: A: Lock the saddle (75) tightly to saddle slider (74). B: Lock saddle slider (74) to saddle post (71) with plum nut (69) and flat washer (70) tightly.
- Page 8 WARM-UP PHASE The purpose of warming up is to prepare your body for exercise and to minimize injuries. Warm up for two to five minutes before strength-training or aerobic exercising. Perform activities that raise your heart rate and warm the working muscles. Activities may include brisk walking, jogging, jumping jacks, jump rope, and running in place.
Need help?
Do you have a question about the WALTZ and is the answer not in the manual?
Questions and answers