Kasco LED3C11 Owner's Manual
Waterglow lighting
Hide thumbs
Also See for LED3C11:
- Operation & maintenance manual (12 pages) ,
- Operation & maintenance manual (13 pages)

Related Manuals for Kasco LED3C11


Summary of Contents for Kasco LED3C11
- Page 1 Owners Manual LED3C11 WaterGlow Lighting Kasco Marine, Inc. 800 Deere Rd. Prescott, WI 54021 PH (715) 262-4488 kascomarine.com Rev 2-18-20...
-
Page 2: Table Of Contents
10-11 Replacement Parts pg 12 Important Safety: Please read and follow these important instructions to help ensure your safety and the quality performance of your Kasco equipment. • Caution should be used when dealing with any electrical and/or moving equipment. -
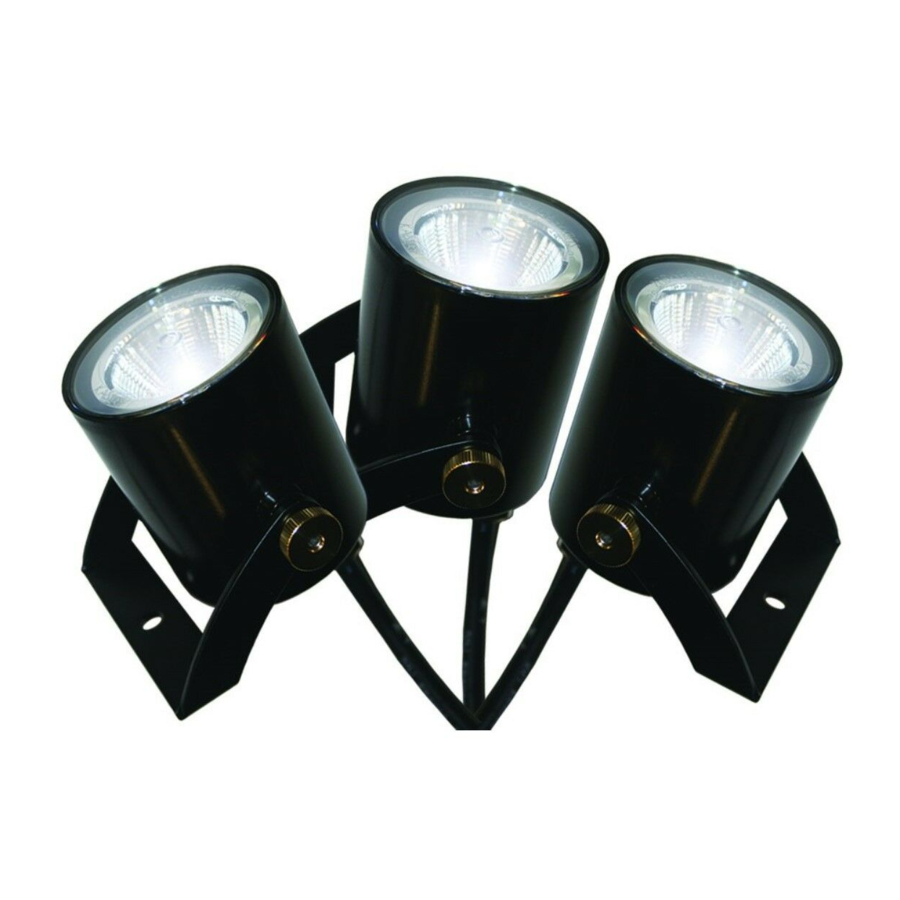
Page 3: Parts Included
Parts Included Alternate Mounting Method Mounting Method for 2HP and larger fountains (8400JF/VFX/AF and larger) -
Page 4: Mounting Instructions
Mounting Instructions Step 1 Attach the bracket (H) to the light fixture (C) by fitting the head of the 10-32 x 1/2’’ hex screw (I) into the tabs on each side of the fixture. Place one bracket O-ring (G), one #10 lock washer (F), and one thumb nut (E) on each #10 screw outside the bracket. - Page 5 Step 3 (Optional) Place lens caps over the light fixture (C) as shown. Ensure the cap is seated all the way down onto the fixture housing. Make sure the fixture and lens are clean before installing the lens cap. Repeat for all fixtures. Step 4 Slide bracket into the top flange on the snap-on clip (J) until it clicks into place and is secure.
- Page 6 Step 5 After attaching unit to the float according to fountain/aerator instructions, push clips into recesses on float until an audible click is heard and fixture is secure. Ensure clip is fully seated on float Step 6 Repeat for remaining fixtures, spacing evenly around the float. Adjust angle of lights using thumb nuts if desired, being sure that the same angle is used for all fixtures.
- Page 7 For 3400/4400 JF/VFX/AF units: For 8400 JF/VFX/AF and larger units: Included with the LED3C11 Kit is optional hardware for use Included with the LED3C11 Kit is required hardware for use instead of the snap-on light clip. Assemble parts K, L, M, and instead of the snap-on light clip.
-
Page 8: Maintenance And Warranty
Warranty Claim Procedure: The best method for establishing warranty period is by keeping your original receipt and registering the equipment online at kascomarine.com under the Warranty Information section. Once warranty coverage has been established, the light kit may be sent to Kasco Marine or any Kasco Authorized Repair Center for evaluation and repair. -
Page 9: Repair
This includes tampering with the unit, power cord, and/or control box. A physical Kasco Repair Form must be included with any equipment sent to Kasco or an Authorized Repair Center. This form can be found under the Product Support section of kascomarine.com. If no Repair Form is available, include your name and physical address for return delivery of the repaired Light Kit and a daytime phone number and/or e-mail address for correspondence regarding the warranty claim. -
Page 10: Troubleshooting Tips
Troubleshooting Tips The following is provided to help diagnose a probable source of trouble. It is a guideline only and may not show all causes for all problems. For additional troubleshooting help, contact your local distributor or visit kascomarine.com for additional guidance. Note: you may need to refer to your owners manual that was provided with your fountain for additional control panel settings and adjustments. - Page 11 or an internal wiring issue with the panel. If the module resets, then reconnect the fountain then the light kit to see which one trips the module. “My lights work, but they are not as bright as they were when fist installed.” Dirty lenses may be to blame.
-
Page 12: Replacement Parts
Replacement Parts... - Page 13 Sales@kascomarine.com Repair Contact Form ❖ Kasco requires all Repairs sent in MUST be accompanied by this form and marked to Repairs attention. (ex. Attn: Repairs) ❖ Repairs returned should include upper pump housing or wire basket for Aerators and De‐Icers. These parts protect the motor during shipping.
Need help?
Do you have a question about the LED3C11 and is the answer not in the manual?
Questions and answers