Table of Contents
Advertisement
Quick Links
Advertisement
Table of Contents

Subscribe to Our Youtube Channel
Related Manuals for Indesit IS5G1PMSS/UK


Summary of Contents for Indesit IS5G1PMSS/UK
- Page 1 IS5G1PMSS/UK IS5G1PMSS/UK IS5G1PMSS/UK...
- Page 2 ENGLISH Safety Instructions Daily Reference Guide Installation Guide...
-
Page 3: Safety Instructions
hazards involved. Children must not play with the appliance. Cleaning and user maintenance must SAFETY INSTRUCTIONS not be carried out by children without supervision. CAUTION : In case of hotplate glass breakage:- IMPORTANT TO BE READ AND OBSERVED shut immediately off all burners and any electrical These instructions are valid if the country heating element and isolate the appliance from symbol appears on the appliance. -
Page 4: Installation
Do not store explosive or flammable The air circulation system may take air directly substances (e.g. gasoline or aerosol cans) inside or from the outside by means of a pipe with an inner near the appliance - risk of fire. cross section of at least 100 cm²;... - Page 5 must be installed and connected in accordance qualified technician.) with current installation regulations. Particular In order to adapt the appliance to a type of gas attention must be paid to the relevant other than the type for which it was manufactured requirements regarding ventilation.
-
Page 6: Disposal Of Packaging Materials
DISPOSAL OF PACKAGING MATERIALS The packaging material is 100% recyclable and is marked with the recycle symbol . The various parts of the packaging must therefore be disposed of responsibly and in full compliance with local authority ! ATTENTION ! ATTENTION ! ATTENTION ! VERY HOT SURFACES ! VERY HOT SURFACES... -
Page 7: Product Description
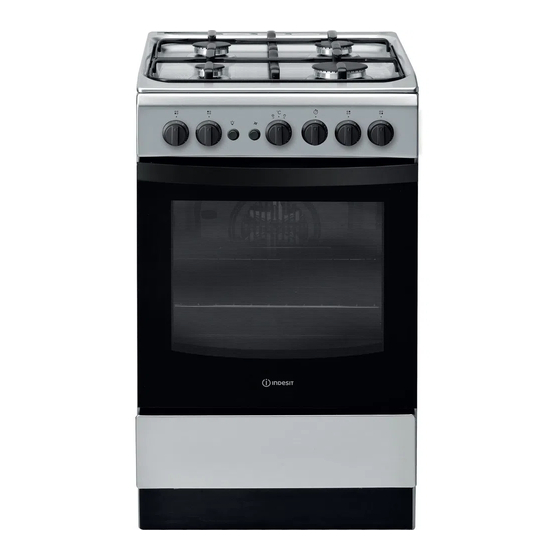
DAILY REFERENCE DAILY REFERENCE DAILY REFERENCE DAILY REFERENCE DAILY REFERENCE DAILY REFERENCE GUIDE GUIDE GUIDE GUIDE GUIDE GUIDE Read the safety instructions carefully before using the product PRODUCT DESCRIPTION Gas burner Hob grid Containment surface for spills Control panel GRILL DRIPPING PAN GUIDE RAILS for the sliding racks... -
Page 8: Installation Tips
WARNING : This operation must be perfomed by a qualified technician INSTALLATION TIPS INSTALLATION TIPS INSTALLATION TIPS INSTALLATION TIPS INSTALLATION TIPS Positioning tap to isolate the supply from the appliance for the This unit may be installed and used only in convenience of any subsequent removal or servicing. - Page 9 WARNING : This operation must be perfomed by a qualified technician 4. Unscrew the nozzle using a special nozzle socket spanner ( see figure ) or with a 7 mm socket spanner, and replace it with a new nozzle that is suited to the new type of gas ( see Burner and nozzle specifications table ).
-
Page 10: Technical Data
TECHNICAL DATA TECHNICAL DATA TECHNICAL DATA TECHNICAL DATA TECHNICAL DATA TECHNICAL DATA After installing the power cable, screw the metal cover TECHNICAL DATA with three screws. may be adapted for use with any Burners type of gas shown on the data plate, which is located inside the flap or, after the oven compartment has been opened,... -
Page 11: Start-Up And Use
START-UP AND USE START-UP AND USE START-UP AND USE START-UP AND USE START-UP AND USE START-UP AND USE START-UP AND USE guarantees a more precise adjustment, allows Using the hob to replicate the flame intensity and to identify easily the preferred level for different cooking Lighting the burners operations. - Page 12 ! The oven is fitted with a safety device and it is Oven light therefore necessary to hold the OVEN control knob The light may be switched on at any moment by down for approximately 6 seconds. pressing the OVEN LIGHT button. ! If the flame is accidentally extinguished, switch off the Timer* burner and wait for at least 1 minute before attempting...
-
Page 13: Oven Cooking Advice Table
OVEN COOKING ADVICE TABLE OVEN COOKING ADVICE TABLE OVEN COOKING ADVICE TABLE OVEN COOKING ADVICE TABLE OVEN COOKING ADVICE TABLE Cooking position of Temperature Cooking time Food to be cooked Pre-heating time (min) (Kg) shelves from bottom (°C) (min.) Pasta Lasagne 200-210 75-85... -
Page 14: Maintenance And Cleaning
3. Replace the lid and reconnect the oven to the electricity supply. ! Do not use the oven lamp as/for ambient lighting. A complete product specification, including the energy efficiency ratings for this oven, can be read and downloaded from our website www.indesit.com... -
Page 15: Removing And Refitting The Door
REMOVING AND REFITTING THE DOOR To remove the door, open it fully and lower the After removing the door and resting it on a soft catches until they are in the unlock position. surface with the handle downwards, simultaneously press the two retaining clips and remove the upper edge of the door by pulling it towards you. - Page 16 Product Guarantee and Repair Information Guarantee Recycling and Disposal Information 12 Months Parts and Labour Guarantee As part of Hotpoint’s continued commitment to helping the environment, Hotpoint reserves the right to use quality, recycled components to keep down Your appliance has benefit of our manufacturer’s guarantee, which covers customer costs and minimise material wastage.
- Page 17 Min. 750 mm Min. 420 mm max. 15 mm...
- Page 18 >50°C ------------ ----------- Connecting to gas supply Gas hose connection point must be installed within the shaded area...
- Page 20 Whirlpool EMEA S.p.A. Via Carlo Pisacane n.1 20016 Pero (MI), Italy 11/2018 W11309149 XEROX FABRIANO VAT number: IT00693740425 www.indesit.com...
Need help?
Do you have a question about the IS5G1PMSS/UK and is the answer not in the manual?
Questions and answers