Table of Contents
Advertisement
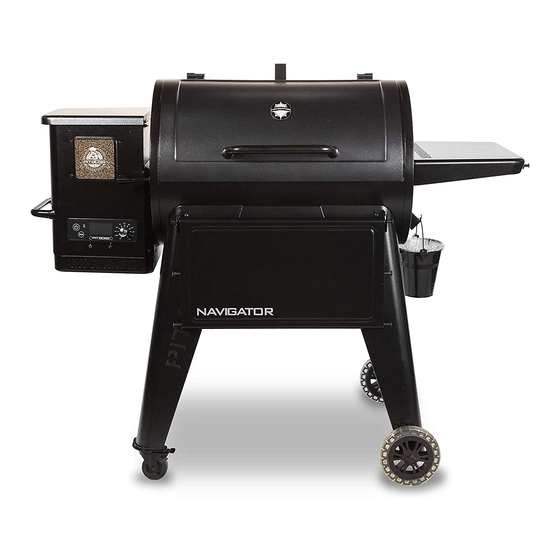
WOOD PELLET GRILL & SMOKER
IMPORTANT, READ CAREFULLY, RETAIN FOR
FUTURE REFERENCE. MANUAL MUST BE READ
BEFORE OPERATING!
For outdoor and household use only. Not for commercial use.
WARNING: Please read the entire manual before installation
and use of this electric, pellet fuel-burning appliance.
Failure to follow these instructions could result in property
damage, bodily injury or even death. Contact local building
or fire officials about restrictions and installation inspection
requirements in your area.
ITEM: 172778
MODEL : PB850G
PART : 10710
OWNERS
MANUAL
Advertisement
Table of Contents

Related Manuals for Navigator PIT BOSS PB850G


Summary of Contents for Navigator PIT BOSS PB850G
- Page 1 ITEM: 172778 MODEL : PB850G PART : 10710 WOOD PELLET GRILL & SMOKER OWNERS IMPORTANT, READ CAREFULLY, RETAIN FOR MANUAL FUTURE REFERENCE. MANUAL MUST BE READ BEFORE OPERATING! For outdoor and household use only. Not for commercial use. WARNING: Please read the entire manual before installation and use of this electric, pellet fuel-burning appliance.
-
Page 2: Safety Information
SAFETY INFORMATION MAJOR CAUSES OF APPLIANCE FIRES ARE A RESULT OF POOR MAINTENANCE AND A FAILURE TO MAINTAIN REQUIRED CLEARANCE TO COMBUSTIBLE MATERIALS. IT IS OF UTMOST IMPORTANCE THAT THIS PRODUCT BE USED ONLY IN ACCORDANCE TO THE FOLLOWING INSTRUCTIONS. Please read and understand this entire manual before attempting to assemble, operate or install the product. - Page 3 6. Parts of the barbecue may be very hot, and serious injury may occur. Keep young children and pets away while in use. Do not enlarge igniter holes or burn pots. Failure to follow this warning could lead to a fire hazard and bodily harm and will void your warranty. 8.
-
Page 4: Table Of Contents
TABLE OF CONTENTS Safety Information ............2 Replacement Parts Grill Replacement Parts ............16 Operating Instructions Hopper Replacement Parts ............18 Grill Environment ................. 5 Grill Temperature Ranges ............6 Warranty Understanding The Control Board ........... 7 Conditions ..................19 Understanding The Probes ............8 Exceptions .................. -
Page 5: Operating Instructions
OPERATING INSTRUCTIONS With today’s lifestyle of striving to eat healthy and nutritious foods, one factor to consider is the importance of reducing fat intake. One of the best ways to cut down on fat in your diet is to use a low fat method of cooking, such as grilling. As a pellet grill uses natural wood pellets, the savory wood flavor is cooked into the meats, reducing the need for high sugar content sauces. -
Page 6: Grill Temperature Ranges
GRILL TEMPERATURE RANGES Temperature readouts on the control board may not exactly match the thermometer. All temperatures listed below are approximate and are affected by the following factors: outside ambient temperature, the amount and direction of wind, the quality of pellet fuel being used, the lid being opened, and the quantity of food being cooked. HIGH TEMPERATURE (205-260°C / 401-499°F) •... -
Page 7: Understanding The Control Board
UNDERSTANDING THE CONTROL BOARD 300º 300º 150° 250º 350º 250º “P” SET “P” SET COOK “P” SET 120° COOK 175° “P” SET 250º 350º “P” SET COOK “P” SET "P"Set 225º 400º 225º PROBE 1 PROBE 1 225º 400º 110° 205°... -
Page 8: Understanding The Probes
UNDERSTANDING THE PROBES • TEMPERATURE PROBE Located inside the main barrel, on the left side wall, is the temperature probe. It is a small, vertical piece of stainless steel. The temperature probe measures the internal temperature of the unit. When the temperature is adjusted on the Control Board, the temperature probe will read the actual temperature inside the unit and adjust to the desired temperature. -
Page 9: First Use - Grill Burn-Off
the Prime Button until you see pellets on the inside of the grill from the auger tube. Once pellets begin to drop into the fire pot, release the Prime Button. Press the Power Button to turn the unit off. 8. Re-install the cooking components into the main barrel. The grill is now ready to use. FIRST USE –... -
Page 10: Shutting Off Your Smoker
SHUTTING OFF YOUR GRILL When finished cooking, with the main barrel lid remaining closed, press the Power Button to turn the unit off and turn the Temperature Control Dial to OFF. The grill will begin its automatic cool-down cycle. The auger system will stop feeding fuel, the flame will burn out, and the fan will continue to run until the cool-down cycle is complete. - Page 11 CLEANING FREQUENCY TIME TABLE (NORMAL USE) ITEM CLEANING FREQUENCY CLEANING METHOD Bottom of Main Grill Every 5-6 Grill Sessions Scoop Out, Shop-Vac Excess Debris Fire pot Every 2-3 Grill Sessions Scoop Out, Shop-Vac Excess Debris Cooking Grids After Each Grill Session Burn Off Excess, Brass Wire Brush Flame Broiler Every 5-6 Grill Sessions...
-
Page 12: Tips & Techniques
TIPS & TECHNIQUES Follow these helpful tips and techniques, passed on from Pit Boss owners, our staff, and customers just like you, to become more ® familiar with your grill: 1. FOOD SAFETY • Keep everything in the kitchen and cooking area clean. Use different platters and utensils for the cooked meat than the ones you used to prepare or transport the raw meat out to the grill. -
Page 13: Troubleshooting
TROUBLESHOOTING Proper cleaning, maintenance and the use of clean, dry, quality fuel will prevent common operational problems. When your Pit Boss grill is operating poorly, or on a less frequent basis, the following troubleshooting tips may be helpful. ® For FAQ, please visit www.pitboss-grills.com . You may also contact your local Pit Boss authorized dealer or contact Customer ®... - Page 14 Press the Power Button to turn the unit off, and allow grill to cool. Follow Care and "ErH" Error Code The Unit Has Overheated, Possibly Maintenance instructions. After maintenance, remove pellets, and confirm positioning of Due To Grease Fire Or all component parts.
-
Page 15: Electrical Wire Diagram
ELECTRICAL WIRE DIAGRAM The Digital Control Board system is an intricate and valuable piece of technology. For protection from power surges and electrical shorts, consult the wire diagram below to ensure your power source is sufficient for the operation of the unit. PB –... -
Page 16: Grill Replacement Parts
GRILL REPLACEMENT PARTS Part# Description Part# Description Lid Stopper (x1) 22-A Front Shelf (x1) Lid Handle (x1) 23-A Meat Probe (x1) Lid Handle Bezel (x2) 24-A Front Shelf Bracket Right (x1) Main Barrel (x1) 25-A Front Shelf Bracket Left (x1) Flame Broiler Adjusting Bar (x1) 26-A Grease Bucket (x1) - Page 17 30-A 31-A 23-A 29-A 28-A 32-A 27-A 33-A 26-A 22-A 10-A 25-A 24-A 12-A 11-A 21-A 19-A 20-A 18-A 14-A 16-A 13-A 17-A 15-A 34-A 35-A 36-A 37-A 40-A 41-A 38-A 39-A...
-
Page 18: Hopper Replacement Parts
HOPPER REPLACEMENT PARTS Part# Description Part# Description 1-PDH Hopper Lid 11-PDH Nylon Bushing Hopper Safety Screen 12-PDH Auger Flighting Assembly 2-PDH Hopper Box Housing 13-PDH Auger Box Housing 3-PDH 4-PDH Hopper Access Panel 14-PDH Hopper Housing Gasket 5-PDH Hopper Handle 15-PDH Igniter 6-PDH Combustion Fan 16-PDH Fire Pot... -
Page 19: Warranty
WARRANTY CONDITIONS All wood pellet grills by Pit Boss, manufactured by Dansons, carry a limited warranty from the date of sale by the original owner. The warranty coverage begins on the original date of purchase and proof of date of purchase, or copy of original bill of sale, is required to validate the warranty. -
Page 20: Ordering Replacement Parts
ORDERING REPLACEMENT PARTS To order replacement parts, please contact Genesis International Corporation Pty Ltd. at: service@genesiscorp.com.au | +61 8 9248 9822 CONTACT CUSTOMER SERVICE Genesis International Corporation Pty Ltd. is the supplier of Pit Boss Grills in Australia and New Zealand. If you have any questions or problems, contact Bunnings Australia or Genesis International Corporation Pty Ltd. - Page 22 IMPORTANT For all questions, inquiries, or customer support, please contact Genesis Inter- national Corporation Pty Ltd. +61 8 9248 9822 | service@genesiscorp.com.au WARNING: This product can expose you to chemicals including carbon monoxide, which is a combus- tion by-product known to cause cancer, birth defects or other reproductive harm. For more information, go to: WWW.PRODUCTSAFETY.GOV.AU/NEWS/CARBON-MONOXIDE-SAFETY 480200428AUM MADE IN CHINA...
Need help?
Do you have a question about the PIT BOSS PB850G and is the answer not in the manual?
Questions and answers
Hi how do I know what wire goes where on the pitboss navigator they've come lose and don't know what goes where ?
To determine the correct wiring connections for the Navigator PIT BOSS PB850G, refer to the wire diagram in the manual. The diagram outlines the electrical components, including the control board, igniter assembly, auger motor, draft fan, temperature probe, and their respective connections. Ensure your power source meets the grill's requirements (110-120V, 60Hz, 250W, 3-prong grounded plug). If needed, locate and remove the two screws on the hopper’s access panel to access internal wiring.
This answer is automatically generated