Table of Contents
Advertisement
Quick Links
Advertisement
Table of Contents

Subscribe to Our Youtube Channel
Related Manuals for Siemens LR18RPU25


Summary of Contents for Siemens LR18RPU25
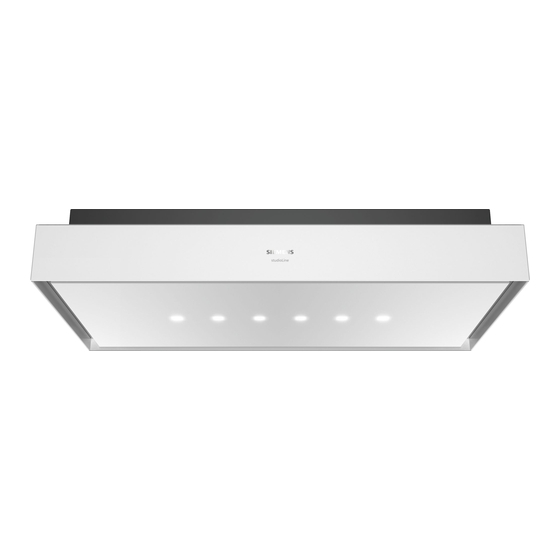
- Page 1 Ceiling-mounted ventilation system LR18RPU25 User manual and assembly instructions Register your product on My Siemens and discover exclusive services and offers. siemens-home.bsh-group.com/welcome The future moving in. Siemens Home Appliances...
-
Page 2: Table Of Contents
en Safety The appliance can only be used safely if it is Table of contents correctly installed according to the safety in- structions. The installer is responsible for en- Safety ................ 2 suring that the appliance works perfectly at its Preventing material damage ........ - Page 3 Safety en ▶ Never work with naked flames close to ¡ Items placed on the appliance may fall the appliance (e.g. flambéing). off. ▶ Do not place any objects on the appli- ▶ Do not install the appliance near a solid fuel heating appliance (e.g. wood- ance.
-
Page 4: Preventing Material Damage
en Preventing material damage ATTENTION! WARNING ‒ Risk of electric shock! ¡ Condensate may cause corrosion damage. ¡ If the appliance or the power cord is dam- To prevent condensation from building up, switch ▶ aged, this is dangerous. on the appliance during cooking. ▶... -
Page 5: Operating Modes
Operating modes en Tip: Align the remote control as precisely as possible Adjust the fan speed to the amount of steam pro- to the infrared receiver for the LED display. duced during cooking. The lower the fan speed, the less energy is con- sumed. -
Page 6: Before Using For The First Time
en Before using for the first time a LED 1 for the fan setting lights up in the LED dis- Before using for the first time play. LED 6 flashes for the fan run-on. a The appliance switches off automatically after ap- Configure the settings for initial start-up. Clean the ap- prox. - Page 7 Basic operation en Or wait approx. 10 seconds until the setting is Press . ▶ saved automatically. a A signal tone sounds as soon as the selected set- Ambient Light – adjusting the ting is saved. brightness Resetting the saturation indicator Press and hold until the required brightness is ▶...
-
Page 8: Hob-Based Hood Control
en Hob-based hood control The Home Connect services are not available in every Hob-based hood control country. The availability of the Home Connect function depends on the availability of Home Connect services You can connect your appliance to a suitable hob and, in your country. You can find information about this at: www.home-connect.com. - Page 9 Home Connect en Press the WPS button on the router within the next Software update 2 minutes. Your appliance's software can be updated using the a If the connection has been established, the appli- software update function, e.g. for the purposes of op- ance automatically connects to the Home Connect timisation, troubleshooting or security updates.
-
Page 10: Cleaning And Servicing
A detailed RED Declaration of Conformity can be found Declaration of Conformity online at www.siemens-home.bsh-group.com among BSH Hausgeräte GmbH hereby declares that the appli- the additional documents on the product page for your ance with Home Connect functionality meets the essen- appliance. - Page 11 Cleaning and servicing en Clean using a damp sponge cloth and hot soapy ATTENTION! Falling grease filters may damage the water. hob below. Grip below the grease filter with one hand. ▶ Dry with a soft cloth. Open the locks on the grease filters. Removing the grease filter WARNING ‒ Risk of injury! ¡...
- Page 12 en Cleaning and servicing Insert the odour filter. WARNING ‒ Risk of fire! Fatty deposits in the grease filters may catch fire. Clean the grease filters regularly. ▶ Requirement: The grease filters have been removed. Observe the information regarding the cleaning agents. → "Cleaning products", Page 10 Soak the grease filter in hot soapy water.
-
Page 13: Troubleshooting
Troubleshooting en Remove the empty batteries. Close the cover. Dispose of the empty batteries in an environmentally friendly manner. Troubleshooting You can rectify minor faults on your appliance yourself. Read the troubleshooting information before contacting after-sales service. This will avoid unnecessary costs. WARNING ‒ Risk of injury! Improper repairs are dangerous. -
Page 14: Customer Service
en Customer Service Fault Cause troubleshooting LED 1 flashes in the LED display. The grease filters are saturated. → "Cleaning grease filters in the dish- ▶ washer", Page 11 → "Cleaning grease filters manually", ▶ Page 11 LED 2 flashes in the LED display. The odour filters are saturated. Change the odour filter. -
Page 15: Installation Instructions
Installation instructions en Dimensions Installation instructions You will find the dimensions of the appliance here Included with the appliance After unpacking all parts, check for any damage in transit and completeness of the delivery. Secure installation Follow these safety instructions when installing the ap- pliance. - Page 16 en Installation instructions To ensure correct installation, you must use a trical installation according to the conditions of ▶ material which is sufficiently stable and suitable Overvoltage Category III and according to the in- for both the structural conditions and the weight stallation regulations.
- Page 17 Installation instructions en ¡ The surfaces of the appliance are sensitive. Avoid Preparing the appliance damaging them during installation. Remove the grease filters. Installation Checking the ceiling Check whether the ceiling is horizontal and ad- equately load-bearing. The max. weight of the appliance is 40 kg. Do not fit the appliance directly onto plasterboard (or similar lightweight materials) in a suspended ceiling.
- Page 18 en Installation instructions Push the side covers inwards and remove them. Move the appliance and lower it further so that the collar nuts are positioned on the edge of the guide sleeves. Close the odour filter cartridge. Hanging the appliance Carefully tighten the diagonally opposite collar nuts until the appliance is flush-mounted on the ceiling.
- Page 19 Installation instructions en Insert the on-site cable into the terminal plug. Push the side covers in the direction of the appli- ance frame and screw them firmly in place. Installing covers Remove the new odour filter from the packaging. Insert the odour filter into the odour filter cartridge. WARNING ‒ Risk of injury! ¡...
- Page 20 en Installation instructions Open the hinges on the filter cover. Connect the appliance-side cable for the lighting. Mount the filter cover on the designated screws and Swing the filter cover up and ensure that it engages. push it backwards/forwards depending on the key Connect the appliance to the power supply.
- Page 21 Installation instructions en Open the filter cover by pulling it downwards. Open the odour filter cartridge. Swing down the filter cover. Remove the odour filter. Open the filter cover fully and without pulling on it. Loosen the screws on the side covers. Remove the appliance-side cable for the lighting.
- Page 22 en Installation instructions Loosen the cable that is provided on-site from the terminal clamp. Carefully loosen the diagonally opposite screws. Disconnect the appliance from the key hole open- ing. Slowly take the appliance down.
- Page 24 BSH Hausgeräte GmbH Carl-Wery-Straße 34 81739 München GERMANY www.siemens-home.bsh-group.com Manufactured by BSH Hausgeräte GmbH under Trademark License of Siemens AG *9001520524* 9001520524 (000220)
Need help?
Do you have a question about the LR18RPU25 and is the answer not in the manual?
Questions and answers