Advertisement
Table of Contents
Advertisement
Table of Contents

Related Manuals for AEG BEK35502HM


Summary of Contents for AEG BEK35502HM
- Page 1 BEK35502HM User Manual Oven USER MANUAL...
-
Page 2: Table Of Contents
13. ENERGY EFFICIENCY..................... 40 FOR PERFECT RESULTS Thank you for choosing this AEG product. We have created it to give you impeccable performance for many years, with innovative technologies that help make life simpler – features you might not find on ordinary appliances. Please spend a few minutes reading to get the very best from it. - Page 3 ENGLISH manufacturer is not responsible for any injuries or damage that are the result of incorrect installation or usage. Always keep the instructions in a safe and accessible location for future reference. 1.1 Children and vulnerable people safety This appliance can be used by children aged from 8 •...
-
Page 4: Safety Instructions
Before carrying out any maintenance, disconnect the • appliance from the power supply. WARNING: Ensure that the appliance is switched off • before replacing the lamp to avoid the possibility of electric shock. Do not use the appliance before installing it in the •... - Page 5 ENGLISH • Connect the mains plug to the mains socket only at the end of the Height of the back of 576 mm installation. Make sure that there is the appliance access to the mains plug after the installation. Width of the front of 595 mm •...
- Page 6 • Do not put flammable products or • Make sure the appliance is cold. items that are wet with flammable There is the risk that the glass panels products in, near or on the appliance. can break. • Replace immediately the door glass WARNING! panels when they are damaged.
-
Page 7: Product Description
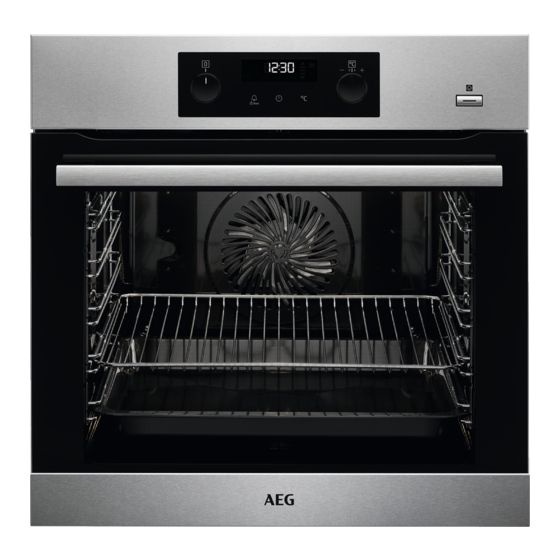
ENGLISH 3. PRODUCT DESCRIPTION 3.1 General overview Control panel Knob for the heating functions Power lamp / symbol Display Control knob (for the temperature) Temperature indicator / symbol Plus Steam Heating element Lamp Shelf support, removable Cavity embossment - Aqua cleaning container Shelf positions 3.2 Accessories... -
Page 8: Control Panel
4. CONTROL PANEL 4.1 Buttons Sensor field / Button Description To set the MINUTE MINDER. Hold it for more than 3 sec- onds to turn on or turn off the oven lamp. To set a clock function. To check the oven temperature or the temperature of the core temperature sensor (if applicable). -
Page 9: Daily Use
ENGLISH 5.2 Initial preheating Preheat the empty oven before the first use. Step 1 Remove all accessories and removable shelf supports from the oven. Step 2 Set the maximum temperature for the function: Let the oven operate for 1 h. Step 3 Set the maximum temperature for the function: Let the oven operate for 15 min. - Page 10 EU 65/2014 and EU 66/2014. Tests according Oven function Application to EN 60350-1. To bake cakes with crispy The oven door should be closed during bottom and to preserve cooking so that the function is not food.
-
Page 11: Clock Functions
ENGLISH Step 1 Make sure that the oven is cold. Step 2 Fill the cavity embossment with tap water. The maximum capacity of the cavity embossment is 250 ml. Do not refill the cavity em- bossment during cooking or when the oven is hot. Step 3 Set the function: Press:... - Page 12 Clock function Application To set the length of cooking. Use only when a heating function is set. Duration To set the oven turn-off time. Use only when a heating function is set. End Time Combination of functions: Duration, End Time.
- Page 13 ENGLISH 7.4 How to set function: End Time Step 1 Set a heating function. Step 2 - press repeatedly. - starts to flash. Step 3 Turn the knob for the temperature to set the hour. - press to confirm. Step 4 Turn the knob for the temperature to set the minutes.
-
Page 14: Using The Accessories
7.6 How to set function: Minute Minder Minute minder can be both set when the oven is turned on and off. Step 1 - press repeatedly. , 00 - flash. Step 2 Turn the knob for the temperature to set the seconds and then the minutes. - Page 15 ENGLISH Deep pan: Push the tray between the guide bars of the shelf support. Wire shelf, Deep pan: Push the tray between the guide bars of the shelf support and the wire shelf on the guide bars above. 8.2 Trivet and Grill- / Roasting pan You can use the trivet to roast larger pieces of meat or poultry on one shelf position.
-
Page 16: Additional Functions
You can use the trivet to grill thin pieces of food in large quantities and to toast them. Step 1 Put the trivet into a deep pan. Make sure the supports of the wire shelf point up. Step 2 Put the deep pan on the recom- mended shelf position. -
Page 17: Hints And Tips
ENGLISH The Automatic switch-off does not work surfaces of the oven cool. If you turn off with the functions: Light, Duration, End the oven, the cooling fan can continue to Time. operate until the oven cools down. 9.5 Cooling fan When the oven operates, the cooling fan turns on automatically to keep the 10. - Page 18 FROZEN READY FOOD REGEN- MEALS (°C) (min) ERATION (min) Pizza 200 - 10 - 20 Vegetables 15 - 25 Use 200 ml of water. Croissants 170 - 15 - 25 Use a glass baking dish. Lasagne 180 - 35 - 50 ROAST- (°C)
- Page 19 ENGLISH Baking results Possible cause Remedy The cake is too dry. The oven temperature is Next time set higher oven tem- too low. perature. The baking time is too long. Next time set shorter baking time. The cake bakes uneven- The oven temperature is Next time set a longer baking too high and the baking...
- Page 20 CAKES / PASTRIES / BREADS CAKES / PASTRIES / BREADS Use the third shelf position. Use the third shelf position. Use the function: True Fan Cook- Use the function: True Fan Cook- ing. ing. Use a baking tray. Use a baking tray.
- Page 21 ENGLISH CAKES / PASTRIES / BREADS Preheat the empty oven. Use the function: Conventional Cooking. Use a baking tray. (°C) (min) Cream puffs / Eclairs 190 - 210 20 - 35 Plaited bread / 170 - 190 30 - 40 Bread crown Fruit flans (made of 35 - 55...
- Page 22 BISCUITS Use the third shelf position. (°C) (min) Biscuits made of yeast True Fan Cooking 150 - 160 20 - 40 dough Macaroons True Fan Cooking 100 - 120 30 - 50 Pastries made of egg True Fan Cooking...
- Page 23 ENGLISH CAKES / PASTRIES (°C) (min) 2 positions Cream puffs / Eclairs, 160 - 180 25 - 45 1 / 4 preheat the empty oven Dry streusel cake 150 - 160 30 - 45 1 / 4 BISCUITS / SMALL CAKES / PASTRIES / ROLLS (°C) (min) 2 positions...
- Page 24 BEEF (°C) (min) Pot roast 1 - 1.5 kg Conventional 120 - 150 Cooking Roast beef or fillet, per cm of thick- Turbo Grilling 190 - 200 5 - 6 rare, preheat the ness empty oven Roast beef or fillet,...
- Page 25 ENGLISH VEAL Use the function: Turbo Grilling. (kg) (°C) (min) Veal knuckle 1.5 - 2 160 - 180 120 - 150 LAMB Use the function: Turbo Grilling. (kg) (°C) (min) Lamb leg / Roast 1 - 1.5 150 - 170 100 - 120 lamb Lamb saddle...
- Page 26 POULTRY Use the function: Turbo Grilling. (kg) (°C) (min) Poultry, portions 0.2 - 0.25 each 200 - 220 30 - 50 Chicken, half 0.4 - 0.5 each 190 - 210 35 - 50 Chicken, poulard 1 - 1.5 190 - 210...
- Page 27 ENGLISH PIZZA PIZZA Use the first shelf position. Preheat the empty oven before cooking. (°C) (min) Use the second shelf position. Vegetable 160 - 180 50 - 60 (°C) (min) Unleavened 230 - 250 10 - 20 PIZZA bread Puff pastry 160 - 180 45 - 55 flan...
- Page 28 GRILL Use the function: Grill (°C) (min) (min) 1st side 2nd side Veal loin 210 - 230 30 - 40 30 - 40 Lamb saddle 210 - 230 25 - 35 20 - 25 Whole fish, 0.5 210 - 230...
- Page 29 ENGLISH 10.14 Defrost the oven cavity. Put the food in a deep dish and set it on top of the plate inside Remove the food packaging and put the the oven. Remove the shelf supports if food on a plate. necessary.
- Page 30 For a better result, stop the oven halfway through the drying time, open the door and let it cool down for one night to SOFT FRUIT complete the drying. (min) For 1 tray use the third shelf position. Cooking time un-...
- Page 31 ENGLISH Ramekins Pizza pan Baking dish Flan base tin Ceramic Dark, non-reflective Dark, non-reflective Dark, non-reflective 8 cm diameter, 28 cm diameter 26 cm diameter 28 cm diameter 5 cm height 10.18 Moist Fan Baking For the best results follow suggestions listed in the table below.
- Page 32 BAKING ON ONE LEVEL. Baking in tins (°C) (min) Fatless sponge cake True Fan Cooking 140 - 150 35 - 50 Fatless sponge cake Conventional Cook- 35 - 50 Apple pie, 2 tins Ø20 True Fan Cooking 60 - 90 Apple pie, 2 tins Ø20...
-
Page 33: Care And Cleaning
ENGLISH GRILL Preheat the empty oven for 5 minutes. Grill with the maximum temperature setting. (min) Toast Grill 1 - 3 Beef steak, turn halfway Grill 24 - 30 through 11. CARE AND CLEANING WARNING! Refer to Safety chapters. 11.1 Notes on cleaning Clean the front of the oven with a soft cloth with warm water and a mild detergent. - Page 34 11.2 How to clean: Cavity embossment Clean the cavity embossment to remove limestone residue after cooking with steam. Step 1 Step 2 Step 3 Pour: 250 ml of white vinegar Let the vinegar dissolve the Clean the cavity with warm into the cavity embossment.
- Page 35 ENGLISH 11.5 How to remove: Grill WARNING! There is a risk of burns. Step 1 Turn off the oven and wait until it is cold to clean it. Remove the shelf supports. Step 2 Grab the grill corners. Pull it for- wards against the spring pres- sure and out of two holders.
- Page 36 Step 4 Hold the door trim (B) on the top edge of the door at the two sides and push in- wards to release the clip seal. Step 5 Pull the door trim to the front to remove it.
-
Page 37: Troubleshooting
ENGLISH Top lamp Step 1 Turn the glass cover to remove Step 2 Clean the glass cover. Step 3 Replace the lamp with a suitable 300 °C heat-resistant lamp. Step 4 Install the glass cover. 12. TROUBLESHOOTING WARNING! Refer to Safety chapters. 12.1 What to do if... - Page 38 Display shows: Description Possible cause Remedy The display shows an error There is an electrical fault. • Deactivate the oven with code that is not in this table. the house fuse or the safety switch in the fuse box and activate it again.
- Page 39 ENGLISH Other problems Description Possible cause Remedy There is no good cooking You did not fill the cavity Refer to "Setting the func- performance using the func- embossment with water. tion: True Fan Cooking tion: True Fan Cooking PLUS". PLUS. You want to activate the You did not select the heat- Refer to "Setting the func-...
-
Page 40: Energy Efficiency
......... Serial number (S.N.) ......... 13. ENERGY EFFICIENCY 13.1 Product Information and Product Information Sheet* Supplier's name Model identification BEK35502HM 944188393 Energy Efficiency Index 81.2 Energy efficiency class Energy consumption with a standard load, conven- 1.09 kWh/cycle tional mode Energy consumption with a standard load, fan-forced 0.69 kWh/cycle... - Page 41 ENGLISH Cooking with fan before the end of cooking. The residual When possible, use the cooking heat inside the oven will continue to functions with fan to save energy. cook. Residual heat Use the residual heat to warm up other If a programme with the Duration or End dishes.
- Page 44 www.aeg.com/shop...
Need help?
Do you have a question about the BEK35502HM and is the answer not in the manual?
Questions and answers