Table of Contents
Advertisement
Quick Links
Advertisement
Table of Contents

Related Manuals for Newworld NWMC60DFB


Summary of Contents for Newworld NWMC60DFB
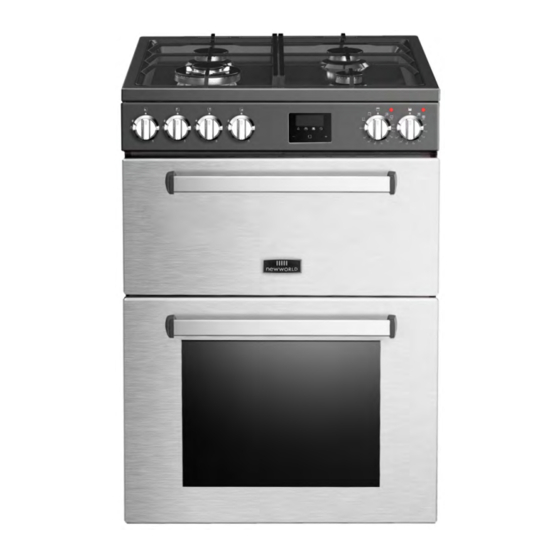
- Page 1 60cm Dual Fuel Freestanding Cooker NWMC60DFB NWMC60DFSS Instruction manual...
- Page 2 You’ll soon be enjoying your new Freestanding Cooker It all begins here, with your instructions. Don’t worry, there’s nothing too technical coming up. Just simple, step-by-step guidance to get you up and running quickly. Sound good? Then let’s get started. Help and Guidance We’re here to help you get the most from your Freestanding Cooker.
-
Page 3: Table Of Contents
Contents Safety information Product support Safety information Troubleshooting Help and assistance Getting to know your Declaration of conformance to product Freestanding Cooker standards Disposal Overview Guarantee Accessories Installing your Freestanding Cooker Installation requirements Electrical connection Using your Freestanding Cooker Control panel Oven functions General oven and cooking tips Practical Cooking Advice... -
Page 4: Safety Information
Safety information Important - Please read these instructions fully before installing or operating DURING USAGE INSTALLATION WARNINGS IMPORTANT: This appliance can be used by children IMPORTANT: This product MUST be installed by a aged from 8 years and above and persons with qualified Gas Safe registered installer in accordance reduced physical, sensory or mental capabilities or with local regulations. - Page 5 Safety information Important - Please read these instructions fully before installing or operating IMPORTANT: Position pans over the centre of the IMPORTANT: When the door of the oven is open, do burners and turn handles to a safe position where they not hang or lean anything on it.
-
Page 6: Getting To Know Your Freestanding Cooker
Getting to know your Freestanding Cooker You’ll be up and running in no time Ready? Let’s begin... Please read these instructions carefully. They contain important information which will help you get the best from your freestanding cooker and ensure safe and correct installation and operation. -
Page 7: Overview
Getting to know your You’ll be up and running in no time Gas burners Cast Iron Trivets Control Panel 4. Shelf positions Wire Shelf Top Oven Door Guide Bracket Wire Shelf Baking tray 10. Bottom Oven Door Hinge 12. Door Seal Door lock 14. -
Page 8: Accessories
Getting to know your You’ll be up and running in no time Accessories 1 x Baking tray 1 x Grill insert 1 x Grill pan handle 2 x Chrome shelves... -
Page 9: Installing Your Freestanding Cooker
Installing your Freestanding Cooker Bringing it all together Installation requireme nts Data Label THIS COOKER MUST BE INSTALLED The Data Label is located on the rear of the ACCORDING TO BS 6172: 2010 BY A SUITABLY appliance.This appliance is suitable for Natural QUALIFIED GAS SAFE REGISTERED INSTALLER Gas and Universal LPG;... - Page 10 Freestanding Cooker Installation of Cooker flo Emptying of the Burned Gases from Environment CONTACT AN AUTHORISED SERVICE AGENT FOR INSTALLATION OF YOUR OVEN! VENTILATION REQUIREMENTS Air inlet section min 100cm2 Attention: Regardless of room size, all rooms Air inlet section containing the appliance must have direct access to min 100cm2 the outside air via an openable window or equivalent.
- Page 11 Installing your Freestanding Cooker Bringing it all together Gas Connection IMPORTANT - All Gas installations must be carried out by a suitably qualified person. For information on choosing a gas installer contact the ‘Gas Safe Register’. www.gassaferegister.co.uk The appliance can be placed close to other furniture on condition that the furniture’s height does not exceed the height of the cooker panel.
- Page 12 Installing your Freestanding Cooker Bringing it all together Gas Conversion (NG to U-LPG) Setting the minimum level CONVERSION TO A DIFFERENT GAS TYPE MUST BE 1. Light one of the burners and turn the tap to CARRIED OUT BY A SUITABLY QUALIFIED GAS SAFE minimum flame REGISTERED INSTALLER 2.
- Page 13 Installing your Bringing it all together Levelling feet The height and level of the appliance can be adjusted by rotating the feet located underneath the appliance at each corner. Rotate the feet to decrease or increase the height. Safety chain Figure 1.
-
Page 14: Electrical Connection
Installing your Freestanding Cooker Bringing it all together Electrical connection IMPORTANT: Electrical connections must be carried out by a suitably qualified person and in accordance with all relevant local building and installation regulations. Fitting on a Power Supply Cable Connecting appropriate power supply terminal board/ connector block: ... -
Page 15: Using Your Freestanding Cooker
Using your Freestanding Cooker Control panel • Adjusts the flame of the hobs... -
Page 16: Oven Functions
Using your Freestanding Cooker Getting the most from your appliance Oven functions Grill Defrost mode Top & Bottom Element Fan Baking Bottom Element Oven light Grill -The top central heating elements comes on .The extremely high and direct temperature of the grill makes it possible to brown the surface of meats and roasts while locking the juices in to keep them tender. - Page 17 Using your Freestanding Cooker Getting the most from your appliance Programmable Timer As an example: If cooking time takes 45 minutes and you want it to finish at 14:00 This model has a digital display, 24hr clock with 3 control buttons. When the power is connected, the Press the function button repeatedly until screen displays ‘AUTO’...
- Page 18 Using your Freestanding Cooker Getting the most from your appliance Timer The digital countdown timer can be set up to 23 hours and 59 minutes maximum. To set the timer, press the button and then + or - button until the desired time is displayed. Once button is released, the current time and U is displayed.
-
Page 19: General Oven And Cooking Tips Practical
Using your Freestanding Cooker Getting the most from your appliance General oven and cooking tips General Oven Tips The wire shelves should always be pushed firmly to the back of the oven. Baking trays with food cooking on them should be placed level with the front edge of the oven’s wire shelves. -
Page 20: Cooking Advice
Using your Freestanding Cooker Getting the most from your appliance Practical Cooking Advice The oven offers a wide range of alternatives which allow you to cook any type of food in the best possible way. With time you will learn to make the best use of this versatile cooking appliance and the following directions are only a guideline which may be varied according to your own personal experience. -
Page 21: Using The Gas Hob Of Your Cooker
Using your Freestanding Cooker Getting the most from your appliance Controls Gas Burner Components Control knob (Hob top Burners) Instructions for use (hob top burners) The symbols on the control knobs mean the following: Maximum gas flow or ‘high’ flame and These parts can be removed for cleaning lighting position periodically. - Page 22 Using your Freestanding Cooker Getting the most from your appliance To light the hob burners The use of pans in excess of the maximum To light the burner, press the control knob fully diameter recommended in the table above can down and hold the knob down before rotating result in over heating/discoloration of hob surface.
-
Page 23: Care And Maintenance
Care and maintenance Looking after your appliance Cleaning WARNING! Isolate the power supply to the appliance and make sure that the cooker is cool. Before cleaning your cooker or performing maintenance, make sure that the cooking mode selection knob and the cooking temperature selection knob is set to ‘OFF’. -
Page 24: Replacing Oven Lamps
Looking after your appliance Disconnect the oven from the power supply at the fuse-box by means of the switch used to connect the appliance to the electrical mains ;or unplug the appliance. Remove the glass cover of the lamp-holder by rotating anti-clockwise. ... -
Page 25: Technical Specification
NWMC60DFB / NWMC60DFSS Model Voltage and frequency 220-240V AC 50Hz Upper oven power consumption 1600-1900W Lower oven power consumption 1710-2030W Total oven power consumption 3310-3930W Upper oven usable capacity Lower oven usable capacity Semi-rapid Burner 1000W x 1 Auxiliary Burner... - Page 26 Product support Help is always at hand Troubleshooting If you have a problem with your appliance, check the troubleshooting table below to try and rectify your problem before calling your product support service centre. Problem Possible Cause Solution Only parts of the cooker Links may be missing in Refer to the Quick Start work it may be that the ovens...
- Page 27 Product support Help is always at hand Help and assistance If you require any technical guidance or find that your washing machine is not operating as intended, a simple solution can often be found in the Troubleshooting section of these instructions or online at www.newworldassist.co.uk If you still require further assistance, call one of our experts on 0333 305 2263*.
- Page 28 Declaration of conformance to Disposal product standards This appliance/fitting is marked according to the European directive This appliance conforms to all relavant standards 2012/19/EU on Waste Electrical applicable to domestic appliances sold in the UK and Electronic Equipment (WEEE). By ensuring this product is disposed of correctly, you will help prevent potential negative consequences for the environment and human health, which could otherwise be...
- Page 29 Call us now and activate your 24 month guarantee Thank you for choosing New World. Your new product is guaranteed against faults and breakdowns for 24 months. Don’t forget to register it with us today so we can provide you with our best possible after-sales service and useful updates.
- Page 31 Contact: www.newworldassist.co.uk Helpline: 0333 305 2263...
Need help?
Do you have a question about the NWMC60DFB and is the answer not in the manual?
Questions and answers