Table of Contents
Advertisement
Quick Links
DP (Display Port)
DP (Display Port)- 4K Video Secure
KVM Switch
User Manual
1. SV142P1 I/O 4 Port Single DP to DP 4K video Secure KVM with CAC PP3.0
2. SV142P0 I/O 4 Port Single DP to DP 4K video Secure KVM without CAC PP3.0
3. SV242P0 I/O 4 Port Dual DP to DP 4K video Secure KVM without CAC PP3.0
4. SV242P1 I/O 4 Port Dual DP to DP 4K video Secure KVM with CAC PP3.0
5. SV122P1 I/O 2 Port Single DP to DP 4K video Secure KVM with CAC PP3.0
6. SV122P0 I/O 2 Port Single DP to DP 4K video Secure KVM without CAC PP3.0
7. SV222P1 I/O 2 Port Dual DP to DP 4K video Secure KVM with CAC PP3.0
8. SV222P0 I/O 2 Port Dual DP to DP 4K video Secure KVM without CAC PP3.0
Advertisement
Table of Contents

Related Manuals for I/O Interconnect SV142P1


Summary of Contents for I/O Interconnect SV142P1
- Page 1 KVM Switch User Manual 1. SV142P1 I/O 4 Port Single DP to DP 4K video Secure KVM with CAC PP3.0 2. SV142P0 I/O 4 Port Single DP to DP 4K video Secure KVM without CAC PP3.0 3. SV242P0 I/O 4 Port Dual DP to DP 4K video Secure KVM without CAC PP3.0 4.
-
Page 2: Table Of Contents
Table of Contents Introduction ......................3 Package Contents .................3 Item Sold Separately ................3 Safety Precautions ................4 User Guidance & Precautions ...............5 Overview ......................6 Security Features ..................6 Tamper Evident Labels .................6 Other Features ..................7 Equipment Requirements ..............8 ... -
Page 3: Introduction
4-Port Single / Dual / 2-Port Dual DP-DP Secure KVM Switch AC input: 90~264 V AC, 12V 1.5A DC Power Output (Power Adapter) Color Label Sheet USB Cable (CAC version), 6 ft (SV142P1, SV122P1, SV242P1, SV222P1 ) User Manual Rubber Foot Items Sold Separately ... -
Page 4: Safety Precautions
Safety Precautions Please read the following safety precautions carefully before using the product: Before cleaning, disconnect the product from any electrical power supply. Do not expose the product to excessive humidity or moisture. Do not store or use for extensive period of time in extreme thermal conditions – it may shorten product lifetime. ... -
Page 5: User Guidance & Precautions
User Guidance & Precautions Please read the following User Guidance & Precautions carefully before using the product: 1. As product powers-up it performs a self-test procedure. In case of self- test failure for any reason, including jammed buttons, the product will be Inoperable. -
Page 6: Overview
Overview Security Features Product is designed, manufactured and delivered in security-controlled environments. Below is a summary of the main advanced features incorporated in product: Advanced isolation between computers and shared peripherals: The emulations of keyboard, mouse and display EDID, prevent direct contact between computers and shared peripherals. Product design achieves maximal security by keeping the video path separate with keyboard and mouse switched together, purging keyboard buffer when switching channels. -
Page 7: Other Features
Product Enclosure Warning Label I/O Secure Switch has the following warning printed next to the location of the product Asset Tag and Tamper Evident labels on product enclosure: Other Features The I/O Secure DP-DP KVM was designed with the user in mind for today’s IT environment. -
Page 8: Equipment Requirements
One Cable Kit is required per connected computer. Do not attach cables that has microphone or line-in audio input USB A/M - B/M Cables USB Cable, 6 ft .(1.8m); (SV142P1, SV122P1, SV242P1, SV222P1) DP-DP Cables USB Cable, 6 ft .(1.8m) Note: Due to USB and DP-DP signal limitations, the cable length cannot exceed 15 feet (4.6m). -
Page 9: System Requirements
System Requirements Operating Systems Product is compatible with devices running on the following operating systems: Microsoft® Windows® 2000 Microsoft® Windows® Vista Microsoft® Windows® 7 Microsoft® Windows® 8 Microsoft® Windows® 8.1 Microsoft® Windows® 10 Linux®: Kernel 2.6+, RedHat v6.0+, SuSE v8.2+. - Page 10 USB Port The product USB port is compatible with standard USB port, standard 2 or 3 buttons USB mouse or keyboard. Monitor Port The product DP-DP monitor is compatible of the highest resolution. CAC Port The product is compatible for CAC (Common Access Card) reader. PS/2 Port The product is compatible for standard PS/2 keyboard or mouse.
-
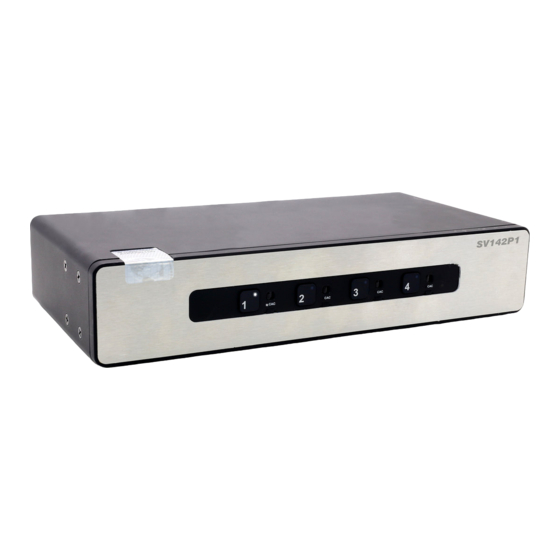
Page 11: Unit Display Diagrams
Unit Display Diagram SV142P1Model Shown Unit Display Diagram, Back View nit Display Diagram, Front View SV142P0 Model Shown Unit Display Diagram, Back View nit Display Diagram, Front View Ioint® Secure DVI 4K KVM Switch User Manual... - Page 12 Model Shown SV242P0 nit Display Diagram, Front View Unit Display Diagram, Back View SV242P1 Model Shown Unit Display Diagram, Back View nit Display Diagram, Front View SV122P1 Model Shown nit Display Diagram, Front View Unit Display Diagram, Back View Ioint® Secure DVI 4K KVM Switch User Manual...
- Page 13 SV122P0 Model Shown nit Display Diagram, Front View Unit Display Diagram, Back View Model Shown SV222P1 nit Display Diagram, Front View Unit Display Diagram, Back View SV222P0 Model Shown nit Display Diagram, Front View Unit Display Diagram, Back View Ioint® Secure DVI 4K KVM Switch User Manual...
-
Page 14: Specifications
Monitor Ports 1 x female connector power adapter with center-pin- positive polarity. AC Input Port Selectors 90 to 264VAC 4 (SV142P1, SV142P0, SV242P0, SV242P1) of Users Supported 4 (SV142P1, SV142P0, 2 (SV122P1, SV122P0, SV222P1, SV242P0, SV242P1) SV222P0) 2 (SV122P1, SV122P0,... -
Page 15: Installation
Installation Pre-Configuration Where to place the Switch: Important: The enclosure of the Switch is designed for desktop or rack-mount configuration. If the unit’s enclosure appears disrupted or if all channel-select Rack-mount brackets are included with the Switch. LEDs Flash continuously, please remove product from Consider the following when deciding where to place the Switch: Service immediately and contact I/O Technical Support at Your proximity to the port selectors on the front of the Switch... -
Page 16: Color Code Label Installation
Step 3 – Connecting the Computers 3.1 Using USB cables, connect each computer to the USB port in “computer interface ports” area on product. 3.2 If computer uses audio output, e.g. speakers/headphones, connect audio cable from its audio output port to the corresponding audio input port on product. 3.3 If the computer uses a smart card/CAC reader, connect a USB cable between the CAC-enabled computer and the corresponding CAC port on product. -
Page 17: Operating The Kvm Switch
Operating the KVM Switch Selecting a Computer Using Port Selectors Now that you have connected your console and computers to the Switch, it is ready for use. You can select which computer you wish to control by Self-Test Procedure: pressing the corresponding port selector on the front of the Switch. -
Page 18: Common Access Card (Cac) Configuration And Operation
Common Access Card (CAC) Configuration and Operation CAC connection to the computer requires a separate USB cable connection and allows the user to specify whether there is a CAC required for that computer or not. This allows the CAC to be connected and controlled separately to the keyboard, mouse, video and audio. -
Page 19: Troubleshooting
Troubleshooting General As product powers-up all channel-select LEDs are turned and then OFF. After that a specific, predefined combination is turned Product is inoperable. The product did not pass self-test procedure. Try to power cycle product. If problem persists please contact your system administrator or our technical support tech@I/O.com . - Page 20 Video I am getting ghosting, shadowing, or fuzzy images on my monitor. Check that all video cables are inserted properly to the Switch, computer, and monitor. With everything connected power-cycle the I/O Secure DP-DP KVM to reset the video. ...
- Page 21 Keyboard The computer does not detect my keyboard, or my keyboard does not work when I switch computers or reboot. Check that the keyboard you are using is connected properly to the Switch, in the USB port labeled “Keyboard.” ...
-
Page 22: Information
We, Interconnect, Inc., of 1202 E. Wakeham Avenue Santa Ana CA 92705, declare under our sole responsibility that the product, SV142P1, SV142P0, SV122P1, SV122P0, SV242P1, SV242P0, SV222P1, SV222P0, to which this declaration relates, complies with Part 15 of the FCC Rules. - Page 23 For information on product disposal please refer to www.I/O.com/ environmental. Australia Declaration of Conformity We, I/O Interconnect, Inc., declare under our sole responsibility that the product SV142P1, SV142P0, SV122P1, SV122P0, SV242P1, SV242P0, SV222P1, SV222P0, to which this declaration relates, are in conformity with the requirements of AS/NZS regulations for Class B Information Technology Equipment (ITE).
- Page 24 Interconnect, Inc., Limited 3-Year Product Warranty What this warranty covers? I/O Interconnect, Inc.(“I/O”) warrants to the original purchaser of this I/O product that the product shall be free of defects in design, assembly, material, or workmanship. What the period of coverage is? I/O warrants the I/O product for three years.
- Page 25 How to get service. To get service for your I/O product you must take the following steps: 1. Contact I/O Interconnect, Inc., at 1202 E WAKEHAM AVE, SANTA ANA CA 92705, Attn: Customer Service, or call (1 (714) 564-1111), within 15 days of the Occurrence.
- Page 26 Reporting Product Security Vulnerability If you are aware of potential security vulnerability with any I/O Government product, we encourage you to contact us immediately at the following email address: info@ioint.com or our technical support line at: 1 (714) 564-1111. After your communication is received, I/O Government personnel will contact you to follow To ensure confidentiality, I/O encourages you to use our PGP encryption key.
- Page 27 © 2018 I/O Interconnect, Inc. All rights reserved. All trade names are registered trademarks of respective manufacturers listed. Windows and Windows Vista are either registered trademarks or trademarks of Microsoft Corporation in the United States and/or other countries. Mac OS is a trademark of Apple Inc., registered in the U.S.
Need help?
Do you have a question about the SV142P1 and is the answer not in the manual?
Questions and answers