Table of Contents
Advertisement
Quick Links
Advertisement
Table of Contents

Related Manuals for Bosch WAX32EH0ES


Summary of Contents for Bosch WAX32EH0ES
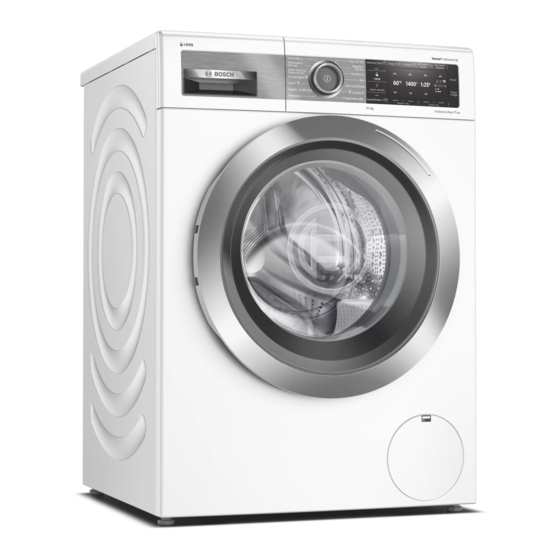
- Page 1 Washing machine WAX32EH0ES [en] User manual and installation instructions...
-
Page 2: Table Of Contents
Table of contents Safety .......... 4 Laundry.......... 38 General information...... 4 Preparing the laundry ..... 38 Intended use........ 4 Sorting laundry ....... 39 Restriction on user group.... 5 Degrees of soiling ...... 39 Safe installation ........ 5 Care symbols on the care labels ... 39 Safe use ........... 7 Detergents and care products.. - Page 3 Connecting the appliance to a Inserting the transit bolts.... 69 WLAN home network (Wi-Fi) Using the appliance again ..... 70 without WPS function ..... 48 Disposing of old appliance .... 70 Connecting your appliance to Customer Service...... 71 the Home Connect app.... 49 Product number (E-Nr.) and pro- Connecting the appliance to the duction number (FD) ...... 71 energy manager ...... 49...
-
Page 4: Safety
en Safety Safety Please read the safety information to ensure that you use the ap- pliance safely. General information You can find general information about this instruction manual here. ¡ Read this instruction manual carefully. Only this will ensure you use the appliance safely and efficiently. ¡... -
Page 5: Restriction On User Group
Safety en Restriction on user group Avoid risks to children and vulnerable persons. This appliance may be used by children aged 8 or over and by people who have reduced physical, sensory or mental abilities or inadequate experience and/or knowledge, provided that they are supervised or have been instructed on how to use the appliance safely and have understood the resulting dangers. - Page 6 en Safety ¡ If the insulation of the power cord is damaged, this is danger- ous. ▶ Never let the power cord come into contact with hot appli- ance parts or heat sources. ▶ Never let the power cord come into contact with sharp points or edges.
-
Page 7: Safe Use
Safety en CAUTION ‒ Risk of injury! ¡ The appliance may vibrate or move when in use. ▶ Place the appliance on a clean, even, solid surface. ▶ Align the appliance using the appliance feet and a spirit level. ¡ If hoses and power cords have been laid incorrectly, this causes a tripping hazard. - Page 8 en Safety ▶ Never expose the appliance to intense heat or humidity. ▶ Do not use steam- or high-pressure cleaners, hoses or sprays to clean the appliance. WARNING ‒ Risk of harm to health! Children can lock themselves in the appliance, thereby putting their lives at risk.
-
Page 9: Safe Cleaning And Maintenance
Safety en ¡ The appliance may tip over if you sit on or lean against the open door. ▶ Do not sit on or lean against the appliance door. ▶ Do not place any objects on the appliance door. ¡ Reaching into the drum while it is still turning may cause hand injuries. - Page 10 en Safety ▶ Only use genuine spare parts when repairing the appliance. ▶ If the power cord of this appliance is damaged, it must be replaced by the manufacturer, the manufacturer's Customer Service or a similarly qualified person in order to prevent any risk.
-
Page 11: Preventing Material Damage
Preventing material damage en Make sure that the valve hous- ▶ Preventing material damage Preventing material dam- ing for the water inlet hose does not come into contact with its surroundings and is not subjec- ted to any external forces. Follow these instructions to avoid ma- Ensure that the inner diameter terial damage and damage to the ap- ▶... -
Page 12: Environmental Protection And Saving Energy
en Environmental protection and saving energy Do not use cleaning products Use the economy programme set- ▶ with a high alcohol content. tings. Do not use hard scouring pads ▶ If you adjust the programme set- or cleaning sponges. tings for a programme, the display Clean the appliance with nothing ▶... -
Page 13: Energy Saving Mode
Installation and connection en The appliance comes with an Aqua- Installation and connection Installation and connec- Sensor. tion During the rinse cycle, the Aqua- Sensor checks the degree of tur- You can find out where and how best bidity of the rinsing water, and ad- to install your appliance here. -
Page 14: Contents Of Package
en Installation and connection Contents of package After unpacking all parts, check for any damage in transit and completeness of the delivery. Requirements for the installa- Washing machine tion location Accompanying documents The appliance may "wander" when it Elbow for fixing the water outlet hose spins. -
Page 15: Removing The Transit Bolts
Installation and connection en Installation location Requirements WARNING Risk of electric shock! On a wooden joist Place the appliance The appliance contains live parts. floor on a water-resistant Touching live parts is dangerous. wooden board which Do not operate the appliance ▶... -
Page 16: Removing The Transport Struts
en Installation and connection Unscrew and remove all four Put on the four cover caps. screws for the transit bolts with a WAF 13 wrench. Press down on the four cover caps. Pull the power cord out of the holder. Removing the transport struts Remove the four sleeves. -
Page 17: Connecting The Appliance
Installation and connection en Unscrew and remove the screws in the vertical transport struts using a T20 screwdriver. Connecting the appliance Connect your appliance to the power Remove the transport struts. supply, water inlet and water outlet. Connecting the water inlet hose Note: Please read the information in the "Safety"... -
Page 18: Aligning The Appliance
en Installation and connection The connection details of the appli- Water outlet connection types ance can be found under "Tech- This information is intended to help nical data" → Page 74. you to connect this appliance to the Check the mains plug is inserted water outlet. - Page 19 Installation and connection en All appliance feet must stand firmly on the ground. Screw the lock nuts tightly against the housing using a WAF 17 wrench. In doing so, hold the foot tight and do not adjust its height.
-
Page 20: Familiarising Yourself With Your Appliance
en Familiarising yourself with your appliance Familiarising yourself with your appliance Familiarising yourself with your appliance Familiarise yourself with the parts of your appliance. Appliance You can find an overview of the parts of your appliance here. On certain models, specific details such as the colour and shape may differ from those pictured. -
Page 21: Detergent Drawer
Familiarising yourself with your appliance en Detergent drawer Manual dosing compartment Below is an overview of the structure / : Dispenser for fabric softener or of the detergent drawer. detergent : Dispenser for detergent Controls The controls are used to configure all functions of your appliance and to obtain information about the operating status. -
Page 22: Operating Logic
en Familiarising yourself with your appliance To select the settings you require, Operating logic press the buttons below the symbols In addition to the actual functions of until the required setting is selected the buttons on the display, you can in the display. also use these buttons to select pro- gramme settings in the main menu and settings in the sub-menus. -
Page 23: Display
Display en Display Display The display shows the current settings, options or relevant information. Example: Display Display Designation Description 0:40 h Programme duration/ Approximate expected programme duration or pro- programme time re- gramme time remaining. maining "Ready in" time The programme end has been set and the remaining number of hours is displayed. - Page 24 en Display Display Designation Description "Save a programme" → Page 42. Saving the programme Set "other programmes" → Page 42. Other programmes Childproof lock ¡ Lights up: The childproof lock is activated. ¡ Flashes: The childproof lock is active and the pro- gramme selector has been adjusted. → "Deactivating the childproof lock", Page 45 Easy Iron The reduced creasing function is activated.
- Page 25 Display en Display Designation Description Water consumption Water consumption for the selected programme. : Low water consumption ¡ : High water consumption ¡ Remote start Remote start is activated. → "Buttons", Page 27 Wi-Fi ¡ Lights up: The appliance is connected to your home network.
-
Page 26: Buttons
en Buttons Buttons Buttons Below is an overview of the buttons The selection of programme settings and their setting options. depends on the selected pro- With the Opciones/Opções button, gramme. You can see the selection you can open the sub-menu for addi- options for each programme in the tional programme settings. - Page 27 Buttons en Button Selection Description Centrif. (Spin Speed) 0 – 1600 rpm Adjust the spin speed or deactivate the spin cycle. If 0 is selected, the water is drained and the spin cycle is deactivated at the end of the washing cycle.
- Page 28 en Buttons Button Selection Description Pre-wash ¡ Activate Activate or deactivate prewash, e.g. for washing heavily soiled laundry. ¡ Deactivate Note: If the intelligent dosing system is activated, the detergent will be dispensed automatically for the prewash and the main wash. If the intelligent dosing system is deactivated, place the detergent for the prewash directly in the drum.
- Page 29 Programmes en Intensivo Plus i-DOS i-DOS Less Ironing Water Plus Soaking Pre-wash Rinse Hold Rinse Plus Stains SpeedPerfect Max. spin speed (rpm) Max. temperature (°C) Max. load (kg)
-
Page 30: Programmes
en Programmes Intensivo Plus i-DOS i-DOS Less Ironing Water Plus Soaking Pre-wash Rinse Hold Rinse Plus Stains SpeedPerfect Max. spin speed (rpm) Max. temperature (°C) Max. load (kg) - Page 31 Programmes en Intensivo Plus i-DOS i-DOS Less Ironing Water Plus Soaking Pre-wash Rinse Hold Rinse Plus Stains SpeedPerfect Max. spin speed (rpm) Max. temperature (°C) Max. load (kg)
- Page 32 en Programmes Intensivo Plus i-DOS i-DOS Less Ironing Water Plus Soaking Pre-wash Rinse Hold Rinse Plus Stains SpeedPerfect Max. spin speed (rpm) Max. temperature (°C) Max. load (kg)
- Page 33 Programmes en Intensivo Plus i-DOS i-DOS Less Ironing Water Plus Soaking Pre-wash Rinse Hold Rinse Plus Stains SpeedPerfect Max. spin speed (rpm) Max. temperature (°C) Max. load (kg)
- Page 34 en Programmes Intensivo Plus i-DOS i-DOS Less Ironing Water Plus Soaking Pre-wash Rinse Hold Rinse Plus Stains SpeedPerfect Max. spin speed (rpm) Max. temperature (°C) Max. load (kg)
- Page 35 Programmes en Intensivo Plus i-DOS i-DOS Less Ironing Water Plus Soaking Pre-wash Rinse Hold Rinse Plus Stains SpeedPerfect Max. spin speed (rpm) Max. temperature (°C) Max. load (kg)
- Page 36 en Programmes Intensivo Plus i-DOS i-DOS Less Ironing Water Plus Soaking Pre-wash Rinse Hold Rinse Plus Stains SpeedPerfect Max. spin speed (rpm) Max. temperature (°C) Max. load (kg)
-
Page 37: Accessories
Accessories en Accessories Accessories Only use original accessories. These have been made especially for your appli- ance. Here you can find an overview of your appliance's accessories and how to use them. Order number Water inlet hose extension Extend the water inlet hose for WMZ2381 cold water or AquaStop (approx. -
Page 38: Laundry
en Laundry Laundry Laundry You can wash all items that the man- ufacturer has marked as machine- washable on the care label and fab- rics made from hand-washable wool using your appliance. Preparing the laundry ATTENTION! To prevent foaming, use only half Objects remaining in the laundry may of the amount of detergent recom- damage the laundry and the drum. -
Page 39: Sorting Laundry
Laundry en – Type of fabric and fibre type Sorting laundry – Whites Note: Please read the information in – Colours the "Safety" → Page 4 and "Prevent- Wash new coloured items ing material damage" → Page 11 sec- separately the first time you tions to ensure that you use the appli- wash them. -
Page 40: Detergents And Care Products
en Detergents and care products Notes Detergents and care products Detergents and care ¡ Only use liquid detergents that are self-flowing products ¡ Do not mix different liquid deter- gents You can protect your appliance and ¡ Do not mix detergent and fabric your laundry by selecting and using softener the correct detergents and care... -
Page 41: Detergent Dosage
Basic operation en Detergent dosage Use the correct detergent dosage to ¡ Water hardness achieve optimal washing results and You can find out how hard your save resources. water is from your local water com- The detergent dosage depends on: pany or measure it yourself using ¡... -
Page 42: Setting A Programme
en Basic operation It may take a few seconds for the Press Main menu to call up the appliance to switch on. main menu. a The appliance performs an audible Adjust the programme settings if function test in the detergent required. drawer. -
Page 43: Loading Laundry
Basic operation en Separate the laundry and place it in the drum. Note: Ensure that there is no laun- dry trapped in the door. Close the door. Adding detergent and care product For programmes in which intelligent dosing is not possible or desirable, you can add detergent to the manual Select a programme. -
Page 44: Soaking Laundry
en Basic operation a The drum rotates and load detec- Cancelling the programme tion takes place. This can take up Once the programme has started, to 2 minutes, after which water enters the drum. you can cancel it at any time. a The display shows either the pro- Note: Please read the information in gramme duration or the "Ready in"... -
Page 45: Switching Off The Appliance
Childproof lock en Childproof lock Childproof lock Secure your appliance against being operated unintentionally using the controls. Activating the childproof lock Press and hold the two Bloquear 3 ▶ seg. buttons for approx. 3 seconds. a The display shows a The controls are locked. Switching off the appliance a The childproof lock remains active even after the appliance has been... -
Page 46: Filling The Dispenser
en Intelligent dosing system can manually add detergent. → "Adding detergent and care product", Page 43 Filling the dispenser Note In order to use intelligent dosing, fill the dispenser. ¡ Fill the dispenser only with suitable "detergent and care products" → Page 40. Close the dispenser lid. ¡... -
Page 47: Basic Dosage
Home Connect en ¡ Please also follow the instructions Basic dosage in the Home Connect app. You can adjust the preset basic Notes dosages for liquid detergent and fab- ¡ Please note the safety precautions ric softener. in this instruction manual and The basic dosage depends on the make sure that they are also ob- manufacturer's instructions for the de-... -
Page 48: Connecting The Appliance To A Wlan Home Network (Wi-Fi) Without Wps Function
en Home Connect Take note of the information in the Confirm the message in the dis- documents for your router. play. flashes in the display. flashes in the display. a The appliance attempts to connect a The appliance now sets up its own to your WLAN home network. -
Page 49: Connecting Your Appliance To The Home Connect App
Home Connect en Carry out the steps in the only when your home photovoltaic Home Connect app to connect the system can provide sufficient energy appliance. or the energy tariff is good. a If the display shows Connected Requirements lights up permanently, the ¡... -
Page 50: Activating Wi-Fi On The Appliance
en Home Connect Press Remote Start. Deactivating Wi-Fi on the ap- a If the display shows Flex Start, pliance Flex Start is activated and the ap- pliance waits to be started by the Press and hold Remote Start for smart energy system (energy man- at least 3 seconds. -
Page 51: Remote Diagnostics
Home Connect app. nect.com Declaration of Conformity Data protection Robert Bosch Hausgeräte GmbH Please see the information on data hereby declares that the appliance protection. with Home Connect functionality The first time your appliance is... -
Page 52: Basic Settings
en Basic settings Basic setting Description Basic settings Basic settings basis Set the basic dosage. → "Detergent You can configure the appliance to dosage", Page 41 meet your needs. Aut. network log-in "Connect the appli- Overview of the basic settings ance to a WLAN home network (Wi-Fi) with Below is an overview of the basic set- WPS function"... -
Page 53: Cleaning And Servicing
Cleaning and servicing en Press Básicos 3 seg. to call up the Cleaning the detergent drawer main menu. If you change detergent or the deter- gent drawer is dirty, clean the deter- gent drawer and the pump unit of the Cleaning and servicing Cleaning and servicing intelligent dosing system. - Page 54 en Cleaning and servicing Clean the detergent drawer and the lid with a soft, damp cloth or hand shower. Empty the detergent drawer. Dry the detergent drawer, lid and pump unit and reinsert them. ATTENTION! The pump unit con- tains electrical components. Do not clean the pump unit in the ▶...
-
Page 55: Descaling
Cleaning and servicing en Push in the detergent drawer. Remove the maintenance flap. Descaling If you add detergent correctly, you do not need to descale your appliance. If you still wish to use descaler, follow the manufacturer's instructions for use. ATTENTION! The use of unsuitable descaling agents, e.g. - Page 56 en Cleaning and servicing CAUTION - Risk of scalding! Cleaning the drain pump When you wash at high temperat- Note: Please read the information in ures, the detergent solution gets the "Safety" → Page 4 and "Prevent- hot. ing material damage" → Page 11 sec- Do not touch the hot detergent ▶...
-
Page 57: Cleaning The Water Outlet Hose At The Siphon
Cleaning and servicing en Insert the maintenance flap and lock it into place. The pump cap is comprised of two parts which can be taken apart for cleaning. Close the maintenance flap. Make sure that the impeller in the drain pump can be rotated. Before the next wash Insert the pump cap. -
Page 58: Cleaning The Water Inlet Filter
en Cleaning and servicing Cleaning the water inlet filter Clean the filter in the water inlet in the event of blockages or if the water pressure is too low. Emptying the water inlet hose In order to clean the filter, first empty the water inlet hose. - Page 59 Cleaning and servicing en Connect the water inlet hose and check for leaks.
-
Page 60: Troubleshooting
en Troubleshooting Troubleshooting Troubleshooting You can rectify minor faults on your appliance yourself. Read the troubleshoot- ing information before contacting after-sales service. This will avoid unneces- sary costs. WARNING Risk of electric shock! Improper repairs are dangerous. Repairs to the appliance should only be carried out by trained specialist ▶... - Page 61 Troubleshooting en Fault Cause troubleshooting i-DOS error, deactivate i- The pump for the intelligent Switch off the appliance. dosing system is blocked. Clean the pump unit. → "Cleaning the detergent drawer", Page 53 If this indicator appears again, call our after-sales service. → "Customer Service", Page 71 Note: You can start the washing pro- gramme if you deactivate the intelli- gent dosing system and dose manu-...
-
Page 62: Malfunctions
en Troubleshooting Malfunctions Fault Cause troubleshooting The appliance is not work- The mains plug of the power Connect the appliance to the power ▶ ing. cord is not plugged in. supply. The circuit breaker is faulty. Check the circuit breaker in the ▶... - Page 63 Troubleshooting en Fault Cause troubleshooting The door cannot be opened. Rinse Hold is activated. Continue the programme by select- ▶ ing Spin or Drain and pressing Ini- cio/Pausa+Carga → "Resuming the programme when the programme status is Rinse Hold", Page 44 The temperature is too high. Wait until the temperature has ▶...
- Page 64 en Troubleshooting Fault Cause troubleshooting Water is not flowing in. De- The water inlet hose is Ensure that the water inlet hose is ▶ tergent is not being dis- kinked or jammed. not kinked or jammed. pensed. The spin cycle runs several The unbalanced load detec- Not a fault –...
-
Page 65: Noise
Troubleshooting en Fault Cause troubleshooting Heavy foam build-up Detergent dosage is too Immediate measure: Mix one table- ▶ high. spoon of fabric softener with 0.5 litres of water and pour the mixture into the compartment for manual dosing (not for outdoor clothing, sportswear or items stuffed with down). -
Page 66: Problem With Results
en Troubleshooting Problem with results Fault Cause troubleshooting Creasing. The spin speed is too high. The next time you run a wash cycle, ▶ set a lower spin speed. The load is too large. The next time you run a wash cycle, ▶... - Page 67 Troubleshooting en Fault Cause troubleshooting Detergent residue on the dry Detergents may contain wa- Brush out the laundry after washing ▶ laundry. ter-insoluble substances that and drying. deposit on the laundry. Unsuitable detergent added Check whether the detergent used to the dispenser of the intelli- is suitable.
-
Page 68: Home Connect Problem
en Troubleshooting Home Connect problem Fault Cause troubleshooting HomeConnect is not work- Different causes are pos- Go to www.home-connect.com. ▶ ing correctly. sible. → "Activating Wi-Fi on the appli- No connection to the home Wi-Fi is switched off. ▶ network. ance", Page 50 Wi-Fi is activated but a con- Ensure that the home network is nection to your home net-... -
Page 69: Emergency Release
Transportation, storage and disposal en Unplug the appliance's mains plug. Emergency release Drain the remaining detergent To remove the laundry in the event of solution. a power failure, for example, you can → "Cleaning the drain pump", manually release the door. Page 55 Detach the hoses. -
Page 70: Using The Appliance Again
en Transportation, storage and disposal Start the Drain programme. a The unused detergent cannot flow straight into the outlet during the next wash. Disposing of old appliance Valuable raw materials can be re- used by recycling. WARNING Risk of harm to health! Insert the power cord into the Children can lock themselves in the holder... -
Page 71: Customer Service
Customer Service en Detailed information on the warranty Customer Service Customer Service period and terms of warranty in your country is available from our after- If you have any queries on use, are sales service, your retailer or on our unable to rectify faults on the appli- website. - Page 72 en Customer Service ¡ A claim can only be made under the guarantee if the appliance has been correctly installed and con- nected with Aqua-Stop according to our instructions; this also in- cludes correctly fitting the Aqua- Stop extension (genuine access- ory).
-
Page 73: Consumption Values
Consumption values en Consumption values Consumption values The following information is provided in accordance with the EU Ecodesign Regulation. The values given for programs other than the Eco 40-60 are indicat- ive only and were determined in accordance with the applicable standard EN60456. -
Page 74: Technical Specifications
en Technical specifications More information about your model Technical specifications Technical specifications can be found online at https://en- ergylabel.bsh-group.com . This web Facts and figures for your appliance address is linked to the official EU can be found here. EPREL product database. At the time of printing its web address had not Appliance height 85,0 cm... - Page 76 Expert advice for your Bosch home appliances, help with problems or a repair from Bosch experts. Find out everything about the many ways Bosch can support you: www.bosch-home.com/service Contact data of all countries are listed in the attached service direct- ory.
Need help?
Do you have a question about the WAX32EH0ES and is the answer not in the manual?
Questions and answers