Sony XAV-AX8000 Operating Instructions Manual
Hide thumbs
Also See for XAV-AX8000:
- User manual ,
- Help manual (124 pages) ,
- Operating instructions manual (27 pages)

Related Manuals for Sony XAV-AX8000


Summary of Contents for Sony XAV-AX8000
- Page 1 5-007-578-22(1) AV RECEIVER Operating Instructions To cancel the demonstration (Demo) display, see page 7. To switch the FM/AM tuning step, see page 7. For the connection/installation, see page 11. XAV-AX8000...
- Page 2 Services offered by third parties may be changed, equipment (applicable in the suspended, or terminated without prior notice. European Union and other Sony does not bear any responsibility in these sorts countries with separate collection of situations. systems)
-
Page 3: Important Notice
Caution devices. Turn off this unit and other BLUETOOTH IN NO EVENT SHALL SONY BE LIABLE FOR ANY devices in the following locations, as it may cause INCIDENTAL, INDIRECT OR CONSEQUENTIAL an accident. -
Page 4: Main Unit
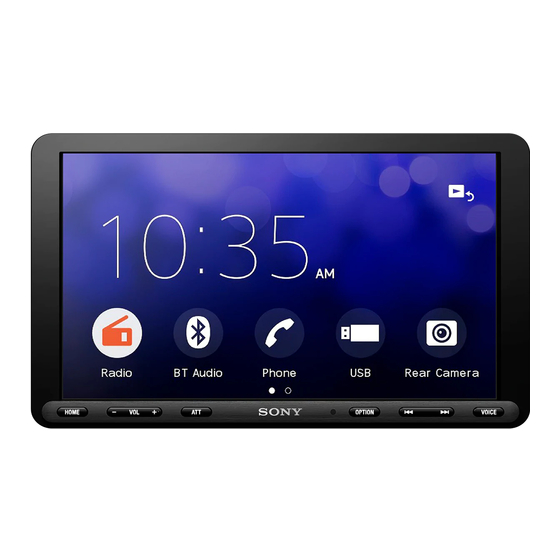
Guide to Parts and Controls Main Unit and Remote Commander Main unit HOME OPTION VOICE OPTION The VOL (volume) + button has a tactile dot. Displays the OPTION screen (page 6). Display/touch panel / (previous/next) HOME Functions differently depending on the selected Displays the HOME screen (page 6). -
Page 5: Rm-X170 Remote Commander
/ (previous/next) RM-X170 remote commander / (fast-reverse/fast-forward) Functions differently depending on the selected The remote commander can be used to operate the source: audio controls. For menu operations, use the touch – Radio: select a preset station. panel. – USB/BT Audio: move to the previous/next file. Press and hold to: –... -
Page 6: Screen Displays
Status indication Screen displays Lights up when the sound is attenuated. Playback screen: Lights up when the Bluetooth® signal is on. Flashes when the connection is in progress. Lights up when the audio device is playable by enabling the A2DP (Advanced Audio Distribution Profile). -
Page 7: Switching The Fm/Am Tuning Step
Canceling the Demonstration Basic Operations Mode Switching the FM/AM Tuning Press HOME, then touch [Settings]. Touch [General], then touch [Demo] to set to Step [OFF]. Set the FM/AM tuning step of your country. To exit the setup menu, touch (back) Press HOME, touch [Settings] ... -
Page 8: Additional Information
Notes on LCD panel • Do not get the LCD panel wet or expose it to liquids. This Additional Information may cause a malfunction. • Do not press down hard on Precautions the LCD panel as doing so can distort the picture or •... -
Page 9: Maintenance
To download, please access the following URL, then select the model name “XAV-AX8000” URL: http://www.sony.net/Products/Linux/ Please note that Sony cannot answer or respond to any inquiries regarding the content of the source code. If you have any questions or problems concerning your unit that are not covered in this Operating Instructions, consult your nearest Sony dealer. -
Page 10: Specifications
The Bluetooth® word mark and logos are registered trademarks owned by the Bluetooth SIG, Inc. and any use of USB port: USB (Hi-speed) such marks by Sony Corporation is under license. Other Maximum current: 1.5 A trademarks and trade names are those of their respective owners. - Page 11 Note on installing in cars with electric parking brake system For cars with electric parking brakes, some related functions Connection/Installation (such as video blocking function) may not work properly. Mounting angle adjustment Cautions Adjust the mounting angle to less than 30°. •...
-
Page 12: Parts List For Installation
Parts List for Installation Power supply leads (1) Mounting screws (5 × max. 9 mm × max. in)) (4) Microphone (1) Flat-mount base (1) Double-sided tape (1) USB extension cable (long) (1) USB extension cable (short) ... - Page 13 Connection Subwoofer* Power amplifier* Rear view camera* * from a wired remote control (not supplied) *4*9 Smartphone, USB device (for audio/video playback)* * FUSE 10A White White/black striped Front speaker* Gray Gray/black striped Green Green/black striped Rear speaker* Purple Purple/black striped Black...
-
Page 14: Making Connections
To the parking brake switch lead *1 Not supplied *2 Speaker impedance: 4 Ω to 8 Ω × 4 The mounting position of the parking brake *3 RCA pin cord (not supplied) switch lead depends on your car. *4 Depending on the type of car, use an adaptor for a wired Be sure to connect the parking brake lead (light remote control (not supplied). -
Page 15: Using The Wired Remote Control
Cautions Installation • It is extremely dangerous if the cord becomes wound around the steering column or gearstick. To install the unit and the display securely, be sure Be sure to keep it and other parts from interfering to follow the steps to in order. with your driving operations. -
Page 16: Setting Up The Display
Using the mounting brackets supplied with your car You may not be able to install this unit in some makes of Japanese cars. In such a case, consult your Sony dealer. Pre-installed screws Slightly loosen the screws until you can slide the Example connector bracket. - Page 17 Adjusting the display angle (tilt) At the desired position, tighten the 3 screws firmly to secure the connector bracket. Remove the 2 pre-installed screws for angle adjustment (on both sides). Tighten the screws firmly. Pre-installed screws When you tighten a screw, be careful not to apply too much torque as doing so may damage Adjust the display angle to decide the the screw (the torque value should be less than...
- Page 18 Making sure the mounting positions Attaching the display to the unit of the display Be careful not to pinch your fingers or scratch the center cluster panel of your car when attaching the Be careful not to pinch your fingers or scratch the display to the unit.
-
Page 19: Fuse Replacement
If the fuse blows, check the power connection and replace the fuse. If the fuse blows again after replacement, there may be an internal malfunction. In such a case, consult your nearest Sony dealer. -
Page 20: Support Site
If you have any questions or for the latest support information on this product, please visit the web site below: https://www.sony-asia.com/support Help Guide (online manual) For more details, please visit the following web site and refer to your unit name as shown below. XAV-AX8000(IN) https://rd1.sony.net/help/ev/xav-ax80/h_zz/ https://www.sony.net/ ©2019 Sony Corporation Printed in Thailand...
Need help?
Do you have a question about the XAV-AX8000 and is the answer not in the manual?
Questions and answers
The screen keeps turn on by itself and turns up also