Sony XAV-AX8100 Operating Instructions Manual
Hide thumbs
Also See for XAV-AX8100:
- Operating instructions manual (61 pages) ,
- Help manual (129 pages) ,
- Operating instructions manual (153 pages)
Table of Contents
Advertisement
Quick Links
F:\Works-G\5025709111\5025709111XAVAX810UC\00COV-XAV-AX810UC\010COV.fm
010COV.book Page 1 Tuesday, October 13, 2020 11:20 AM
AV RECEIVER
Owner's Record
The model and serial numbers are located on the bottom of the
unit.
Record the serial number in the space provided below.
Refer to these numbers whenever you call upon your Sony dealer
regarding this product.
Model No. XAV-AX8100
Serial No.
To cancel the demonstration (Demo) display, see page 7.
For the connection/installation, see page 11.
Pour annuler l'affichage de démonstration (Démo), reportez-
vous à la page 7.
Pour le raccordement/l'installation, reportez-vous à la page 11.
Para cancelar la pantalla de demostración (Demostración),
consulte la página 7.
Para la conexión/instalación, consulte la página 12.
XAV-AX8100
masterpage: Cover
5-025-709-11(1)
Operating Instructions
Mode d'emploi
Manual de instrucciones
XAV-AX8100
5-025-709-11(1)
GB
FR
ES
Advertisement
Table of Contents

Subscribe to Our Youtube Channel
Related Manuals for Sony XAV-AX8100


Summary of Contents for Sony XAV-AX8100
- Page 1 The model and serial numbers are located on the bottom of the unit. Record the serial number in the space provided below. Refer to these numbers whenever you call upon your Sony dealer regarding this product. Model No. XAV-AX8100 Serial No.
- Page 2 If you have any questions about this product: APPLICABLE IN CANADA, INCLUDING IN THE Visit: https://www.sony.com/electronics/support PROVINCE OF QUEBEC. Contact: Sony Customer Information Service Center POUR LES CLIENTS AUX ÉTATS-UNIS. NON at 1-800-222-7669 APPLICABLE AU CANADA, Y COMPRIS LA Write: Sony Customer Information Service Center PROVINCE DE QUÉBEC.
-
Page 3: Important Notice
The remote commander contains a coin/ Caution button cell battery. If the coin/button cell battery is IN NO EVENT SHALL SONY BE LIABLE FOR ANY swallowed, it can cause severe internal burns in just INCIDENTAL, INDIRECT OR CONSEQUENTIAL 2 hours and can lead to death. -
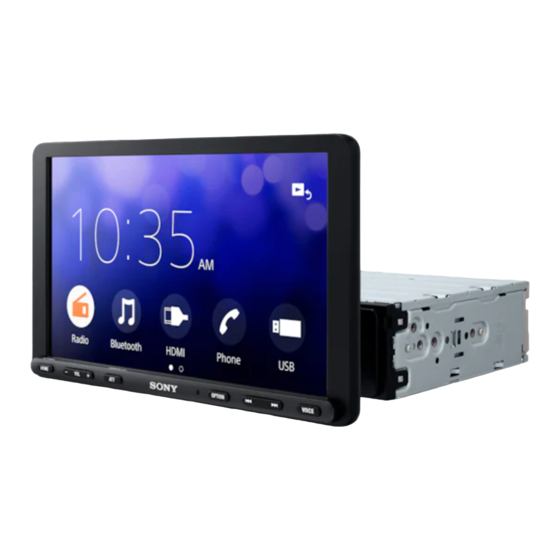
Page 4: Main Unit
Activates the voice command function for Apple Press and hold to turn off the monitor. CarPlay and Android Auto™. To turn back on, touch any part of the display. HDMI connector Receptor for the remote commander XAV-AX8100 5-025-709-11(1) -
Page 5: Rm-X170 Remote Commander
Turns off the monitor. To turn back on, press again. EQ (equalizer) Selects an equalizer curve. Number buttons (0 to 9) CLEAR ATT (attenuate) Attenuates the sound. Press again to cancel the attenuation. (play/pause) XAV-AX8100 5-025-709-11(1) -
Page 6: Screen Displays
Displayed items differ depending on the source. Clock Displays the time which are set on the Date/ Time setting. OPTION screen: (return to the playback screen) Switches from the HOME screen to the playback screen. XAV-AX8100 5-025-709-11(1) -
Page 7: Basic Operations
To exit the setup menu, touch (back) twice. Updating the Firmware To update the firmware, visit the support site on the back cover, then follow the online instructions. Note During the update, do not remove the USB device. XAV-AX8100 5-025-709-11(1) -
Page 8: Additional Information
Do not operate the unit or watch the monitor damaged part as it may cause injury. while driving. • Keep other electrical devices away from the touch panel. They may cause the touch panel to malfunction. XAV-AX8100 5-025-709-11(1) -
Page 9: Maintenance
To download, please access the following URL, then select the model name “XAV-AX8100.” URL: http://www.sony.net/Products/Linux/ Please note that Sony cannot answer or respond to any inquiries regarding the content of the source code. If you have any questions or problems concerning your unit that are not covered in this Operating Instructions, consult your nearest Sony dealer. -
Page 10: Specifications
BLUETOOTH Standard version 3.0 Output: BLUETOOTH Standard Power Class 2 (Max. Conducted +1 dBm) Maximum communication range* Line of sight approx. 10 m (33 ft) Frequency band: 2.4 GHz band (2.4000 GHz – 2.4835 GHz) Modulation method: FHSS XAV-AX8100 5-025-709-11(1) - Page 11 • Do not get the leads trapped under a screw or trademarks owned by Bluetooth SIG, Inc. and any caught in moving parts (e.g., seat railing). use of such marks by Sony Corporation is under • Before making connections, turn the car ignition license. Other trademarks and trade names are off to avoid short circuits.
-
Page 12: Parts List For Installation
60 mm (2 in) 76 mm (3 in) 60 mm (2 Fixing screw (for the joint part) (4 × 6 mm ( × in)) (4) This parts list does not include all the package contents. XAV-AX8100 5-025-709-11(1) - Page 13 White White/black striped Front speaker* Gray Gray/black striped Green Green/black striped Rear speaker* Purple Purple/black striped Black Yellow For details, see “Making Blue/white striped connections” (page 14). Orange/white striped Light green Purple/white striped from a car antenna (aerial)* XAV-AX8100 5-025-709-11(1)
-
Page 14: Making Connections
It will take about 10 seconds to shut down the output of REM OUT after the unit is turned off. To a car’s illumination signal Be sure to first connect the black ground (earth) lead to a common ground (earth) point. XAV-AX8100 5-025-709-11(1) -
Page 15: Using The Wired Remote Control
– the back lamp of your car lights up (or the shift lever is set to the R (reverse) position). Release the lock of the – you press HOME, then touch [Rear Camera]. cable cover when removing it. * USB connector (male) XAV-AX8100 5-025-709-11(1) -
Page 16: Setting Up The Display
Using the mounting brackets supplied with your car You may not be able to install this unit in some makes of Japanese cars. In such a case, consult your Sony dealer. Pre-installed screws Slightly loosen the screws until you can slide the Example connector bracket. - Page 17 (the torque value should be less than When you tighten a screw, be careful not to 1.5 N•m). apply too much torque as doing so may damage the screw (the torque value should be less than 1.5 N•m). XAV-AX8100 5-025-709-11(1)
- Page 18 USB cable along the groove through the catches inside. Tighten the screw firmly. When you tighten a screw, be careful not to apply too much torque as doing so may damage the screw (the torque value should be less than 1.5 N•m). XAV-AX8100 5-025-709-11(1)
-
Page 19: Fuse Replacement
If the fuse blows, check the power connection and replace the fuse. If the fuse blows again after replacement, there may be an internal malfunction. In such a case, consult your nearest Sony dealer. XAV-AX8100 5-025-709-11(1) -
Page 20: Support Site
XAV-AX8100(UC) https://rd1.sony.net/help/ev/xav-ax81/h_zz/ https://www.sony.net/ ©2021 Sony Corporation Printed in Thailand XAV-AX8100 5-025-709-11(1)
Need help?
Do you have a question about the XAV-AX8100 and is the answer not in the manual?
Questions and answers