
Related Manuals for Scandium SC900UMS

Summary of Contents for Scandium SC900UMS
- Page 1 I N S T A L L A T I O N · O P E R A T I O N · M A I N T E N A N C E G U I D E UNDERMOUNT RANGEHOOD SC900UMS...
-
Page 2: Table Of Contents
Index Welcome ............................3 Before Installation ..........................4 Maintenance and Service ...........................5 Maintenance and Service .........................5 LED Bulb Replacement ............................6 Electrical Cord ..............................6 For Users ................................6 Description & Installation .........................7 Rangehood Contents ............................7 Operation ................................7 Cutout Size ................................7 Installation ............................8 Mounting Instructions ............................8 For Installers ................................8 Overhead Cabinet Rangehood Installation Position ..................9 Mounting Points ..............................10... -
Page 3: Welcome
1. Welcome Welcome Thank you for purchasing this Scandium appliance. To achieve the optimal performance from your appliance, and to avoid the risk of accident or damage, it is essential to read this manual before installation and first time use. -
Page 4: Before Installation
2. Before Installation Important • Upon collection or delivery of the appliance, any damage or defects MUST be reported within 48 hours to the retailer or the customer service centre, or no claim will be recognised. • Before installing the electrical connections, you should: –... -
Page 5: Maintenance And Service
3. Maintenance and Service • Stainless steel is very easily damaged during installation if scratched or knocked by tools. Protect the rangehood with the cardboard box or a plastic bag during installation. • CAUTION: Accessible parts may become hot when used with cooking appliances. •... -
Page 6: Led Bulb Replacement
3. Maintenance and Service mild detergent. Do not scrub. NOTE: some discolouration of the frame may occur when washing in the dishwasher. CAUTION: Never use abrasive or oil based liquid cleaners. • If the grease filters are very dirty, the motor will extract only a small quantity of air, which reduces its efficiency. -
Page 7: Description & Installation
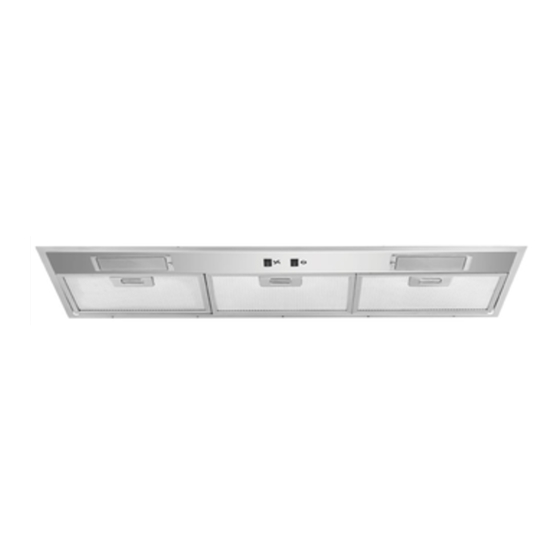
4. Description & Installation Rangehood Contents Power to motor system Male Plug (Main Power 240V) Ducting Outlet 200mm Reducer (150mm - 200mm) Filter Lamp Note: Filter and light quantity may vary from model to model. Operation This rangehood is equipped with an ON/OFF switch. When the “ON” position is selected the unit will run at maximum speed. -
Page 8: Installation
Rangehood distance of less than minimum height above the cooking surface, Distance Scandium declines responsibility for damages suffered by the rangehood due to excess heat or damage to objects, people and Cooktop others caused directly or indirectly by a malfunction, breakage or fire. -
Page 9: Overhead Cabinet Rangehood Installation Position
5. Installation Overhead cabinet Rangehood Installation position It is important to consider the benchtop and overhead cabinetry depth before installing the rangehood. The information below is to be used as a guide only, drawings are not to scale and do not account for all circumstances. -
Page 10: Mounting Points
5. Installation SIDE SIDE VIEW Mounting Points TOP VIEW The diagrams below are a guide for all mounting points. SIDE VIEW SIDE VIEW Side View FRONT VIEW Front View Cabinet Wall Mounting point A and B need to be tightened with slightly angled screws to pull the rangehood up tight to the cabinet. -
Page 11: Installation Example
5. Installation TOP VIEW Installation Example WARNING FRONT VIEW Please remove filters before installations. Failure to do so may damage the clips. BOTTOM VIEW Step 1 Construct cabinet according to rangehood SIDE VIEW SIDE VIEW specifications, make sure it will support the rangehood. -
Page 12: Overview
5. Installation Overview Hi Flow VX120 Motor Roof Seal Kit (Dektite)* Support Straps* Attach Flexi Duct to Bell-Mouth Adaptor using duct tape and cable tie. DO NOT rip the ducting. Motor Power Lead (Male Plug) Rangehood to Motor Lead (Female Plug) Main Power Lead (Male Plug) Flexi Ducting must be pulled taut. -
Page 13: Condensation Information
• Installation distance from cooktop to the rangehood • Speed of food & liquid heating • Angle of ducting – Scandium ‘S’ bend preferred • Filter size - larger canopy preferred • Quality of pots or cookware you are using – high quality recommended How to reduce the possibility of condensation forming: •... -
Page 14: Troubleshooting
7. Troubleshooting Troubleshooting If the product does not work: Before you contact the service centre, make sure the product is plugged in, the electrical fuse (on selected models) is in correctly and electrical wiring is connected. Do not take any action that will damage the product. Rangehood does not work Light does not work Rangehood air suction is weak... -
Page 15: Faulty Installation
Faulty Installation It is not the responsibility of Scandium to rectify any incorrect installations. A service call out fee will be charged for any Scandium technician that attends a call, whereby it’s established that the fault is due to an incorrect installation or non-manufacturing fault. -
Page 16: Specifications
All information supplied is to be used for general reference purposes only and is on the understanding that Scandium will not be liable for any loss, liability or damage of whatever kind arising as a result of any reliance upon such information. All pictures used in the guide are for illustrative purposes only. - Page 17 Page 17...
- Page 18 Page 18...
- Page 19 Page 19...
- Page 20 Australia 8/3-4 Anzed Court, Mulgrave 3170 Victoria. Phone 1300 881 693 Email info@scandiumappliances.com.au Web www.scandiumappliances.com.au New Zealand 5 Tolich Place, Henderson, Auckland 0610. Phone 0800 200 510 Email info.parex@emerson.com Web www.parex.co.nz Distributed by Axis Group International Pty Ltd. ACN 124 141 322 V1090817...
Need help?
Do you have a question about the SC900UMS and is the answer not in the manual?
Questions and answers