Table of Contents
Advertisement
Quick Links
Advertisement
Table of Contents

Related Manuals for Foxpro XWave


Summary of Contents for Foxpro XWave
- Page 2 General Inquiry E-mail: sales@gofoxpro.com Stay up to date with the latest sounds by visiting our online sound library. Watch for ® new products and upgrades from FOXPRO . Visit us online: www.gofoxpro.com This manual, the animal sounds stored in your caller, and animal sounds purchased from ®...
-
Page 3: Table Of Contents
Navigating the XWave ............... 16 Playing Sounds Manually..............16 Moving the Speakers ................. 17 Using a Tripod ................... 17 Accessing the XWave Parameter Menu ..........17 Parameter Menu: Options & Details ..........17 Bluetooth ................... 18 3-10 External Speaker Jacks Specifications ..........19 3-11 Auxiliary Device Jack Specifications .......... - Page 4 XWave Remote Operation ................ 20 What are FOX FEATURES? ..............20 Turning on the XWave Remote ............20 Navigating the XWave Remote ............20 Understanding the XWave Remote Display ........21 Accessing XWave Remote Configuration Menu ........ 23 Smart Light ..................25 Verifying Channel of Operation ............
- Page 5 Temperature Units ................43 Barometer Measurement Units ............43 Elevation .................... 43 About Info ..................44 Restore Defaults ................44 10. XWave Remote USB Operation ..............44 10-1 Editing the Presets File ..............45 10-2 Viewing the FOXDATA File..............45 11.
- Page 6 11-5 Using the FOXPRO Programming Utility ..........48 11-6 Editing the Categories Manually ............50 11-7 Editing the Categories with FOXPRO Utility ........51 11-8 Updating the Remote Playlist ............51 12. Creating FOXCAST Sequence Files ............52 12-1 Creating FOXCAST Sequences Manually ........... 52 12-2 Enabling File Extensions in Windows ..........
-
Page 7: Getting Started
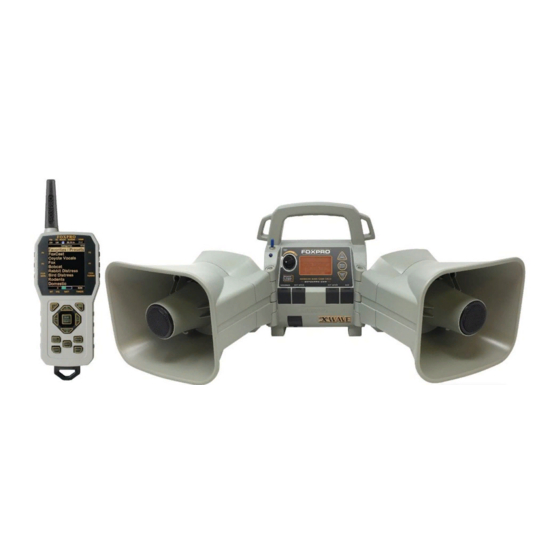
11.1V Lithium Ion Battery Pack/Charger Kit Mini-USB Cable 1-2 XWave: First Glance The graphic on the next page depicts the XWave. Certain aspects of the XWave will be marked with a number which corresponds to the chart defining that particular element. Number... - Page 8 Figure 1-1 XWave Digital Game Call...
-
Page 9: Xwave: Requirements
XWave. Reinstall the battery cover. By default, the XWave’s battery chemistry is preset for the included lithium battery pack. If you are using a different approved battery source, such as 10 ‘AA’ batteries, you will have to change the battery chemistry. To accomplish this, follow the following steps: Turn on the XWave. - Page 10 XWave in temperatures ranging from 40°F to 85°F (5°C to 30°C). • Disconnect any/all accessory devices that may be attached to the XWave prior to charging. This includes external speakers, auxiliary devices, and USB cables. • Make sure that the rechargeable battery pack is installed in the XWave properly.
-
Page 11: Xwave Remote: First Glance
1-5 XWave Remote: First Glance The following chart corresponds to a graphic on the next page that depicts the XWave remote. Certain aspects of the XWave remote will be marked with a number which corresponds to the chart defining that particular element. -
Page 12: Xwave Remote: Requirements
After it is fully powered, the sound list will be displayed. Use the scroll buttons on the front of the XWave to scroll through the available sound list. When you find a sound you wish to play, simply push the “Menu/Select” button to initiate playback. - Page 13 Push “Play/Select” to lock in the setting. The bottom status line of the XWave display can show either the current time or the stand timer. The stand timer will only be displayed if it is turned on—otherwise, the clock will show the current time.
-
Page 14: Playing Sounds Remotely
Section 4. Using Presets/Favorites The XWave remote is capable of storing up to 50 unique presets or favorites. A preset is a shortcut to a particular sound which has a defined volume level. The XWave remote has 4 quick access preset buttons located on the top left and right (see image 1-2 in Section 1). -
Page 15: Xwave Manual Operation
“Play/Select” button, just as if you were picking a sound for normal playback. Presets can also be managed by editing a specific file located within the XWave remote. For the advanced information on this process, please view Section 10. -
Page 16: Navigating The Xwave
Figure 3-1 XWave Front View Number Description XWave display Sound list (displays names or names and numbers depending upon setup) Sound indicator displays the currently selected sound or FOXCAST file Volume level indicator Mute status indicator Battery level indicator Navigating the XWave The up and down scroll buttons (located to the right of the on-board display) allow you to step through your sound list and menu options. -
Page 17: Moving The Speakers
Moving the Speakers The XWave speakers are secured to the back of the XWave housing by rubber straps. You can release the straps from their mounting points to move the speakers. The speakers can be moved from the side-facing position to pointing directly forward or any point there in between. -
Page 18: Bluetooth
FOXCAST sequence files. Bluetooth The FOXPRO XWave game call is not only a predator caller. It also has the ability to function as an external Bluetooth speaker. To enable the Bluetooth function, first make sure the caller is powered on. -
Page 19: External Speaker Jacks Specifications
3-11 Auxiliary Device Jack Specifications The XWave is equipped with an auxiliary jack labeled “AUX”. This jack is located on the front of the XWave. The purpose of this jack is to allow for the connection of certain external devices (such as Jack Predator Decoys) for triggering their action on and off by using the XWave remote control. -
Page 20: Integrated Mini Usb Port
This port allows you to connect a mini USB cable from the XWave to a USB port on a computer for performing such tasks as loading FOXCAST sequence files and reprogramming sounds. Both of these topics will be covered in a later Section. -
Page 21: Understanding The Xwave Remote Display
Understanding the XWave Remote Display The XWave remote control screen can be viewed in three main segments: top status line, primary display area, and bottom status line. The top and bottom status lines are static— meaning that they will always be present. The primary display area is dynamic and will change depending upon the operation that you are performing. - Page 22 Primary Display Area Overview Details The image above shows the primary display area for the XWave remote with default settings using the day theme. Above the menu items you will see “Categories” which is the title of this particular screen. When you enter other menu sections, the title will change accordingly.
-
Page 23: Accessing Xwave Remote Configuration Menu
Accessing XWave Remote Configuration Menu From the sounds screen, push the “Back/Menu” button a single time. This will get the XWave configuration menu to appear. There are a total of five elements that will appear on this menu: FOX FEATURES, Sound Settings, Display/Power, Date/Time(r), and TX1000 Settings. - Page 24 5% - 100% Keypad Brightness of keypad backlight Off – 100% Theme Sets the remote display theme. FOXPRO, Day, Night Disp Timeout Sets the screen timeout delay. 5 seconds, 15 seconds, 30 seconds, 1 minute, 2 minutes, 5 minutes Auto Off...
-
Page 25: Smart Light
Prior to attempting remote controlled operation, it is important that you first verify that both the XWave and XWave remote are set to operate on the same channel. If the two devices are not on the same channel, then radio communication will not be possible. -
Page 26: Playing Sounds With The Remote
“Play/Select” button to lock it in. Default: Categories View When the XWave remote is turned on, the main screen will be displayed. The first item is “Favorites/Presets” followed by “FOXCAST”. The next menu item marks the beginning of the category listings. -
Page 27: Volume & Mute Control
Sound Settings. The available stepping values are 1, 2, 3, and 5. By default, the XWave remote is set for a volume stepping value of 2. Volume can be controlled automatically by a feature called Auto Volume. -
Page 28: Fox Features
These are located on the top left and right sides of your remote control marked with “P1”, “P2”, “P3” and “P4”. If the XWave is muted when selecting a preset, it will remain muted. You can change this configuration with the Preset Mute Override within the menu. - Page 29 Push the “FOXFUSION” button on the right side of the XWave remote. The screen title changes to “FOXFUSION Sounds”. Select the FOXFUSION sound in the same manner you would the primary sound and then push “Play/Select” to initiate playback. Both sounds should now be playing.
-
Page 30: Foxmotion
FOXMOTION will also work with external speakers. By using an external speaker with a longer cable, you can get more distance between the two sounds helping to enhance the effect even more. You cannot turn the speakers off or on with the XWave remote while operating with FOXMOTION. -
Page 31: Foxpitch
When the sensitivity level has been set, push “Play/Select” to lock it in. Tip from FOXPRO The FOXBANG sensor is located inside of the XWave remote. In order for it to detect the gunshot, the remote needs to be relatively close to the firearm (within 5 feet). It is assumed that most hunters will have the remote on a lanyard around their neck. -
Page 32: Auto Volume
User Button The User button is located on the bottom left side of your XWave remote keypad. This button can be assigned a function of your choice for quick one button access. You can choose from preset 5, theme change, FOXBANG, FOXMOTION, Auto Volume, time(r) toggle, timer reset, or backlight. -
Page 33: Foxdata
The recorded data is stored in a CSV file within the remote control. You can access this file by connecting the XWave remote to a PC (see Section 10). CSV files can be opened with popular software titles such as Microsoft Excel. - Page 34 IMPORTANT NOTE Even though FOXDATA provides weather condition selections including rain and snow, be aware that the XWave and XWave remote are not weather proof or weather resistant. Proactive measures should be taken prior to using the devices in adverse weather conditions.
-
Page 35: Foxgrip
Volume Step The XWave remote has a range of volumes from 0 – 40. Increasing the volume in the field by increments of 1 may be too slow for some and therefore this stepping value is configurable. You can choose from 1, 2, 3, and 5. -
Page 36: Primary & Secondary (Foxfusion) Mode
The modes are: Stereo, Mono, and Sep Mon (Separate Mono). By default, the device will be setup for stereo speaker mode. As the XWave has a quad speaker setup (left horn/tweeter and right horn/tweeter) a stereo audio file will be split so that the left channel plays through the left speakers while the right channel plays through the right speakers. -
Page 37: Right And Left Speaker
When the desired option is set, push the “Play/Select” button to lock it in. Preset Mute Override During normal operation, if the XWave is muted and you play a preset, the preset is queued for playback, but it cannot be heard until the caller is un-muted. Preset mute override will take care of this and eliminate the need for un-muting the call upon preset activation. -
Page 38: Brightness
After being idle for an established period of time, the on-screen display will go blank. The XWave remote will not power off completely during display timeout (see Auto Off) and is still completely usable. When the screen completes a timeout cycle, the screen can be reactivated... -
Page 39: Auto Off
Auto Off After being idle for an established period of time, the XWave remote control will completely power down. When this happens, the remote must be powered back on like normal. There are five different time settings that you can use for configuring the auto power off: 30 minutes, 45 minutes, 1 hour, 2 hours, and 4 hours. -
Page 40: Alarm
To get the clock back on the display, simply set the stand timer to off. Alarm The XWave remote features a visual alarm that can be set to go off after a span of time. The available times are represented in minutes: 1 – 60. When the alarm is set and the configured time span passes, the stand timer (or clock if set to display the clock) will begin to flash alerting you. -
Page 41: Date & Date Format
Push “Play/Select” to lock in the setting. The bottom status line of the XWave display can show either the current time or the stand timer. The stand timer will only be displayed if it is turned on—otherwise, the clock will show the current time. -
Page 42: Radio Channel
Any time you reprogram the XWave digital game call to add new sounds or new FOXCAST sequence files, you must download a new copy of the play list to the XWave remote. This menu item will guide you through that process. The entire programming process is covered in more detail later in the manual. -
Page 43: Temperature Units
The pressure is not constant, but changes depending upon altitude and weather conditions. In order to get the most accurate measurement with your XWave remote, it is recommended that you set the elevation value for your location. Atmospheric pressure is the greatest at sea level as compared to higher altitudes. -
Page 44: About Info
Connecting the XWave Remote to a Computer: Connect the USB cable from the jack on the XWave remote to a USB port in the computer. Power on the XWave remote. The screen should activate and show “USB Active”... -
Page 45: Editing The Presets File
When the XWave remote is connected to a computer, you can browse through the device just as you would any other USB storage device. Inside of the file system, you should encounter two files. These files are: File Name Description foxdata.csv... -
Page 46: Programming The Xwave
The FOXPRO XWave digital game call can be completely programmed from home with the use of a computer. It is possible to reprogram a XWave from a Windows based PC as well as a Mac. Both subjects will be covered in this section. -
Page 47: Manual Programming Process
‘Computer’. The next screen will show all of the available drives on this computer. Look for one titled “XWAVE”. Beneath this icon is a letter in parenthesis—make a note of this letter as this is what drive letter the XWave is on. Double-click on this icon to view the files. -
Page 48: Indexing The Files
The XWave can hold up to 1,000 sounds in total. Proper indexing values for all file names range from 000 through 999. If you download a 4 sound pack from FOXPRO, you will see the files in a format similar to:... - Page 49 The last item in the box contains the official download link. To begin the download, click on the "Download" button. If you are upgrading from a previous version of the FOXPRO Programming Utility, there is no need to uninstall the original version before launching the new installer as it will automatically upgrade for you.
-
Page 50: Editing The Categories Manually
Through simple editing of this file, you can easily build your own category names and associated sound lists. The best way to go about doing this is to have your XWave remote control next to you. Turn it on and access the sound list. Next to each one of the sounds is a three-digit number. -
Page 51: Editing The Categories With Foxpro Utility
Beneath that category name you list the sounds numerically based upon their assignment within the XWave remote control. Any time you modify the category file in the XWave, you must download the playlist to the XWave remote control. -
Page 52: Creating Foxcast Sequence Files
IMPORTANT NOTE Verify that the XWave and XWave remote are set to operate on the same channel prior to updating the sound list. If they are not on the same channel, you will have difficulty in getting the list to update. -
Page 53: Enabling File Extensions In Windows
“R” represents repeat. Once the sequence has played entirely, the XWave will play that sequence again until it is interrupted by the operator. The XWave can accept up to 20 FOXCAST sequence files. These files will need to be in a format such as: Example FOXCAST Sequence File Names S00 My Coyote Sequence 1.seq... -
Page 54: Placing Sequences In The Xwave
The XWave digital game call features a mini USB port. Make sure you have the appropriate mini USB type A/B cable for connecting the XWave to a PC. This same cable can be used to connect the XWave remote to your PC as well. -
Page 55: Xwave Remote
You are welcome to contact FOXPRO technical support for assistance in this matter. After you obtain the update file, make sure the XWave is turned off and then connect it to your computer. Be advised, the XWave must remain turned off the entire time it is connected to your computer. -
Page 56: Product Care & Maintenance
14. Product Care & Maintenance In order to help get years of trouble free service with your FOXPRO game call, it is strongly recommended that you read and understand the following points. Many of these are considered proactive or preventative. -
Page 57: Troubleshooting
Before performing anything else, try installing fresh batteries. When your batteries get low, in either the XWave or the XWave remote, unexpected operation can occur. You can experience such things as loss of audio quality, loss of remote control range, and other abnormal results. -
Page 58: Maximizing Remote Range
Remote range can be affected by many factors. Some of these factors can be controlled while others cannot. In order to achieve the best possible remote range with your XWave digital game call system, it is recommended that the following points be observed: •... -
Page 59: Fcc & Ic Information
XWave until that signal is turned into a change in operation that you are able to perceive. It will not always be instantaneous and may take a second or two before a change in operation is detected from your vantage point. - Page 60 RF Exposure Safety Notice The XWave transmitter is not intended to be operated closer than 20cm (about 8 inches) to your body. The transmitter can produce a radiated RF field similar to that of a standard cell telephone, although the duty cycle of this RF field is much lower than that of a cell telephone.
- Page 61 Notes:...
- Page 62 Notes:...
- Page 63 Notes:...
-
Page 64: Warranty Statement
14 Fox Hollow Drive Lewistown, PA 17044 Online Warranty Registration You can register your XWave digital game call online at the following address (locate the Warranty Registration link on the left of this page): http://www.gofoxpro.com/warranty Make sure that you retain a hard copy of your proof of purchase (i.e. store receipt) for any...
Need help?
Do you have a question about the XWave and is the answer not in the manual?
Questions and answers