
Related Manuals for ThunderX3 AD7


Summary of Contents for ThunderX3 AD7
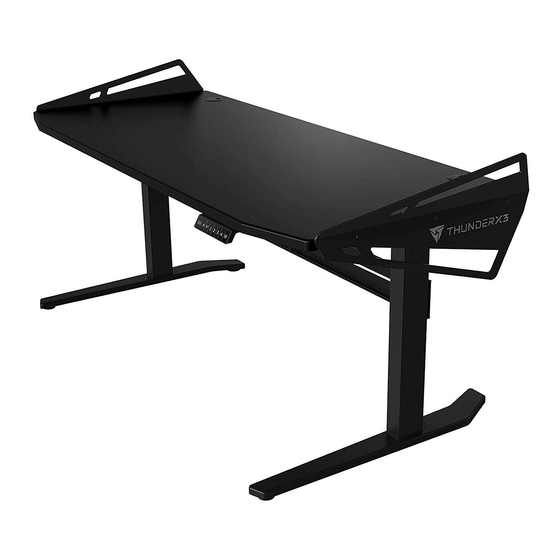
- Page 1 GAMING DESK User’s Manual How to Assemble Manual del usuario 使用说明书 Podręcznik użytkownika Bedienungsanleitung ユーザーズマニュアル Руководство пользователя Manuel d'utilisation нұсқаулары Manual de utilizador Manuale dell'utente Talimatlar 使用說明書...
- Page 2 How to set up HEX RGB remote control Digital control panel Reset Control Panel ThunderX3 designs and creates gaming furniture including Warranty gaming chairs and is a division of Aerocool Advanced Technologies Corporation based in Taipei. We aim to deliver new products for the gaming community that break new market standards and complement the eSports scene.
- Page 3 Please check and ensure the following parts are in the package. If any parts are missing or not included, please call the local distributor for assistance. Local distributor information can be obtained from 'Where to Buy' on thunderx3.com Crosspiece Light bar Control box Control panel...
- Page 4 8 screws, then lock the table beams screws. Si alguna de las piezas falta o no se incluye, llame al distribuidor local para obtener ayuda. En la sección 'Where to Buy (Dónde comprar)' del sitio web thunderx3.com puede obtener información sobre el distribuidor local.
- Page 5 2. Use 4 screws to attach side beams to the table beams. 3. Use 4 screws to lock the crosspiece onto the table legs. M6 x 12 M8 x 10 2. Utilice 4 tornillospara colocar vigas laterales en las vigas de la mesa. 3.
- Page 6 4. Use 8 screws to lock feet onto the table legs, then install 4 foot pads. 5. Place tabletop upside down, adjust the crosspiece and beams to an appropriate length by using allen key to loosen the screws. M6 x 16 Allen Key Foot pads 4.
- Page 7 6. Use 6 screws to lock the table frame onto the tabletop, then lock the crosspiece and beams screws. 7. Use screws to lock the control panel. ST4.8 x 25 Control panel ST3.5 x 19 6. Utilice 6 tornillospara bloquear el marco de la mesa en el tablero, a continuación bloquee el travesaño y los 7.
- Page 8 8. Use screws to lock the light bar and motor onto the desk, then place LED strip onto the light bar. 9. Use 1 screws fix LED strip cable with wire clip. LED strip Wire clip AD7-M x 5 AD7-L x 6 ST4.8 x 19 ST4.8 x 19 8.
- Page 9 Connect power cable and control cable to the control box Conecte el cable de alimentación y el cable del control a la caja de control. Schließen Sie das Netzkabel und das Steuerkabel am Steuerkasten an. Connectez le cordon d'alimentation et le câble de commande au boîtier de commande. Collegare il cavo di alimentazione e il cavo di controllo alla scatola di controllo.
- Page 10 10. Use 6 screws to attach side panels to the desk. 1. Connect USB to computer or charger. 2. Make sure charger's output current is greater than 2A 10. Utilice 6 tornillospara acoplar los paneles laterales al escritorio. 1. Conecte el USB al equipo o al cargador. 2.
- Page 11 3. Remove battery slot from remote control and insert battery. 5. Magnetic remote control adheres to metal frames. 4. Battery model CR2025. 3. Retire la ranura de la pila del mando a distancia 4 . Modelo de batería: CR2025. 5. El mando distancia magnético se adhiere a las estructuras metálicas. e introduzca la pila.
- Page 12 Power On/Off Lock pairing 5. Velocidad de iluminación - Aumentar 8. Brillo - Disminuir Press 5 times to lock or unlock 5. Beleuchtungsgeschwindigkeit – Höher 8. Helligkeit – Niedriger pairing to switch between single Auto lighting mode or multiple devices. 5.
- Page 13 PS. Presione 5 veces para bloquear o desbloquear la sincronización para cambiar entre uno o varios Lock pairing Power On/Off dispositivos (para 2 o más dispositivos) PS. Zum Festlegen oder Aufheben der Kopplung 5-mal drücken, um zwischen einzelnem oder mehreren Press 5 times to lock or unlock Auto lighting mode Geräten umzuschalten (bei 2 oder mehr Geräten)
- Page 14 Digital control panel 5. Modo 2 7. Modo 4 7. Modus 4 5. Modus 2 Height - Up 5. Mode 2 7. Mode 4 5. Modalità 2 7. Modalità 4 Height - Down 5. Tryb 2 7. Tryb 4 5. Режим 2 7.
- Page 15 Set desk to desired height 3. Seleccione el modo deseado y guarde la configuración 3. Modus wählen und Einstellungen speichern Press and hold mode setting button until display flashes 3. Choisissez le mode et enregistrez les réglages 3. Scegliere la modalità e salvare le impostazioni Choose mode and save settings 3.
- Page 16 Reset Control Panel Ripristino del pannello di controllo - If the control panel stops working, you may need reset it. - Se il pannello di controllo smette di funzionare, è possibile ripristinarlo. - Follow these steps to reset: Press and hold the "↑” and "↓" buttons together for about 15s and you will - Attenersi alle istruzioni che seguono per eseguire il ripristino: Tenere premuti contemporaneamente i tasti hear a beep.
- Page 17 制御パネルのリセット - 制御パネルの動作が停止した場合、リセットする必要があります。 - 以下のステップに従い、リセットしてください。 「↑」と「↓」ボタンを同時に約15秒間押し続けると、 ビープ音が聞こえます。 - デスクは最も低い位置まで下がり、別のビープ音が発せられます。 - これで制御パネルがリセットされ、デスクの高度を調整できるようになります。 Басқару тақтасын қалпына келтіру - Егер басқару панелі жұмыс істемей қалса, оны қалпына келтіру қажет болуы мүмкін. - Қайта орнату үшін мына қадамдарды орындаңыз:«↑» жəне «↓» түймелерін 15 секунд бойы бірге басып...
- Page 18 Modifca dell'unità di misura dell'altezza (cm/pollici) 簡中 显示单位切换 1. Tenere premuti contemporaneamente i tasti 1, 2 e M per circa 5 secondi; la misura dell'altezza inzia a 1. 同时长按1、2和M按键大约5秒会直到高度显示画面开始闪烁 lampeggiare e visualizza "C-E". 2. 要改变显示单位为(cm),即,请在荧幕闪烁后5秒内按1按键 2. Per impostare l'unità di misura sui centimetri (cm), premere il tasto 1 entro 5 secondi da quando 3.
- Page 19 Notice 繁中 提示 1. This product must meet all technical specifications. 1. 本產品操作必須符合所有技術規格。 2. Keep this product away from water and corrosive gases. 2. 使本產品遠離水和腐蝕性氣體。 3. Please contact your point of purchase or our local agent if product is defective. 3.
- Page 20 Garantía Warranty AeroCool reparará o reemplazará, sin cargo alguno, cualquier producto(s) o pieza(s) de un producto que presente(n) defectos de material o mano de obra, siempre y cuando se haya(n) utilizado de forma correcta y se realice un mantenimiento adecuado. Daños cubiertos por la Garantía limitada AeroCool will repair or replace, at no charge, any product(s) or part(s) of a Esta Garantía limitada cubre cualquier defecto de material o mano de obra en condiciones normales de uso.
- Page 21 Garantie Gwarancja AeroCool s'engage à réparer ou remplacer, sans frais, tout produit(s) ou partie(s) d'un produit qui s'avère défectueux à Firma AeroCool bezpłatnie naprawi lub wymieni każdy produkt lub część, które podczas normalnego użytkowania cause d'un défaut de matériel ou de fabrication dans des conditions normales d'utilisation et d'entretien. okażą...
- Page 22 Garantía 保固 AeroCool irá reparar ou substituir, sem nenhum custo adicional, quaisquer produto(s) ou peça(s) de um produto que Aerocool将免费维修或更换由于材料或工艺不当导致有缺陷的产品部件及零件。 apresentar(em) algum defeito por causa de material ou mão-de-obra inadequada, sob condições normais de uso e manutenção. 正常保固包含 Cobertos pela Garantia Limitada 只提供在正常使用下的材料或工艺缺陷之有限保固。...
- Page 23 Кепілдік การรั บ ประกั น AeroCool компаниясы қалыпты пайдалану жəне қызмет көрсету кезінде жарамсыз материал немесе дұрыс AeroCool จะซ่ อ มหรื อ เปลี ่ ย นผลิ ต ภั ณ ฑ์ ห รื อ ชิ ้ น ส่ ว นของผลิ ต ภั ณ ฑ์ ท ี ่ พ ิ ส ู จ น์ ไ ด้ ว ่ า มี ข ้ อ บกพร่ อ งเนื ่ อ งจากวั ส ดุ ห รื อ ฝี ม ื อ การผลิ ต ที ่ өндірмеу...
- Page 24 THUNDERX3.com...
Need help?
Do you have a question about the AD7 and is the answer not in the manual?
Questions and answers