Table of Contents
Advertisement
Available languages
Available languages
Quick Links
Advertisement
Table of Contents

Related Manuals for Olympia A 235


Summary of Contents for Olympia A 235
- Page 1 Laminiergerät Laminator Plastifieuse Aparato laminador Plastificatrice Lamineerapparaat Laminátor Olympia Business Systems Vertriebs GmbH Weg zum Wasserwerk 10 D-45525 Hattingen http://www.olympia-vertrieb.de (15.04.2010)
-
Page 2: Table Of Contents
Deutsch Wichtige Sicherheitsanweisungen.................6 Empfehlung......................7 Haftungsausschluss....................7 Bestimmungsgemäße Verwendung ..............7 Übersicht ......................8 Leistungsmerkmale....................9 Heißlaminieren....................10 Kaltlaminieren .....................11 Folienstau beheben ....................11 Pflege und Reinigung..................12 Fehlerbehebung....................12 Entsorgungshinweis ....................13 Garantie ......................13 English Important Safety Information................14 Recommendation....................15 Exemption From Liability..................15 Intended Use.......................15 Overview ......................16 Features ......................17 Hot Laminating....................18 Cold Laminating ....................19 Clearing Foil Jams ....................19 Cleaning and Servicing ..................20... - Page 3 Français Consignes importantes de sécurité ..............22 Recommandation....................23 Exclusion de la garantie ..................23 Utilisation conforme aux prescriptions..............23 Vue d’ensemble ....................24 Caractéristiques de performance ................25 Plastification à chaud ..................26 Plastification à froid.....................27 Elimination de bourrage ..................27 Entretien et nettoyage ..................28 Elimination d'erreurs ...................28 Reseignement sur la évacuation.................29 Garantie ......................29 Español...
- Page 4 Italiano Istruzioni importanti di sicurezza .................39 Consiglio ......................40 Esclusione di responsabilità................40 Impiego conforme alle disposizioni ..............40 Vista generale .....................41 Caratteristiche di prestazione................42 Plastificazione a caldo..................43 Plastificazione a freddo ..................44 Rimuovere l'intasamento da pellicola..............45 Cura e pulizia ......................45 Soluzione di problemi..................46 Indicazione sopra l’eliminazione dei rifiuti ............47 Garanzia ......................47 Nederlands...
- Page 5 Česky Důležité bezpečnostní pokyny................56 Doporučení ......................57 Vyloučení záruky....................57 Použití přístroje odpovídající jeho původnímu určení..........57 Přehled ......................58 Výkonnostní znaky....................59 Laminování za tepla....................60 Laminování za studena ..................61 Odstranění nakupené fólie ..................61 Údržba a čištění ....................62 Odstranění závady....................62 Pokyny k likvidaci ....................63 Záruka ......................63...
-
Page 6: Wichtige Sicherheitsanweisungen
Wichtige Sicherheitsanweisungen Um ein zuverlässiges Arbeiten mit dem Laminiergerät zu gewährleisten, beachten Sie bitte Folgendes: Lesen Sie diese Anweisungen bitte sorgfältig durch und beach- ten Sie sie bei der Handhabung Ihres Gerätes. Bedienungsanleitung für zukünftige Benutzung aufbewahren Beschädigung des Netzsteckers oder Netzkabels vermeiden. Netzkabel nie verdrillen. -
Page 7: Empfehlung
Die Steckdose und der Netzanschluss des Gerätes müssen aus Sicherheitsgründen frei zugänglich sein, damit die Stromversorgung im Notfall schnell getrennt werden kann! Das Gerät darf nur in trockenen, geschlossenen Räumen benutzt werden. Empfehlung Wenn sehr weiche Materialien (wie Servietten) oder kleine Formate laminiert werden sollen, dann empfehlen wir zur Vermeidung von möglichen Staus das Lamieniergut zusätzlich in ein gefaltetes Blatt Papier zu legen. -
Page 8: Übersicht
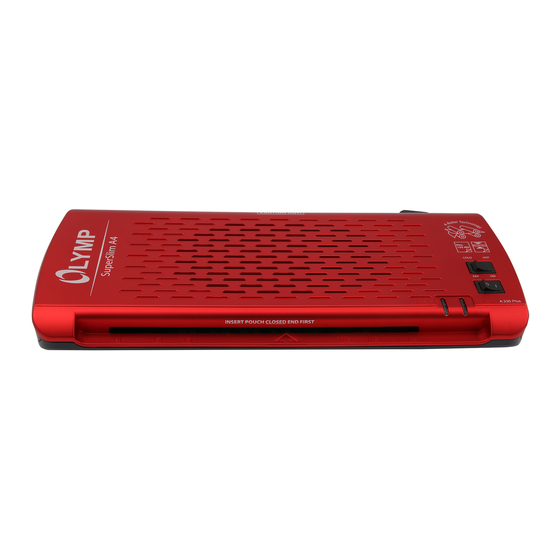
Übersicht Folienstau beheben – Jam Release Schalter Kalt- / Heißlaminieren Linke Schalterstellung = Kaltlaminieren Mittlere Schalterstellung = Heißlaminieren 80 μm Rechte Schalterstellung = Heißlaminieren 125 μm EIN/AUS-Schalter (ON/OFF) Rote LED (Power) Gerät eingeschaltet Grüne LED (READY) Gerät bereit Einführschlitz Ausgabeschlitz... -
Page 9: Leistungsmerkmale
Leistungsmerkmale Schutz und Veredelung für Ihre Dokumente. Laminiert Fotos, Dokumente, Grafiken, Ausweise usw. bis Größe DIN A4. Das Gerät arbeitet mit 4 Heizwalzen, hat eine schnelle Aufwärmzeit und la- miniert ohne Träger. • 2 LED Lampen zeigen die Betriebszustände an •... -
Page 10: Heißlaminieren
Heißlaminieren Schließen Sie das Stromkabel an eine gut zugängliche Standard- steckdose an. Achtung: Prüfen Sie, ob die Spannungsangabe des Gerätes mit der Ihres Stromnetzes übereinstimmt (220 - 240 V, 50 Hz). Schalten Sie den Ein/Aus-Schalter an der rechten Geräteoberseite ein (I). Der Antriebsmotor für die Transportrollen läuft an, die rote Anzeige- leuchte (POWER) leuchtet und die Aufwärmphase beginnt. -
Page 11: Kaltlaminieren
Kaltlaminieren Schließen Sie das Stromkabel an eine gut zugängliche Standard- steckdose an. Achtung: Prüfen Sie, ob die Spannungsangabe des Gerätes mit der Ihres Stromnetzes übereinstimmt (220 - 240 V, 50 Hz). Schalten Sie den Ein/Aus-Schalter an der rechten Geräteoberseite ein (I). Der Antriebsmotor für die Transportrollen läuft an, die rote Anzeige- leuchte (POWER) und die grüne Anzeigeleuchte (READY) leuchten. -
Page 12: Pflege Und Reinigung
Pflege und Reinigung Ablagerungen und Klebereste an den Transportwalzen können das Lami- nierergebnis beeinflussen. Darum müssen die Transportwalzen regelmäßig nach der Benutzung gereinigt werden: Hierzu ein gefaltetes Blatt Papier in den Einführschlitz einführen. Klebereste werden vom austretenden Papier mitgenommen. Den Vorgang mehrmals wiederholen. -
Page 13: Entsorgungshinweis
Garantie Bitte unbedingt aufbewahren! Lieber Kunde, wir freuen uns, dass Sie sich für das Olympia Laminiergerät A 235 entschie- den haben. Sollte sich an Ihrem Gerät wider Erwarten ein technisches Prob- lem ergeben, beachten Sie bitte folgende Punkte: • Die Garantiezeit für Ihr Gerät beträgt 24 Monate. -
Page 14: Important Safety Information
Important Safety Information Please observe the following information to ensure reliable operation of the laminator: Read this manual thoroughly and observe the instructions and information in it when operating the unit. Keep the operating instruction manual available for future refer- ence Prevent damage to the power plug and power cable. -
Page 15: Recommendation
Recommendation If very soft materials (such as serviettes) or small formats are to be lami- nated, then we recommend placing these within a folded piece of paper to avoid possible jamming. The piece of paper has to be placed in the lamina- tion device with the folded edge first. -
Page 16: Overview
Overview Clearing Foil Jams – Jam Release Hot Cold Laminating switch Left position = Cold laminating Center position = Hot laminating 80 μm Right position = Hot laminating 125 μm On/Off switch (ON/OFF) Red LED (Power) Device switched on Green LED (READY) Device ready Insertion slot Discharge slot... -
Page 17: Features
Features Protection and refinement of your documents. Laminate photographs, documents, graphics, identity cards etc. up to A4 size. The unit operates using 4 heating rollers, has a quick warm-up phase and laminates without a carrier. • 2 LED lamps indicate the operating states •... -
Page 18: Hot Laminating
Hot Laminating Connect the power cable to an easily accessible, standard electrical socket. Caution: Check that the voltage specifications of the unit correspond to that of your power supply network (220 - 240 V, 50 Hz). Switch on the On/Off switch on the top, right-hand side of the unit (I). -
Page 19: Cold Laminating
Cold Laminating Connect the power cable to an easily accessible, standard electrical socket. Caution: Check that the voltage specifications of the unit correspond to that of your power supply network (220 - 240 V, 50 Hz). Switch on the On/Off switch on the top, right-hand side of the unit (I). -
Page 20: Cleaning And Servicing
Cleaning and Servicing Deposits and residual adhesive on the transport rollers can influence the re- sults of the laminating process. Therefore, the transport rollers must be cleaned periodically after use: To do this, insert a folded piece of paper in the insertion slot. Residual adhe- sive is removed and taken up by the paper when ejected. -
Page 21: Disposal Notes
Disposal Notes This symbol [the crossed-out wheeled bin/PICTURE] means that the product should be brought to the return and or separate collection systems available to end-users, when the product has reached the end of its lifetime. This symbol applies only to the countries within the EEA. -
Page 22: Consignes Importantes De Sécurité
Consignes importantes de sécurité Afin de garantir un travail fiable avec la machine à plastifier, veuillez tenir compte des points suivants : Veuillez lire attentivement ces instructions et tenez-en compte lors du maniement de votre machine. Conservez le mode d'emploi pour une utilisation future Evitez tout endommagement de la prise de secteur ou du câble de réseau. -
Page 23: Recommandation
Eloignez de l'ouverture d'introduction toute partie de vêtement qui bouge, cravates, bijoux, cheveux longs ou autres objets à l'air libre. Risque de blessures ! Pour des raisons de sécurité, la prise et le raccordement au ré- seau doivent être facile-ment accessibles afin de pouvoir inter- rompre rapidement l’alimentation électrique en cas d’urgence ! N’utilisez votre appareil que dans des pièces fermées et sèches. -
Page 24: Vue D'ensemble
Vue d’ensemble Éliminer le bourrage de pochette – „Jam Release“ Interrupteur plastification à froid / à chaud Position de l’interrupteur à gauche = plastification à froid Position de l’interrupteur centrale= plastification à chaud 80 μm Position de l’interrupteur à droite = plastification à chaud 125 μm Interrupteur MARCHE/ARRÊT (ON/OFF) LED rouge (Power) Appareil allumé... -
Page 25: Caractéristiques De Performance
Caractéristiques de performance Protection et façonnage de vos documents. Plastifie photos, documents, graphiques, papiers d'identité etc. d'une taille A4 max.. L'appareil travaille avec 4 rouleaux chauffants, a un temps d’échauffement rapide et plastifie sans support. • 2 lampes DEL indiquent les états de fonctionnement •... -
Page 26: Plastification À Chaud
Plastification à chaud Branchez le câble électrique dans une prise de courant standard facile d'accès. Attention : Contrôlez si les données relatives à la tension de l'appa- reil correspondent bien à celles de votre réseau (220 - 240 V, 50 Hz). Branchez l'interrupteur Marche/Arrêt situé... -
Page 27: Plastification À Froid
Plastification à froid Branchez le câble électrique dans une prise de courant standard facile d'accès. Attention : Contrôlez si les données relatives à la tension de l'appa- reil correspondent bien à celles de votre réseau (220 - 240 V, 50 Hz). Branchez l'interrupteur Marche/Arrêt situé... -
Page 28: Entretien Et Nettoyage
Entretien et nettoyage Des dépôts et des restes de colle sur les rouleaux de transport peuvent in- fluencer le résultat de la plastification. C'est pourquoi les rouleaux de trans- port doivent être nettoyés périodiquement après l'emploi : A cet effet, introduire une feuille de papier pliée dans la fente d'introduction. Les restes de colle seront emportés par le papier sortant. -
Page 29: Reseignement Sur La Évacuation
Reseignement sur la évacuation Ce symbole (un conteneur à déchets barré d´une croix) signifie que le produit, en fin de vie, doit être retourné à une des systèmes de collecte mis à la disposition des utilisateurs finaux. Ce symbole s’applique uniquement aux pays de l’EEE. EEE = Espace économique européen, qui regroupe les États membres de l’UE plus la Norvège, l’Islande et le Liechtenstein. -
Page 30: Instrucciones De Seguridad Importantes
Instrucciones de seguridad importantes Tenga en cuenta los aspectos siguientes a fin de garantizar un trabajo fiable con el aparato laminador: Lea las presentes instrucciones detenidamente y tenga las mismas en cuenta a la hora de manejar el aparato. Guardar el manual de instrucciones para cualquier utilización posterior Evitar cualquier daño de la clavija de red o del cable de red. -
Page 31: Recomendación
sufrirían daños. No corte las fundas de película transparente. Los cantos de corte que se producen pueden originar atascos de película transparente. Las partes sueltas de la ropa, corbatas, bisutería, pelo largo u otros objetos sueltos deben mantenerse alejados del orificio de entrada. ¡Peligro de lesiones! Por motivos de seguridad, la caja de enchufe y la conexión a red del aparato deberán quedar accesibles, para facilitar la... -
Page 32: Vista General
Vista general Eliminar un atasco de película transparente - Jam Release Interruptor para laminación en frío / caliente Posición de interruptor izquierda = Laminación en frío Posición de interruptor central = Laminación en caliente 80 μm Posición de interruptor derecha = Laminación en caliente 125 μm Interruptor CON/DES (ON/OFF) LED rojo (Power): aparato encendido LED verde (READY): aparato preparado... -
Page 33: Características Prestacionales
Características prestacionales Protección y mejora de sus documentos. Para laminar fotos, documentos, gráficos, Documentos Nacionales de Identidad, etc. hasta un tamaño máximo de DIN A4. El aparato trabaja con 4 rodillos calefactores, tiene un rápido Tiempo de calentamiento y lamina sin materias portantes. -
Page 34: Laminación En Caliente
Laminación en caliente Conecte el cable de corriente a una caja de enchufe estándar fácilmente accesible. Atención: Compruebe si la indicación de tensión del máquina coincide con la de su red de corriente (220 - 240 V, 50 Hz). Conecte el interruptor de conectado/desconectado en la parte superior derecha del aparato (I). -
Page 35: Laminación En Frío
Laminación en frío Conecte el cable de corriente a una caja de enchufe estándar fácilmente accesible. Atención: Compruebe si la indicación de tensión del máquina coincide con la de su red de corriente (220 - 240 V, 50 Hz). Conecte el interruptor de conectado/desconectado en la parte superior derecha del aparato (I). -
Page 36: Eliminar Un Atasco De Pelíula Transparente
Eliminar un atasco de pelíula transparente Este aparato laminador está equipado con la función "ABS“ para poder eliminar rápidamente cualquier atasco de película transparente. En caso de bloqueo de la película transparente se debe desconectar el aparato y posicionar el interruptor en la parte derecha del aparato a la posición "Jam Release“. -
Page 37: Eliminación De Fallos
Eliminación de fallos Error Soluciones • El LED rojo (POWER) no se • Compruebe si el cable de corriente ilumina está correctamente enchufado en la caja de enchufe estándar. • El aparato no reacciona • Si no ha sido posible eliminar el error rogamos se ponga en contacto con nuestra línea de asistencia telefónica. -
Page 38: Indicación Sobre La Eliminación De Residuos
Indicación sobre la eliminación de residuos Este símbolo (imagen de un cubo de basura tachado) significa que el producto deberia ser llevado a los sistemas de recogida dispuestos para los usuarios finales cuando llegue al final de su vida útil. Este símbolo solo tiene validez en los países de la EEA. EEA incluye a los países miembros de la UE y Noruega, Islandia y Liechtenstein. -
Page 39: Istruzioni Importanti Di Sicurezza
Istruzioni importanti di sicurezza Per garantire un funzionamento affidabile della plastificatrice, si prega di osservare quanto segue: Leggere attentamente queste istruzioni ed osservarle scrupolo- samente nell'utilizzo del vostro apparecchio. Conservare le istruzioni per l'uso per gli utilizzi futuri Evitare danneggiamenti della spina o del cavo di alimentazione. Non attorcigliare il cavo di alimentazione. -
Page 40: Consiglio
Tenere lontano dall'apertura di inserimento le parti libere del- l'abbigliamento, cravatte, gioielli, capelli lunghi o altri oggetti li- beri. Pericolo di lesioni! Per motivi di sicurezza, la presa e il cavo di rete dell’apparecchio devono essere facilmente accessibili per poter disinserire l’alimentazione elettrica in caso d’emergenza! Impiegare l’apparecchio solo in ambienti chiusi, asciutti. -
Page 41: Vista Generale
Vista generale Rimozione intasamento da pellicola – Jam Release Interruttore per plastificazione a freddo/caldo Interruttore a sinistra = plastificazione a freddo Interruttore al centro = plastificazione a caldo 80 μm Interruttore a destra = plastificazione a caldo 125 μm Interruttore di accensione/spegnimento (ON/OFF) LED rosso (Power) apparecchio inserito LED verde (READY) apparecchio pronto all’esercizio Apertura di introduzione... -
Page 42: Caratteristiche Di Prestazione
Caratteristiche di prestazione Protezione e valorizzazione per i vostri documenti. Plastificazione di fotografie, documenti, grafiche, tessere ecc. fino ad alla grandezza DIN A4. L'apparecchio dispone di 4 rulli a caldo, il tempo di ri- scaldamento è breve e la plastificazione viene eseguita senza supporto. •... -
Page 43: Plastificazione A Caldo
Plastificazione a caldo Collegare il cavo di alimentazione ad una presa di corrente facilmente accessibile. Attenzione: Verificare che il valore di tensione dell'apparecchio corri- sponda con quello della rete elettrica (220 - 240 V, 50 Hz). Accendere l'interruttore ON/OFF sul lato superiore destro dell'appa- recchio (I). -
Page 44: Plastificazione A Freddo
Plastificazione a freddo Collegare il cavo di alimentazione ad una presa di corrente facilmente accessibile. Attenzione: Verificare che il valore di tensione dell'apparecchio corri- sponda con quello della rete elettrica (220 - 240 V, 50 Hz). Accendere l'interruttore ON/OFF sul lato superiore destro dell'appa- recchio (I). -
Page 45: Rimuovere L'intasamento Da Pellicola
Rimuovere l'intasamento da pellicola Questa plastificatrice è equipaggiata con la funzione „Jam Release / Rimo- zione intasamento“, allo scopo di rimuovere rapidamente eventuali intasa- menti causati dalle pellicole. In presenza di un intasamento causato dalla pellicola, spegnere l'ap- parecchio e spostare l'interruttore presente rispettivamente sul lato destro in posizione di „ABS / Rimozione intasamento“. -
Page 46: Soluzione Di Problemi
Soluzione di problemi Problema Soluzione • Spia LED rossa (POWER) non si • Controllare il corretto inserimento accende più del cavo elettrico nella presa stan- dard. • Apparecchio non reagisce • Nel caso di mancata soluzione del problema, rivolgersi alla nostra hotline. -
Page 47: Indicazione Sopra L'eliminazione Dei Rifiuti
Indicazione sopra l’eliminazione dei rifiuti Questo simbolo significa che il prodotto, giunto a fine vita, dovrebbe essere conferito ai punti di raccolta differenziata a disposizione dell’utente finale. Questo simbolo si applica ai paesi aderenti all’EEA. EEA = Europea Economic Area che comprende gli stati membri dell’EU, compresi Norvegia, Islanda e Liechtenstein. -
Page 48: Belangrijke Veiligheidsinstructies
Belangrijke veiligheidsinstructies Neem het volgende in acht om er zeker van te zijn dat u het lamineerapparaat correct gebruikt: Lees deze instructies aandachtig door en volg ze op bij het gebruik van het apparaat. Gebruiksaanwijzing voor toekomstig gebruik bewaren Beschadiging van netstekker en netsnoer voorkomen. Netsnoer niet laten opkrullen. -
Page 49: Advies
Stopcontact en netstekker van het apparaat moeten om redenen van veiligheid vrij toegankelijk zijn opdat u de stroomvoorziening in geval van nood snel kunt onderbreken! Het apparaat mag alleen in gesloten, droge ruimten worden gebruikt. Advies Als zeer zachte materialen (zoals servetten) of kleine formaten moeten worden gelamineerd dan adviseren wij om het materiaal in een gevouwen vel papier te leggen. -
Page 50: Overzicht
Overzicht Vastgelopen folie losmaken – Jam Release Schakelaar Koud-/Heetlamineren Schakelaar in linkerstand = koudlamineren Schakelaar in middelste stand = heetlamineren 80 μm Schakelaar in rechterstand = heetlamineren 125 μm AAN/UIT-schakelaar (ON/OFF) Rode led (Power) Apparaat ingeschakeld Groene led (READY) Apparaat gereed Invoeropening Uitvoeropening... -
Page 51: Kennmerken
Kennmerken Bescherming en veredeling van uw documenten. Lamineert foto's, documenten, grafieken, pasjes enzovoort tot formaat DIN A4. Het apparaat werkt met 4 verwarmingsrollen heeft een korte opwarmtijd en lamineert zonder drager. • 2 LED's signaleren de bedrijfsstatus • Automatische uitschakeling bij oververhitting •... -
Page 52: Heetlamineren
Heetlamineren Steek de netstekker in een goed bereikbaar stopcontact. Let op: Controleer of de voedingsspanning die op het apparaat vermeld staat overeenkomt met die van het elektriciteitsnet (220 – 240 V, 50 Hz). Schakel de Aan/Uit-schakelaar aan de rechterbovenkant van het apparaat in (I). -
Page 53: Koudlamineren
Koudlamineren Steek de netstekker in een goed bereikbaar stopcontact. Let op: Controleer of de voedingsspanning die op het apparaat vermeld staat overeenkomt met die van het elektriciteitsnet (220 – 240 V, 50 Hz). Schakel de Aan/Uit-schakelaar aan de rechterbovenkant van het apparaat in (I). -
Page 54: Verzorging En Reiniging
Verzorging en reiniging Aangekoekt materiaal en lijmresten op de transportrollen kunnen het lamineerresultaat verslechteren. Daarom moeten de transportrollen regelmatig na gebruik worden schoongemaakt: Hiervoor een gevouwen blad papier in de invoeropening steken. Lijmresten worden door het eruit komend papier meegenomen. Deze handeling enkele malen herhalen. -
Page 55: Verwijderings Tip
Verwijderings tip Dit symbool betekent dat het Product na zijn levensduur naar een verzamelpunt wordt terug gebracht door de laatst verkopende. Dit symbool geldt alleen in de Staten van de E.W.R. E.W.R. = Europa´s gebied: welke de EU staten + de Noorwegen, Ysland en Lichtenstein omringd. -
Page 56: Důležité Bezpečnostní Pokyny
Důležité bezpečnostní pokyny Respektujte prosím následující pokyny, aby bylo zaručeno spolehlivé zacházení s laminátorem: Pozorně si prosím pročtěte tyto pokyny a dodržujte je při manipulaci s Vaším přístrojem. Návod k obsluze uschovejte k případnému pozdějšímu použití Chraňte zástrčku a síťový kabel před poškozením. Síťový kabel nikdy nepřekrucujte. -
Page 57: Doporučení
Zásuvka a síťová přípojka přístroje musí být z bezpečnostních důvodů volně přístupné, aby mohla být v případě nouze rychle odpojena dodávka elektřiny! Přístroj se smí používat pouze v suchých, uzavřených prostorách. Doporučení Pokud chcete laminovat velmi měkké materiály (jako např. ubrousky) nebo malé... -
Page 58: Přehled
Přehled Odstranění nakupené fólie – Jam Release Přepínač laminování za studena / za tepla poloha přepínače vlevo = laminování za studena střední poloha přepínače = laminování za tepla 80 μm poloha přepínače vpravo = laminování za tepla 125 μm Přepínač ZAP./VYP. (ON/OFF) Červená... -
Page 59: Výkonnostní Znaky
Výkonnostní znaky Ochrana a zlepšení vlastností Vašich dokumentů. Laminuje fota, dokumenty, grafiky, průkazy atd. do velikosti formátu DIN A4. Přístroj pracuje se 4 výhřevnými válečky, rychle se zahřívá a laminuje bez nosiče. • 2 kontrolky LED ukazují provozní stav • Automatické... -
Page 60: Laminování Za Tepla
Laminování za tepla Zapojte síťový kabel do snadno dostupné standardní zásuvky. Pozor: Přesvědčte se, že údaje o napájení přístroje se shodují s údaji Vaší el.sítě (220 - 240 V, 50 Hz). Zapněte přepínač Zap./Vyp. na pravé horní straně přístroje (I). Hnací... -
Page 61: Laminování Za Studena
Laminování za studena Zapojte síťový kabel do snadno dostupné standardní zásuvky. Pozor: Přesvědčte se, že údaje o napájení přístroje se shodují s údaji Vaší el.sítě (220 - 240 V, 50 Hz). Zapněte přepínač Zap./Vyp. na pravé horní straně přístroje (I). Hnací... -
Page 62: Údržba A Čištění
Údržba a čištění Usazeniny a zbytky lepidla mohou negativně ovlivnit výsledek laminování. Proto je nutné posouvací válečky pravidelně po použití vyčistit: Zasuňte přeložený list čistého papíru do vstupní štěrbiny. Zbytky lepidla se zachytí na papíře a spolu s ním budou vytlačeny ven. Tento postup několikrát opakujte. -
Page 63: Pokyny K Likvidaci
Pokyny k likvidaci Tento symbol (přeškrtnutá nádoba na odpad) znamená, že je uživatel povinen odevzdat výrobek určený k likvidaci na dostupném sběrném místě nebo místě s tříděným odpadem. Tento symbol platí pouze ve státech EHP. EHP = Evropský hospodářský prostor, do něhož jsou zahrnuty členské... - Page 64 DoC-Nr.: 3111 Rev: 00 gemäß der Richtlinie 2004/108/EG und der Richtlinie 2006/95/EG in accordance with the Directive 2004/108/EEC and the Directive 2006/95/EEC OLYMPIA Business Systems Vertriebs GmbH ....................... Hersteller / Verantwortliche Person The manufacturer / responsible person erklärt, dass das Produkt:...
- Page 66 Diese Bedienungsanleitung dient der Information. Ihr Inhalt ist nicht Vertragsgegenstand. Alle angegebenen Daten sind lediglich Nominalwerte. Die beschriebenen Ausstattungen und Optionen können je nach den länderspezifischen Anforderungen unterschiedlich sein. Wir behalten uns inhaltliche und technische Änderungen vor.
Need help?
Do you have a question about the A 235 and is the answer not in the manual?
Questions and answers