Table of Contents
Advertisement
Available languages
Available languages
Quick Links
Advertisement
Table of Contents

Related Manuals for Olympia A 2024


Summary of Contents for Olympia A 2024
- Page 1 Laminiergerät Laminator Plastifieuse Aparato laminador Plastificatrice Lamineerapparaat Olympia Business Systems Vertriebs GmbH Zum Kraftwerk 1 45527 Hattingen Deutschland http://www.olympia-vertrieb.de (19.04.2012)
-
Page 2: Table Of Contents
Deutsch Wichtige Sicherheitsanweisungen............5 Wichtige Hinweise ..................6 Haftungsausschluss.................. 6 Bestimmungsgemäße Verwendung ............7 Leistungsmerkmale................... 7 Bedienelemente ..................8 Kaltlaminieren ................... 9 Heißlaminieren..................10 Folienstau beheben ................11 Pflege und Reinigung ................11 Fehlerbehebung..................12 Entsorgungshinweis................12 Garantie ....................13 English Important Safety Information .............. - Page 3 Français Consignes importantes de sécurité ............23 Informations importantes ................ 24 Exclusion de la garantie................24 Utilisation conforme à son usage ............25 Caractéristiques de performance ............25 Éléments de manipulation ..............26 Plastification à froid................. 27 Plastification à chaud................28 Elimination de bourrage................
- Page 4 Italiano Importanti indicazioni di sicurezza............43 Indicazioni importanti ................44 Esclusione di responsabilità ..............44 Impiego conforme agli usi previsti ............45 Caratteristiche di prestazione ..............45 Elementi di comando ................46 Plastificazione a freddo................47 Plastificazione a caldo ................48 Rimozione di intasamenti da pellicola ............
-
Page 5: Wichtige Sicherheitsanweisungen
Deutsch Wichtige Sicherheitsanweisungen Um ein zuverlässiges Arbeiten mit dem Laminiergerät zu gewährleisten, be- achten Sie bitte Folgendes: Lesen Sie diese Anweisungen bitte sorgfältig durch und beachten Sie ● sie bei der Handhabung Ihres Geräts. Bewahren Sie die Bedienungsanleitung für eine zukünftige Benutzung ●... -
Page 6: Wichtige Hinweise
Schneiden Sie keine Laminierfolien zu. Die entstehenden Schnittkanten ● können Folienstaus verursachen. Verwenden Sie keine verschmutzten Laminierfolien. Reinigen Sie diese ● gegebenenfalls zuvor mit einem weichen leicht feuchten Tuch. Metallische Gegenstände können nicht laminiert werden. ● Laminieren Sie mit diesem Gerät keine hitzeempfindlichen Materialien, ●... -
Page 7: Bestimmungsgemäße Verwendung
• Aufwärmzeit nur ca. 4-10 Minuten • Abkühlzeit auf Zimmertemperatur ca. 30 Minuten • Folienstärken bei A 2024 + A 3024: mindestens 80 μm, maximal 175 μm • Folienstärken bei A 2048 + A 3048: mindestens 80 μm, maximal 250 μm... -
Page 8: Bedienelemente
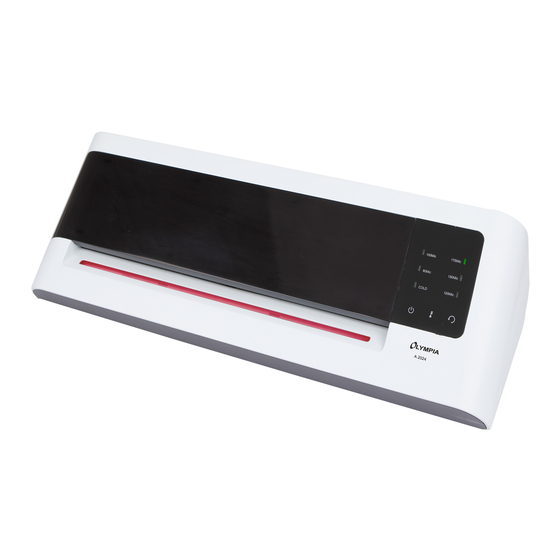
Bedienelemente Laminierauslauf Laminiereinzug Netzschalter LED-Leiste Bedienfeld Bedienfeld Bedienfeld A 2024 / A 3024 A 2048 / A 3048 A 2024, A 3024 A 2048, A 3048 Anzeige für Kalt-/Heißlaminieren und gewählte Folienstärke Rücklauf-Taste Taste für Kalt-/Heißlaminieren und Folienstärke einstellen Ein-/Aus-Taste... -
Page 9: Kaltlaminieren
Kaltlaminieren Schließen Sie das Stromkabel an eine gut zugängliche Standardsteck- dose an. Achtung: Prüfen Sie, ob die Spannungsangabe des Geräts mit der Ih- res Stromnetzes übereinstimmt (220-240 V / 50 Hz). Schalten Sie den Netzschalter auf der Geräterückseite ein. Berühren Sie die Ein-/Aus-Taste auf dem Bedienfeld, um das Gerät ein- zuschalten. -
Page 10: Heißlaminieren
Heißlaminieren Schließen Sie das Stromkabel an eine gut zugängliche Standardsteck- dose an. Achtung: Prüfen Sie, ob die Spannungsangabe des Geräts mit der Ih- res Stromnetzes übereinstimmt (220-240 V / 50 Hz). Schalten Sie den Netzschalter auf der Geräterückseite ein. Berühren Sie die Ein-/Aus-Taste auf dem Bedienfeld, um das Gerät ein- zuschalten. -
Page 11: Folienstau Beheben
Wenn Sie das Laminieren beendet haben, berühren Sie die Ein-/Aus- Taste auf dem Bedienfeld, um das Gerät auszuschalten. Schalten Sie den Netzschalter auf der Geräterückseite aus. Ziehen Sie gegebenen- falls zusätzlich den Netzstecker, insbesondere wenn Sie das Gerät län- gere Zeit nicht verwenden. Folienstau beheben Dieses Laminiergerät ist mit einer Rücklauffunktion ausgerüstet, um Folien- staus schnell wieder beheben zu können. -
Page 12: Fehlerbehebung
Fehlerbehebung Fehler Lösungen • Die LED-Leiste leuchtet nicht • Prüfen Sie, ob der Netzschalter an der Rückseite des Geräts einge- • Gerät reagiert nicht schaltet wurde. Ferner prüfen Sie, ob der Einschalter auf dem Be- dienfeld ebenfalls eingeschaltet ist. • Falls der Fehler nicht behoben wurde, wenden Sie sich an unsere Hotline. -
Page 13: Garantie
Gerät in der Originalverpackung an folgende Anschrift zu senden: Service-Center Hattingen Zum Kraftwerk 1 45527 Hattingen Garantiereparaturen können nur mit beigefügtem Kaufbeleg erfolgen. Herzlichen Dank für Ihr Verständnis. Mit freundlichen Grüßen Ihre Olympia Business Systems Vertriebs GmbH Version vom 19.04.2012... -
Page 14: English
English Important Safety Information Please observe the following information to ensure reliable operation of the laminator: Read this manual thoroughly and observe the instructions and ● information in it when operating the device. Keep the operating manual in a safe place for future reference. ●... -
Page 15: Important Information
Metallic objects cannot be laminated. ● Do not laminate heat sensitive materials, such as thermal paper, in the ● device. Lamination of moist documents produces poor results. ● Maintain a pause of at least 15 seconds between each lamination ● process. -
Page 16: Intended Use
• Cool down phase to room temperature, approx. 30 minutes • Foil thickness using A 2024 + A 3024: min. 80 μm, max. 175 μm • Foil thickness using A 2048 + A 3048: min. 80 μm, max. 250 μm... -
Page 17: Operating Elements
Laminator infeed Power switch LED strip Operating panel Operating panel Operating panel A 2024 / A 3024 A 2048 / A 3048 A 2024, A 3024 A 2048, A 3048 Indicators for cold/hot laminating and selected foil thickness Reverse button... -
Page 18: Cold Laminating
Cold Laminating Connect the power cable to an easily accessible, standard electrical socket. Attention: Check that the voltage specifications of the machine corre- spond to that of your power supply network (220-240 V / 50 Hz). Switch on the power switch on the rear side of the device. Press the On/Off button on the operating panel to switch the device on. -
Page 19: Hot Laminating
Hot Laminating Connect the power cable to an easily accessible, standard electrical socket. Attention: Check that the voltage specifications of the machine corre- spond to that of your power supply network (220-240 V / 50 Hz). Switch on the power switch on the rear side of the device. Press the On/Off button on the operating panel to switch the device on. -
Page 20: Clearing Foil Jams
When you have finished your laminating tasks, press the On/Off button on the operating panel to switch the device off. Switch off the power switch on the rear side of the device. Also disconnect the power plug, particularly when the device will remain out of operation for a longer pe- riod. -
Page 21: Troubleshooting
Troubleshooting Fault Corrective measures • The LED strip does not light up • Check that the power switch on the rear side of the device has • Device does not respond been switched on. Also check that the On/Off switch on the operating panel has been switched on. -
Page 22: Disposal
Disposal This symbol (crossed out waste bin) indicates that the product must be returned to an authorised recycling centre or collection point when it has reached the end of its service life. This symbol only applies in member states of the EEA Warranty In the case of a defect, please return the device together with the receipt and original packing material to the point-of-sale. -
Page 23: Consignes Importantes De Sécurité
Français Consignes importantes de sécurité Afin de garantir un travail fiable avec la plastifieuse, veuillez tenir compte des points suivants : Veuillez lire attentivement ces instructions et en tenir compte lorsque ● vous manipulez votre appareil. Conservez le mode d'emploi pour une utilisation future. ●... -
Page 24: Informations Importantes
N'utilisez pas, pour la plastification à chaud, des pochettes prévues ● pour la plastification à froid. L'appareil, la pochette ainsi que le document en seraient endommagés. Ne coupez pas les pochettes. Les arêtes de coupe qui en résultent ● pouvant provoquer un bourrage. N'utilisez pas de pochettes sales. -
Page 25: Utilisation Conforme À Son Usage
A3 (A 3024, A 3048) ou DIN A4 (A 2024, A 2048). L'appareil fonctionne avec 4 rouleaux (A 2048, A 3048) ou 2 rouleaux chauf- fants (A 2024, A 3024), a un temps de chauffe rapide et plastifie sans sup- port. -
Page 26: Éléments De Manipulation
2,2 kg (A 2024), env. 3,0 kg (A 2048) Éléments de manipulation Sortie du produit plastifié Fente d'introduction de la plasti- fieuse Commutateur principal Barre LED Champ de commande... -
Page 27: Plastification À Froid
Champ de commande Champ de commande A 2024 / A 3024 A 2048 / A 3048 A 2024, A 3024 A 2048, A 3048 Affichage pour plastification à froid/à chaud et épaisseur sélection- née Touche marche arrière Touche pour plastification à froid/à chaud et réglage de l'épaisseur... -
Page 28: Plastification À Chaud
Si vous avez utilisé peu auparavant la plastifieuse pour Attention : une plastification à chaud, vous devez la laisser refroidir. Le temps de refroidissement est de 30 minutes au maxi- mum. La barre LED clignote rouge pendant la phase de refroidissement. - Page 29 Si vous avez auparavant plastifié à des températures Attention : assez élevées et avec une épaisseur de pochette plus grande, vous devez laisser refroidir la plastifieuse. Le temps de refroidissement est de 30 minutes au maxi- mum. La barre LED clignote rouge pendant la phase de refroidissement.
-
Page 30: Elimination De Bourrage
Elimination de bourrage Cette plastifieuse est dotée d'une touche marche arrière afin de supprimer rapidement les bourrages. Si la pochette se bloque, appuyez sur la touche marche arrière La pochette se débloque et ressort à l'avant par la fente d'introduction. Ensuite, l'appareil doit vraisemblablement être nettoyé... -
Page 31: Elimination D'erreurs
Elimination d'erreurs Erreurs Solutions • La barre LED n'est pas allumée • Contrôlez si le commutateur prin- cipal situé au dos de l'appareil est • La plastifieuse ne réagit pas branché. Contrôlez également si le commutateur sue le champ de manipulation est aussi branché. -
Page 32: Remarque Concernant L'élimination
Remarque concernant l'élimination Ce symbole (la poubelle rayée) signifie que ce produit doit, en fin de vie, être apporté à un organisme de reprise ou de collecte séparée disponible pour l'utilisateur final. Ce symbole est uniquement valable dans les États de l'Espace économique européen Garantie Cher client,... -
Page 33: Español
Español Instrucciones de seguridad importantes Tenga en cuenta los aspectos siguientes a fin de garantizar un trabajo fiable con el aparato laminador: Lea las presentes instrucciones detenidamente y téngalas en cuenta a ● la hora de manejar el aparato. Guarde el manual de instrucciones para cualquier utilización posterior. ●... -
Page 34: Advertencias Importantes
Para la laminación en caliente no debe utilizar películas transparentes ● de laminación que estén previstas para la laminación en frío. En tal caso, el aparato, la película transparente de laminación y el documento sufrirían daños. No corte las películas transparentes de laminación a medida. Los ●... -
Page 35: Exclusión De Responsabilidad
Protección y mejora de sus documentos. Permite laminar fotos, documentos, gráficos, etc. de un tamaño de hasta DIN A3 (A 3024, A 3048) o DIN A4 (A 2024, A 2048). El aparato funciona con 4 rodillos calefactores (A 2048, A 3048) o con 2 rodillos calefactores (A 2024, A 3024), tiene un tiempo de calentamiento rápido y lamina sin materias portantes. -
Page 36: Elementos De Mando
A 2048) Dimensiones (longitud x an- 482 x 191 x 124 mm (A 3024, A 3048) chura x altura): 382 x 191 x 124 mm (A 2024, A 2048) Peso: aprox. 3,2 kg (A 3024), aprox. 4,0 kg (A 3048) aprox. -
Page 37: Laminación En Frío
Panel de mando Panel de mando A 2024 / A 3024 A 2048 / A 3048 A 2024, A 3024 A 2048, A 3048 Indicación para laminación en frío/caliente y el espesor de película transparente seleccionado Tecla de retroceso Ajustar la tecla para la laminación en frío/caliente y el espesor de película transparente... -
Page 38: Laminación En Caliente
Atención: Si se ha utilizado el aparato laminador poco antes para la laminación en caliente, es necesario dejar que este se en- fríe. El tiempo de enfriamiento es de hasta 30 minutos. La barra de LEDs parpadea en rojo durante la fase de en- friamiento. - Page 39 Seleccione el espesor de película transparente: si fuera necesario, pulse repetidamente Ajustar la tecla para la laminación en frío/caliente y el espesor de película transparente hasta que se ilumine el LED en el panel de mando al lado del correspondiente espesor de película trans- parente.
-
Page 40: Eliminar Un Atasco De Película Transparente
Cuando haya finalizado la laminación, pulse la Tecla de encen- dido/apagado ubicada en el panel de mando para apagar el aparato. Apague el Interruptor de red en la parte posterior del aparato. Si fuera necesario, extraiga además la clavija de alimentación, sobre todo cuando no va a utilizar el aparato durante un período de tiempo de mayor duración. -
Page 41: Eliminación De Fallos
Eliminación de fallos Fallo Soluciones • La barra de LEDs no se ilumina • Compruebe si el interruptor de red en la parte posterior del aparato • El aparato no muestra ninguna está conectado correctamente. reacción Compruebe también si el conecta- dor en el panel de mando está... -
Page 42: Indicaciones De Eliminación
Indicaciones de eliminación Este símbolo (cubo de basura tachado) significa que después de finalizar su vida útil, se debe llevar el producto a un sistema de recogida o reciclaje disponible para el usuario final. Este símbolo únicamente es aplicable a los estados del EEE Garantía Estimado cliente, nos alegramos de que Usted se haya decidido por este aparato. -
Page 43: Importanti Indicazioni Di Sicurezza
Italiano Importanti indicazioni di sicurezza L'esercizio affidabile della plastificatrice richiede l'osservanza di quanto se- gue: Leggere attentamente le presenti istruzioni ed osservarle ● scrupolosamente durante l'utilizzo dell’apparecchio. Conservare le istruzioni per l’uso per riferimento futuro. ● Usare l'apparecchio solo in ambienti d'ufficio asciutti, chiusi e ben ●... -
Page 44: Indicazioni Importanti
contrario l'apparecchio, la pellicola di plastificazione ed il documento saranno danneggiati. Non tagliare le pellicole di plastificazione nel tentativo di adattarne le ● dimensioni. Gli spigoli di taglio risultanti possono infatti causare un intasamento da pellicola. Non utilizzare pellicole di plastificazione sporche. Pulirle se occorre ●... -
Page 45: Impiego Conforme Agli Usi Previsti
• Tempo di raffreddamento a temperatura ambiente ca. 30 minuti • Spessore della pellicola per A 2024 + A 3024: min. 80 μm, max. 175 μm • Spessore della pellicola per A 2048 + A 3048: min. 80 μm, max. 250 μm... -
Page 46: Elementi Di Comando
Spia LED Pannello di comando Pannello di comando Pannello di comando A 2024 / A 3024 A 2048 / A 3048 A 2024, A 3024 A 2048, A 3048 Spia per plastificazione a freddo/a caldo e per spessore della pelli-... -
Page 47: Plastificazione A Freddo
Plastificazione a freddo Collegare il cavo di alimentazione ad una presa di corrente standard fa- cilmente accessibile. Attenzione: Verificare che il valore della tensione riportato sull’apparecchio coincida con quello della rete elettrica (220-240 V / 50 Hz). Inserire l’interruttore di rete presente sul retro dell’apparecchio. Per inserire l’apparecchio, sfiorare il tasto ON/OFF sul pannello di co- mando. -
Page 48: Plastificazione A Caldo
Plastificazione a caldo Collegare il cavo di alimentazione ad una presa di corrente standard fa- cilmente accessibile. Attenzione: Verificare che il valore della tensione riportato sull’apparecchio coincida con quello della rete elettrica (220-240 V / 50 Hz). Inserire l’interruttore di rete presente sul retro dell’apparecchio. Per inserire l’apparecchio, sfiorare il tasto ON/OFF sul pannello di co- mando. -
Page 49: Rimozione Di Intasamenti Da Pellicola
Non utilizzando l’apparecchio per oltre 30 minuti, questo si Nota: spegne automaticamente. Per inserire di nuovo l’apparecchio, sfiorare il tasto ON/OFF sul pannello di co- mando. Una volta conclusa la procedura di plastificazione, per spegnere l’apparecchio sfiorare il tasto ON/OFF sul pannello di comando. Disin- serire l’interruttore di rete presente sul retro dell’apparecchio. -
Page 50: Eliminazione Di Guasti
Eliminazione di guasti Problema Soluzione • La spia LED non è accesa • Verificare se l'interruttore di rete sul retro dell'apparecchio risulta • Apparecchio non reagisce inserito. Controllare inoltre anche, se l'interruttore sul pannello di comando è inserito. • In caso di mancata eliminazione dell’errore, si prega di rivolgersi al rivenditore presso cui è... -
Page 51: Nota Sullo Smaltimento
Nota sullo smaltimento Questo simbolo (il bidone sbarrato) indica che l'utilizzatore finale è tenuto a smaltire il presente prodotto alla fine della rispettiva durata utile attraverso un sistema di recupero o di raccolta differenziata. Il simbolo è valido soltanto per gli stati del Garanzia Caro cliente, ci congratuliamo con Lei per aver scelto questo apparecchio. -
Page 52: Nederlands
Nederlands Belangrijke veiligheidsinstructies Neem het volgende in acht om er zeker van te zijn dat u het lamineer- apparaat op de juiste manier gebruikt: Lees deze instructies aandachtig door en volg ze op bij het gebruik van ● het apparaat. Bewaar deze handleiding, opdat u ze later opnieuw kunt raadplegen. -
Page 53: Belangrijke Informatie
Snij lamineerfolie nooit op maat. De snijkanten die hierbij ontstaan ● kunnen tot gevolg hebben dat de folie vastloopt. Gebruik geen verontreinigde lamineerfolie. Reinig hem eventueel vooraf ● met een licht vochtige doek. Metalen voorwerpen kunnen niet gelamineerd worden. ● Gebruik het apparaat nooit om hittegevoelige materialen zoals ●... -
Page 54: Bedoeld Gebruik
Lamineert foto’s , documenten, illustraties enz. tot een formaat van DIN A3 (A 3024, A 3048) of DIN A4 (A 2024, A 2048). Het apparaat werkt met 4 (A 2048, A 3048) of 2 (A 2024, A 3024) verwarmde rollen, heeft een snelle opwarmtijd en lamineert zonder drager. -
Page 55: Bedieningselementen
Bedieningselementen Lamineeruitvoer Lamineerinvoer Netschakelaar Ledstrip Bedieningspaneel Bedieningspaneel Bedieningspaneel A 2024 / A 3024 A 2048 / A 3048 A 2024, A 3024 A 2048, A 3048 Weergave heet-/koudlamineren en geselecteerde foliedikte Teruglooptoets Insteltoets voor heet-/koudlamineren en foliedikte Aan-uittoets... -
Page 56: Koudlamineren
Koudlamineren Steek de netstekker in een goed bereikbaar stopcontact. Controleer of de gespecificeerde spanning van het apparaat Let op: overeenkomt met de spanning van het net (220-240 V / 50 Hz). Schakel de netschakelaar op de achterkant van het apparaat in. Druk op de aan-uittoets op het bedieningspaneel, om het apparaat in te schakelen. -
Page 57: Heetlamineren
Heetlamineren Steek de netstekker in een goed bereikbaar stopcontact. Controleer of de gespecificeerde spanning van het apparaat Let op: overeenkomt met de spanning van het net (220-240 V / 50 Hz). Schakel de netschakelaar op de achterkant van het apparaat in. Druk op de aan-uittoets op het bedieningspaneel, om het apparaat in te schakelen. -
Page 58: Vastgelopen Folie Losmaken
Als u klaar bent met lamineren, drukt u op de aan-uittoets op het bedieningspaneel, om het apparaat uit te schakelen. Schakel de netschakelaar op de achterkant van het apparaat uit. Trek eventueel ook de stekker uit het stopcontact, zeker als u het apparaat gedurende een langere periode niet meer zult gebruiken. -
Page 59: Storingen Verhelpen
Storingen verhelpen Storing Maatregel • De ledstrip brandt niet • Controleer of de netschakelaar aan de achterkant van het • Apparaat reageert niet apparaat ingeschakeld is. Controleer bovendien of de Aan- schakelaar op het bedieningspaneel eveneens ingeschakeld is. • Als de storing niet kan worden verholpen, neemt u contact op met het verkooppunt waar u het apparaat hebt gekocht (zie... -
Page 60: Gescheiden Inzameling
Gescheiden inzameling Dit pictogram (een doorgekruiste minicontainer) betekent dat dit product na afloop van zijn levensduur naar een voor de eindgebruiker beschikbaar inzamelingspunt moet worden teruggebracht. Dit pictogram geldt alleen in de staten van de Garantie Geachte klant, Het verheugt ons dat u voor dit apparaat hebt gekozen. Geef het apparaat in geval van een defect met de kassabon en de originele verpakking terug in de zaak, waar u het gekocht heeft. -
Page 61: Konformitätserklärung / Declaration Of Conformity
Konformitätserklärung / Declaration of Conformity Olympia A 2024 / A 2048 / A 3024 / A 3048 The manufacturer hereby declares that the equipment complies with the stipulations defined in the following guidelines and standards: Der Hersteller erklärt hiermit, dass das Gerät mit den Bestimmungen der Richtlinien und Normen übereinstimmt:... - Page 62 Diese Bedienungsanleitung dient der Information. Ihr Inhalt ist nicht Vertragsgegenstand. Alle angegebenen Daten sind lediglich Nominalwerte. Die beschriebenen Ausstattungen und Optionen können je nach den länderspezifischen Anforderungen unterschiedlich sein. Wir behalten uns inhaltliche und technische Änderungen vor.
Need help?
Do you have a question about the A 2024 and is the answer not in the manual?
Questions and answers