Table of Contents
Advertisement
Quick Links
Advertisement
Table of Contents

Related Manuals for CohuHD Costar 3440HD Series


Summary of Contents for CohuHD Costar 3440HD Series
- Page 1 Installation Manual 3440HD Series Installation Manual 9992000 Rev B youtube.com/CohuHD LinkedIn.com/company/CohuHD twitter.com/CohuHD facebook.com/CohuHD CohuHD.com (858) 391-1800 © CohuHD Costar, LLC reserves the right to change specifications without notice...
-
Page 3: Table Of Contents
Installation Manual Table of Contents 1.0 General Information 1.1 About This Document 1.2 Additional Information and Documents Related to the Camera System 1.3 Copyright/Intellectual Property Rights Statement 1.4 FCC Compliance 1.5 Support Services 2.0 Returns 2.1 Instructions 2.2 Shipment 3.0 Safety 3.1 Instructions 3.2 Grounding 4.0 Package Contents... -
Page 5: General Information
1.1 About This Document This document contains information on how to install and maintain the 3440HD Series. Please read this manual carefully prior to installation to prevent any accidental damage or misuse. The manual is available from the CohuHD website at http://www.cohuhd.com/Support/Product-Documentation. -
Page 6: Returns
Installation Manual 2.0 Returns 2.0 Returns 2.1 Instructions This item was thoroughly tested and carefully packed at the factory prior to shipping. Upon acceptance by the carrier, the carrier assumes responsibility for the item’s safe arrival. If you receive the item in a damaged condition, apparent or concealed, a claim for damage must be made to the carrier. -
Page 7: Safety
Installation Manual 3.0 Safety 3.0 Safety 3.1 Instructions Warning: Do not remove the covers or housing. There are no user-serviceable parts inside. Warning: PoE++ (Power over Ethernet) injectors used with this camera system may operate from 100-240 Vac. These voltages are dangerous. Use extreme care working with equipment connected to these voltages. -
Page 8: Grounding
Installation Manual 3.0 Safety 3.2 Grounding To provide protection against electrical surges induced by lightning, static charges, or any other cause, the camera and cabling system must be properly grounded to earth. For installation on a building, the camera must be bonded (that is, provided with a low impedance connection) to the building’s structural earth ground system. -
Page 9: Package Contents
Installation Manual 4.0 Package Contents 4.0 Package Contents Upon opening of the products shipping package, please verify you have received the following items: 1. CohuHD 3440HD Camera System 2. Quick Disconnect Coupler 1.5” NPT 3. PoE++ Power Supply + US AC Cord 4. -
Page 10: Product Overview
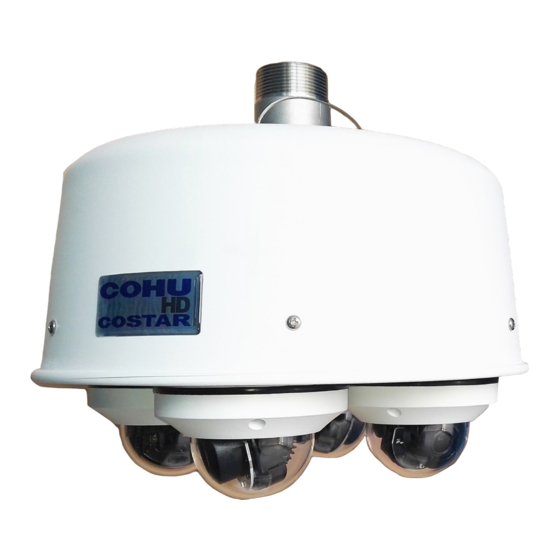
Installation Manual 5.0 Product Overview 5.0 Product Overview 1. 1.5” NPT Quick Disconnect Coupler 2. Camera Sunshield / Enclosure 3. Camera PTZ Assembly and Dome (x4) -
Page 11: Factory Defaults
Installation Manual 6.0 Factory Defaults 6.0 Factory Defaults 6.1 Factory Default IP Address and Settings The camera is shipped with the following network settings: IP Address: 192.168.2.150 Subnet Mask: 255.255.255.0 Gateway: 192.168.2.1 6.2 Factory Default User Names and Passwords The camera is shipped with the usernames and passwords shown in the table. Access Level Username Password Administrator admin... -
Page 12: Connections
Installation Manual 7.0 Connections 7.0 Connections 7.1 RJ45 Pinout RJ45 Function Cat5E or 6 Wire Color RJ45 Pin Ethernet WHITE/ORANGE -VDC ORANGE -VDC WHITE/GREEN +VDC GREEN +VDC WHITE/BLUE +VDC BLUE +VDC WHITE/BROWN -VDC BROWN -VDC 7.2 Waterproof Coupler Assembly 7.2.1 Parts The coupler comes pre-assembled. - Page 13 Installation Manual 7.0 Connections 1. Using head of a pencil or another non-sharp object, push the Seal (2) out of both Sealing Collars (3). 2. If the RJ45 plug has a strain-relief boot, push it away from the RJ45 plug. The strain-relief boot will not be used.
- Page 14 Installation Manual 7.0 Connections 9. Now attached the Sealing Nut (1) to the Sealing Collar (3). Warning: Tighten by hand and do not over-tighten. Using tools and over-tightening may split the Seal’s notch, which compromises the waterproof assembly. The Seal’s notch should join without a flaw. 10.
-
Page 15: Best Practices
Installation Manual 8.0 Best Practices 8.0 Best Practices The purpose of this section is to provide recommendations regarding the proper selection and use of Surge Protection Devices (SPDs) in CCTV systems. This section is not meant to provide guidance for SPDs selection, placement, and use on incoming utility power. -
Page 16: Installation
Installation Manual 9.0 Installation 9.0 Installation Warning: Always support a camera until it has been fastened securely. Caution: Do not use the cable to support the weight of the camera. -
Page 17: Mounting Installation Instructions
Installation Manual 9.0 Installation 9.1 Mounting Installation Instructions Locate the 3 Stainless Screws included with the quick Disconnect Bracket. Notice there are : 2 HEX Bolts of different length used to secure the quick disconnect coupling and 1 Philips head screw used to attach the safety lanyard (Fig.1). -
Page 18: Typical Wall Mount Installation
Installation Manual 9.0 Installation 9.1.1 Typical Wall Mount Installation... -
Page 19: Typical Pole Mount Installation
Installation Manual 9.0 Installation 9.1.2 Typical Pole Mount Installation... -
Page 20: Camera Urls
Installation Manual 10.0 Camera URLs 10.0 Camera URLs 10.1 Camera Default Passwords User = admin Password = admin 10.2 Network Video Ports Required for RTSP 554: RTSP uses TCP or UDP as its transport protocol. UDP Ports: Self-Determined 10.3 Video Stream Connection URL’s URL Structure: rtsp://ipaddr/channel#_stream# ipaddr: Current IP address of the camera channel#: ch1 or ch2 or ch3 or ch4... -
Page 21: System Requirements
Installation Manual 11.0 System Requirements 11.0 System Requirements 11.1 Requirements In order to test the camera system you need the following items: Laptop or desktop computer 100/1000BASE-T network card installed in the computer Microsoft Internet Explorer, version 11 or later web browser 100/1000BASE-T network switch or hub Cat5e or Cat 6 cable 11.2 Recommended Computer Specifications... -
Page 22: Optional Accessories
Installation Manual 12.0 Optional Accessories 12.0 Optional Accessories The following optional accessories are recommended by CohuHD and can be purchased with the camera system. Mounts Wall Mount: 7411420-001 Pole Mount: 8518-2 PoE ++ Injectors (Spare/Replacement) PoE++ Injector: 7412007-003 Waterproof RJ45 Coupler (Spare/Replacement) IP67 Coupler: 7610203-002 Outdoor Surge Protective Device for PoE++ IP67 Surge Protective Device: 7412009-001... -
Page 23: Service
13.0 Service 13.0 Service The 3440HD Series is designed for long-term unattended use and contains no user-serviceable parts. In the event of product failure, the system should be removed from the site and returned to an authorized service center for repair. -
Page 24: Troubleshooting
Installation Manual 13.0 Service 13.2 Troubleshooting The table below identifies possible issues that could occur with the camera, and corrective actions on how to resolve them. If the issue persists after following the corrective actions, contact CohuHD field service department at (858) 391-1800 option 2 for additional assistance. Problem/Symptom Possible Cause Correction... -
Page 25: Warranty
Installation Manual 14.0 Warranty 14.0 Warranty Please refer to the CohuHD website for product warranty information: http://www.cohuhd.com/Support/Warranty. - Page 26 Installation Manual For more information please visit us at: www.CohuHD.com...
Need help?
Do you have a question about the 3440HD Series and is the answer not in the manual?
Questions and answers