Table of Contents
Advertisement
Quick Links
1 1 2 2 " " ( ( 1 1 6 6 : : 9 9 ) )
O O v v e e r r h h e e a a d d V V i i d d e e o o
M M o o n n i i t t o o r r / / D D V V D D P P l l a a y y e e r r
M M O O D D E E L L O O H H D D 1 1 2 2 0 0 2 2
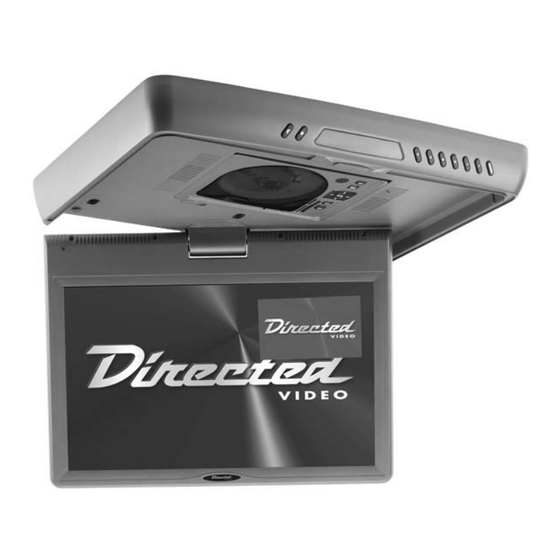
© 2005 Directed Electronics, Inc. N82122 03-05
O O W W N N E E R R ' ' S S G G U U I I D D E E
I I N N S S T T A A L L L L A A T T I I O O N N G G U U I I D D E E
Advertisement
Table of Contents

Related Manuals for Directed Electronics OHD1202


Summary of Contents for Directed Electronics OHD1202
- Page 1 1 1 2 2 ” ” ( ( 1 1 6 6 : : 9 9 ) ) O O v v e e r r h h e e a a d d V V i i d d e e o o M M o o n n i i t t o o r r / / D D V V D D P P l l a a y y e e r r M M O O D D E E L L O O H H D D 1 1 2 2 0 0 2 2 ©...
- Page 2 N N O O N N - - T T R R A A N N S S F F E E R R A A B B L L E E L L I I M M I I T T E E D D O O N N E E Y Y E E A A R R C C O O N N S S U U M M E E R R W W A A R R R R A A N N T T Y Y Directed Electronics, Inc.
-
Page 3: Table Of Contents
T T a a b b l l e e o o f f C C o o n n t t e e n n t t s s N N o o n n - - T T r r a a n n s s f f e e r r a a b b l l e e L L i i m m i i t t e e d d O O n n e e Y Y e e a a r r C C o o n n s s u u m m e e r r W W a a r r r r a a n n t t y y ..........2 2 S S a a f f e e t t y y I I n n s s t t r r u u c c t t i i o o n n s s a a n n d d C C a a u u t t i i o o n n s s . - Page 4 B B a a s s i i c c F F u u n n c c t t i i o o n n s s ....................2 2 3 3 DVD Playback...23 Play/Pause (DVD/MP3/CD) ...24 Stop (DVD/MP3/CD)...24...
-
Page 5: S S A A F F E E T T Y Y I I N N S S T T R R U U C C T T I I O O N N S S A A N N D D C C A A U U T T I I O O N N S
S S a a f f e e t t y y I I n n s s t t r r u u c c t t i i o o n n s s a a n n d d C C a a u u t t i i o o n n s s W W A A R R N N I I N N G G : : TO REDUCE THE RISK OF FIRE OR ELECTRIC SHOCK, DO NOT EXPOSE THIS EQUIP- MENT TO RAIN OR MOISTURE. -
Page 6: While Driving
■ When operating the unit, avoid contact with the LCD panel. ■ Prevent metal or foreign objects being locked between the LCD screen and the enclosure. Foreign objects may impair smooth running of the disc and may cause electrical problems. ■... -
Page 7: Installation
W W H H E E N N P P A A R R K K E E D D The screen is easily visible when deployed. Always close the screen when parking for an extended period of time to avoid potential theft or extended exposure to direct sunlight. P P R R O O P P E E R R U U S S E E Do not touch the screen. -
Page 8: Picture Quality
P P I I C C T T U U R R E E Q Q U U A A L L I I T T Y Y The picture quality of this LCD unit depends strictly on its installed location. To achieve the best picture quality, adjust the brightness control or viewing angle of the unit until the optimum view- ing is achieved. -
Page 9: Directed Electronics, Inc
C C o o n n t t r r o o l l s s M M O O N N I I T T O O R R COURTESY LIGHT—Activate this switch to "ON/OFF" to activate the dome lights on the monitor. - Page 10 UP Button—Used in conjunction with the menu setting. DOWN Button—Used in conjunction with the the menu setting. POWER—Power On/Off button. D D V V D D — — M M O O U U N N T T E E D D The illustration below shows the DVD player mounted in a typical LCD monitor.
- Page 11 LEFT— RIGHT— ENTER * 10. PLAY/PAUSE—When pressed pauses the playback until pressed again. 11. STOP—Halts playback. If the Play button is pressed the playback will continue from where stopped. If the Stop button is pressed twice, playback will now start from the beginning. W W A A R R N N I I N N G G : : DO NOT CLOSE THE LCD SCREEN IF A MEMORY CARD HAS BEEN INSERTED INTO THE DVD PLAYER.
- Page 12 D D V V D D — — U U N N M M O O U U N N T T E E D D The illustration below shows the side of the DVD player when removed from the LCD monitor. Electrical connector—This connector provides the electrical interface when mounted in the LCD monitor.
- Page 13 D D V V D D — — M M E E M M O O R R Y Y C C A A R R D D M M O O U U N N T T I I N N G G Ensure that the memory cards are mounted with the logo side of the memory cards oriented with the arrows as shown below: Memory Stick...
-
Page 14: D D V V D D P P L L A A Y Y E E R R - - I I N N S S T T A A L L L L A A T T I I O O N
D D V V D D P P l l a a y y e e r r — — I I n n s s t t a a l l l l a a t t i i o o n n Ensure power to the monitor is off and that the ignition key is off. -
Page 15: D D V V D D P P L L A A Y Y E E R R - - R R E E M M O O V V A A L
D D V V D D P P l l a a y y e e r r — — R R e e m m o o v v a a l l While holding and supporting the DVD player. Move and hold the lock/unlock button to the right. -
Page 16: R R E E M M O O T T E E C C O O N N T T R R O O L L U U N N I I T
R R e e m m o o t t e e C C o o n n t t r r o o l l U U n n i i t t R R E E M M O O T T E E B B U U T T T T O O N N S S 1. - Page 17 16. DOWN (display) 17. MENU/PBC 18-19 Numeric 20. Image (wide, zoom, full, normal) 21. TITLE 22. UP (Cursor) 23. SETUP 24. MUTE (on/off) 25. LEFT (Cursor) 26. ENTER 27. RIGHT (Cursor) I I R R R R E E M M O O T T E E F F E E E E D D T T H H R R O O U U G G H H The remote will operate, through the monitor, and transmit commands to other compatible devices attached to the AV1 or AV2 source at the switch-box.
-
Page 18: L L O O A A D D I I N N G G A A N N D D U U N N L L O O A A D D I I N N G G D D I I S S C C S
B B A A T T T T E E R R Y Y R R E E P P L L A A C C E E M M E E N N T T N N O O T T E E : : Before using remote after installation, remove the battery plastic protective slip. 1. - Page 19 side you want to watch facing up. Ensure that the disc is seated properly before pushing tray back into its locking position. 3. Push to close the door. U U N N L L O O A A D D I I N N G G D D I I S S C C 1.
-
Page 20: O O P P E E R R A A T T I I N N G G T T H H E E M M O O N N I I T T O O R
O O p p e e r r a a t t i i n n g g t t h h e e M M o o n n i i t t o o r r O O P P E E N N / / C C L L O O S S E E T T H H E E D D I I S S P P L L A A Y Y M M O O N N I I T T O O R R To open the display monitor, push the "OPEN"... -
Page 21: P P O O W W E E R R U U P P / / D D O O W W N N T T H H E E D D I I S S P P L L A A Y Y M M O O N N I I T T O O R
P P o o w w e e r r U U p p / / D D o o w w n n t t h h e e D D i i s s p p l l a a y y M M o o n n i i t t o o r r The unit will power up when the display monitor is unlatched and pulled down. - Page 22 M M E E N N U U ( ( C C O O N N S S O O L L E E M M E E N N U U ) ) Press "MENU" button on the monitor or remote to activate the screen parameters set-up. The sequence of set-up items is as follows: FM →...
-
Page 23: Dvd Playback
B B a a s s i i c c F F u u n n c c t t i i o o n n s s D D V V D D P P L L A A Y Y B B A A C C K K Press the remote control’s POWER switch on the unit’s power. - Page 24 2. Press the “F F R R ” button during playback. Each time this button is pressed, the unit will go into a rapid reverse playback mode. This will be shown on the LCD, depending on the speed of the playback selected.
- Page 25 S S E E L L E E C C T T I I N N G G A A T T R R A A C C K K O O R R C C H H A A P P T T E E R R Selecting tracks or chapters can be accomplished by either using the remote or front mounted con- trols.
- Page 26 P P L L A A Y Y B B A A C C K K P P R R O O G G R R A A M M M M I I N N G G Press the PROGRAM button on the remote to display the Track (T)/Chapter (C) programming menu screen.
- Page 27 A A D D V V A A N N C C E E D D P P L L A A Y Y B B A A C C K K ( ( D D V V D D / / M M P P 3 3 / / C C D D ) ) R R E E P P E E A A T T M M O O D D E E ■...
- Page 28 S S U U B B T T I I T T L L E E ( ( D D V V D D ) ) You may change the subtitle language from the one selected at the initial playback setting to a dif- ferent language, if available.
-
Page 29: Screen Saver
S S y y s s t t e e m m S S e e t t u u p p 1 1 . . T T V V S S Y Y S S T T E E M M According to the Color System of the TV, you can choose the TV System. -
Page 30: Password
3 3 . . T T V V T T Y Y P P E E 4 : 3 PS (Pan & Scan): Choosing this setting if your DVD player is connected to a normal ratio TV. You can fill the movie to the entire screen of your TV. -
Page 31: Osd Language
6 6 . . D D E E F F A A U U L L T T Choose this option to reset all the setup options (except for password and rating setting) to default settings. SCREEN SAVER 7 7 . . E E X X I I T T Choose this option to exit the setup options. -
Page 32: Electrical Connections
3 3 . . S S U U B B T T I I T T L L E E L L A A N N G G The Subtitle Lang Menu allows the user to select the lang- uage for the subtitle of disc. Highlight the SUBTITLE LANG option, and press the Arrow buttons to choose the subtitle language you prefer. - Page 33 Do not connect the yellow wire and red wire together of this product directly to the +12V. Connect the red wire of this product to the ACC of the ignition key switch and yellow wire to +12V. Failure to do so may result in discharge of the battery. Only supplied accessories should be used to avoid damage to the unit during installation.
- Page 34 S S I I G G N N A A L L C C O O N N N N E E C C T T I I O O N N S S A A d d a a p p t t e e r r A A u u d d i i o o C C o o l l o o r r C C o o d d e e White 1 (RCA) White 2 (RCA)
- Page 35 T T Y Y P P I I C C A A L L W W I I R R I I N N G G D D I I A A G G R R A A M M Wireless Headphones YELLOW–12V Constant...
-
Page 36: Dome Light Wiring
I I n n s s t t a a l l l l a a t t i i o o n n P P r r o o c c e e d d u u r r e e Identify the polarity of the dome light circuit and set the switch on the cable connection side of the overhead monitor housing to match the vehicle’s door trigger polarity. -
Page 37: Metal Bracket
Cut a 1" hole in the headliner along the backside of the mounting bracket for the cables to pass through. Route cables through the hole to the predetermined location of the AV source(s). Identify the dome light wires in the vehicle and connect them to the corresponding dome light wires on the overhead monitor system. - Page 38 S S y y s s t t e e m m W W i i r r i i n n g g D D i i a a g g r r a a m m E E x x a a m m p p l l e e AUDIO AMPLIFIER YELLOW BATTERY (+12V)
- Page 39 T T r r o o u u b b l l e e s s h h o o o o t t i i n n g g N N o o P P i i c c t t u u r r e e Press the POWER and SOURCE buttons (or the button on the remote) to make sure the...
- Page 40 T T h h e e R R e e m m o o t t e e d d o o e e s s N N O O T T F F u u n n c c t t i i o o n n Are there obstacles obstructing the view between the monitor and the remote.
- Page 41 S S p p e e c c i i f f i i c c a a t t i i o o n n s s S S y y s s t t e e m m Laser Signal Formats A A u u d d i i o o C C h h a a r r a a c c t t e e r r i i s s t t i i c c s s...
- Page 42 T T h h e e c c o o m m p p a a n n y y b b e e h h i i n n d d t t h h i i s s s s y y s s t t e e m m i i s s D D i i r r e e c c t t e e d d E E l l e e c c t t r r o o n n i i c c s s , , I I n n c c . . Since its inception, Directed has had one purpose, to provide consumers with the finest vehicle security, car stereo products, rear seat entertainment, and accessories available.
Need help?
Do you have a question about the OHD1202 and is the answer not in the manual?
Questions and answers