
Related Manuals for Bluebird BIP-1250 Series

Summary of Contents for Bluebird BIP-1250 Series
- Page 1 -Before getting started, ensure that you read and follow the “Safety Warnings and Precautions” section of this manual.
- Page 2 If these principles are not adhered to, free repair service will not be offered. If these principles are not adhered to, free repair service will not be offered. • Use only accessories and batteries provided or authorized by Bluebird Soft. • Use only accessories and batteries provided or authorized by Bluebird Soft.
-
Page 3: Table Of Contents
Table of Contents Table of Contents 1. Product Composition 1. Product Composition 2. Getting Started 2. Getting Started 3. Precautions 3. Precautions 4. Using Barcode 4. Using Barcode 5. Using Wireless LAN Features 5. Using Wireless LAN Features 6. Connecting BIP-1250 to Desktop 6. -
Page 4: Product Composition
BIP-1250 Series 1.Product Composition 1.Product Composition 1.Product Composition 1. Product Composition 2. Getting Started 3. Precautions 4. Using Barcodes 5. Using Wireless LAN Features 6. Connecting BIP-1250 to Desktop Copyright © 2004 Bluebird Soft, Inc. All Rights Reserved. - Page 5 Before using the product, inspect the contents of your package box for all the components shown below: [PDA BOX] [One Main body of BIP-1250] [One Stylus Pen] [One Battery for BIP-1250] [Warranty] [ACCESSORY BOX] [One Cradle for BIP-1250] [Power Cable(AC Adapter)] Copyright © 2004 Bluebird Soft, Inc. All Rights Reserved.
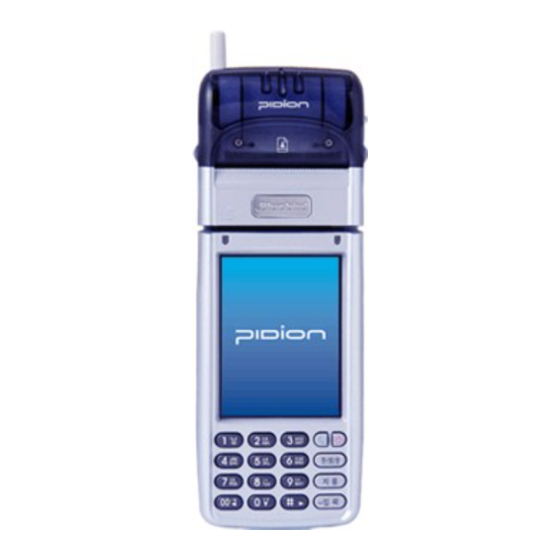
- Page 6 BIP-1250 Series 1.Product Composition 1.Product Composition 1.Product Composition 1-2. Hardware Specifications Acquaint yourself with the basic parts and names of the terminal using the following figures: Copyright © 2004 Bluebird Soft, Inc. All Rights Reserved.
- Page 7 - Power button (when depressed and held, the front light turns ON/OFF) - One button on the left side - Three buttons on the right side 8 ) I/O receptacle: connector used for charging or for USB communication(via ActiveSync) Copyright © 2004 Bluebird Soft, Inc. All Rights Reserved.
- Page 8 This PDA is designed to be used for hand-held operation only. European Union Notice This system has been tested for conformance with CE radio spectral, EMC and safety requirements. Copyright © 2004 Bluebird Soft, Inc. All Rights Reserved.
-
Page 9: Getting Started
BIP-1250 Series 2.Getting Started 2.Getting Started 2.Getting Started 1. Product Composition 2. Getting Started 3. Precautions 4. Using Barcodes 5. Using Wireless LAN Features 6. Connecting BIP-1250 to Desktop Copyright © 2004 Bluebird Soft, Inc. All Rights Reserved. - Page 10 • Charging the battery combined with the product will cause the charge indicator lamp light to light up. The indicator is red when the battery is not fully charged, and green when charging is complete. Copyright © 2004 Bluebird Soft, Inc. All Rights Reserved.
- Page 11 C. Power ON/OFF Depress the Power button to turn the power on. • When you depress the Power button for about two seconds while power is on • the front light turns off. Copyright © 2004 Bluebird Soft, Inc. All Rights Reserved.
-
Page 12: Precautions
BIP-1250 Series 3.Precautions 3.Precautions 3.Precautions 1. Product Composition 2. Getting Started 3. Precautions 4. Using Barcodes 5. Using Wireless LAN Features 6. Connecting BIP-1250 to Desktop Copyright © 2004 Bluebird Soft, Inc. All Rights Reserved. - Page 13 Replace it when its capacity is half original capacity. 12) Do not use both charge ports at the same time while battery is being charged. 13) Do not disconnect the battery while using the terminal. Copyright © 2004 Bluebird Soft, Inc. All Rights Reserved.
- Page 14 ③. Select [Connection Settings]again. When the dialog box appears, check the checkbox for “Allow USB connection with this desktop computer” and click [OK] ④. Connect the PDA to the cradle. ActiveSync should work properly. Copyright © 2004 Bluebird Soft, Inc. All Rights Reserved.
- Page 15 Power button. Note that this will remove all data in the memory – only the data in file storage will be preserved. F. Please refer to Microsoft ActiveSync’s help menu for more information. Copyright © 2004 Bluebird Soft, Inc. All Rights Reserved.
-
Page 16: Using Barcode
BIP-1250 Series 4.Using Barcode 4.Using Barcode 4.Using Barcode 1. Product Composition 2. Getting Started 3. Precautions 4. Using Barcodes 5. Using Wireless LAN Features 6. Connecting BIP-1250 to Desktop Copyright © 2004 Bluebird Soft, Inc. All Rights Reserved. - Page 17 (Enable) and read it. If you don’t want a barcode, output the corresponding code (Disable) and read it. When the Enable and Disable commands are input successfully, you will hear two “beeps”. Copyright © 2004 Bluebird Soft, Inc. All Rights Reserved.
-
Page 18: Using Wireless Lan Features
5. Using Wireless LAN Features 5. Using Wireless LAN Features 1. Product Composition 2. Getting Started 3. Precautions 4. Using Barcodes 5. Using Wireless LAN Features 6. Connecting BIP-1250 to Desktop Copyright © 2004 Bluebird Soft, Inc. All Rights Reserved. - Page 19 AP in “Network Name(SSID)”. Check the corresponding settings for the AP. Depress “OK”. 2-3) 3) The window in (2) above appears again, and the AP name appears. 4) Depress “OK”. Depress “Connect” on the window. 4-1) Copyright © 2004 Bluebird Soft, Inc. All Rights Reserved.
- Page 20 1250 to Desktop 6.Connecting BIP 1250 to Desktop 6.Connecting BIP-1250 to Desktop 1. Product Composition 2. Getting Started 3. Precautions 4. Using Barcodes 5. Using Wireless LAN Features 6. Connecting BIP-1250 to Desktop Copyright © 2004 Bluebird Soft, Inc. All Rights Reserved.
- Page 21 4) After all files are copied, the connection setting window appears if the terminal is as yet unconnected. When the terminal is connected, the installation process moves on to the next step.(If you have already connected the terminal, this step is skipped). Copyright © 2004 Bluebird Soft, Inc. All Rights Reserved.
- Page 22 c. During first installation, the terminal may not be able to connect to the PC. In this case, the Communication Error dialog box appears on the terminal. Click “OK” in this dialog box and retry connection. Copyright © 2004 Bluebird Soft, Inc. All Rights Reserved.
-
Page 23: Connecting Bip-1250 To Desktop
6) When connection is made, the following window appears. Select Yes and click “Next.” If you are making a temporary connection to the desktop, select “NO.” 7) When you select “Yes,” the following window appears. Copyright © 2004 Bluebird Soft, Inc. All Rights Reserved. - Page 24 “Next.” To connect to one desktop, select “No.” The following window appears. 9) Select programs to synchronize and click “Next.” The following window appears. 10) By clicking “Finish,” installation is completed. Copyright © 2004 Bluebird Soft, Inc. All Rights Reserved.
Need help?
Do you have a question about the BIP-1250 Series and is the answer not in the manual?
Questions and answers