
Related Manuals for Solo Music Gear SBK-10


Summary of Contents for Solo Music Gear SBK-10
- Page 1 SBK-10 Electric Guitar Kit Assembly Manual Version 2.0 Copyright © 2011 Solo Music Gear - All rights reserved...
- Page 2 Welcome... Hi, and congratulations on purchasing this Solo DIY Guitar Kit! As you know, a great deal of the 'difficult' work on this guitar has already been completed to a very high quality standard. All the cutting, shaping, drilling and fretwork (including fret dressing and fret levelling) has been completed by our technicians, to ensure you will end up with a functional instrument.
- Page 3 What You Need... It would always be advisable to have a complete basic set of tools available, but at the very least we suggest you have the following..1. Sand Paper (180, 240, 320, 400 grits) 2. Flat and needle files for metal 3.
- Page 4 a slightly damp cloth to wipe the dust away, just allow the surface to dry before you resume sanding, or you can also use a 'tack cloth' available at most paint stores. In the case of a raw wood body that has not been sealed at the factory, you would wipe with a damp (warm water) cloth before your final grit.
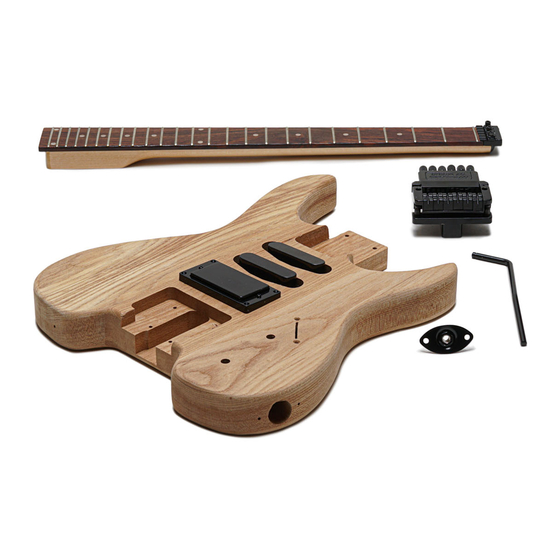
- Page 5 Assembly SL SBK-10 Notes : The SBK-10 is a unique headless guitar design with a complex but functional bridge. As much as the assembly is fairly easy and straight forward, extra care must be taken in setting up this special instrument! 1.
- Page 6 mechanism that either locks or unlocks the trem mechanism...make sure this trigger assembly works correctly and easily. 4. If you are satisfied with your electronics, you may install the control cavity cover with the supplies screws. You may install the strap pins as well in the prescribed holes with the supplies screws, and finally, install the pot knobs and switch knob.
- Page 7 combination of how the nut is cut and how high the bridge and or saddles are adjusted). Because of the relationship between string height and neck relief, you may have to go back and forth between adjusting the neck relief and adjusting the string height a couple times.
- Page 8 For the 1st string (the thinnest one) adjust the height using the saddle for that string, so there is a 0.063" - 0.078" gap (1.6 - 2 mm) between the string and the 12fth fret. This should create a gap of about 0.01" - 0.016" (0.25 - 0.4 mm) between the string and the 1st fret (this is a very small gap so you may want to use feeler gauges for this measurement).
- Page 9 the tone control at halfway...plug your guitar into an amplifier and start adjusting the pickup height closer and away from the body while you play each string or strum..you should notice an obvious difference in volume and tone by doing so. Adjust each pickup to where it sounds best.
Need help?
Do you have a question about the SBK-10 and is the answer not in the manual?
Questions and answers