Table of Contents
Advertisement
Quick Links
P r o d u c t s
Savina
Product Numbers
845/485/...
845/486/...
JADO USA
6615 West Boston
Chandler, AZ 85226
Phone: (8OO) 227 -2734
Fax: (8OO) 552-JADO (5236)
www.jadousa.com
© J A D O U S A 2 0 1 0
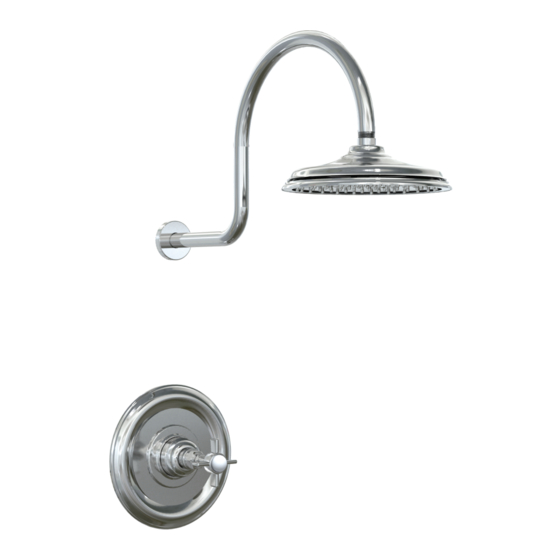
Pressure Balanced Shower and Valve Set
Pressure Balanced Shower and Valve Set
Installation Instructions
To ensure that your installation proceeds smoothly--please
read these instructions carefully before you begin.
L u x u r y
F a u c e t s
a n d
A c c e s s o r i e s
H 9 6 5 8 6 0
Advertisement
Table of Contents

Related Manuals for JADO Savina 845/485 Series


Summary of Contents for JADO Savina 845/485 Series
- Page 1 Product Numbers 845/485/... 845/486/... JADO USA 6615 West Boston Chandler, AZ 85226 Phone: (8OO) 227 -2734 Fax: (8OO) 552-JADO (5236) www.jadousa.com © J A D O U S A 2 0 1 0 H 9 6 5 8 6 0...
- Page 2 RECOMMENDED TOOLS Phillips Screwdriver Hammer Adjustable Wrench Regular Screwdriver Pipe Wrench Teflon Tape ROUGHING-IN CAUTION Turn off water at main supply. ROUGHING-IN DIMENSIONS NOTE When soldering, remove PLASTER GUARD, CARTRIDGES and CHECK STOPS (IF PRESENT). When finished soldering, flush valve body, replace cartridges, check stops (if present) and plaster guard to continue installation.
- Page 3 INSTALL TRIM Remove PIPE PLUG (1) from shower pipe. APPLY SEALING TAPE Apply sealing tape to both ends of SHOWER ARM (2). Install SHOWER ARM (2) and RAIN SHOWER HEAD (3). APPLY SEALING TAPE CAUTION: Protect finish on SHOWER ARM, SHOWER HEAD when installing.
- Page 4 JADO will not be liable for labor or other costs relating to the sale, installation, or replacement of their products. In the event of a defect in any JADO product covered by this warranty, the product must be returned to the dealer where originally purchased JADO BATHROOM AND HARDWARE MFG.
Need help?
Do you have a question about the Savina 845/485 Series and is the answer not in the manual?
Questions and answers