Advertisement
Quick Links
Advertisement

Related Manuals for Covert Blackhawk


Summary of Contents for Covert Blackhawk
- Page 1 Blackhawk LTE Trail Camera Instruction Manual...
- Page 2 What you will need to set this camera up: -Internet Access to Choose Your Plan. https://secure.covert-wireless.com -At least 4 AA Batteries -SD Card...
-
Page 3: Table Of Contents
Table of Contents Camera Button Control Diagram ......Main Screen Info ........... Installing the Batteries .......... Downloading the Mobile App ....... Purchasing Your Plan ..........Setting up the Wireless Network ......Send a Test Photo ..........Customizing Camera Settings ....... PIR Tab .............. - Page 4 Federal Communications Commission (FCC) Statement This device complies with part 15 of the FCC Rules. Operation is subject to the following two conditions: (1) This device may not cause harmful interference, and (2) this device must accept any interference received, including interference that may cause undesired operation.
- Page 5 and on, the user is encouraged to try to correct the interference by one or more of the following measures: Reorient or relocate the receiving antenna. ● Increase the separation between the equipment ● and receiver. Connect the equipment into an outlet on a circuit ●...
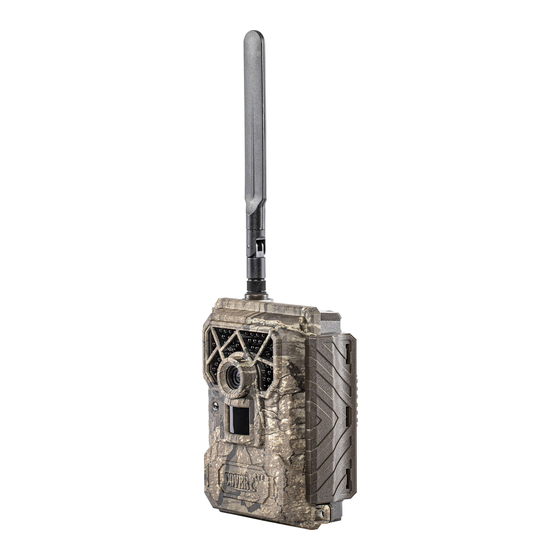
- Page 6 Camera overview: This camera is a water resistant outdoor used infrared surveillance Camera. It can be triggered by any movement of animal or human. It is monitored by a high sensitive Passive Infrared (PIR) motion sensor, and then automatically captures high quality pictures or records video clips.
-
Page 7: Installing The Batteries
Your L4-AG can function short term on 4- AA batteries. Improved battery life on 8-AA, but we suggest you use 12-AA batteries to get the most out of your cameras battery life. Using Covert rechargeable NiMH, 2300mAh, AA batteries will extend the battery life significantly when paired with a Covert Solar Panel. - Page 8 Use the Covert Tree60 mounting system to mount the camera up higher pointing down on them for a better look. Works great when you don’t have a straight tree to attach to.
-
Page 9: Downloading The Mobile App
Downloading the Mobile App: Search "Covert Wireless" in your Google Play Store or Apple App Store. Accessing the Web Portal: Open your web browser to: www.covert-wireless.com... - Page 10 Now that you have activated your AT&T plan, you will need to install a SD card in the bottom of the camera, (Covert SD card recommended). See Figure 8 for card orientation. Push in until it clicks and release. To remove, repeat that process, the card will pop out enough to remove.
-
Page 11: Setting Up The Wireless Network
Setting up the wireless network: NET tab: While finding the network you will see the words Searching Signal, in red on the screen. The camera will then say Connecting to Server as it is connecting to the server. Once you see AT&T in the top right corner, you are ready to move on. - Page 12 Download Firmware: Anytime your camera needs a firmware update, it will be automatically pushed to your camera. When you go check your camera, we encourage you to scroll to the NET Tab and download the latest firmware version in case there’s been an update. Then take out your SD card, lock it and put it in your camera.
-
Page 13: Send A Test Photo
Send a test photo: This is a great way to make sure that your camera is working properly before leaving your camera set up remotely. 1) Press the button that has the CAMERA symbol on it (1) time to manually take a photo with the camera. -
Page 15: Customizing Camera Settings
Customizing the camera settings Camera Mode Photo Mode: You can change Photo Size, set Flash power, and Photo Burst in Photo Mode. Video Mode: You can further set the Video Size and Video Length. Picture +Video Mode: If you select the combination of photo and video, the camera will automatically take a 8MP picture and a video of 10s length with 720p resolution. - Page 16 Trigger Mode Settings PIR Sensitivity: The camera will react on movements and temperature changes. Auto High PIR Interval: The PIR sensor takes a break in order to avoid unnecessary recordings. 0 seconds means the PIR function is opened all the time.
- Page 17 Time Lapse: Camera release at defined intervals: 5-60 seconds in 5 seconds steps 1-5 minutes in steps of 1 minute 5-60 minutes in steps of 5 minutes 1-8 hours in steps of 1 hour 12,16,20,24 hours in steps of 4 hours. Time Frame Setting Select ”ON”...
- Page 18 If you wish the camera to be active permanently, select the time frame menu and switch it “OFF”. Note: 1. Work hour: 00:00-00:00 means 24 hours. 2. Start: 20:00 Stop: 10:00 means 00:00-10:00 am and 20:00-24:00 of the chosen day.
- Page 19 System Settings The following settings can be done. (Information about navigation please see chapter camera programming) Set Clock You can choose different date formats according to different countries to set date and time. Password: Select ”On” and enter a 4 digit code to protect the camera from unauthorized use.
- Page 20 Rename: Enter a name that will be shown on each picture stamp. Overwrite Save the new data file to overwrite the old data file when SD card is full. SD card formatting: Delete all data of your memory card. Be sure that you won’t need the data any more.
- Page 21 6, 9 or 12 volt battery. In order to use 12 volt, you must use the Covert auxiliary battery cable. We also sell a Covert Solar Panel to directly hook up to your camera for optimal battery usage. MINI USB: Your camera can use a mini USB cable to hook up to your computer or TV to look at the photos.
-
Page 22: Troubleshooting
Troubleshooting: COMMON ERROR MESSAGES: “LOG IN FAIL” “SEND FAIL” “NETWORK BUSY” Reasons for error: Login Fail: 1. The service in your area is insufficient to run the camera. 2. Make sure that your antenna is attached securely. 3. Make sure the firmware on your device is the most up-to-date version. - Page 23 If it’s a cellular service issue you may need to purchase a booster antenna from Covert Scouting Cameras to help boost the signal. These can be very effective in boosting the signal to your camera in a...
- Page 24 If you are still having problems, contact customer service at 877-462-1799 or e-mail support@dlccovert.com If you e-mail or have to leave a message, we will get back to you as quickly as we can. Cannot access the SET-UP menu: Reasons for issue: 1) SD card not inserted 2) SD card is corrupted...
-
Page 25: Technical Specifications
Appendix One: Technical Specifications Picture Resolution 12MP Lens F/NO=2.2 FOV (Field of View)=58° Frequency Bands: FDD-LTE: B4/B13; WCDMA: Not supported; GSM: Not supported Flash Power Full, Low Display Screen 2.0” LCD Memory Card Up to 64GB Video Resolution 1080P, 720P, VGA, QVGA PIR Sensor Multi Zone PIR Sensitivity Adjustable(High/Normal/Low) Trigger Time 0.6s... - Page 26 1-8 hours (in 1 hour increments) ; 12h,16h,20h,24h; Photo Burst 1–10 Video Length 1–60s Power Supply 4AA, 8AA or 12AA Stand-by Current < 0.25 (<6mAh/Day) Power Consumption 600 videos(interval=5min, video Length=10s ) ; >800 MMS (use 12*AA batteries) Low Battery Alert LED Indicator Mounting Rope/Belt/Pythonlock Dimensions 5.6”x4.75”x3 Operation Humidity 5% - 90%...
Need help?
Do you have a question about the Blackhawk and is the answer not in the manual?
Questions and answers