Table of Contents
Advertisement
Advertisement
Table of Contents

Related Manuals for d.gen TELEIOS GRANDE H6


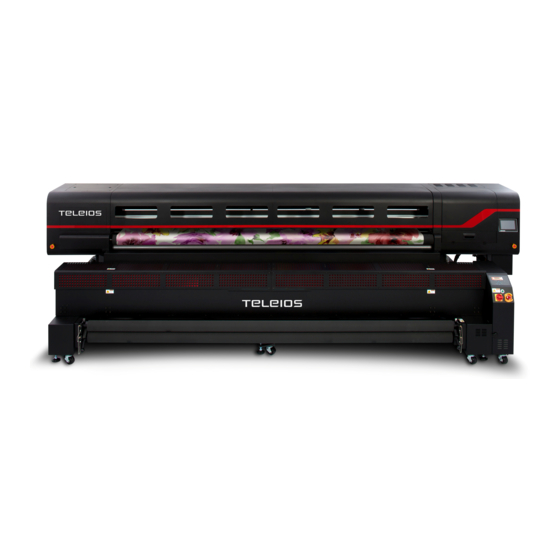
Summary of Contents for d.gen TELEIOS GRANDE H6
- Page 1 OPERATOR MANUAL...
-
Page 2: Table Of Contents
TITLE OPERATOR MANUAL PAGE PRINTERS TELEIOS GRANDE H6 VERSION 2017JAN23/1 OUT OF REVISED BY MUNOZ, ANTONIO support@dgen.com INDEX. 1. Important Safety Instructions ………………………………………………………………………………. 2. Notes on Usage and Storage ……………………………………………...……………………………….. 3. Presenting the printer ……………………………………………………………………………………….. 4. Turning ON and OFF the printer ……………………………………………………………..………….. -
Page 3: Important Safety Instructions
TITLE OPERATOR MANUAL PAGE PRINTERS TELEIOS GRANDE H6 VERSION 2017JAN23/1 OUT OF REVISED BY MUNOZ, ANTONIO support@dgen.com 1. IMPORTANT SAFETY INSTRUCTIONS. When using this product. Take care not to spill liquid on this product. Do not attempt to service this product yourself. - Page 4 TITLE OPERATOR MANUAL PAGE PRINTERS TELEIOS GRANDE H6 VERSION 2017JAN23/1 OUT OF REVISED BY MUNOZ, ANTONIO support@dgen.com When not using the printer. If you do not print for a long time, the print head nozzles may become clogged. Turn the printer on at least once a week to prevent the print head clogging.
-
Page 5: Presenting The Printer
TITLE OPERATOR MANUAL PAGE PRINTERS TELEIOS GRANDE H6 VERSION 2017JAN23/1 OUT OF REVISED BY MUNOZ, ANTONIO support@dgen.com 3. PRESENTING THE PRINTER. FRONT Left side maintenance front cover. Open this cover to clean the area around the print head. It is normally closed when the printer is in use. - Page 6 TITLE OPERATOR MANUAL PAGE PRINTERS TELEIOS GRANDE H6 VERSION 2017JAN23/1 OUT OF REVISED BY MUNOZ, ANTONIO support@dgen.com Lower carriage cover. This cover is opened for maintenance purposes taken in the capping station. Also, to switch on the control PC by pressing the green led button. Normally closed when using the printer.
- Page 7 TITLE OPERATOR MANUAL PAGE PRINTERS TELEIOS GRANDE H6 VERSION 2017JAN23/1 OUT OF REVISED BY MUNOZ, ANTONIO support@dgen.com Automated wiper unit. If user executes Auto cleaning, this wiper will work automatically. To increase the wiper’s performance, remove ink residue on wiper periodically.
- Page 8 TITLE OPERATOR MANUAL PAGE PRINTERS TELEIOS GRANDE H6 VERSION 2017JAN23/1 OUT OF REVISED BY MUNOZ, ANTONIO support@dgen.com PC control box’s main switch. To turn ON/OFF the software side of the printer. BACK Printer’s main ON/OFF switch. This switch turns ON/OFF the printer (not the other units like take-up unit…).
- Page 9 TITLE OPERATOR MANUAL PAGE PRINTERS TELEIOS GRANDE H6 VERSION 2017JAN23/1 OUT OF REVISED BY MUNOZ, ANTONIO support@dgen.com Stopper. There are 6 stoppers in this printer located in its base to fix and level up the machine to a permanent and perfect horizontal position.
- Page 10 TITLE OPERATOR MANUAL PAGE PRINTERS TELEIOS GRANDE H6 VERSION 2017JAN23/1 OUT OF REVISED BY MUNOZ, ANTONIO support@dgen.com Big Ink System SP1 SP2 sensor level cables. These cables come from the photo reflecting sensors located in the Big Ink System activating the green LED indicator when full, and activating the red LED indicator when empty.
- Page 11 TITLE OPERATOR MANUAL PAGE PRINTERS TELEIOS GRANDE H6 VERSION 2017JAN23/1 OUT OF REVISED BY MUNOZ, ANTONIO support@dgen.com BIG INK SYSTEM Cover. Buzzer can be heard if this cover is opened. Cover normally closed when using the printer. Lid and ink filter.
- Page 12 TITLE OPERATOR MANUAL PAGE PRINTERS TELEIOS GRANDE H6 VERSION 2017JAN23/1 OUT OF REVISED BY MUNOZ, ANTONIO support@dgen.com White LED bar’s power connector. This cable powers up the white LED light bar in the Big Ink System. Ink outlets. By pushing down the silver fastening is possible to release or insert the ink line without spilling ink.
-
Page 13: Turning On And Off The Printer
TITLE OPERATOR MANUAL PAGE PRINTERS TELEIOS GRANDE H6 VERSION 2017JAN23/1 OUT OF REVISED BY MUNOZ, ANTONIO support@dgen.com 4. TURNING ON AND OFF THE PRINTER. Turning ON the printer. The operator must follow the following steps to correctly turn ON the printer. - Page 14 TITLE OPERATOR MANUAL PAGE PRINTERS TELEIOS GRANDE H6 VERSION 2017JAN23/1 OUT OF REVISED BY MUNOZ, ANTONIO support@dgen.com Turn on the front control panel by pressing the green switch. Note The buzzer located at the REAR CONTROL panel will be activated if one or both FEEDER and TAKE UP units are in AUTO OFF (AUTO button in idle).
- Page 15 TITLE OPERATOR MANUAL PAGE PRINTERS TELEIOS GRANDE H6 VERSION 2017JAN23/1 OUT OF REVISED BY MUNOZ, ANTONIO support@dgen.com Turn on the PC control box by pressing the green switch. Wait for the touch panel to display “Jetting”. Turning OFF the printer.
-
Page 16: Loading Ink
TITLE OPERATOR MANUAL PAGE PRINTERS TELEIOS GRANDE H6 VERSION 2017JAN23/1 OUT OF REVISED BY MUNOZ, ANTONIO support@dgen.com 5. LOADING INK. The operator must follow the following steps to correctly load with ink the Big Ink System. Open the Big Ink System’s cover. Buzzer will be activated. - Page 17 TITLE OPERATOR MANUAL PAGE PRINTERS TELEIOS GRANDE H6 VERSION 2017JAN23/1 OUT OF REVISED BY MUNOZ, ANTONIO support@dgen.com Pour gently to avoid spilling ink outside the cylinder. Do not pour the ink too fast. Leave some time to let the ink go through the filter before pouring some more.
-
Page 18: Loading The Media
TITLE OPERATOR MANUAL PAGE PRINTERS TELEIOS GRANDE H6 VERSION 2017JAN23/1 OUT OF REVISED BY MUNOZ, ANTONIO support@dgen.com 6. LOADING THE MEDIA. Introducing the printer’s rear control panel. Introducing the printer’s front control panel. d·gen International, Inc. - COMPANY PRIVATE (LEVEL 1) FOR THE USER NOT TO BE DISCLOSED TO UNAUTHORIZED PERSONS –... - Page 19 TITLE OPERATOR MANUAL PAGE PRINTERS TELEIOS GRANDE H6 VERSION 2017JAN23/1 OUT OF REVISED BY MUNOZ, ANTONIO support@dgen.com Release the latches at both side of the feeding unit to remove the pneumatic shaft. Press the golden valve to release all the air inside the pneumatic tube.
- Page 20 TITLE OPERATOR MANUAL PAGE PRINTERS TELEIOS GRANDE H6 VERSION 2017JAN23/1 OUT OF REVISED BY MUNOZ, ANTONIO support@dgen.com Place the pneumatic shaft in the media’s core oriented to make the printable side facing upwards when going through the printing table. Make sure the roll is centered using the measuring tape as a reference.
- Page 21 TITLE OPERATOR MANUAL PAGE PRINTERS TELEIOS GRANDE H6 VERSION 2017JAN23/1 OUT OF REVISED BY MUNOZ, ANTONIO support@dgen.com Make the media pass the dancing bar as shown in the illustration below. Unwind media while pulling upwards its ends. Stop unwinding when the media reached a higher point than the free roller. Make the media go through the free roller.
- Page 22 TITLE OPERATOR MANUAL PAGE PRINTERS TELEIOS GRANDE H6 VERSION 2017JAN23/1 OUT OF REVISED BY MUNOZ, ANTONIO support@dgen.com Then make it go through the first rubber roller. Make sure the media is aligned by ensuring that the distance between the edge of the media and the printer’s frame is the same at all points.
- Page 23 TITLE OPERATOR MANUAL PAGE PRINTERS TELEIOS GRANDE H6 VERSION 2017JAN23/1 OUT OF REVISED BY MUNOZ, ANTONIO support@dgen.com Once the media reached the front side of the printer, push the feeding button in the touch panel, and make it pass through the drying unit’s free roller. Then make the media go through the dancing bar while pulling upwards the media to apply tension.
- Page 24 TITLE OPERATOR MANUAL PAGE PRINTERS TELEIOS GRANDE H6 VERSION 2017JAN23/1 OUT OF REVISED BY MUNOZ, ANTONIO support@dgen.com Raise the upper take-up roller using the side levers. 2 persons needed for this operation. Pass the media between the pair of take-up rollers like shown in the illustration bellow and apply some tension by pulling the media from the edges.
- Page 25 TITLE OPERATOR MANUAL PAGE PRINTERS TELEIOS GRANDE H6 VERSION 2017JAN23/1 OUT OF REVISED BY MUNOZ, ANTONIO support@dgen.com Lower the upper take-up roller and lock it with both latches. Caution The drying unit may be hot; observe all necessary precautions. Failure to observe the necessary precautions could result in burns.
- Page 26 TITLE OPERATOR MANUAL PAGE PRINTERS TELEIOS GRANDE H6 VERSION 2017JAN23/1 OUT OF REVISED BY MUNOZ, ANTONIO support@dgen.com Important If media is loaded and the right and left edges of the roll are uneven, media feeding problems may cause the media to move around during printing. Either rewind to align the edges or use a roll without any issues.
- Page 27 TITLE OPERATOR MANUAL PAGE PRINTERS TELEIOS GRANDE H6 VERSION 2017JAN23/1 OUT OF REVISED BY MUNOZ, ANTONIO support@dgen.com Caution Since the media is heavy, it should not be carried by one person. When loading or removing the media, use at least two persons.
- Page 28 TITLE OPERATOR MANUAL PAGE PRINTERS TELEIOS GRANDE H6 VERSION 2017JAN23/1 OUT OF REVISED BY MUNOZ, ANTONIO support@dgen.com In case using the TU-4000. In case using the TU-4000 reel, the setting will look like this. Introducing the control panel. d·gen International, Inc. - COMPANY PRIVATE (LEVEL 1) FOR THE USER NOT TO BE DISCLOSED TO UNAUTHORIZED PERSONS –...
-
Page 29: Nozzle Check Test Print
TITLE OPERATOR MANUAL PAGE PRINTERS TELEIOS GRANDE H6 VERSION 2017JAN23/1 OUT OF REVISED BY MUNOZ, ANTONIO support@dgen.com 7. NOZZLE CHECK TEST PRINT. The nozzle check test print allows the user to check the current state of the nozzles in the print head. - Page 30 TITLE OPERATOR MANUAL PAGE PRINTERS TELEIOS GRANDE H6 VERSION 2017JAN23/1 OUT OF REVISED BY MUNOZ, ANTONIO support@dgen.com Once the media is correctly loaded you may proceed to check the media’s width by pressing the button MEDIA WIDTH. The media’s width will be displayed under “MEDIA WIDTH” in mm. Then set the desired point of origin (START POINT).
- Page 31 TITLE OPERATOR MANUAL PAGE PRINTERS TELEIOS GRANDE H6 VERSION 2017JAN23/1 OUT OF REVISED BY MUNOZ, ANTONIO support@dgen.com HOW DOES YOUR TEST PRINT LOOKS LIKE? All the nozzles are firing correctly presenting no gaps in the test print. A certain number of nozzles are not firing independently from which row number they belong to.
- Page 32 TITLE OPERATOR MANUAL PAGE PRINTERS TELEIOS GRANDE H6 VERSION 2017JAN23/1 OUT OF REVISED BY MUNOZ, ANTONIO support@dgen.com Big number of missing nozzles affecting both channels equally. Perform several cleanings until getting a perfect test pattern. Make sure the ink tubes are free of air and bubbles.
- Page 33 TITLE OPERATOR MANUAL PAGE PRINTERS TELEIOS GRANDE H6 VERSION 2017JAN23/1 OUT OF REVISED BY MUNOZ, ANTONIO support@dgen.com No nozzles being fired. All the nozzles may be clogged. Perform several cleanings until getting a perfect test pattern. Make sure the gray flat cables are well connected to the head driver board.
-
Page 34: Purge And Auto-Cleaning
TITLE OPERATOR MANUAL PAGE PRINTERS TELEIOS GRANDE H6 VERSION 2017JAN23/1 OUT OF REVISED BY MUNOZ, ANTONIO support@dgen.com Blank space between row of nozzles. Make sure the bidirectional alignments were correctly performed. BDR value should be the same in both row of nozzles. - Page 35 TITLE OPERATOR MANUAL PAGE PRINTERS TELEIOS GRANDE H6 VERSION 2017JAN23/1 OUT OF REVISED BY MUNOZ, ANTONIO support@dgen.com Press the PURGE button. The air pump will kick in. Giving approximately 3 to 5 seconds, before the vacuum pumps kicks back, close the solenoid valves by pressing the white LED buttons at the carriage.
- Page 36 TITLE OPERATOR MANUAL PAGE PRINTERS TELEIOS GRANDE H6 VERSION 2017JAN23/1 OUT OF REVISED BY MUNOZ, ANTONIO support@dgen.com To stop the heads dripping ink, open the solenoid valves again by switching ON the white LED buttons. Press the HOME button to raise the capping station. Wait until all the subtanks are full and the JETTING message is displayed.
-
Page 37: Global Bidirectional Adjustment
TITLE OPERATOR MANUAL PAGE PRINTERS TELEIOS GRANDE H6 VERSION 2017JAN23/1 OUT OF REVISED BY MUNOZ, ANTONIO support@dgen.com 9. GLOBAL BIDERECTIONAL ADJUSTMENT. The bidirectional alignment is performed (by a qualified technician) using a specific media and carriage height (usually middle position). If the user wants to change the media’s thickness and/or change the carriage height for whatever reason, the bidirectional compensation factor needs to be regulated to make the heads fire exactly on the same spot when printing from right to left and left to right. - Page 38 TITLE OPERATOR MANUAL PAGE PRINTERS TELEIOS GRANDE H6 VERSION 2017JAN23/1 OUT OF REVISED BY MUNOZ, ANTONIO support@dgen.com The test print will look something like the image below. Using a loop or a microscope is possible to check the middle line. If BDL and BDR are were not fired on the same spot means the bidirectional compensation factor needs to be corrected.
- Page 39 TITLE OPERATOR MANUAL PAGE PRINTERS TELEIOS GRANDE H6 VERSION 2017JAN23/1 OUT OF REVISED BY MUNOZ, ANTONIO support@dgen.com Repeat steps 1 to 4 adjusting the BI-DIR COMPENSATION value until getting a test print similar to the illustration below. Important Do not forget to switch OFF the TEST button and turn ON the FEEDING before resuming production with the new media and/or carriage height.
-
Page 40: Feed Adjustment
TITLE OPERATOR MANUAL PAGE PRINTERS TELEIOS GRANDE H6 VERSION 2017JAN23/1 OUT OF REVISED BY MUNOZ, ANTONIO support@dgen.com 10. FEED ADJUSTMENT. A proper feed adjustment will help to obtain good quality prints without having feeding banding issues. There are two steps to adjust the feeding. First, before start to print, is recommended to take a look at the speed dials located at the take-up and feeder units. - Page 41 TITLE OPERATOR MANUAL PAGE PRINTERS TELEIOS GRANDE H6 VERSION 2017JAN23/1 OUT OF REVISED BY MUNOZ, ANTONIO support@dgen.com Once the feeder and take-up units are correctly adjusted is time to start adjusting the feeding distance more precisely to eliminate the banding effect.
- Page 42 TITLE OPERATOR MANUAL PAGE PRINTERS TELEIOS GRANDE H6 VERSION 2017JAN23/1 OUT OF REVISED BY MUNOZ, ANTONIO support@dgen.com Dancing bar’s weights. Both front and rear dancing bars are equipped with a series of weights. Depending on the media’s characteristics it is needed to add or subtract weights to the dancing bar in order to add stability to the feeding and take-up systems.
- Page 43 TITLE OPERATOR MANUAL PAGE PRINTERS TELEIOS GRANDE H6 VERSION 2017JAN23/1 OUT OF REVISED BY MUNOZ, ANTONIO support@dgen.com Press roller. This printer is equipped with a press roller located between the 3 rubber roller and the printing table. The press roller’s function is to increase the tension in the media located on the printing table. It is easy to use.
-
Page 44: Using The Front Dryer
TITLE OPERATOR MANUAL PAGE PRINTERS TELEIOS GRANDE H6 VERSION 2017JAN23/1 OUT OF REVISED BY MUNOZ, ANTONIO support@dgen.com 11. USING THE FRONT DRYER. The front dryer consists of 6 blowers and 6 heating rods. The main function is to dry the ink before it gets into the fixation unit and avoid “ghosting issues”... -
Page 45: Using The Fixation Unit
TITLE OPERATOR MANUAL PAGE PRINTERS TELEIOS GRANDE H6 VERSION 2017JAN23/1 OUT OF REVISED BY MUNOZ, ANTONIO support@dgen.com 12. USING THE FIXATION UNIT. Introducing the control panel. Green LCD screen. Fixation unit’s menu is displayed here. AUTO/MANUAL button. With this button is possible to select the mode between AUTO and MANUAL. AUTO mode basically turns off the heaters and the fume buster and lowers the up/down roller automatically after a certain adjustable time frame. - Page 46 TITLE OPERATOR MANUAL PAGE PRINTERS TELEIOS GRANDE H6 VERSION 2017JAN23/1 OUT OF REVISED BY MUNOZ, ANTONIO support@dgen.com BUSY indicator. The “BUSY” green LED blinks when the machine is operational. Introducing the control panel. Fixation’s unit main switch. Turn clockwise the switch to turn on all the fixation unit. Turn counter-clockwise the switch to turn off all the fixation unit.
- Page 47 TITLE OPERATOR MANUAL PAGE PRINTERS TELEIOS GRANDE H6 VERSION 2017JAN23/1 OUT OF REVISED BY MUNOZ, ANTONIO support@dgen.com After finishing setting the media following the diagram below (leaving some 2 to 3 meters of extra media in the front of the fixation unit)… (Printer is stopped at this moment).
- Page 48 TITLE OPERATOR MANUAL PAGE PRINTERS TELEIOS GRANDE H6 VERSION 2017JAN23/1 OUT OF REVISED BY MUNOZ, ANTONIO support@dgen.com The green LCD display will show the welcome screen. It is possible to control the machine in AUTO or MANUAL mode. For the correct functioning of the fixation unit we recommend to leave the settings a shown in the image below.
- Page 49 TITLE OPERATOR MANUAL PAGE PRINTERS TELEIOS GRANDE H6 VERSION 2017JAN23/1 OUT OF REVISED BY MUNOZ, ANTONIO support@dgen.com Caution Please note that under MANUAL conditions leaving the fixation unit unattended for a long period of time may put at risk the integrity of the machine and the safety of the people around.
- Page 50 TITLE OPERATOR MANUAL PAGE PRINTERS TELEIOS GRANDE H6 VERSION 2017JAN23/1 OUT OF REVISED BY MUNOZ, ANTONIO support@dgen.com HEATER 1 SV. This is the temperature set value. Press ENTER and modify this value using the arrow keys (Left/right to change position and up/down to increase/decrease the value). Then press ENTER button again to confirm.
- Page 51 TITLE OPERATOR MANUAL PAGE PRINTERS TELEIOS GRANDE H6 VERSION 2017JAN23/1 OUT OF REVISED BY MUNOZ, ANTONIO support@dgen.com Caution Before regulating values, we strongly suggest the user to check first under which conditions is the fixation unit working in. Either in AUTO or MANUAL mode.
- Page 52 TITLE OPERATOR MANUAL PAGE PRINTERS TELEIOS GRANDE H6 VERSION 2017JAN23/1 OUT OF REVISED BY MUNOZ, ANTONIO support@dgen.com Lower the cursor until reaching the TAKE-UP function. Since the take-up unit is currently turned OFF an “X” is displayed next by the percentage RPM.
- Page 53 TITLE OPERATOR MANUAL PAGE PRINTERS TELEIOS GRANDE H6 VERSION 2017JAN23/1 OUT OF REVISED BY MUNOZ, ANTONIO support@dgen.com Note Only possible to change the direction of rotation having the take-up in the OFF position. Turn off the take- up. Change direction and then turn on the take-up again.
- Page 54 TITLE OPERATOR MANUAL PAGE PRINTERS TELEIOS GRANDE H6 VERSION 2017JAN23/1 OUT OF REVISED BY MUNOZ, ANTONIO support@dgen.com When the PV value reached the SV value you may raise the up/down roller. Move the cursor to ROLLER UP/DOWN and then press the ON/OFF button. The X will change to an O when the up/down roller reaches the highest point.
-
Page 55: Using The Fume Buster
TITLE OPERATOR MANUAL PAGE PRINTERS TELEIOS GRANDE H6 VERSION 2017JAN23/1 OUT OF REVISED BY MUNOZ, ANTONIO support@dgen.com Caution Lower the UP/DOWN roller if the printer will remain idle for a long time. Note Before switching off the fixation unit we suggest to switch off the heater and leave the fume buster running for a while to cool down. - Page 56 TITLE OPERATOR MANUAL PAGE PRINTERS TELEIOS GRANDE H6 VERSION 2017JAN23/1 OUT OF REVISED BY MUNOZ, ANTONIO support@dgen.com Fume buster’s side. With the air valve provided, is possible to regulate the air flow from the fixation unit to the fume buster.
-
Page 57: Exchanging Media
TITLE OPERATOR MANUAL PAGE PRINTERS TELEIOS GRANDE H6 VERSION 2017JAN23/1 OUT OF REVISED BY MUNOZ, ANTONIO support@dgen.com 14. EXCHANGING THE MEDIA. Exchanging the media is possible after pausing/cancelling the printing process. 1. Pause/Cancel the current job. 2. Switch off the take-up and the feeder. - Page 58 TITLE OPERATOR MANUAL PAGE PRINTERS TELEIOS GRANDE H6 VERSION 2017JAN23/1 OUT OF REVISED BY MUNOZ, ANTONIO support@dgen.com 13. Turn on both take-up and feeder units. 14. Press the forward button in the touch panel to move the union to the front side after passing the carriage.
-
Page 59: Removing The Take-Up Roll
TITLE OPERATOR MANUAL PAGE PRINTERS TELEIOS GRANDE H6 VERSION 2017JAN23/1 OUT OF REVISED BY MUNOZ, ANTONIO support@dgen.com 15. REMOVING THE TAKE-UP ROLL. Removing the take up-roll while printing is possible 1. Make sure the take-up unit in the fixation unit is turned on. -
Page 60: Problem Solver
TITLE OPERATOR MANUAL PAGE PRINTERS TELEIOS GRANDE H6 VERSION 2017JAN23/1 OUT OF REVISED BY MUNOZ, ANTONIO support@dgen.com 16. PROBLEM SOLVER PRINT LOOKS LIKE THIS? Missing nozzles on the image. For example, yellow lines can be seen on a red area means a certain number of magenta REASON nozzles are not firing. - Page 61 TITLE OPERATOR MANUAL PAGE PRINTERS TELEIOS GRANDE H6 VERSION 2017JAN23/1 OUT OF REVISED BY MUNOZ, ANTONIO support@dgen.com PRINT LOOKS LIKE THIS? Darker colors between passes. REASON The printer is feeding less distance than it should. Check the feeding compensation at 2 passes (in case running with a 2-pass profile).
- Page 62 TITLE OPERATOR MANUAL PAGE PRINTERS TELEIOS GRANDE H6 VERSION 2017JAN23/1 OUT OF REVISED BY MUNOZ, ANTONIO support@dgen.com PRINT LOOKS LIKE THIS? Ink drops on the print. REASON Pressure in the heads may be too low. Make sure all the solenoid valves are open (LED on).
-
Page 63: Appendix
TITLE OPERATOR MANUAL PAGE PRINTERS TELEIOS GRANDE H6 VERSION 2017JAN23/1 OUT OF REVISED BY MUNOZ, ANTONIO support@dgen.com 17. APPENDIX. Printing area and margins. Print quality is greatly affected by the type and quality of media used. Choose a media suited to the task at hand. - Page 64 TITLE OPERATOR MANUAL PAGE PRINTERS TELEIOS GRANDE H6 VERSION 2017JAN23/1 OUT OF REVISED BY MUNOZ, ANTONIO support@dgen.com Printing area and margins. The light grey area in the illustration below shows the printable area. The arrow indicates the feeding direction. Total width 3300 mm 130’’...
Need help?
Do you have a question about the TELEIOS GRANDE H6 and is the answer not in the manual?
Questions and answers