Table of Contents
Advertisement
Quick Links
Basic Operations
You can switch the display language for function names and other items to English.
Setting Guide
On the home screen, tap [ ] [[設定] (Settings) [[設定] (Settings) [[言語と文字入力]
Please read this manual first
●
(Language & input) [[言語(Language)を選択] (Select language) [[English].
For detailed operations, refer to the "Instruction Manual application" (Japanese).
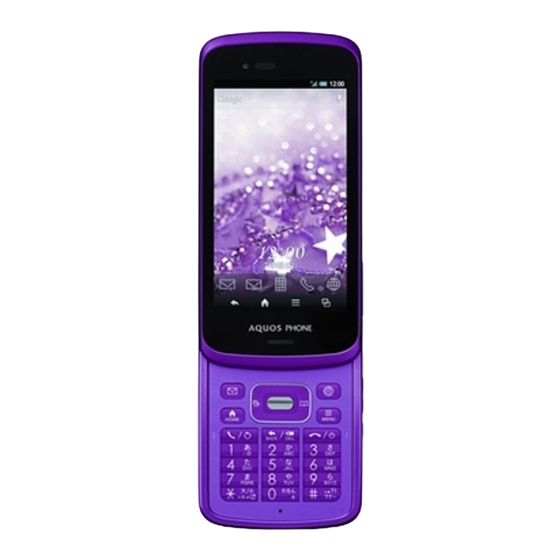
Thank you for buying the "AQUOS PHONE SL IS15SH" (simply called the "product" from here on).
On the home screen, tap [ ] [[Settings] [[Instruction Manual].
●
This manual describes the settings and precautions for using the product.
For descriptions on various functions, refer to the "Instruction Manual application" (Japanese).
● E xplanations of this manual are based on the case when the main unit is closed. If it is opened,
menu items/icons/on-screen keys etc. may be different.
●Basic Operations
●E-mail Setting and Changing
Describes names of parts and basic operations.
E-mail Address
Set for using E-mail (~@ezweb.ne.jp). An e-mail
●Initial Settings
address is set automatically in the initial settings.
■STEP1: Setting Profile settings
You can change the e-mail address set in the initial
Set information such as your phone number and
settings.
mail address.
●Making Calls
■STEP2: Setting Google account
You can also use incoming histories/outgoing
You will be able to download applications from
histories or the address book to make a call.
Google Play. You can also use services such as
Gmail, YouTube, Google Maps and Google
●Receiving Calls
Calendar by setting it.
You can also put a call on hold.
■STEP3: Setting Location
You can use location information acquired by GPS
●Transferring Data
function.
You can transfer your data from your old au phone.
■STEP4: Setting Wi-Fi
®
settings
●Viewing/Playing Data
Set the wireless LAN (Wi-Fi
®
) function.
Hardware keyboard
You can view/play transferred data.
■STEP5: Setting au ID
You can operate the product with the hardware keyboard when the product is opened.
Set it to download applications from au
●Data Backup
Explanations of this manual are based on the case when the main unit is closed.
Market.
You can back up data to a microSD™ memory
Tap
card.
■STEP6: Setting au Wi-Fi SPOT
Gently touch the screen
Set it to use au Wi-Fi SPOT.
and then immediately
●Reducing Battery
release your finger.
■STEP7: Setting au widget
Consumption
■ Character Input Method
Paste au widget.
You can switch "function key" setting to reduce the
You can enter characters by flick input or tapping keys repeatedly.
battery consumption.
●WEB de Seikyu-sho (Online
When the explanation of how to switch input methods is displayed, confirm
billing statements)
the contents and follow the on-screen instructions.
This is a service in which you can check the monthly
Flick input
billing statements on the Internet.
* All company names and product names in this manual are trademarks or registered trademarks
of the respective companies.
Sold by: KDDI CORPORATION,
OKINAWA CELLULAR TELEPHONE COMPANY
《Character entry screen (12 Key)》
Manufactured by: SHARP CORPORATION
June 2012, 1st Edition
■
STEP4: Setting Wi-Fi
®
settings
■
STEP5: Setting au ID
You can connect to Internet services using wireless LAN (Wi-Fi
®
) environment set up at home or
You can use various services provided by au such as "au Kantan Kessai (Easy Payment)" in which you can purchase applications displayed on au Market and Google Play by setting an au ID.
public wireless LAN environment while you are out.
au ID
●
Set in an environment where the product can receive radio waves from access point devices
you connect to.
au ID password
1
2
3
● Alternatively, on the home screen, tap [ ] [[Settings] [[au Easy Setting] to set up.
1
Tap
Move [OFF] to the right
Tap a Wi-Fi
®
network to
[To Wi-Fi settings].
to switch it to [ON].
connect to.
Tap [Next].
* If access points to which
you want to connect are not
detected, tap [ADD
NETWORK] and add the
access points manually.
4
5
6
7
Enter the password and
Tap [^] and tap
Tap [No] or [Yes].
tap [Connect].
[Done].
Tap [設定画面へ]
(Go to the setting
screen).
* au ID registration is
complete. Next, set the
information for reissuing
the password.
After you purchase the product, the initial settings screen is displayed automatically when
turning on the power for the first time. Follow the on-screen instructions to set each function.
Alternatively, on the home screen, tap [ ] [[Settings] [[Settings] [[Initial setting] to
●
set up.
■ STEP1: Setting Profile settings
Display
1
2
Touch it directly with your fingers to operate.
f Power key
Power ON
Hold down f.
Unlock
Unlock by
moving
down.
$
Tap it to display Recent Apps.
Tap [Next].
e
Tap it to display available functions (menus).
#
4
5
Tap it to display the home screen.
^
Tap it to return to the previous screen.
Flick
Touch the screen and then
quickly flick your finger up,
down, left or right.
Tap [Yes].
By touching a key, the candidates that can be entered by
flick input are displayed. By flicking the key in the direction
of a desired character being displayed, the character is
entered in the character entry area.
Input mode key
Tap it to switch the input modes.
Register your au phone number or any other characters as an au ID. Same "au ID" as another user's cannot be registered.
Register the password for using au ID.
2
3
4
5
Tap [Next].
Confirm the contents
Tap [au IDの設定 ・ 保存]
Enter the security
and tap [OK].
(Set/Save au ID).
password and
tap [OK].
* The default value is the
four-digit security code you
set at the time of the
subscription.
9
8
Enter your date of birth,
Tap [終了] (End).
the secret question and
its answer, tap [入力完了]
(Finish entering) and tap
[設定] (Set).
■
STEP2: Setting Google account
You can use applications provided by Google Inc. such as "Gmail", "Play Store" and "Talk" by setting up a Google account. You can use the product without a Google account set, but in such case the
applications provided by Google Inc. are not available.
The main setting items are as follows (For "secondary e-mail address", leave it blank when you do not have another mail address.).
Register your Google account (user ID) and any characters which you want to use as a mail address. You can register any user name but you cannot set the
User name
same user name as another user's.
Password
Register the password for using your Google account.
3
●
The Google account setup screen is also displayed when you activate an application for which a Google account is required for the first time.
1
2
Tap [To profile
Register each item
settings].
and tap [Save].
Tap
Tap [New].
[To Google account].
* If you have already had
a Google account,
tap [Existing].
7
8
Tap [Next].
Tap [Not now].
Confirm the contents
and tap [I accept].
* Tap [Join Google+] to
join Google+.
■
STEP6: Setting au Wi-Fi SPOT
au Wi-Fi SPOT is a public wireless LAN service that enables you to use the comfortable high-speed
Internet when you are out.
1
2
6
Confirm the contents
Confirm the contents and
and tap [Next].
tap [同意する] (Agree).
4
Enter the password and
tap [利用規約に同意して新規登録]
(Agree with the terms of
service and register newly).
* Tap "お好きなau IDを新規登録
したい方はこちら" (For registering
any au ID) to register a new au ID
with other than au phone numbers.
* Tap "au IDをお持ちの方はこち
ら" (For using the au ID you
already have) to set an au ID you
have already owned.
Tap [設定完了] (Finish setting).
3
3
4
5
6
Enter your [First] and
Enter any e-mail
Enter the password and
Enter the secondary
[Last], and tap [Next].
address and tap
tap [Next].
e-mail address and
[Next].
the question and answer
needed in case
you forget the password,
and tap [Next].
9
10
11
Enter the text displayed
Tap [Next].
Tap [Next].
on the screen and tap
[Next].
■
STEP7: Setting au widget
au widget is a widget that notifies you of latest information at the best time.
1
2
3
Confirm the contents,
Tap [Finish].
Confirm the contents and
tap [Accept] or [Not
* Tap [Finish and E-mail
tap [同意する] (Agree).
setup] to proceed to the
accept], and tap [Next].
initial settings of E-mail.
■ STEP3: Setting Location
1
2
3
Tap a function to use.
Confirm the contents
Tap [Next].
and tap [Agree] to
enable it.
WEB de Seikyu-sho (Online billing statements)
"WEB de Seikyu-sho" (Online billing statements) is a service in which you can check the
monthly billing statements on the Internet.
● A Support ID is required to check the billing statements in "WEB de Seikyu-sho" (Online
billing statements). If you do not have one, register a new Support ID* in advance. You
can acquire a new Support ID on the au Customer Support website (https://cs.kddi.com/).
* For registration, "au phone number", "security code" and "Customer code (written on a customer copy
which you get when newly subscribing/changing subscription contents)" are required.
1
2
3
On the home screen, tap
Tap
Tap [サイトへアクセス]
[ ], tap [Internet] and
(Access to site).
[auお客さまサポート]
tap [auサービスリスト]
(au Customer Support).
* When the explanations
(au service list).
about the quick tool box
are displayed, tap "Close".
* When the confirmation screen
is displayed, confirm the
contents, tap "許可する" (Allow)
and tap "同意する" (Agree).
4
5
6
Tap [請求内容 ・ お支払い]
Tap [請求書をWEBで見る
For details such as
(WEB de 請求書)]
subsequent operations,
(Bill/Payment).
(Check bill on the WEB
check them on the
(WEB de Seikyu-sho)).
web pages.
Advertisement
Table of Contents

Related Manuals for Sharp Aquos phone SL


Summary of Contents for Sharp Aquos phone SL
- Page 1 Register your Google account (user ID) and any characters which you want to use as a mail address. You can register any user name but you cannot set the User name Thank you for buying the “AQUOS PHONE SL IS15SH” (simply called the “product” from here on). On the home screen, tap [ ] [[Settings] [[Instruction Manual].
- Page 2 E-mail Setting and Changing E-mail Address Making Calls Receiving Calls ■ Changing E-mail Address ■ Making a Call Using an Address Book 1 2 3 3 3 4 5 6 1 2 3 E-mail (~@ezweb.ne.jp) is a service which enables you to exchange e-mails with other cell ■...
Need help?
Do you have a question about the Aquos phone SL and is the answer not in the manual?
Questions and answers