Table of Contents
Advertisement
Quick Links
Advertisement
Table of Contents

Related Manuals for Sharp AQUOS zero


Summary of Contents for Sharp AQUOS zero
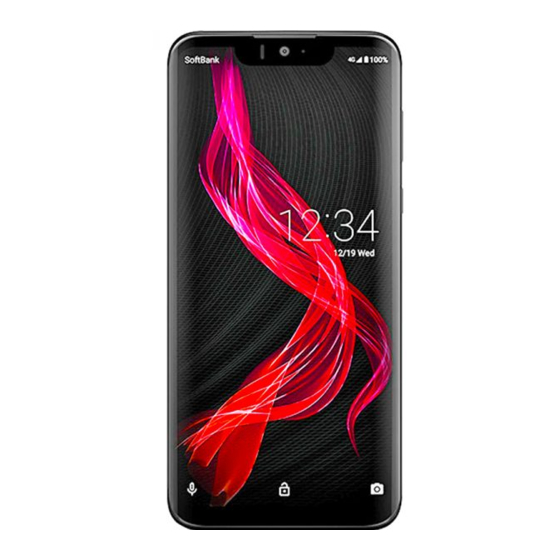
- Page 1 AQUOS zero User Guide...
-
Page 3: Table Of Contents
About the User Guide............3 Getting Started Package Contents............... 6 Parts & Functions.............. 6 SIM Card................8 Internal Storage..............10 Charging Handset..............10 AQUOS zero Power On/Off..............13 User Guide Contents Making Initial Settings............ 14 Google Account..............16 Unlocking Screen...............18 Basic Operations Basic Operations............... - Page 4 Viewing & Managing Photos/Videos (Album)....92 Radio Wave Exposure and Specific Absorption Rate (SAR) Information..............206 Water & Dust Resistance..........208 Application Basics Confirmation when First Activating Applications..96 Applications...............97 Adding/Deleting Applications.......... 99 Managing Data Backup & Restore............106 Importing Data from Other Mobiles......106 Wi-Fi/Bluetooth ®...
-
Page 5: About The User Guide
Display. Key labels in the User Guide are simplified for description purposes and differ with actual Display. Other Notations In the User Guide, the product is referred to as "handset." "801SH" here refers to this mobile phone "AQUOS zero."... -
Page 7: Getting Started
Getting Started Package Contents............... 6 Parts & Functions.............. 6 SIM Card................8 Internal Storage..............10 Charging Handset..............10 Power On/Off..............13 Making Initial Settings............ 14 Google Account..............16 Unlocking Screen...............18... -
Page 8: Package Contents
Package Contents Parts & Functions Package Contents Handset (Front) ・Handset (AQUOS zero) ・Battery is built into handset. ・Handset back cover is not removable. ・SIM Removal Tool (Complimentary sample) ・3.5mm Earphones Adapter (Complimentary sample) ・クイックスタート (Japanese) ・お願いとご注意 (Japanese) ・Instructional insert Name... - Page 9 Handset (Back and Sides) Handset Keys Name Description Volume Up Increase volume. Name Description Use while recording videos or when talking Volume Decrease volume. through Speakerphone. Down Key (Recorder Mic) Make sure not to cover Recorder Mic. Turn Display off/on. Long Press for power Power Key Back on/off, reboot, etc.
-
Page 10: Sim Card
SIM Card With Display upward, insert SIM Removal Tool in removal hole SIM Card is an IC card containing phone number and other in Card Tray customer information. Handling SIM Card Check the following regarding SIM Card handling. ・Press firmly and straight until Card Tray ejects. IC (gold) chip ・For SIM Card handling, see SoftBank Website. - Page 11 Removing SIM Card SIM-Unlocking Handset Always power off beforehand. Handset can be SIM-unlocked. SIM-unlocking handset allows other-carrier SIM cards to be used with it. ・Some services, functions, etc. may have restrictions when With Display upward, insert SIM Removal Tool in removal hole an other-carrier SIM card is used.
-
Page 12: Internal Storage
Internal Storage Charging Handset Internal storage can be used for saving data including system Battery is built into handset. data, applications, and video and photos taken with Camera. Internal Battery Data in Internal Storage A lithium-ion battery is built into handset; it is not Data in internal storage may be lost/altered due to accidents, removable. - Page 13 About Charging ROBOQUL The following charging options are available. ROBOQUL is designed for use in Japan. You assume all responsibility if used abroad. Use abroad may infringe on the country's/region's laws; check before using. Charging Description Option ROBOQUL Place handset in ROBOQUL and (desktop charge using an AC Adaptor (optional holder)
- Page 14 Charging with ROBOQUL After charging, remove handset from ROBOQUL and disconnect Charge using ROBOQUL [SHEGH1] and an AC Adaptor (USB USB Type-C plug on AC Adaptor Type-C™ quick charge AC Adaptor for USB PD [ZSDBAS] (SB- AC20-TCPD)) (optional accessories). When charging using ROBOQUL and handset is powered on, ROBOQUL swivels when Display lights up, at start of charging, for incoming calls, alarms, etc.
-
Page 15: Power On/Off
Powering On USB PD [ZSDBAS] (SB-AC20-TCPD)) (optional accessory). For information on other peripheral devices, see SoftBank Website. Long Press Power Key until SHARP logo appears Insert USB Type-C plug of AC Adaptor into External Connection Jack Handset powers on, and lock screen appears after a while. -
Page 16: Making Initial Settings
Making Initial Settings Powering Off When powering on the first time, an initial settings wizard appears for optionally making Wi-Fi, Google™ account, and other settings. Follow onscreen instructions to set items. Power Key (Long Press) Insert SIM Card before powering on handset. Making Initial Settings Select language then START... - Page 17 Set up a Google Account Skip ・See "Google Account" for details on a Google Account. ・ After Tapping Add a card follow onscreen prompts to ・ To skip Google Account setup, Tap Skip save card information. Set/check each item ACCEPT Set each item DONE FOR NOW Handset restarts, and initial settings are complete.
-
Page 18: Google Account
Google Account Add account Use a Google Account and get more convenience with Google services. A Google Account is required to use some services or fully use some applications. Google Account Cautions Google Account Mail Address & Password Be careful not to forget your Google account mail address and password. - Page 19 Enter first name Enter last name Next Yes, I'm in ・If confirmation appears, follow onscreen prompts. ・To not add a phone number, or add a phone number for security only, Tap More options . Continue by following onscreen prompts. ・ To not set a phone number, Tap Skip Set/enter date of birth and gender Next...
-
Page 20: Unlocking Screen
Unlocking Screen Signing in to a Google Account Screen Lock In window for logging in to a Google account, enter mail address Next After a period of inactivity, Display turns off to save battery power (screen lock active). Screen lock prevents accidental Touchscreen operation. - Page 21 Unlocking Screen When Display is turned off (screen lock active), Power Key Lock screen appears. In lock screen, Flick Screen is unlocked. ・For enhanced security, set handset to require pattern drawing or lock no. (PIN)/password entry for unlocking screen or set screen to be unlocked with your fingerprint as needed.
-
Page 23: Basic Operations
Basic Operations Basic Operations............... 22 Using Manner Mode............22 Using Airplane Mode............24 Using Fingerprint Authentication Function....24 Updating the System............27 Using ROBOQUL..............28... -
Page 24: Basic Operations Basic Operations
Basic Operations Using Manner Mode Mute ringtones and other handset sounds to avoid disturbing Selecting Options and Navigating others around you. Screens Manner mode setting is also accessible from Quick Settings Window. Tap items, icons, onscreen keys, etc. to open assigned items. Manner Mode Options Settable items are the following. - Page 25 Canceling Manner Mode (Vibe) Using Manner Mode (Mute) Press Volume Up/Down Key for volume bar, (Vibe) (Mute) Press Volume Up/Down Key Icon changes to (Manner OFF), and handset exits Manner mode. Volume bar appears. (Manner OFF) Icon changes to (Vibe), and handset enters Manner mode (vibe).
-
Page 26: Using Airplane Mode
Using Airplane Mode Using Fingerprint Authentication Function Leaving power on, suspend signal-transmitting functions. Fingerprint Authentication Function Activating Airplane Mode Hold finger to sensor to authenticate and use handset. Use this function to unlock screen or access Notifications Window. Drag Status Bar down Fingerprint Authentication Function Cautions Observe the following when using the fingerprint... - Page 27 Saving Fingerprints Follow onscreen prompts and set pattern / lock no. (PIN) / password for unlocking screen In Home Screen, Drag Favorites Tray to top of Display (Settings) Security & location ・This is a backup method for unlocking the screen if unable to authenticate with your fingerprint.
- Page 28 Fingerprint Sensor Cautions DONE Observe the following when using Fingerprint Sensor. ・Do not hit or subject handset to excessive shock. May cause malfunction or damage. Do not scratch sensor surface or poke with a pen, pin, or other pointed object. ・Do not place stickers on sensor surface or mark with ink.
-
Page 29: Updating The System
Updating the System Advanced System update Check whether system updates are required via the network, and update manually as required. Software Update Cautions Applications Applications may be updated or newly added, or names, icons, operations and user interfaces of applications may be changed. -
Page 30: Using Roboqul
Using ROBOQUL NEXT When charging using ROBOQUL and handset is powered on, ROBOQUL swivels when Display lights up, at start of charging, for incoming calls, alarms, etc. If emopa is enabled, ROBOQUL makes an audio notification as it swivels. ROBOQUL Firmware Updates ROBOQUL firmware is updatable. - Page 31 Setting ROBOQUL Operations of ROBOQUL Set whether ROBOQUL swivels while charging with ROBOQUL. ・When enabled while charging using ROBOQUL and handset is powered on, ROBOQUL swivels when Display lights up, at start of charging, for incoming calls, alarms, etc. Setting is complete. ・...
-
Page 33: Touchscreen/Text Entry
Touchscreen/Text Entry Using Touchscreen............32 Text Entry.................33... -
Page 34: Using Touchscreen
When using handset with gloves on, enable glove mode. Touch icon or other item lightly, move it where desired, and ・Use of pens, pencils or sharp objects release finger. ・Use with objects on/against Display ・Use while wet Touchscreen Usage Cautions To prevent malfunctions, do not: ・Touch Display with wet fingers... -
Page 35: Text Entry
Text Entry Pinch/Spread Contact Display lightly, then move fingers toward each other Keyboards (Pinch) or away from each other (Spread). Use onscreen keyboards for text entry. ・ Tap Text entry field for keyboard. To hide it, Tap ・Text entry descriptions are for Google Keyboard (default input method). - Page 36 Switching Keyboards In a text entry window, Entry mode is switched. ・ Tap to toggle between alphabet entry mode and number/symbol/emoji/emoticon entry mode. Entering Letters To enter Phone: In a text entry window, Phone is entered. ・ To toggle case, Tap before typing a letter.
-
Page 37: Handset Interface
Handset Interface Handset Screens............... 36 Icons at Display Top (Status Bar)........43 Checking Notifications (Notifications Window).....44 Checking Notifications (Quick Settings Window)..46 Capturing Screenshots (Clip Now)........48 Scrolling Screen Automatically (ScrollAuto)....49... -
Page 38: Handset Screens
Handset Screens Home Screen Layout Lock Screen Layout Lock screen appears at power on or when Power Key is Pressed while Display is turned off (screen lock active). From lock screen, unlock screen or quickly activate (Camera) or Google Assistant. By default, Wallpaper changes randomly each time lock screen appears (Lock Photo Shuffle). - Page 39 Navigation Bar Portrait Orientation & Landscape Orientation Tap, Drag, or Flick icons on Navigation Bar (Display bottom) for the following functions/operations. appears in Navigation Bar when handset is rotated horizontally. Tap to switch current screen to landscape orientation. To switch screen to portrait orientation, rotate handset vertically and Tap Enable Auto-rotate screen...
- Page 40 Multi-Window From application history at bottom of Multi-Window, Tap next Split screen to view and operate two applications. application Activate the two applications beforehand. Viewing and operating (Address Book) and (Phone) is described as an example. ・Viewing in Multi-Window is not available for some applications.
- Page 41 Changing Wallpaper Home screen Lock screen Home screen and lock screen Touch & Hold open area of Home Screen Setting is complete. ・ Tap Home screen to set the image as Wallpaper for Home Screen only. Wallpapers ・ Tap Lock screen to set the image as Wallpaper for lock screen only.
- Page 42 Adding Shortcuts Adding Widgets Add Album, Analog clock, etc. as follows. In app list, Touch & Hold application and Drag to "Add to home screen" Touch & Hold open area of Home Screen Release finger at location to add shortcut Widgets Shortcut is added.
- Page 43 Adding Folders Drag to location to add widget Add folders to collect icons. ・Folders can also be created in Favorites Tray and app list. In Home Screen, Touch & Hold icon to place in folder Widget is added. ・Drag to sheet visible at edge of Display to toggle sheets and add.
- Page 44 Making Home Screen Settings Deleting Folders Settable items are the following. In Home Screen, Touch & Hold folder Drag to "Remove" ・Delete folders the same way in Favorites Tray and app Item Description list. Set whether to show dots with application ・Applications in folder are also deleted.
-
Page 45: Icons At Display Top (Status Bar)
Icons at Display Top (Status Bar) Main Notification Indicators Indicators (new message notification, handset status, etc.) Notification Indicators appear on the left. appear at the top of Display. ・Notification Indicators do not appear in lock screen. Status Bar Layout Indicator Description Glove Mode On Call (Dialing/Arriving/in Progress) -
Page 46: Checking Notifications (Notifications Window)
Checking Notifications Main Status Indicators (Notifications Window) Status Indicators appear on the right. Open notifications and check handset status. Opening Notifications Window Drag Status Bar down Indicator Description Battery Strength Charging Battery Saver On Signal Strength No Signal (4G LTE/4G/3G) Notifications Window opens. - Page 47 Notifications Window Layout Checking Notifications Drag Status Bar down Notifications and active functions Use corresponding functions. Notifications Window opens. Manage notifications. Delete all notifications and close Notifications Window. Deleting Notifications 1 Usable functions depend on the notification. As an example, dial or send an SMS to the phone number of a new call.
-
Page 48: Checking Notifications (Quick Settings Window)
Checking Notifications (Quick Deleting All Notifications Settings Window) Tap icons to toggle functions on/off, etc. Drag Status Bar down Opening Quick Settings Window Drag Status Bar down Notifications Window opens. CLEAR ALL Notifications Window opens. Drag Status Bar down All notifications are deleted. ・Some notifications may not be deleted. - Page 49 Quick Settings Window Layout Adding Setting Keys In Quick Settings Window, Touch & Hold Setting key below "Hold and drag to add tiles" Drag Setting key to target location Deleting Setting Keys In Quick Settings Window, Touch & Hold Setting Drag to "Drag here to remove"...
-
Page 50: Capturing Screenshots (Clip Now)
Capturing Screenshots (Clip Now) Capturing Screenshots Slide finger along the edge of Display to capture a screenshot. Capture screenshots for saving as files. ・Some screens may not be capturable. Enabling Clip Now ・ View captured screenshots in (Album), etc. In Home Screen, Drag Favorites Tray to top of Display Touch upper left (upper right) corner of Display (Settings) AQUOS Useful... -
Page 51: Scrolling Screen Automatically (Scrollauto)
Scrolling Screen Automatically Setting Clip Now (ScrollAuto) Set sliding gesture for capturing screenshots. Scroll the screen up and down automatically. Enabling ScrollAuto In Home Screen, Drag Favorites Tray to top of Display (Settings) AQUOS Useful Clip Now In Home Screen, Drag Favorites Tray to top of Display (Settings) AQUOS Useful Clip Now menu opens. - Page 52 ScrollAuto Operations Using ScrollAuto Setting ScrollAuto to Applications The feature may not follow the setting with certain applications. In ScrollAuto menu, Set Apps Tap application name ・ Tap application name to toggle on ( )/off ( ・If confirmation appears, follow onscreen prompts. Drag up slowly Setting Whether to Show Status Bar Indicator while Running Target Applications...
-
Page 53: Phone
Phone Placing/Answering Calls........... 52 Optional Services..............56 Handset Phone Number............ 63 Making Phone Settings.............63 Address Book..............65... -
Page 54: Placing/Answering Calls
Placing/Answering Calls How to dial directly to make a call and answer a call, as well as options when a call is arriving/during a call are described. Support for VoLTE/VoLTE (HD+) and HD Voice Handset supports VoLTE/VoLTE (HD+) and HD Voice for high-quality call sound. - Page 55 Calling Emergency Number When Answering Calls (Display Off) Handset Screen is Locked In lock screen, Flick up Emergency Enter number Flick up when call is arriving for emergency service ・Use if method for unlocking screen is setting other than None Swipe .
- Page 56 Arriving Call/Answer Phone Operations Answering Calls (Display On) Answering with Answer Phone As call is arriving, Flick Absence Memo When call is arriving, ANSWER ・ When screen is unlocked, Incoming call Flick Absence Memo Playing Back Answer Phone Messages In lock screen, Tap notification twice Tap message ・When screen is unlocked, Drag Status Bar down for Notifications Window, then Tap notification...
- Page 57 Call Window Layout/In-Call Operation Editing Subjects of Voice Memos In Home Screen, (Phone) Settings Calls Answer phone Voice Memo List Touch & Hold message Edit Subject Enter subject name Copying Voice Memos to Internal Storage In Home Screen, (Phone) Settings Calls Answer phone Voice Memo List...
-
Page 58: Optional Services
Optional Services Using VoLTE/VoLTE (HD+) Use these optional services for voice calls: VoLTE (Voice over LTE) is a system enabling voice calls over LTE networks. Compared to voice calls over conventional 3G connections, high-sound quality calls and reduced time until Optional Services ringtones sound are possible. - Page 59 Call Forwarding Always forward When busy When unanswered When unreachable In Home Screen, (Phone) Divert menu opens. Phone opens. ・ Tap Always forward to set whether to always forward calls. ・ Tap When busy to set whether to forward a new call during a call.
- Page 60 Voicemail Always forward When busy When unanswered When unreachable In Home Screen, (Phone) Divert menu opens. Phone opens. ・ Tap Always forward to set whether to always divert calls to Voicemail Center. ・ Tap When busy to set whether to divert a new call during a call to Voicemail Center.
- Page 61 Voicemail Call Waiting Voicemail and Answer Phone Requires separate subscription. Voicemail and Answer Phone differ mainly in the following ways. ・Voicemail: Messages are held at the Voicemail Center. In Home Screen, (Phone) Messages are held even when handset is not turned on or outside a service area.
- Page 62 When Call Arrives during Another Call Notify Caller ID A tone sounds; Flick up to begin call. In Home Screen, (Phone) Canceling Call Waiting In Additional settings, Call waiting Group Calling Requires separate subscription. Phone opens. During a call, (Add call) Settings Calls Phone opens.
- Page 63 Call Barring Caller ID Network default Hide number Show Restrict outgoing/incoming calls and SMS messages. number ・When attempting to place/send a call/SMS while calling is restricted, a message appears. Message may take time to appear in some areas. Restriction Description - All outgoing calls Restrict all outgoing calls.
- Page 64 Rejecting Calls from Unnotified Numbers SoftBank call settings Call barring In Call barring menu, Reject call Number not sent Troubleshooting Calling is not barred Are you using Call Forwarding or Voicemail? Calling may not be barred even if All outgoing calls and Call barring menu opens.
-
Page 65: Handset Phone Number
Handset Phone Number Making Phone Settings Checking Your Phone Number Making Phone Settings Check phone information and make settings. Settable items are the following. In Home Screen, Drag Favorites Tray to top of Display (Settings) Item Description - Sort by Change the sort order of callers/callees in Display Call History. - Page 66 Setting/Canceling Answer Phone Settings In Phone settings, Calls Answer phone Answer phone Mannermode Checking Answering Message for Answer Phone In Phone settings, Calls Answer phone Answering message confirm Touch & Hold "Answering message content" Play Phone settings open. Setting Answering Time for Answer Phone In Call settings, Calls Answer phone...
-
Page 67: Address Book
Address Book Save phone numbers and mail addresses as well as birthdays, nicknames, etc. Set ringtones for each contact as needed. Address Book Caution Contacts may be altered/lost if handset is left uncharged or due to accidents, malfunctions, repairs, handset upgrade/replacement, mishandling, etc. - Page 68 Dialing from Contacts Syncing with Contacts on Server Sync handset Address Book with Google contacts on server. Also sign in to a Google Account before syncing with a In Home Screen, (Phone) non-Google Account. In Home Screen, Drag Favorites Tray to top of Display (Settings) Accounts Tap account to sync...
- Page 69 Tap number Handset dials number. Call begins when other party answers.
-
Page 71: Messaging
Messaging Sending Messages (+メッセージ (+Message))....70 Using Gmail............... 71 Using Email................74... -
Page 72: Sending Messages (+メッセージ (+Message))
Sending Messages (+メッセージ (+Message)) Tap recipient Sending New Messages In Home Screen, (+メッセージ) Message window opens. ・To send to a number/mail address not saved in contacts, Enter number/mail address and create message. Tap message entry field Enter message Message is sent. New message... -
Page 73: Using Gmail
Using Gmail Follow onscreen prompts Use Gmail (Google's webmail service) as well as your work/ personal email. Account setup is complete. Setting an Account Set up a Google Account or an email account to use Gmail. When activating (Gmail) for the first time, account setup menu appears;... - Page 74 Creating/Sending Gmail Enter recipient, subject and text In Home Screen, Drag Favorites Tray to top of Display Message is sent. Operations when Creating Message (Google) Adding Cc/Bcc Recipients In message composition window, in Recipient field Enter recipient Attaching Files In message composition window, Attach file Select where file is saved Select file...
- Page 75 Opening New Gmail Opening Gmail When message arrives, new message notification appears in lock screen. In Home Screen, Drag Favorites Tray to top of Display In lock screen, Tap new message notification twice (Google) Message window opens. ・For two or more new messages, message list opens; Tap one. ・...
-
Page 76: Using Email
Using Email Operations when Opening Messages Replying to Messages Send/receive email using (Email), an email-only application. In message window, for message to reply to Create message Setting an Account ・ To reply to all, for message to reply to Reply all ・... - Page 77 Creating/Sending Email Saving Current Message as Draft While creating message, Save draft In Home Screen, Drag Favorites Tray to top of Display (Tools) (Email) Discarding Current Message In message composition window, Discard DISCARD Adding Quick Response Text In message composition window, Insert quick response Select text...
- Page 78 Opening Email Syncing Accounts Manually In message list, Drag down ・Sync sent and received messages manually at any time In Home Screen, Drag Favorites Tray to top of Display regardless of the automatic sync settings. (Tools) (Email) Message list opens. Tap message Message window opens.
-
Page 79: Internet
Internet Using the Internet (Chrome)..........78... -
Page 80: Using The Internet (Chrome)
Using the Internet (Chrome) Enter search string or URL Use Chrome simply by entering words to search for or URLs. TLS (Transport Layer Security) is a protocol for encrypting sent/received data. While in a screen connected by TLS, data is encrypted to safely send/receive private information, credit card numbers, corporate secrets, etc., and provide protection against online threats (eavesdropping, falsification, impersonation, etc.). - Page 81 Adding Bookmarks Opening Saved (Downloaded) Image, Etc. In Home Screen, Drag Favorites Tray to top of Display (Contents Manager) Tap image, etc. In Home Screen, (Chrome) ・ When menu appears, Tap Downloads Chrome activates. Show Website to add Current Website is added to Bookmarks.
- Page 82 Bookmark Operations Checking Browsing History Editing Bookmarks In Chrome, Bookmarks for bookmark to In Home Screen, (Chrome) edit Edit Edit each item Moving Bookmarks In Chrome, Bookmarks for bookmark to move Move Select location ・SoftBank folder and bookmarks in SoftBank folder cannot be moved.
- Page 83 Setting Chrome Settings Set items Make Chrome settings. Settable items are the following. Item Description Sign in to your Google Account and make Sign in to settings for bookmarks, history, etc. View Chrome account information. Search engine Select a search engine. Autofill and Enable or disable automatic form entry, or payments...
-
Page 85: Camera
Camera Capturing Photos/Videos..........84... -
Page 86: Capturing Photos/Videos
Capturing Photos/Videos Drag shooting mode at bottom to right and select Picture Photos and videos taken with handset are saved to handset (internal storage). Camera Cautions General Use Mind etiquette when using Camera. Test Camera before shooting special moments. Do not use Camera in places where shooting is prohibited. Shot images may not be used/transferred without Photo Viewfinder (Back Camera) appears. - Page 87 Photo Viewfinder (Front Camera) Layout Images are dark/grainy Is there a strong light near the subject, or a strong light source in the screen? Avoid letting a strong light source (the sun, light, etc.) in the screen. Leaving handset in a warm place for a long time or where Camera is in direct sunlight for a long time may affect image quality.
- Page 88 Recording Videos In Home Screen, (Camera) Tone sounds and video is saved. Troubleshooting Camera exits suddenly Continuing to use Camera while handset is warm causes warning to appear, after which Camera saves captured image data and exits. Drag shooting mode at bottom to right and select Video Camera exits automatically after a period of inactivity.
- Page 89 Video Viewfinder Layout Settings Access various Camera settings. Mobile Light Change Mobile Light setting. Front/Back Camera switch Switch between Front Camera and Back Camera. Shooting menu Change shooting scene. Capture video. Album/thumbnail Open Album, or view immediately captured photo/video. Shooting mode Drag up/down to change shooting modes ( Video Picture...
-
Page 91: Music & Images
Music & Images Listening to Music (Play Music)........90 Viewing & Managing Photos/Videos (Album)....92... -
Page 92: Listening To Music (Play Music)
Listening to Music (Play Music) Music library Play Music Playing High-Resolution Audio Handset supports high-resolution audio playback. Requires commercially available headphone or speaker compatible with high-resolution audio. (Output to Earphones-Microphone Jack on 3.5mm Earphones Adapter connected to External Connection Jack.) Playable music formats are those with a combined quantization bit rate and sampling frequency of 16 bits Music library opens. - Page 93 Music Playback Screen Layout Creating Playlists In Home Screen, Drag Favorites Tray to top of Display (Google) (Play Music) Song image Listen Now opens. Toggle repeat all songs, repeat current song, normal ・If confirmation appears, follow onscreen prompts. playback. Drag slider to adjust playback position. Song rating Music library for item/song to add to...
-
Page 94: Viewing & Managing Photos/Videos (Album)
Viewing & Managing Photos/ Adding Currently Playing Song to a Videos (Album) Playlist In Music Playback screen, Add to playlist Playing Videos Compatible with Dolby playlist name VisionTM Song is added to playlist. Once a video compatible with Dolby Vision plays, the view mode setting appears in Notifications Window. - Page 95 enable With photos ) and Tap to also play photos captured during video capture (Video with Photos Tap photo/video Playback screen). Alternatively, in file view window for photos captured while taking a video, Tap to play a video. ・ appears for photos/videos that are set to be hidden. ・...
- Page 96 Drag frame left/right. using a commercially available USB Type-C cable, and ・To save the current image as a photo and share it, Tap delete the DATABASE folder in ¥PRIVATE¥SHARP¥PM . Follow onscreen prompts. on internal storage before opening photos or videos.
-
Page 97: Application Basics
Application Basics Confirmation when First Activating Applications..96 Applications...............97 Adding/Deleting Applications.......... 99... -
Page 98: Confirmation When First Activating Applications
Confirmation when First Activating Applications DENY ALLOW Set the operation of applications when activating for the first time. The type and content of a confirmation differ with the application. The following explains two types of confirmation: First things first and Battery optimization. Setting Required Permissions for Applications Permit applications to use data on handset, Camera, etc. -
Page 99: Applications
Applications Setting Battery Optimization Enable Battery optimization to prevent applications from Activating Applications running while Display is turned off (except while charging). ・Confirmation for optimizing Battery appears when launching or making settings for some applications. Normally, ignore Battery optimization. Optimizing the Battery may cause In Home Screen, Drag Favorites Tray to top of Display some applications to exit. - Page 100 Opening Recent Apps Window Function Shortcuts With some applications, Touch & Hold for shortcuts to functions. Tap function shortcut to launch function Flick directly. Exiting Applications Recent apps window opens. ・In app list, recent apps window does not appear by Flicking ・...
-
Page 101: Adding/Deleting Applications
Adding/Deleting Applications Recent Apps Window Layout Download a variety of applications (free/paid) from Google Play. Change the setting of downloaded applications to enable manual or automatic updates. Sign in to a Google Account beforehand. Getting Help with Google Play In Google Play, Help &... - Page 102 Purchasing Applications (Play Store) In Home Screen, Drag Favorites Tray to top of Display Google Play opens. ・If confirmation appears, follow onscreen prompts. (Play Store) Tap free application Google Play opens. ・If confirmation appears, follow onscreen prompts. INSTALL Tap paid application Application downloads and installs.
- Page 103 Refund Requests Request refunds within designated period. Returned applications are deleted from handset; no payment is required. One refund request per application. In Google Play, My apps & games application REFUND Application Purchase Disclaimer Purchase applications at your own risk. SoftBank Corp. is not responsible for any disadvantage resulting for user or third parties.
- Page 104 Updating Installed Applications Uninstalling Applications Applications installed via Google Play can be deleted (uninstalled). In Home Screen, Drag Favorites Tray to top of Display (Play Store) In Home Screen, Drag Favorites Tray to top of Display Google Play opens. ・If confirmation appears, follow onscreen prompts. (Play Store) My apps &...
- Page 105 Tap application UNINSTALL Application is deleted.
-
Page 107: Managing Data
Managing Data Backup & Restore............106 Importing Data from Other Mobiles......106... -
Page 108: Backup & Restore
Backup & Restore Importing Data from Other Mobiles Backup/Restore Options Import data from other mobiles, etc. using Bluetooth ® Backup and restore options are the following. Receiving Data via Bluetooth (e.g., ® Address Book) Option Description Use あんしんバックアップ (Anshin Backup) When data reception request arrives, notification appears in to back up handset data to a server in the lock screen. - Page 109 Tap Bluetooth share notification Tap file ® Data is saved. ・If confirmation appears, follow onscreen prompts. Opening Files Received by Bluetooth ® Transfer In Home Screen, Drag Favorites Tray to top of Display (Settings) Connected devices Connection preferences Received files Tap file Follow onscreen prompts...
-
Page 111: Wi-Fi/Bluetooth
Wi-Fi/Bluetooth ® Connecting by Wi-Fi............110 Using Bluetooth Function..........116 ® Using Tethering.............. 120... -
Page 112: Connecting By Wi-Fi
Connecting by Wi-Fi Wi-Fi Handset supports Wi-Fi (wireless LAN). Access the Internet via household Wi-Fi networks. Automatic Updates for Optimizing Wi- Fi Connection While using Wi-Fi, updates for optimizing connection may be received or applied automatically. Connecting Selected Access Points Wi-Fi menu opens. - Page 113 Checking IP Address Enter password CONNECT In Wi-Fi menu, Wi-Fi preferences Advanced ・IP address is shown below "IP address." Checking Access Point Activity while Connected In Wi-Fi menu, Tap access point ・Connection activity, signal strength, frequency, security, etc. appear. Handset connects to the access point. Troubleshooting ・Password (indicated by WEP, WPA, KEY, etc.) may be found on a label on your Wi-Fi router.
- Page 114 Entering Details Manually to Connect Use Wi-Fi In Home Screen, Drag Favorites Tray to top of Display Wi-Fi is enabled. ・ Tap Use Wi-Fi to toggle on ( )/off ( (Settings) Add network Network & internet Enter network name Wi-Fi Select security Wi-Fi menu opens.
- Page 115 Deleting Connected Access Points Enter password SAVE In Home Screen, Drag Favorites Tray to top of Display Handset is connected. ・Entering a password is not required if an access point is not security protected. (Settings) Network & internet Wi-Fi Wi-Fi menu opens.
- Page 116 Deleting Saved Access Points Tap connected access point In Home Screen, Drag Favorites Tray to top of Display FORGET (Settings) Handset disconnects from the access point. ・After disconnecting from an access point connection, the password may need to be entered again to reconnect. Network &...
- Page 117 Using Wi-Fi Direct Saved networks Use Wi-Fi Direct to establish a Wi-Fi connection with other Wi-Fi Direct compatible devices with no need for an access point or Internet connection. In Home Screen, Drag Favorites Tray to top of Display (Settings) Network &...
-
Page 118: Using Bluetooth ® Function
Using Bluetooth Function ® Wi-Fi Direct Connect handset to other Bluetooth devices (e.g., headset) ® for handsfree conversations, or connect to other Bluetooth ® capable mobile phones, etc. to exchange data. Bluetooth Connectivity ® The Bluetooth function is a technology that enables wireless ®... - Page 119 Troubleshooting Enabling Bluetooth Function ® Cannot use Bluetooth ® Handset may be in Airplane mode. If in Airplane mode, In Home Screen, Drag Favorites Tray to top of Display Bluetooth function is disabled. Bluetooth function ® ® (Settings) Connected devices Connection can be enabled again after placing handset in Airplane preferences...
- Page 120 Pairing Bluetooth Devices Connecting to Paired Bluetooth Devices ® ® Search for and pair nearby Bluetooth devices. Paired Connect handset and paired Bluetooth device. ® ® Bluetooth devices can be connected easily. ® ・Enable the Bluetooth function on handset and the paired ®...
- Page 121 Sending Data via Bluetooth (e.g., ® Address Book) Tap target device In Home Screen, Drag Favorites Tray to top of Display (Address Book) Data is sent. Sending to Several Contacts Address Book opens. Touch & Hold contact in Address Book Tap another contact ( Bluetooth...
-
Page 122: Using Tethering
Using Tethering Setting Tethering When using tethering, several methods are available for About Tethering connecting handset with other devices. Make settings according to connection method and status of target device beforehand. Tethering makes handset act as an external modem (like a Wi- Settable items are the following. -
Page 123: Handset Settings
Handset Settings About Settings............... 122 Data Usage Settings............123 Battery Settings.............130 Display Settings............. 132 Sound Settings..............139 AQUOS Useful Settings..........144 Security & Location Settings........146 System Settings..............158 Other Handset Settings..........164... -
Page 124: About Settings
Set captions, magnification gestures, and Accessibility other useful accessibility functions. Google Make settings for Google services. Check and make settings for language, System input, date and time, backup, reset, handset information, etc. Check FAQ on Sharp Website and do a Troubleshooting self-check. -
Page 125: Data Usage Settings
Data Usage Settings Setting Whether to Use Mobile Data Check the amount of your mobile data usage (per month) and In Data usage menu, Mobile data restrict usage. Data usage is only as tracked by handset, and may differ from ・... - Page 126 Checking Mobile Data Usage App data usage In Home Screen, Drag Favorites Tray to top of Display Check application data usage in App data usage window. (Settings) Network & internet Network & internet window opens. Data usage Data usage menu opens.
- Page 127 Checking Data Usage per Application App data usage In Home Screen, Drag Favorites Tray to top of Display App data usage window opens. Tap application name (Settings) Data usage for each application appears. Network & internet Network & internet window opens. Data usage Data usage menu opens.
- Page 128 Setting Reset Date for Data Usage Data warning & limit In Home Screen, Drag Favorites Tray to top of Display App data usage cycle (Settings) Flick date up/down to set reset date Network & internet Reset date is set. Network & internet window opens. Data usage Data usage menu opens.
- Page 129 Setting an Alert Amount for Increased Data Usage Data warning & limit In Home Screen, Drag Favorites Tray to top of Display Data warning (Settings) ・ Available when Set data warning is enabled. Enter amount for alert Network & internet Amount for data alert is set.
- Page 130 Changing Automatic Data Setting a Limit on Mobile Data Usage Communication & Sync Settings Customize settings to automatically lower amount of data In Home Screen, Drag Favorites Tray to top of Display communication. Change settings in the following ways. Item Description Disable location information.
- Page 131 Restrict Background Mobile Data Data warning & limit In Home Screen, Drag Favorites Tray to top of Display Data limit (Settings) ・ Available when Set data limit is enabled. Enter amount for limit Network & internet Limit on data is set. ・...
-
Page 132: Battery Settings
Battery Settings App data usage Save battery power by restricting some handset features, or check Battery usage. Battery Settings Settable items are the following. Item Description Check battery strength, condition, etc. Save battery power by restricting some Battery Saver handset features. Tap application name Adaptive Set whether to limit battery usage of... - Page 133 Using Battery Saver Setting Whether to Show Battery Strength in Percent beside Battery Indicator on Status Bar In Home Screen, Drag Favorites Tray to top of Display In Home Screen, Drag Favorites Tray to top of Display (Settings) Battery Battery percentage ・...
-
Page 134: Display Settings
Display Settings TURN ON NOW Set Display brightness, wallpaper, etc. Display Settings Settable items are the following. Item Description Brightness Set Display brightness. level Adaptive Set whether to automatically adjust of Setting is complete. brightness Display brightness for surroundings. ・ To disable Battery Saver, Tap TURN OFF NOW Set a period of inactivity after which Sleep... - Page 135 Setting Text Font Setting Timing for Activating Screen Saver In Home Screen, Drag Favorites Tray to top of Display In Home Screen, Drag Favorites Tray to top of Display (Settings) Display Advanced Font (Settings) Display Advanced Screen Settings Text font Tap font APPLY AFTER saver...
- Page 136 Setting Display Timeout Setting Whether to Enable Touch Operation Even with Gloves On In Home Screen, Drag Favorites Tray to top of Display In Home Screen, Drag Favorites Tray to top of Display (Settings) Display Advanced glove mode ・ Tap glove mode to toggle on ( )/off (...
- Page 137 Setting Font Size Tap time In Home Screen, Drag Favorites Tray to top of Display Set time until Display goes out. ・If confirmation appears, follow onscreen prompts. ・Set a shorter time to save battery power. (Settings) Display Display menu opens. Advanced...
- Page 138 Setting Size of Images and Icons Font Settings In Home Screen, Drag Favorites Tray to top of Display Font size (Settings) Drag left/right Display Font size is changed. ・Check the set font size in Preview. Display menu opens. Advanced...
- Page 139 Setting Illumination Display size Set illumination pattern for Display. Settable items are the following. Item Description For incoming Set whether handset illuminates for call incoming calls. Illumi pattern/color Set illumination pattern and color for for incoming incoming calls. call When start Set whether handset illuminates when charging handset starts charging.
- Page 140 Setting Illumination Pattern and Color for Advanced Incoming Calls In Illumination menu, Illumi pattern/color for incoming call Tap flash pattern Tap color ・ Available when For incoming call is enabled. ・ Color cannot be set when Change by relationship Pattern 11 Pattern 12 is Tapped.
-
Page 141: Sound Settings
Sound Settings Setting Volume for emopa Set ringtone, notification sound, etc. In Home Screen, Drag Favorites Tray to top of Display (Settings) Sound Drag for "エモパー Sound Settings volume" to adjust ・emopa speaks at set volume when releasing finger from Settable items are the following. - Page 142 Setting Rules to Keep Do Not Disturb Active Setting Whether Tone Sounds when Locking/ during Specific Hours or Events Unlocking Screen In Home Screen, Drag Favorites Tray to top of Display In Home Screen, Drag Favorites Tray to top of Display (Settings) Sound Advanced...
- Page 143 Setting Ringtones Tap ringtone In Home Screen, Drag Favorites Tray to top of Display Ringtone plays. (Settings) Setting is complete. Sound Sound menu opens. Phone ringtone...
- Page 144 Setting Ringtone Volume Setting Volume of Music and Videos In Home Screen, Drag Favorites Tray to top of Display In Home Screen, Drag Favorites Tray to top of Display (Settings) (Settings) Sound Sound Sound menu opens. Sound menu opens. Drag "Ring volume" left/right Drag "Media volume"...
- Page 145 Setting Alarm Volume Setting Vibration for Incoming Calls Set whether handset vibrates for incoming calls. In Home Screen, Drag Favorites Tray to top of Display In Home Screen, Drag Favorites Tray to top of Display (Settings) (Settings) Sound Sound Sound menu opens. Drag "Alarm volume"...
-
Page 146: Aquos Useful Settings
AQUOS Useful Settings Auto Sleep Off Settings Set ROBOQUL motion and useful functions such as Simple Set Display on or off by handling handset. Settable items are mode and Clip Now. the following. AQUOS Useful Settings Item Description Set whether to turn on Display when Turn screen Settable items are the following. - Page 147 Simple Mode Settings Setting Home Screen, Size of Text, Etc. Individually Set a simple and intuitive Home Screen and easy-to-read text. In Simple mode window, Kantan Home Font size (Largest) Hakkiri View Batch change simple In Home Screen, Drag Favorites Tray to top of Display keyboard (Settings) ・...
-
Page 148: Security & Location Settings
Security & Location Settings Setting Time after Display Off until Screen Make security settings including screen lock and security Locks codes as well as location. In Home Screen, Drag Favorites Tray to top of Display (Settings) Security & location Security & Location Settings "Screen lock"... - Page 149 Setting Whether to Hide Notification Viewed in Changing When to Unlock Screen after Saving Lock Screen so New Notifications Are Easier to Face Data View In Home Screen, Drag Favorites Tray to top of Display In Home Screen, Drag Favorites Tray to top of Display (Settings) Security &...
- Page 150 Setting Screen to Unlock by Using Trusted Showing Applications Recently Using Location Device In Home Screen, Drag Favorites Tray to top of Display In Home Screen, Drag Favorites Tray to top of Display (Settings) Security & location Advanced (Settings) Security & location Smart Lock Location Enter pattern / lock no.
- Page 151 Setting Whether to Allow Applications Access Setting Screen of Only Specified Application to to Trusted Certificates and Other Credentials Be Kept in View In Home Screen, Drag Favorites Tray to top of Display In Home Screen, Drag Favorites Tray to top of Display (Settings) Security &...
- Page 152 Main Security Codes Setting Operation Password The following are main security codes required for handset use. In Home Screen, Drag Favorites Tray to top of Display (Settings) Security & location Code Description A code required for using some functions. Operation "Operation Password and Center Password Access...
- Page 153 Enabling SIM PIN Resetting Operation Password When SIM PIN is enabled, PIN entry is required for handset use If prompted for Operation Password, Tap PASSWORD each time handset is powered on with SIM Card installed. It is RESET then Tap .
- Page 154 Changing SIM PIN Setting Screen to Unlock by Flicking Screen Enable SIM card lock first. See "Enabling SIM PIN" for details. In Home Screen, Drag Favorites Tray to top of Display In Home Screen, Drag Favorites Tray to top of Display (Settings) Security &...
- Page 155 Setting Screen to Unlock by Tracing Pattern Swipe In Home Screen, Drag Favorites Tray to top of Display Setting is complete. ・If confirmation appears, follow onscreen prompts. (Settings) Security & location Security & location menu opens. Screen lock ・If method for unlocking screen before change is setting other than None Swipe...
- Page 156 Pattern CONFIRM ・If method for unlocking screen before change is setting other than None Swipe , setting is complete. Enter new pattern Select method of notification display NEXT DONE ・ Tap CLEAR to erase entered pattern. Setting is complete. Enter new pattern again...
- Page 157 Requiring Lock No. (PIN) Entry for Unlocking Screen Lock No. (PIN) In Home Screen, Drag Favorites Tray to top of Display Enter new lock no. (PIN) (Settings) NEXT Security & location Enter new lock no. (PIN) again Security & location menu opens. Screen lock ・If method for unlocking screen before change is setting other than...
- Page 158 Setting Screen to Unlock with Password CONFIRM In Home Screen, Drag Favorites Tray to top of Display ・If method for unlocking screen before change is setting other than None Swipe , setting is complete. ・ Tap CLEAR to erase entered lock no. (PIN). (Settings) Select method of notification display Security &...
- Page 159 Password CONFIRM ・If method for unlocking screen before change is setting other than None Swipe , setting is complete. ・ Tap CLEAR to erase entered password. Enter new password Select method of notification display NEXT DONE Enter new password again Setting is complete.
-
Page 160: System Settings
System Settings Editing Emergency Information Check and make settings for language, input, date and time, Save your own medical information (name, address, blood backup, reset, etc. type, allergies, etc.) to handset as emergency information. In Home Screen, Drag Favorites Tray to top of Display System Settings (Settings) System... - Page 161 Adding Languages Shown on Display Downloading Languages for Voice Recognition In Home Screen, Drag Favorites Tray to top of Display In Home Screen, Drag Favorites Tray to top of Display (Settings) System Languages & input (Settings) System Languages & input Languages Add a language Tap language...
- Page 162 Setting Whether to Check Spelling During Entry Setting Speed for Text-to-Speech In Home Screen, Drag Favorites Tray to top of Display In Home Screen, Drag Favorites Tray to top of Display (Settings) System Languages & input (Settings) System Languages & input Advanced Spell checker Use spell checker...
- Page 163 Setting Manner Mode That Is Activated by Setting Backup to Google Drive Pressing Power Key and Volume Up Key In Home Screen, Drag Favorites Tray to top of Display In Home Screen, Drag Favorites Tray to top of Display (Settings) System Advanced Backup...
- Page 164 Setting 24-Hour Time Indication Use 24-hour format In Home Screen, Drag Favorites Tray to top of Display Setting is complete. ・ Tap Use 24-hour format to toggle 24-hour format )/12-hour format ( (Settings) System Date & time...
- Page 165 Resetting Handset Reset options In Home Screen, Drag Favorites Tray to top of Display Erase all data (factory reset) (Settings) Enter Operation Password System ・If Operation Password is unset, follow onscreen prompts. RESET PHONE Advanced...
-
Page 166: Other Handset Settings
Other Handset Settings ERASE EVERYTHING Phone Number "Checking Your Phone Number" for details on phone number. Handset is reset. Cautions when Erasing All Data (Factory Reset) Observe the following when erasing all data (factory reset). ・Erasing all data (factory reset) deletes all data in internal storage irreversibly. - Page 167 Network & Internet Deleting Added Access Points Make network and Internet settings for Wi-Fi, mobile In Home Screen, Drag Favorites Tray to top of Display network, data usage, etc. Settable items are the following. (Settings) Network & internet Mobile network Advanced Access Point Names Item...
- Page 168 Connected Devices Applications & Notifications Make Bluetooth connection and other settings. Settable items Make notification and application settings applications. ® are the following. Settable items are the following. ・Names and status of devices connected by Bluetooth ・Any recently used applications appear in "Recently opened ®...
- Page 169 Setting Whether to Hide Notification Viewed in Setting Default Applications for Browser, Home Lock Screen so New Notifications Are Easier to Screen, Phone, SMS, Etc. View In Home Screen, Drag Favorites Tray to top of Display In Home Screen, Drag Favorites Tray to top of Display (Settings) Apps &...
- Page 170 Storage Accounts Check memory space of internal storage and USB drive, etc. Create or add accounts. Make settings for syncing created or Settable items are the following. added accounts. Settable items are the following. ・"Internal shared storage" and the USB drive name appear Item Description when the USB host function is in use.
- Page 171 Accessibility Setting Size of Text Appearing in Display Set captions, magnification gestures, and other useful In Home Screen, Drag Favorites Tray to top of Display accessibility functions. Settable items are the following. (Settings) Accessibility Font size Drag to set Item Description Volume key Set whether to enable accessibility...
- Page 172 Setting Whether Not to Show Animation when Setting Whether Handset Vibrates when Tapping Setting Switch ( ) or Tapping Dialpad, , Etc. In Home Screen, Drag Favorites Tray to top of Display In Home Screen, Drag Favorites Tray to top of Display (Settings) Accessibility Vibration...
- Page 173 Google Troubleshooting Make settings for Google services. Settable items are the Check FAQ on Sharp Website and do a self-check. following. Item Description Item Description Check FAQ on Sharp Website. Google Search for Make settings for a Google account. Search for items in settings menu.
- Page 174 Exiting Safe Mode and Restarting Handset In Home Screen, Drag Favorites Tray to top of Display (Settings) Troubleshooting Self check REBOOT CANCEL SAFE MODE Viewing Advice Related to Temperature Rise in Handset In Home Screen, Drag Favorites Tray to top of Display (Settings) Troubleshooting Self check...
-
Page 175: Global Services
Global Services Global Roaming............... 174 Calling from Outside Japan...........175... -
Page 176: Global Services Global Roaming
Global Roaming Changing Data Roaming Setting Handset is Global Roaming Service eligible. Use the same handset number outside Japan. Handset connects to an appropriate cellular provider In Home Screen, Drag Favorites Tray to top of Display automatically by default. (Settings) Network &... -
Page 177: Calling From Outside Japan
Calling from Outside Japan Call to Japan See SoftBank Website to learn about roaming areas/rates, etc. http://mb.softbank.jp/en/global_services/ Print out roaming area/rate information to carry while traveling abroad as needed. Enabling/Disabling Abroad Assistant While outside Japan, use Abroad assistant to select how to place calls. - Page 178 Calling Landlines & Mobiles within Calling Countries aside from Japan Current Country In Home Screen, (Phone) In Home Screen, (Phone) Dialpad window opens. Dialpad window opens. Touch & Hold Use onscreen dialpad to enter number ・Do not add + before the number. Call to This Number "+"...
- Page 179 Handset dials number. Call begins when other party answers.
-
Page 181: For Assistance
For Assistance Handset Powers Off............180 Handset Does Not Power On......... 180 Cannot Charge / Charging Stops / Charging Is Slow... 181 Battery Runs Out Quickly..........181 Display Turns Off Suddenly.......... 182 Display Goes Dark Suddenly.......... 182 Screen Freezes / Operation Is Unstable....... 183 SIM Card Not Recognized.......... -
Page 182: For Assistance Handset Powers Off
Handset Powers Off Handset Does Not Power On While Using Certain Applications Handset Interior Is Hot The application may be the cause. Did handset remain powered on after continuing to use Update the application if not the latest version. handset while handset was warm? Let handset cool before If problem persists, delete the application, and check if same powering on handset. -
Page 183: Cannot Charge / Charging Stops / Charging Is Slow
Cannot Charge / Charging Stops / Battery Runs Out Quickly Charging Is Slow Battery Runs Out Quickly Even With No Operation Charging Does Not Start Some applications may use data communication even if not Check the following if charging does not start. being operated. -
Page 184: Display Turns Off Suddenly
Display Turns Off Suddenly Display Goes Dark Suddenly While Using Certain Applications Handset Interior Is Hot The application may be the cause. Display goes dark automatically if handset becomes warm. Update the application if not the latest version. Display returns to its original brightness once handset cools. If problem persists, delete the application, and check if same problem occurs again. -
Page 185: Screen Freezes / Operation Is Unstable
Screen Freezes / Operation Is SIM Card Not Recognized Unstable SIM Card Not Recognized While Using Certain Applications Check the following if handset does not recognize SIM Card. The application may be the cause. ・Is SIM Card inserted correctly? Is SIM Card inserted in the Update the application if not the latest version. -
Page 186: Cannot Send/Receive Mail
Cannot Send/Receive Mail Cannot Connect to Internet Airplane Mode Set Airplane Mode Set Is handset in Airplane mode? appears in Status Bar when Is handset in Airplane mode? appears in Status Bar when in Airplane mode. To cancel Airplane mode: in Airplane mode. -
Page 187: Cannot Talk On Phone / Cannot Hear Other Party
Cannot Talk on Phone / Cannot Cannot Use Applications Hear Other Party Cannot Install New Application Cannot Make or Receive Calls Is there only a little free space in internal storage? To check free space: Is handset in Airplane mode? appears in Status Bar when In Home Screen, Drag Favorites Tray to top of Display in Airplane mode. - Page 189 Warranty/Specifications/ Customer Service Warranty & After-Sales Service........188 Specifications..............188 Customer Service............190...
-
Page 190: Warranty & After-Sales Service
Warranty & After-Sales Service Specifications Some information may differ due to specification changes. Warranty Handset ・Handset warranty is for 1 year from date of purchase. ・Repair may be made free of charge under the terms of free Handset specifications are as follows. repair. - Page 191 3.5mm Earphones Adapter Materials (3.5mm Earphones Adapter) Item Description Parts Materials Used/Surface Finish Cable Length 135mm±15mm USB Type-C plug (metal Stainless steel/nickel plating Weight Approx. 6.33 g (without PE bag) part) USB Type-C Materials (Handset) plug (outside PC resin of resin part) USB Type-C Parts Materials Used/Surface Finish...
-
Page 192: Customer Service
Customer Service For SoftBank handset or service information, call General Information. For repairs, call Customer Assistance. General Information Direct all inquiries to SoftBank, from charges to service information, here. From a SoftBank handset, dial toll free at 157 From a landline/IP phone, dial toll free at 0800-919-0157 Hours of service:9 am to 8 pm Assistance with Repairs/Lost Handsets Use the number below in case of loss or needing repair:... -
Page 193: Safety Precautions
Safety Precautions Safety Precautions............192 Important Product Information........200 Handset & Hardware Care..........202 General Notes..............204 Radio Wave Exposure and Specific Absorption Rate (SAR) Information..............206 Water & Dust Resistance..........208... -
Page 194: Safety Precautions
Safety Precautions Handset, SIM Card, SIM Removal Tool, 3.5mm Earphones Adapter, AC Adaptor (Sold Separately) (Common) Read Safety Precautions before using handset. Observe precautions to avoid injury to self or others, or damage to property. Safety Precautions These labels show degree of risk from improper use. Do not use, store, or leave in extreme heat or where heat collects, such as fire, heat sources, Label... - Page 195 Do not apply excessive force to or break handset. Particularly when carrying handset in Do not drop, stomp, throw or subject to your clothes pocket, do not bump it or place it excessive force or strong impact/vibration. between objects. May cause fire, burns, injury, electric shock, etc. Internal Battery breakage may cause fire, burns, injury, etc.
- Page 196 May cause fire, burns, injury, etc. For use by a child, explain instructions and supervise use. Do not pierce with a sharp object (nail, etc.), Failure to do so may cause injury, etc. hit with a hard object (hammer, etc.), step on, or otherwise subject to excessive force.
- Page 197 Regarding handset use in a hospital, follow the instructions given by the respective medical Do not shine Mobile Light close to eyes. institution. Maintain a safe distance, especially from small children. Power off handset where handset use is prohibited. Radio waves may adversely affect an airplane's electronic May cause visual impairment or other problems;...
- Page 198 If Display or Camera lens breaks, be careful with shards of broken glass and exposed When using the motion sensor and handset parts. electromagnetic sensor, make sure of the safety around you and hold handset firmly; do Touching the broken or exposed parts may cause burns, not swing with excessive force.
- Page 199 AC Adaptor (Optional Accessory) Earpiece/Speaker, Speaker, and Back Camera use magnetic parts; check that nothing metal (cutter blades, staples, etc.) is adhering. Metal strip on handset may cause injury, etc. Do not use AC Adaptor if the cord is damaged. May cause fire, burns, electric shock, etc.
- Page 200 If charging terminals become bent or deformed, Cut edges may be sharp and cause injury. discontinue use immediately. In addition, do not use AC Adaptor by restoring the terminals to their original state.
- Page 201 SIM Removal Tool 3.5mm Earphones Adapter Tip of SIM Removal Tool is pointed. Do not use If there is abnormal odor/sound, smoke, pointed at yourself or others. overheating, discoloration, distortion, or other abnormalities during use, charging, or storage, Doing so may allow it to strike yourself or others, causing do the following.
-
Page 202: Important Product Information
Important Product Information General Use 3.5mm Earphones Adapter is not water- or dustproof. ・If your SIM Card or handset (with SIM Card inserted) is lost Do not use or store in a location that is or stolen, suspend your service immediately. For details, subject to excessive dust, high humidity, or contact Customer... - Page 203 Heat from Handset Use Voluntary Control of Radio Interference ・Handset internal temperature may increase depending on Handset conforms to technical regulations pursuant to usage or environment, causing handset to become warm. the Rules for Voluntary Control Measures of VCCI; the (Handset may stop charging or Display brightness may be corresponding conformity mark is shown on electronic rating adjusted for safety.)
-
Page 204: Handset & Hardware Care
・Use with gloves/long fingernails For use in bathrooms, see "Cautions for Use in a Bathroom." ・Use of pens, pencils or sharp objects ・Avoid extreme temperature or direct sunlight. ・Use with objects on/against Display ・Handset/Internal Battery may become warm during operation ・Use while wet... - Page 205 Self Check Wi-Fi (Wireless LAN) If handset is unstable, diagnose the cause as follows. Wireless LAN (hereafter "Wi-Fi") uses radio waves to enable communication between compatible devices within range. In Home Screen, Drag Favorites Tray to top of Display However, it is advisable for the user to configure security (Settings) Troubleshooting Self check...
-
Page 206: General Notes
General Notes Regulatory Information "801SH" here refers to this mobile phone "AQUOS zero." In some countries/regions including Europe , there are restrictions on the use of 5GHz WLAN that may limit the use to indoors only. Portrait Rights Please check the local laws and regulations beforehand. - Page 207 Frequency Range of Supported Bands in Maximum Transmit Power Item Description Item Description GSM 900 +33 dBm (Power Class 4) Tx 880.2 to 914.8 MHz DCS 1800 +30 dBm (Power Class 1) GSM 900 Rx 925.2 to 959.8 MHz WCDMA FDD I +24 dBm (Power Class 3) Tx 1710.2 to 1784.8 MHz DCS 1800...
-
Page 208: Radio Wave Exposure And Specific Absorption Rate (Sar) Information
This device complies with part 15 of the FCC Rules. Operation is subject to the following two conditions: 【801SH】 here refers to this mobile phone 【AQUOS zero】. (1) This device may not cause harmful interference, and (2) this device must accept any interference received, including Specific Absorption Rate (SAR) for This interference that may cause undesired operation. - Page 209 https://www.softbank.jp/mobile/support/sar/ (Japanese) Simplified Declaration of Conformity for 【801SH】 Hereby, SHARP CORPORATION declares that the radio equipment type 【801SH】 is in compliance with Directive 2014/53/EU. The full text of the EU declaration of conformity is available at the following internet address:http://www.sharp.co.jp/k-tai/.
-
Page 210: Water & Dust Resistance
Mic, Earpiece, Speaker, Recorder Mic, etc. with a ・Water and dust resistance may be affected under some sharp object; may affect water and dust resistance. circumstances. Warranty does not cover malfunctions ・Avoid placing handset directly on sand. Sand may penetrate resulting from misuse. - Page 211 If handset gets exposed to liquids other than tap water or Shop. falls in a bathtub, wash it in the specified way. ・Do not insert a sharp object into Card Tray gap or External ・Use handset at 5 C - 40 C with humidity of 99% or less, for Connection Jack.
- Page 212 Drying Handset After Drying Procedure After exposing handset to water, be sure to dry Earpiece, Do not use handset in wet conditions. Volume Keys, Power Key, Mic/Recorder Mic, External ・Calls may fail, or moisture may transfer to clothes, bag, Connection Jack, Speaker, Card Tray, and Mic. etc.
- Page 213 About Settings............... 122 About the User Guide............3 Adding/Deleting Applications.......... 99 Address Book..............65 Album................. 92 Applications...............97 AQUOS Useful Settings..........144 AQUOS zero User Guide Index B Backup & Restore............106 Basic Operations............... 22 Battery Runs Out Quickly..........181 Battery Settings.............130 C...
- Page 214 Status Bar................. 43 I System Settings..............158 Icons at Display Top (Status Bar)........43 Important Product Information........200 T Importing Data from Other Mobiles......106 Internal Storage..............10 Text Entry.................33 L U Listening to Music (Play Music)........90 Unlocking Screen...............18 Updating the System............27 Using Airplane Mode............24 M...
- Page 216 AQUOS zero User Guide January 2019, First Edition SoftBank Corp. Visit SoftBank Shop for assistance Model : AQUOS zero Manufacturer : SHARP CORPORATION...
Need help?
Do you have a question about the AQUOS zero and is the answer not in the manual?
Questions and answers