Advertisement
Available languages
Available languages
Quick Links
THIS INSTRUCTION BOOKLET CONTAINS IMPORTANT SAFETY INFORMATION. PLEASE
READ INSTRUCTIONS CAREFULLY BEFORE ASSEMBLY
Manufactured by:
Kolcraft Enterprises Inc.
1100 W Monroe St
Chicago, IL 60607
www.kolcraft.com
(800) 453-7673
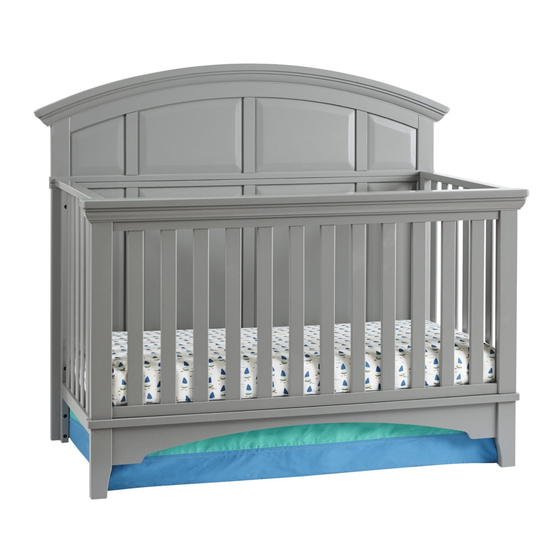
Brooklyn Crib
Assembly Instructions
READ AND KEEP FOR FUTURE REFERENCE.
Record manufacturing date and lot number
from product label here:
Conforms to
ASTM F 1169
Safety Standards
Q054
Advertisement

Related Manuals for Kolcraft Brooklyn Crib


Summary of Contents for Kolcraft Brooklyn Crib
- Page 1 Conforms to ASTM F 1169 Safety Standards Brooklyn Crib Assembly Instructions THIS INSTRUCTION BOOKLET CONTAINS IMPORTANT SAFETY INFORMATION. PLEASE READ AND KEEP FOR FUTURE REFERENCE. READ INSTRUCTIONS CAREFULLY BEFORE ASSEMBLY Record manufacturing date and lot number Manufactured by: from product label here: Kolcraft Enterprises Inc.
- Page 2 FASTENERS, MISSING PARTS, OR SHARP EDGES BEFORE AND AFTER ASSEMBLY AND FREQUENTLY DURING USE. SECURELY TIGHTEN LOOSE BOLTS AND OTHER FASTENERS. DO NOT USE CRIB IF ANY PARTS ARE MISSING, DAMAGED, OR BROKEN. CONTACT KOLCRAFT ENTERPRISES, INC (www.kolcraft.com/customer-service/contact-kolcraft) FOR REPLACEMENT PARTS AND INSTRUCTIONAL LITERATURE IF NEEDED.
-
Page 3: Care And Maintenance
Your furniture has a durable and protective non-toxic finish, however if you decide to refinish it, you must use a non-toxic finish specified for children's products. Do not use any toxic stripping methods to remove the old finish. Please refer to your furniture’s instruction manual for proper assembly. Instruction manuals can be downloaded from Kolcraft.com. - Page 4 What will Kolcraft Enterprises, Inc. do? Kolcraft will repair or replace, at its option, the defective product. If you have a problem with or are not satisfied with your product, please contact the Customer Service Department at Kolcraft. Repair or replacement as provided under this warranty is the exclusive remedy of the consumer.
- Page 5 Crib Parts: Upper Headboard Upper Footboard Lower Headboard Lower Footboard Left Day Bed Cap Right Day Bed Cap 2x Crib Side 2x Headboard Brace Mattress Support Allen Wrench...
- Page 6 (A) Upper Headboard Thread and tighten three screws (I) Headboard Brace (C) Lower Headboard Thread and tighten three screws (both sides) (I) Headboard Brace Step 1: A. Line up the Upper Headboard (A) with the Lower Headboard (C). B. Align the two screws connecting the two parts of the headboard and tighten with the allen wrench.
- Page 7 Headboard Mattress support holes should face the inside of the crib Thread and tighten four (E) Crib Side screws (both sides) (E) Crib Side Step 2: A. Line up the Crib Sides (E) with the headboard. The mattress support holes on the crib sides should be facing the inside of the crib.
- Page 8 Thread and tighten all four screws High Position Middle Position Low Position (F) Mattress Support Label reading “This Side Up” should be facing up Mattress support arms should be above the mattress support Step 3: A. Flip the mattress support so the “This Side Up” label is facing up. If the label is missing, the correct orientation is with the springs at the top of the frame.
- Page 9 (B) Upper Footboard Thread and tighten all four screws (both sides) ( D) Lower Footboard Step 4: A. Place the Lower Footboard (D) against the crib sides. B. Turn the two bottom screws into the lower footboard holes, but don’t tighten them yet. C.
- Page 10 Undo both screws on (B) Upper Footboard each side (E) Left Crib Side (H) Right Day Bed Cap Toddler guard rail holes should face inside (F) Mattress Support Should be set to lowest position (G Left Day Bed Cap Converting to a Day Bed: A.
- Page 11 POUR POUVOIR LES CONSULTER ULTÉRIEUREMENT. LISEZ ATTENTIVEMENT LES INSTRUCTIONS AVANT LE MONTAGE. Enregistrez la date de fabrication et le numéro Fabriqué par: de l’étiquette du produit ici: Kolcraft Enterprises Inc. 1100 W Monroe St Chicago, IL 60607 www.kolcraft.com (800) 453-7673...
- Page 12 LÂCHES. N'UTILISEZ PAS LE LIT POUR BÉBÉ SI L'UNE DES PIÈCES EST MANQUANTE, ENDOMMAGÉE OU BRISÉE. COMMUNIQUEZ AVEC KOLCRAFT ENTERPRISES, INC (www.kolcraft.com/customer-service/contact- kolcraft) POUR OBTENIR DES PIÈCES DE RECHANGE ET LES INSTRUCTIONS, LE CAS ÉCHÉANT. NE SUBSTITUEZ AUCUNE PIÈCE. POUR REPEINDRE, UTILISEZ UN FINI NON TOXIQUE DESTINÉ AUX PRODUITS POUR ENFANT.
-
Page 13: Soin Et Entretien
N'utilisez pas d'agents décapants toxiques pour enlever l'ancienne finition. Pour un assemblage correct, veuillez consulter le manuel d'instruction de votre meuble. Vous pourrez télécharger les manuels d'instruction sur les sites suivants : Kolcraft.com. - Page 14 Kolcraft réparera ou remplacera, à sa discrétion, le produit défectueux. Si vous avez un problème avec ce produit ou si vous n'en êtes pas satisfait, veuillez contacter le service à la clientèle de Kolcraft. La réparation ou le remplacement selon les termes de la garantie constitue le recours exclusif à la disposition du client.
- Page 15 Comment puis-je contacter Kolcraft Enterprises, Inc à propos du service de garantie? Pour obtenir le service de garantie, veuillez contacter le service à la clientèle Kolcraft. Si vous retournez le produit au service de consommation de Kolcraft pour réparation ou remplacement, vous devez l'assurer suffisamment et payer les frais de poste.
- Page 16 Pièces du lit pour bébé : Tête de lit relevé Pied de lit relevé Tête de lit inférieur Pied de lit inférieur Barre gauche pour Barre droite pour lit 2x Côtés de lit lit de repos de repos Support de la Tête de lit Support de matelas Clé...
- Page 17 (A) Tête de lit supérieure Serrez les trois vis (I) Support de tête de lit (C) Tête de lit inférieure Serrez les trois vis (I) Support de tête de lit Étape 1: A. Alignez la tête de lit supérieure (A) avec la tête de lit inférieure (C). B.
- Page 18 Tête de lit Les trous du support de matelas sur les côtés du lit pour bébé doivent être dirigés vers l'intérieur du lit pour bébé. Vissez et serrez les quatre vis (de chaque côté) (E) Côté de lit de bébé (E) Côté...
- Page 19 Vissez et serrez les quatre vis Position élevée Position du milieu Position basse (F) Support de matelas L'étiquette « This Side Up » doit être placée sur le dessus. Les bras de support de matelas doivent être au-dessus du support de matelas Étape 3 : A.
- Page 20 (B) Pied de lit supérieur Vissez et serrez les quatre (D) Pied de lit inférieur vis (de chaque côté) Étape 4: A. Placez le pied de lit inférieur (D) contre les côtés du lit pour bébé. B. Tournez les deux vis du bas dans les trous du pied de lit inférieur, mais sans les serrer. C.
- Page 21 Dévissez les deux vis (B) Pied de lit supérieur sur chaque côté (E) Côté du lit bébé (H) Barre droite du lit de repos Les trous de la glissière de sécurité pour enfant doivent être tournés vers l'intérieur (F) Le support de matelas doit être placé...
- Page 22 GUÁRDELAS PARA FUTURA REFERENCIA LAS INSTRUCCIONES PARA USO FUTURO LEA CUIDADOSAMENTE LAS INSTRUCCIONES ANTES DEL MONTAJE. Grabar fecha de fabricación y número de lote Fabricado por: de la etiqueta del producto aquí: Kolcraft Enterprises Inc 1100 W Monroe St Chicago, IL 60607 www.kolcraft.com (800) 453-7673...
- Page 23 SUJETADORES FLOJOS. NO USE LA CUNA SI ALGUNA DE SUS PARTES FALTA, ESTÁ DAÑADA O ESTÁ ROTA. CONTÁCTESE CON KOLCRAFT ENTERPRISES, INC (www.kolcraft.com/customer-service/contact- kolcraft) SI NECESITA PIEZAS DE REPUESTO U OTRAS INSTRUCCIONES IMPRESAS. NO SUSTITUYA PIEZAS. SI VA A APLICAR OTRO ACABADO, USE UNO NO TÓXICO Y ESPECÍFICO PARA PRODUCTOS ¢...
-
Page 24: Cuidado Y Mantenimiento
No utilice ningún método de eliminación tóxico para quitar el acabado antiguo. Consulte el manual de instrucciones del mueble para ver el armado correcto. Los manuales de instrucciones pueden descargarse de Kolcraft.com, MiraStudios.com y Sealybaby.com. - Page 25 ¿Qué sucede si vivo fuera de EE. UU.? Las garantías de productos son válidas solo para el país en el que se compran. Kolcraft Enterprises, Inc. no enviará productos o piezas de repuesto a países en los que dichos productos no cumplan con las reglamentaciones locales, incluso en el caso en que el producto original se haya comprado en EE.
- Page 26 ¿Cómo me comunico con Kolcraft Enterprises, Inc. para obtener servicio de garantía? Para obtener servicio de garantía, comuníquese con el Departamento de atención al cliente de Kolcraft. Si el producto se devuelve al Departamento de atención al cliente de Kolcraft para reparación o reemplazo, debe enviarse prepago y correctamente asegurado.
- Page 27 Partes de la cuna: Cabecera superior Piecera superior Cabacera inferior Piecera inferior Listón izquierdo Listón derecho para Barandilla Izquierda cama de día Soporte de la cabacera Base del colchón Llave Allen...
- Page 28 (A) Cabacera superior Apriete los tres tornillos (I) Soporte de cabecera (C) Cabecera inferior Apriete los dos tornillos (I) Soporte de cabecera Paso 1: A. Alinee la cabecera superior (A) con la cabecera inferior (C). B. Alinee los dos tornillos que conectan las dos partes de la cabecera y apriételas con la llave hexagonal.
- Page 29 Cabecera Los agujeros de la base del colchón deben mirar hacia adentro. Enrosque y ajuste los quatro tornillos (ambos lados) (E) Barandilla (E) Barandilla Paso 2: A. Alinee las barandillas de la cuna (D & E) con la cabecera (A). Los agujeros que unen la base del colchón con las barandillas de la cuna deben mirar hacia dentro.
- Page 30 Enrosque y ajuste los cuatro tornillos Posición alta Posición media Posición baja (F) Base del colchón Si la etiqueta dice “Este lado hacia arriba”, la pieza debe mirar hacia arriba Los brazos de base de colchón debe estar por encima del base del colchón. Paso 3: A.
- Page 31 (B) Piecera superior Enrosque y ajuste los quatro tornillos (ambos ( D) Piecera inferior Paso 4: A. Coloque la piecera inferior (D) contra las barandillas. B. Coloque los dos tornillos inferiores en los agujeros de la piecera inferior, pero todavía no los ajuste.
- Page 32 Desenrosque ambos tornillos de cada lado (B) Piecera superior (E) Barandilla (H) Listón derecho para cama de día Los agujeros de la barandilla deben mirar hacia adentro (F) La base del colchón debe configurarse en la (G) Listón izquierdo posición más baja para cama de día Para convertir la cuna en cama de día: A.
Need help?
Do you have a question about the Brooklyn Crib and is the answer not in the manual?
Questions and answers