Table of Contents
Advertisement
Quick Links
TM
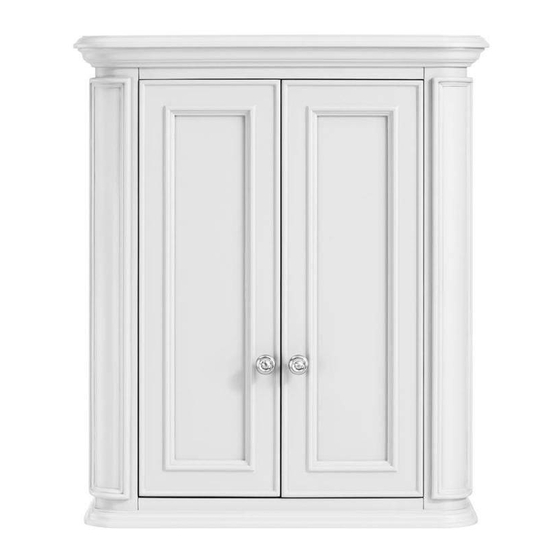
Wrightsville Bathroom Wall Cabinet
26-IN Wall Cabinet
( 26-IN W x 10-IN D x 30-IN H)
Date Purchased _______________________
Questions, problems, missing parts?
Before returning to your retailer,
call our customer service department at
1-855-571-1044 9 a.m. - 5 p.m., EST, Monday-Friday.
www.greentouchhome.com
Advertisement
Table of Contents

Related Manuals for Scott Living Wrightsville Bathroom Wall Cabinet


Summary of Contents for Scott Living Wrightsville Bathroom Wall Cabinet
- Page 1 Wrightsville Bathroom Wall Cabinet 26-IN Wall Cabinet ( 26-IN W x 10-IN D x 30-IN H) Date Purchased _______________________ Questions, problems, missing parts? Before returning to your retailer, call our customer service department at 1-855-571-1044 9 a.m. - 5 p.m., EST, Monday-Friday.
-
Page 2: Model Number Description
MODEL NUMBER DESCRIPTION 1116WC-26-201 26" White Finish Wall Cabinet 1116WC-26-202 26" Mahogany Finish Wall Cabinet 1116WC-26-242 26" Light Gray Finish Wall Cabinet... -
Page 3: Package Contents
PACKAGE CONTENTS PART DESCRIPTION QUANTITY Cabinet Wall Bracket Shelf Left Door (preassembled to Cabinet (A)) Right Door (preassembled to Cabinet (A)) HARDWARE CONTENTS Shelf pin Qty.8 Touch-up pen Qty.1... -
Page 4: Safety Information
SAFETY INFORMATION Please read and understand this entire manual before attempting to assemble, operate or install this product. WARNING • Some steps are more easily handled with two adults. CAUTION • Before installation, carefully use scissors or utility knife to cut and unwrap all parts. Make sure you DO NOT discard the hardware. - Page 5 INSTALLATION INSTRUCTIONS 2. Using hardware appropriate for your wall type (not included), secure the Wall Bracket (B) to the wall into preferably 2 wall studs. Use hardware such as a cabinet screw or toggle bolt depending on your wall type. Make sure the Wall Bracket (B) is level and centered well to the desired location of the Cabinet (A).
- Page 6 INSTALLATION INSTRUCTIONS 4. Insert shelf pins (BB) at desired height, ensuring they are level. Place shelf (C) on top of shelf pins (BB). Hardware Used Shelf Pin 5. If you need to adjust the doors, do so in the following manner. To adjust door up or down, loosen screws (a) on both hinges, adjust door, and retighten screws.
-
Page 7: Care And Maintenance
CARE AND MAINTENANCE • Dust the Wall cabinet regularly with a soft, non-lint producing cloth or household dusting product. • You can clean the Wall cabinet with a gentle, non-abrasive household cleaner. • Make sure to dry the wood immediately with a soft cloth or towel. •... -
Page 8: Part Description
REPLACEMENT PARTS LIST FOR 1116WC-26-201 For replacement parts, call our customer service department at 1-855-571-1044, 9 a.m. - 5 p.m., EST, Monday - Friday. PART DESCRIPTION PART# 1116WC-26-201-001 Wall Bracket Shelf 1116WC-26-201-002 Left Door 1116WC-26-201- 003/004 Right Door Touch-up pen OF-0010 Shelf pin B1044... - Page 9 REPLACEMENT PARTS LIST FOR 1116WC-26-202 For replacement parts, call our customer service department at 1-855-571-1044, 9 a.m. - 5 p.m., EST, Monday - Friday. PART DESCRIPTION PART# 1116WC-26-202-001 Wall Bracket Shelf 1116WC-26-202-002 Left Door 1116WC-26-202- 003/004 Right Door Touch-up pen W3350A Shelf pin B1044...
- Page 10 REPLACEMENT PARTS LIST FOR 1116WC-26-242 For replacement parts, call our customer service department at 1-855-571-1044, 9 a.m. - 5 p.m., EST, Monday - Friday. PART DESCRIPTION PART# 1116WC-26-242-001 Wall Bracket Shelf 1116WC-26-242-002 Left Door 1116WC-26-242- 003/004 Right Door Touch-up pen OF-0120R Shelf pin B1044...
Need help?
Do you have a question about the Wrightsville Bathroom Wall Cabinet and is the answer not in the manual?
Questions and answers