Table of Contents
Advertisement
Quick Links
Advertisement
Table of Contents

Subscribe to Our Youtube Channel
Related Manuals for Kuppersbusch CBM6350.0


Summary of Contents for Kuppersbusch CBM6350.0
- Page 1 INSTRUCTIONS FOR USE and fi tting CBM6350.0 Please read the users instructions carefully before installation of the appliance and before starting to use it. Please, store these instructions carefully. Service and Customer Service Phone: 0209;401/ 631 Email: kundendienst@kueppersbusch.de...
-
Page 2: Table Of Contents
Contents 9. Roasting and baking charts ....35 9.1. Guidelines for roasting ..........38 1. Explanation for symbols and indications .6 9.2. Guidelines for grilling ..........39 9.3. Recommended food probe temperatures ....41 2. Safety Instructions and Warnings ..8 9.4. Low-temperature cooking guidelines .......43 2.1. - Page 3 1. Please note: Küppersbusch Customer Service Germany We require the following details for your re- quest for customer service so that our cus- Küppersbusch Hausgeräte GmbH tomer service technicians can be well-pre- Küppersbuschstraße 16 pared for carrying out any repairs and have 45883 Gelsenkirchen the required spare parts available: 2.
- Page 4 Copyright Software This documentation is protected by copyright. Any Please note that these instructions apply for vari- rights duly derived, in particular those concerning its ous series of equipment. Details that possibly do translation or reproduction, the extraction of images, not apply for your appliance may be described.
- Page 5 Dear new Küpperbusch appliance user... Don't worry, it's not going to be that complicated. We have made every effort structure this information briefl y and succinctly, clearly and explicitly, and above all, logically. In addition to the instructions given by our Customer Service, these instructions aim at enabling you to be able to operate this appliance quickly.
-
Page 6: Explanation For Symbols And Indications
Explanation for symbols and indications 1. Explanation for symbols and indications The appliance was produced according to state of the art technology. Machines nevertheless give rise to risks which cannot be constructively avoided. In order to guarantee suffi cient safety for the use, safety instructions are also given. These instructions are marked by way of the highlighted texts which follow. - Page 7 Explanation for symbols and indications OBSERVE REGULATIONS FOR HANDLING ELECTROSTATI- CALLY SENSITIVE COMPONENTS AND MODULES (ESDS). Electrostatically endangered components and modules are located behind covers bearing the adjacent symbol. Never touch plug connections, strip conductors or component pins. Only qualifi ed staff...
-
Page 8: Safety Instructions And Warnings
Safety Instructions and Warnings 2. Safety Instructions and Warnings 2.1. For connection and operation □ Only KÜPPERSBUSCH ovens have been manufactured and tested for use under a KÜPPERSBUSCH hob. Do not use other hobs. □ Any handling or repair to the appliance, including replacement of the power cable, should be carried out by authorised Technical Service Personnel using original spare parts. -
Page 9: Switching On And Operating
Safety Instructions and Warnings 2.2. Switching On and Operating □ Do not allow children to come near the oven while in use as it can reach very high temperatures. □ Children should be supervised in order to ensure that they do not play with the appliance. -
Page 10: Oven
Safety Instructions and Warnings 2.3. Oven □ Unplug your oven if it malfunctions. □ If the glass is broken, split or cracked: switch the hob off immediately, disconnect it from the power supply and contact our Customer Service or your specialised dealer. □... -
Page 11: For Persons
Safety Instructions and Warnings 2.4. For persons □ These appliances may be used by children aged 8 years and over and by persons with physical, sensory or mental impairments or by persons who lack experience and/or know-how, provided they are supervised or have been instructed in the safe used of the appliance and have understood the risks relating to the appliance. -
Page 12: Environmental Protection
Safety Instructions and Warnings 2.6. Environmental Protection □ Remove packaging and the old appliance □ Remove packaging and recycle in an environmentally-friendly way. □ In Europe, the transport packaging is returned to the store where the appliance has been purchased. By returning the packaging material, raw materials are saved and also fewer waste products are generated. -
Page 13: Safety Instructions - Microwave
Safety Instructions and Warnings □ The oven may only be used if it has been installed in a suitable unit. Only use the oven as described in these instructions for use. Any other use is not considered to be intended and may result in damage to material or even injury to persons. The manufacturer cannot be held responsible for damages caused by improper use of this oven. - Page 14 Safety Instructions and Warnings □ Use only microwaveable cooking utensils. □ Never leave the oven unwatched, especially when using paper, plastic or other com- bustible materials. These materials can char and take fire. □ The appliance is intended for heating food and drinks. Drying garments and heating warming pads, slippers, sponges, damp cloths, etc.
- Page 15 Safety Instructions and Warnings □ The contents of baby bottles and jars of baby food must be stirred or shaken before consumption and the temperature checked to avoid burns. □ Eggs in shell and whole hard-boiled eggs must not be heated in the appliance as they may explode even after the heating has finished.
-
Page 16: Cleaning And Care
Cleaning and Care 3. Cleaning and Care You should carefully read this chapter before you use your appliance the fi rst time. If cleaned correctly and looked after regularly the appliance will remain beautiful and clean for many years. The following tips will help you to clean and care for your oven's various surfaces gently but thoroughly. - Page 17 Cleaning and Care NEVER CLEAN WITH □ aggressive or bleach-based cleaning agents that contain active oxygen, chlorine or other caustic substances. □ abrasive cleaning or scouring agents, such as steel wool, soap- impregnated steel wool, stiff brushes, metal or plastic sponges or any similar cleaners with an abrasive surface.
- Page 18 Cleaning and Care Door front and handle with chromium-plated, black trimming □ Limescaling, grease and starch deposits must be removed immediately; stains will result if they are not. □ These models are very sensitive to scratches and oven spray will damage them. Do not using cleaning scrapers, pot scourers or hard-fibre sponges.
-
Page 19: Cleaning The Oven Door
Cleaning and Care 3.2. Cleaning the oven door (*not possible for ovens with a microwave function) Do not use any metal pot scourers, wire brushes, scouring powder or abrasives to clean the oven door, since this may result in the surface becoming scratched or the glass breaking. Clean the outside of the door and its accessories with lukewarm soapy water or a mild detergent. -
Page 20: Pyrolytic Self-Cleaning Of The Oven
Before using the fi rst time 3.3. Pyrolytic self-cleaning of the oven (depending on the model) This function involves a pyrolytic cleaning process which applies high temperatures in the oven interior to trigger a process of oxidation and carbonisation process on the grease contamination. After the pyrolytic cleaning process has been completed, all you need to do is remove the ash generated during the process with a damp cloth. -
Page 21: Important Instructions
Before using the fi rst time 4.1. Important instructions □ Do not cover the bottom of the oven with aluminium foil as this may affect cooking performance and damage the enamel inside the oven and the interior of your kitchen unit. Do not pour water on the bottom surface when in use;... -
Page 22: Accessories
Accessories 5. Accessories Some oven models have a glide-out shelves kit accessory. IMPORTANT! The glide-out shelves must be placed at height 2, starting from below. To assemble the glide-out shelves on the chrome-plated supports, proceed as follows: 5.1. Glide-out shelves with folding clip not possible for ovens with a microwave function) □... -
Page 23: Glide-Out Shelves With Direct Clip
Accessories 5.2. Glide-out shelves with direct clip not possible for ovens with a microwave function) IMPORTANT! The single extraction shelf must be placed at heights 1, 2, 3 and 5 starting from below. The double extraction shelves must be placed at heights 1, 2, 3 and 3 starting from below. -
Page 24: Cleaning The Oven Accessories
Maintenance work 5.3. Cleaning the oven accessories Clean the outside of the oven and accessories with warm soapy water or with a mild detergent. Take care with rust-free and varnished surfaces and only use sponges or cloths that do not scratch. CAUTION! The telescopic glide-out shelves must not be placed in the dishwasher. -
Page 25: Removing The Oven Door
Maintenance work □ Use a tool to take out the glass cover of the lamp mpunting. □ Replace the lamp. □ Attach the glass cover again, making sure it is properly positioned. The replacement lamp must be resistant to temperatures of up to 300°C. - Page 26 Maintenance work 6.2.1 Door with hinge on body Dismantling the door □ Open the oven door as far as it will go. □ Block the hinge by turning the latches. □ Swing the hinge locks down towards you. □ Close the door to the locked position. □...
- Page 27 Maintenance work 6.2.2 Door with hinge on door Dismantling the door □ Open the oven door as far as it will go. □ Block the hinge by turning the latches. □ Swing the hinge locks down towards you. □ Close the door to the locked position. □...
-
Page 28: Dismantling/Assembling The Interior Glass Of The Door
Maintenance work 6.3. Dismantling/assembling the interior glass of the door (does not apply to ovens with microwave function) Depending on the model, your oven may have 2, 3 or 4 panes of glass. Follow the instructions for the type of door your oven has. Assembling Depending on the model, your oven may have a completely closed stainless steel door. -
Page 29: Dismantling/Assembling The Shelf Runners
Maintenance work □ Once clean, insert pane no. 3 into the same position so that the TERMOGLASS indication printed on it is visible as shown in the figure. □ In pyrolytic ovens, the TERMOGLASS indication on panes numbers 3 and 4 must be visible as shown. □... -
Page 30: Dismantling The Rear Wall
Maintenance work □ Insert the rear notch into the rear fastening nut. □ Fix the front fastening nut (C) in the front notch of the support. □ Secure the support with the nut (D) and turn until it is fully ad- justed (E). - Page 31 Maintenance work □ Let the element fall and clean the top part of the oven. □ Then put the grill element back in place in its original position and proceed in the reverse order. User's guide...
-
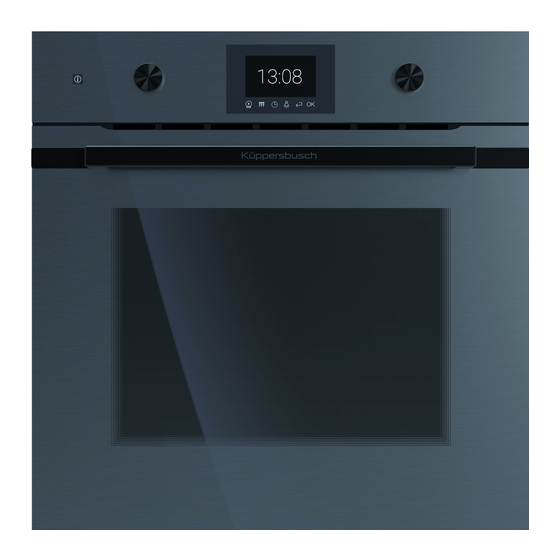
Page 32: Overview Of Your Oven
Overview of your oven 7. Overview of your oven Control panel Optional accessories: Door lock (only for pyrolytic models) Pizza stone Grill element (accessory no. 145) Oven grid Rack levels (accessory no. 124) Gridiron Baking tray Baking tray (accessory no. 541) Hinge Cake tin (accessory no. -
Page 33: Control Panel - Sensor Keys And Displays
Overview of your oven 7.1. Control panel - sensor keys and displays ON/OFF sensor Sensor Time settings / Timer With this sensor you can With this sensor you have access switch off an on your to the menu Time setting. appliance. -
Page 34: Basic Settings
Basic settings 8. Basic settings 8.1. Setting the clock The clock must be set before the oven is used and when- ever power has been disconnected to the appliance. In such cases «12.00» will blink in the display. When the oven is switched on, 12:00 will blink in the dis- play. -
Page 35: Roasting And Baking Charts
Roasting and baking charts □ Turn the left selection switch to select an hour. □ Turn the right selection switch to select the minutes. □ Then confirm by pressing □ You can then choose between the standard and the retro clock. Turn the right switch and then confirm with This will be followed by and acoustic signal as confi... - Page 36 Roasting and baking charts Guidelines for baking Operating mode Hot air Top/Bottom heat Pizza mode Hot air convection bottom heat Preferred settings Rack Temp. Rack Temp. Rack Temp. Baking have a grey level in °C level in °C level in °C time in background minutes...
- Page 37 Roasting and baking charts with a dry topping 150-160 180-190 30-40 with a moist topping 160-170 170-180 160-170 30-50 Sponge dough Gateaux and fl ans 150-160 175-180 30-40 (preheat) Rolls (preheat) 170-180 180-200 15-25 Egg white baking Meringue 80-90 100-120 80-120 Cinnamon stars 100-120...
-
Page 38: Guidelines For Roasting
Roasting and baking charts 9.1. Guidelines for roasting □ Meat that has been well hung is best suited for roasting. □ Make criss-cross cuts on the outer layers of fat on the meat (e.g. knuckle). □ Roasts can all be cooked with or without the addition of fat. □... -
Page 39: Guidelines For Grilling
Roasting and baking charts 160 / 160 / Beef fi llet 1,200 100* Veal / lamb 170- Lamb roast 1,000 170- Roast veal 1,000 Steak Rump steak (browned 120** 120** beforehand) T-bone steak 180- (browned 180** 1,000 200** beforehand) Poultry 180- 180- Chicken... - Page 40 Roasting and baking charts □ Food grilled on the grid will need to be turned. □ The first side will need to be grilled a little longer than the second side. □ Since the food generally differs in shape, thickness and consistency, you should check now and then on whether or not the meat has been cooked as required.
-
Page 41: Recommended Food Probe Temperatures
Roasting and baking charts Chicken 15-18 10-12 17-20 11-14 drumsticks Chicken halfs 18-20 10-12 22-24 12-15 Fish Fish fi llet 10-12 Whole fi sh 8-11 7-10 Toast Toast Toast with a 10-12 topping 9.3. Recommended food probe temperatures Recommended food probe temperatures Core temperatures in °C Rare Medium... - Page 42 Roasting and baking charts Roastbeef 38-55 55-60 from 65 Roulades Joint of beef 85-90 Boiled beef Entrecote 55-58 Veal Knuckle 80-85 Roasting 64-74 Breast 75-78 Saddle 65-70 Shoulder 75-80 Sirloin Lamb Lamb 79-85 Leg of lamb 70-72 Lamb chop Saddle of lamb 60-62 Rack of lamb Game...
-
Page 43: Low-Temperature Cooking Guidelines
Roasting and baking charts Goose 75-80 90-92 Turkey 80-90 Fish Salmon Pike Zander Tuna Redfi sh Trout Yellow mackerel 9.4. Low-temperature cooking guidelines Low-temperature cooking guidelines Cooking time Cooking Weight Browning time in minutes temperature in g in minutes (core temperature in °C as an alternative) (oven setting) - Page 44 Roasting and baking charts Veal Fillet steak 500-800 90-110 1500-1800 10-12 140-160 Saddle 1000-1500 8-10 110-120 Lamb Leg of lamb 2000-2500 10-12 200-250 Saddle fi llet 400-600 60-80 Poultry Breast of duck 400-600 70-80 Turkey breast 400-600 50-60 User's guide...
-
Page 45: Oven Functions
Oven functions 10. Oven functions The functions all depend on the model in question. 10.1. Cooking functions Top / bottom heat Heat from the top and the bottom ensures even baking results for food placed on one level. Ideal for baking delicate cakes and gateaus, such as yeast dough, cheesecake, etc. - Page 46 Oven functions ECO makes it possible to cook dishes with a lower energy consumption than usual. In order to save on energy, the oven switches off automatically a few min- utes before the end of the cooking time and uses the remaining heat in the oven to cook food through.
-
Page 47: Special Functions
Oven functions Intensive fan-assisted grilling + bottom heat This combination of a large-surface grill, bottom heat and a fan ensures that large food portions remain juicy inside and that they are beautifully crispy and brown on the outside. Ideal for stuffed roasts or poultry. 10.2. - Page 48 Oven functions Gratinating This function is ideal for gratinating gratin dishes, oven bakes and souffl és. Preserving Ideal for preserving foods such as fruit and vegetables. Dehydrating With the dehydrating mode water is extracted from food to extend its shelf life. Most vitamins and minerals are preserved.
-
Page 49: Operating The Oven
Operating the oven 11. Operating the oven The fan is switched on and off in the case of some programmes, but this is not an indication of a fault. 11.1. Switching on the oven In order to be able to use your oven for cooking food, you will need to press on the symbol. -
Page 50: Changing A Setting During The Cooking Process
Operating the oven 11.4. Changing a setting during the cooking process If you wish to change a cooking setting during the cooking process, turn the left switch; turn the right switch if you wish to change the cooking temperature. Then following the instructions above. During the cooking process, press symbol , to adjust the cooking time or the fi... - Page 51 Operating the oven □ Turn the right switch again in order to select the cooking temperature and to confirm press (This setting depends on the programme and is not available in some programmes.) □ Turn the right switch again in order to select the cooking setting and to confirm press You will access the settings view.
- Page 52 Operating the oven The programmes for white bread, black bread and thin and thick pizza dough are operated with pre-heating with the oven empty, i.e. before the food to be cooked is put into the oven. This means that the oven reaches the right temperature to be able to best cook the food. The procedure for cooking with these programmes is as follows: □...
- Page 53 Operating the oven □ Turn the right switch again in order to select the cooking temperature and to confirm press □ Turn the right switch again in order to select the cooking setting and to confirm press to save the settings. You will be returned to the settings view or you will return to the cooking process.
-
Page 54: Time Settings
Operating the oven □ Turn the right switch again in order to select the cooking setting and to confirm press to save the settings. You will access the settings view. Cooking times are automatically calculated. You can also set fi nish times and cooking time. (See 11.6.1 and 11.6.3) INFO If a cooking process has already been started, it will only be possible to change the cooking... - Page 55 Operating the oven □ Turn the right switch to set the cooking time. Then confirm by pressing Turn the right switch to set the end of cooking time (when the proposed end of cooking time is confi rmed, the cooking process will start as soon as the setting view has been confi...
- Page 56 Operating the oven □ Turn the right switch to change the cooking time. □ Turn the switch back to 00:00 to deactivate the cooking time. □ Then confirm by pressing In the next step you will need to set the end of cooking time. Confi rm the proposed end of cooking time to start the process immediately.
- Page 57 Operating the oven 11.6.3 Selecting a later end of cooking time (only possible before starting the cooking process) The end of cooking time is the time at which the oven switches off. You can use it to combine the cooking time and the end of cooking time.
- Page 58 Operating the oven INFO! You can delete a preprogrammed cooking process by pressing the key. A signal will sound and the end of cooking time in the status display will go off. 11.6.4 Setting the timer to a minute minder □...
- Page 59 Operating the oven 11.6.5 Setting the timer in connection with a cooking process Setting the timer function during cooking process will serve as an alarm, for example when you wish to turn your food at a specifi c point in time during the cooking process. □...
-
Page 60: Memory Function
Operating the oven 11.7. Memory function (depending on the model in question) The oven is fi tted with a storage function, which makes it possible to save a cooking process an and au- tomatic programme. 11.7.1 Saving an additional programme □... -
Page 61: Rapid Heating
Operating the oven 11.8. Rapid heating (has been activated as of the factory setting) □ Keep the symbols pressed for 3 seconds until the following screen appears. □ Turn the right switch in order to switch the rapid heating func- tion on and off in the banking functions permitted by the oven... -
Page 62: Setting The Demo Mode
Operating the oven 11.10. Setting the demo mode □ Now press the and the symbols for 3 seconds until an acoustic signal sounds and the symbol appears in the status display. □ Deactivate the demo mode by holding the same combination of keys for 4 seconds until an acous- tic signal sounds and the symbol in the status display goes off. -
Page 63: Microwave
Microwave 12. Microwave □ Use only dishes suitable for microwaves. Before using dishes and containers in the microwave, check that these are suitable (see the section on types of dishes). □ Never remove the mica cover on the ceiling of the oven interior! This cover stops fat and pieces of food damaging the microwave generator. -
Page 64: Combined Functions
Microwave 12.2. Combined functions □ Select a function or an automatic programme and set the required temperature. □ Touch the symbol INFO The function automatically adds the maximum microwave power □ Turn the right switch to set the time. This step is omitted if a cooking time has already been set previously □... -
Page 65: Quickstart Microwave
Microwave 12.3. Quickstart Microwave □ Touch the symbol to switch on the oven. □ Turn the left switch and select the tile without function. □ Then confirm by pressing to start the Quickstart function. The power level of 1000 Watts for 30 seconds is the default setting. -
Page 66: What To Do If
What to do if … 13.What to do if … ATTENTION! Repairs may only be carried out by qualifi ed staff members! f your appliance is faulty, please check whether you can rectify the problem yourself by consulting these instructions for use. You may be able to rectify some problems yourself. They are described below. If ... - Page 67 What to do if … If ... What to do? Replace the door sealing See «Replacing the door sealing». ATTENTION! ... the door sealing is damaged? Do not use the oven when the door sealing is damaged! The oven can still be used. Replace the halogen lamp as ...
- Page 68 K02-180200/01 Küppersbusch Hausgeräte GmbH Postfach 10 01 32, D-45801 Gelsenkirchen, Küppersbuschstraße 16, D-45883 Gelsenkirchen Telefon: (0209) 401-0, Telefax: (0209) 401-303 www.kueppersbusch.de Teka Austria GmbH Eitnergasse 13, A-1230 Wien Telefon: (01) 86680-15, Telefax: (01) 86680-50 www.kueppersbusch.at...
Need help?
Do you have a question about the CBM6350.0 and is the answer not in the manual?
Questions and answers