Advertisement
Quick Links
AV Receiver
Ampli-Tuner Audio-Vidéo
Quick Start Guide
EN
快速启动指南
ZH-CH
UTA
Precautions ........................................................... 2
Preparations........................................................ 10
Playback.............................................................. 21
注意事项.............................................................. 30
准备工作.............................................................. 38
播放..................................................................... 50
English
中文
Advertisement

Related Manuals for Yamaha RX-V3085


Summary of Contents for Yamaha RX-V3085
-
Page 1: Table Of Contents
AV Receiver Ampli-Tuner Audio-Vidéo Quick Start Guide 快速启动指南 ZH-CH Precautions ............2 English Preparations............10 Playback.............. 21 注意事项.............. 30 准备工作.............. 38 中文 播放..............50... - Page 2 12 Use only with the cart, stand, tripod, bracket, or table specified by the IMPORTANT SAFETY INSTRUCTIONS manufacturer, or sold with the apparatus. When a cart is used, use caution when moving the cart/apparatus combination to avoid injury from tip-over. 13 Unplug this apparatus during lightning storms or when unused for long periods of time.
- Page 3 If you can not locate the appropriate retailer, please contact Yamaha Corporation of America A/V Division, 6600 Orangethorpe Avenue, Buena Park, CA 90620, USA. The above statements apply ONLY to those products distributed by Yamaha Corporation of America or its subsidiaries. COMPLIANCE INFORMATION STATEMENT (DECLARATION OF CONFORMITY...
-
Page 4: Precautions
If you notice any irregularities, be sure to request an inspection or repair from the dealer where you purchased the unit or from qualified Yamaha • Yamaha cannot be held responsible for injury to you or damage of service personnel. - Page 5 Continued use could cause electric shocks, a fire, or malfunctions. Immediately request an itself. inspection or repair from the dealer where you purchased the unit or from qualified Yamaha • For proper installation of the outdoor antenna, make sure to have it done by the dealer from service personnel.
- Page 6 AC outlet and request an inspection from the dealer where you purchased the unit or from qualified current is still flowing. Yamaha service personnel. Installation • Do not do the following: - put heavy items on top of the equipment.
- Page 7 Maintenance • When cleaning the unit, use a dry, soft cloth. Using chemicals such as benzine or thinner, cleaning agents, or chemical scrubbing cloths can cause discoloration or deformation. Batteries • Be sure to discard used batteries in accordance with local regulations. Information About content in this manual •...
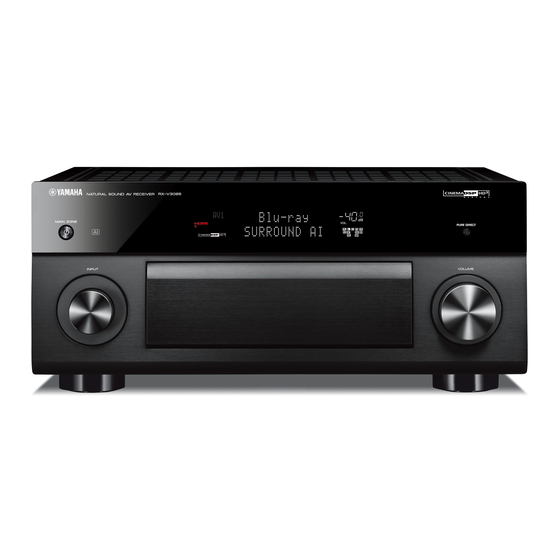
- Page 8 (Be careful not to trap your fingers.) • In this document, the RX-V3085 is used for illustration purposes. Some parts or components, such as jacks, may vary by specific model. Such differences are indicated as required.
- Page 9 Features The unit is also capable of the following, which are not described in this document. See the Owner’s Manual to help you get the most out of the unit. • Playing music files stored on a media server (PC or NAS) •...
-
Page 10: Preparations
Preparation Confirming package contents AM antenna Power cable (Except for Australia model) The supplied power cable varies Batteries depending on the region of purchase. (AAA, LR03, UM-4) (x2) Remote control FM antenna DAB/FM antenna YPAO microphone Microphone base Pole (Except for Australia model) (Australia model) Use to measure angle/height during YPAO. - Page 11 Connecting speakers/subwoofer Positioning speakers Precautions for connecting speaker cables Use the diagram as a reference for positioning speakers. • Be sure that the unit and subwoofer are turned off. • Prepare speaker cables in a place away from the unit, to avoid accidentally dropping wire strands into the unit's interior which could result in a short 0.5 to 1 m 0.5 to 1 m...
- Page 12 • Use a subwoofer equipped Surround speaker (R) Surround speaker (L) Subwoofer with built-in amplifier. • Up to two subwoofers can be connected. INPUT 10 mm (3/8") Audio pin cable Surround back speaker (L) Surround back speaker (R) PRE OUT (FRONT) (REAR) FRONT...
- Page 13 Connecting external devices HDMI (HDCP2.2) HDMI OUT HDMI OUT AV 1 AV 2 AV 3 AV 4 AV 5 AV 6 AV 7 (HDCP2.2) (HDCP2.2) (1 MOVIE) (5 STB) (6 GAME) (ZONE OUT) Playback devices are best connected to the input jack with the HDMI HDMI HDMI...
- Page 14 Connecting the radio antennas FM/AM antennas DAB/FM antenna (Except for Australia model) (Australia model) Assembling the AM antenna Fix the end of the FM antenna to a wall. DAB/FM antenna (supplied) Place the AM Fix the antenna antenna on a ends to a wall.
- Page 15 Preparing a network connection Prepare a wired or wireless network connection in accordance with your network environment. Note The wireless antenna must be raised if the unit will be connected to a Bluetooth device. Wireless network connection Wired network connection NETWORK (4 NET) (8 SERVER)
- Page 16 Connecting the power cable to an AC wall outlet, and turning on the unit Press z (receiver power) to Plug the power cable into an The Network Setup screen shown below will be displayed on the TV when the unit is turned on for AC wall outlet.
- Page 17 Optimizing the speaker settings automatically (YPAO) The Yamaha Parametric room Acoustic Optimizer (YPAO) function detects speaker connections, measures the distances from them to your listening position(s), and then automatically optimizes the speaker settings, such as volume balance and acoustic parameters, to suit your room.
- Page 18 Turn on the subwoofer and set the volume to half. Use the cursor keys to select “Start” and press ENTER. If the crossover frequency is adjustable, set it to maximum. The measurement will start in 10 seconds. CROSSOVER/ VOLUME It takes about 5 minutes to measure. HIGH CUT The screen below appears on the TV when the measurement finishes.
- Page 19 Using MusicCast CONTROLLER To use the network features on the MusicCast compatible device, you need MusicCast is a brand new wireless musical solution from Yamaha, allowing the dedicated app “MusicCast CONTROLLER” for the operation. Search for you to share music among all of your rooms with a variety of devices. You can the free app “MusicCast CONTROLLER”...
- Page 20 Press and hold the CONNECT button on the front panel of the unit for 5 seconds, as instructed by the app. VOLUME SCENE INFO (WPS) MEMORY PRESET (CONNECT) PROGRAM MULTI ZONE TUNING ZONE 2 ZONE 3 ZONE 4 ZONE CONTROL PHONES SILENT CINEMA AUDIO...
-
Page 21: Playback
Playback This section describes basic operations such as playing Blu-ray Discs and DVDs, and tuning into radio stations. Most operations can be performed using the remote control. Basic playback functions MAIN 2 3 4 MAIN 2 3 4 SLEEP SLEEP SLEEP SLEEP ZONE... - Page 22 Playing a BD/DVD Listening to FM/AM radio MAIN 2 3 4 MAIN 2 3 4 SLEEP SLEEP SLEEP SLEEP ZONE ZONE (Except for Australia model) We recommend playing back multichannel audio (5.1- PARTY PARTY PARTY P P P P P A A A A A P P P P P P R R R R R T T T T T Y Y Y Y Y T T T T T T T T T T T T T T T T PURE DIRECT PURE DIRECT PURE DIRECT...
- Page 23 Listening to DAB radio Listening to Internet radio MAIN 2 3 4 MAIN 2 3 4 SLEEP SLEEP SLEEP SLEEP ZONE ZONE (Australia model) Press NET repeatedly to select PARTY PARTY PARTY P P P P P A A A A A P P P P P P R R R R R T T T T T Y Y Y Y Y T T T T T T T T T T T T T T T T PURE DIRECT PURE DIRECT PURE DIRECT...
- Page 24 SCENE function Playing music stored on a MAIN 2 3 4 MAIN 2 3 4 ® SLEEP SLEEP SLEEP SLEEP ZONE ZONE Bluetooth device Unit input sources and settings that have been assigned PARTY PARTY PARTY P P P P A A A A P P P P P P R R R R T T T T Y Y Y Y T T T T T T T T T PURE DIRECT PURE DIRECT PURE DIRECT...
- Page 25 Playing music stored on a Basic operation of the MAIN 2 3 4 MAIN 2 3 4 SLEEP SLEEP SLEEP SLEEP ZONE ZONE USB flash drive Option menu PARTY PARTY PARTY P P P P A A A A P P P P P P R R R R T T T T Y Y Y Y T T T T T T T T T PURE DIRECT PURE DIRECT PURE DIRECT...
- Page 26 Basic operation of the MAIN 2 3 4 MAIN 2 3 4 SLEEP SLEEP SLEEP SLEEP ZONE ZONE Setup menu PARTY PARTY PARTY P P P P A A A A P P P P P P R R R R T T T T Y Y Y Y T T T T T T T T T PURE DIRECT PURE DIRECT PURE DIRECT...
- Page 27 As a safety precaution, capability to turn on the power is disabled. Contact your consecutively. nearest Yamaha dealer or service center to request repair. When the unit is in this condition, the standby indicator on the unit’s front panel blinks if you try to turn on the power.
- Page 28 Problem Cause Remedy No sound is coming from the The playback source does not contain LFE or low- To check if the subwoofer is working properly, use “Test Tone” in the “Setup” subwoofer. frequency signals. menu (p. 26). Subwoofer output is disabled. Perform YPAO (p.
- Page 29 17.0 kg (37.5 lbs) The contents of this manual apply to the latest specifications as of the publishing date. Refer to the Owner’s Manual on the Yamaha website to confirm specifications other than described above and obtain the latest information of the unit.
-
Page 30: 注意事项
请立即断开电源开关并从AC插座中拔下插头。即使电源已经关闭,只要电源 线未从AC插座上拔除,本产品就不会从电源上真正断开。 • 如果听到雷声或怀疑闪电接近,请快速关闭电源开关并将插头从AC插座上拔 请在使用前,仔细阅读下述内容。请务必按照这 下。否则可能造成火灾或故障。 • 如果长时间不使用本产品,请务必将插头从AC插座上拔下。否则可能造成火 些指示操作。 灾或故障。 下列注意事项能够防止给用户和其他事物造成伤害的风险以及防止财 请勿拆卸 产损失,并为用户合理、安全地使用本产品提供帮助。请务必按照这 些指示操作。 • 请勿拆卸或改装本产品。否则可能造成火灾、触电、受伤或故障。如果您发 阅读完本手册后,请将本手册放置在安全的位置以便您日后参考。 现任何不恰当的操作,请务必向您购买本产品的经销商或具有资质的Yamaha 服务人员要求检测或维修。 • 请务必向您购买本产品的经销商或具有资质的Yamaha服务人员要求 防水警告 检测或维修。 • 对由于不正当使用、擅自改造本产品所造成的人身伤害和产品损坏 • 请勿让本产品淋雨或在水附近及潮湿环境中使用,或将盛有液体的容器(如花 或数据丢失或损坏,Yamaha不负任何责任。 瓶、水瓶或玻璃杯)放在其上,否则可能会导致液体溅入任何开口或可能掉落水 的位置。液体,如水等进入本产品,可能造成火灾、触电或故障。如果任何液体 • 本产品适用于普通家庭。请勿用于需要高可靠性的应用,例如管理 如水渗入本设备,请立即切断电源并从AC电源插座拔下电源线。然后,请向您 生命、医疗保健或高价值资产。 购买本产品的经销商或具有资质的Yamaha服务人员要求检测产品。 • 切勿用湿手插拔电源线插头。请勿使用湿手搬运本产品。否则可能造成触电 警告 或故障。 防火警告... - Page 31 故障。 任何一种异常时,请立即关闭放大器和接收器。 • 地震等自然灾害发生时请勿靠近本产品。由于产品可能翻倒或坠落造成人身 - 电源线/插头损坏。 伤害,请尽快远离产品并转移到安全地带。 - 本产品发出异味或烟雾。 • 移动本产品前,请务必关闭电源开关和断开所有连接线。否则可能损坏线缆 - 异物进入本产品。 或造成您或他人绊倒和跌倒。 - 使用过程中声音中断。 - 产品出现裂缝或损坏。 • 搬运或移动本机时,请务必要两人或两人以上。试图自行抬起本机可能会使 继续使用可能造成触电、火灾或故障。请立即向您购买本产品的经销商或具 您的背部受伤而导致其他伤害,或导致本机受损。 有资质的Yamaha服务人员要求检测或维修。 • 为了室外天线的正确安装,确保让购买本机的经销商或有资质的服务人员来 • 请注意不要使本产品掉落或对其施加重力。如果怀疑因掉落等情况对本产品 完成。如果不能遵守,可能会导致安装失败,并造成受伤。安装需要专业技 造成损坏,请立即关闭电源并将插头从AC插座上拔下。否则可能造成触电、 术和经验。 火灾或故障。请立即向您购买本产品的经销商或具有资质的Yamaha服务人员 听力损伤 要求检测。 • 请勿长时间持续在很高或不舒服的音量水平使用本产品/扬声器或耳机,否 则可能会造成永久性听力损害。若发生任何听力损害或耳鸣,请尽快就医。 注意 • 将本产品连接到其它设备之前,请关闭所有设备的电源开关。打开或关闭所 有设备电源之前,确保将所有设备的音量调节到最小。否则可能造成听力损...
- Page 32 电或故障。如果有异物进入本产品,请立即关闭电源并将插头从AC插座上 热,或是变得非常冷,或使产品受到过多的灰尘或震动。否则会造成产品面 拔下,并向您购买本产品的经销商或具有资质的Yamaha服务人员要求检测 板变形,内部元件故障,或使操作变得不稳定。 产品。 • 安装本产品时请尽可能远离其他电子设备。 • 请勿执行以下操作: 本产品的数字信号可能会对其他电子设备造成干扰。 - 将重物置于设备顶上。 • 如果使用无线网络,请避免将本产品安装在金属墙或桌面、微波炉或其他无 - 堆放设备。 线网络设备附近。 - 对按钮、开关、输入/输出端子等施加不合理外力。 障碍物可能会缩短传输距离。 • 避免拉拽已连接的线缆以保护人员因产品掉落而受伤或产品损坏。 连接 电池使用 • 如果连接外部产品,请务必彻底阅读每个产品的使用说明书,并按照指示进 行连接。 • 电池换新时,请务必同时全部更换。请勿新旧电池混用。新旧电池混用会因 如果没有根据指示正确地操作产品将造成故障。 液体泄漏造成火灾、烧伤或发炎。 • 请勿将本产品连接至工业产品。 • 请勿使用非指定电池。否则可能因液体泄漏造成火灾、烧伤或发炎。 个人使用和工业使用的产品的数字音频接口标准有所不同。本产品为用于连 • 请勿混用不同的电池,比如碱性电池与锰电池,不同品牌的电池,或同一品 接个人使用数字音频接口的设计。连接工业用途的数字音频接口可能对本产 牌但不同型号的电池,否则会因液体泄漏造成火灾、烧伤或发炎。...
- Page 33 雅马哈乐器音响 (中国)投资有限公司 上海市静安区新闸路1818 号云和大厦2 楼 此标识适用于在中华人民共和国销售的电子信息产品。 标识中间的数字为环保使用期限的年数。 客户服务热线:400-051-7700 公司网址:http://www.yamaha.com.cn 产品中有害物质的名称及含量 制造商:雅马哈株式会社 制造商地址:日本静冈县滨松市中区中泽町10-1 部件名称 有害物质 进口商:雅马哈乐器音响(中国)投资有限公司 进口商地址:上海市静安区新闸路1818 号云和大厦2 楼 铅 汞 镉 六价铬 多溴联苯 多溴二苯醚 原产地:马来西亚 (Pb) (Hg) (Cd) (Cr(VI)) (PBB) (PBDE) 电路板 × ○ ○ ○ ○ ○ 为便于您理解使用说明书的内容,本公司已经依据国家的相关标准尽可能 的将其中的英文表述部分翻译成中文。但是,由于专业性、通用性及特殊...
- Page 34 5GHz 1. – 工作频率范围:5150 - 5350 MHz – 等效全向辐射功率 (EIRP):≤ 200mW – 最大功率谱密度:≤ 10 dBm / MHz – 载频容限:20 ppm – 带外发射功率 (EIRP):≤ -80 dBm / Hz – 杂散发射 ( 辐射 ) 功率: ≤ -36 dBm / 100 kHz (30 - 1000 MHz) ≤...
- Page 35 Zh-cn...
- Page 36 简介 • 本机是用于在家中欣赏音乐和视频的产品。 打开和关闭前面板门 • 本文件通过步骤演示说明基本音箱系统设置和设备配置。还包括如 当使用前面板门后面的控制器或插孔时,轻轻按下门的底部将其打开。 播放蓝光碟片、 DVD 及电台内容等基本操作说明。 如果前面板门后面的控制器或插孔未使用,请保持门关闭。 (小心不要 • 在本手册中, RX-V3085 供说明之用。某些零件或组件,如插孔,可 夹住你的手指。 ) 能因具体型号而异。这些差异按要求表示。 本机有许多未在本文件中记述的功能。有关本产品的详情,请参阅雅 马哈网站上的使用说明书。 按照下述方法中的一种查看最新的使用说明书。 HTML 格式 • 扫描本文件封面上的二维码。 • 访问以下网站。 http://avpro.global.yamaha.com/manual/avr/rxv3085/ PDF 格式 • 访问以下网站。 http://download.yamaha.com/ [仅限于美国客户] 有关更多信息、常见问题、下载内容 (如 《使用说明书》 )和产品更 新,请访问以下网站。...
- Page 37 功能 本机还具有以下功能,这些功能在本文件中没有描述。请参阅使用说 明书来帮助您充分使用本机。 • 播放存储在媒体服务器 (PC 或 NAS)上的音乐文件 • 通过网络 (AirPlay) 播放 iTunes 的音乐或 iPhone/iPad/iPod touch 的音乐 • 在多个房间中播放音乐 (Zone 功能) • 配置高级设置 (ADVANCED SETUP 菜单) 有关详情,请参阅使用说明书上的 “ 本机功能介绍 ”。 AV SETUP GUIDE AV SETUP GUIDE 是一种应用程序,可以指导您连 接电视机或播放设备 (例如 BD / DVD 或 CD 播放 器)以及将音箱连接至收音扩音机等程序。有关详...
-
Page 38: 准备工作
准备工作 确认包装内容 AM 天线 电源线 电池 (AAA, LR03, UM-4) (澳大利亚型号除外) 附带的电源线因购买地区而异。 (x2) 遥控器 FM 天线 DAB/FM 天线 YPAO 麦克风 麦克风底座 支架 (澳大利亚型号除外) (澳大利亚型号) 用于在 YPAO 期间测量角度 / 高度。 具体附带上述哪个配件因 天线隔离器 购买地区而异。 快速启动指南 (本册子) 准备缆线 需要以下缆线 (非附带)来构建本文档中所述的系统。 • 音箱缆线 (视音箱的数量定) • 音频针口缆线 (x1) •... - Page 39 连接音箱 / 低音炮 放置音箱 音箱缆线连接的注意事项 利用图表作为参考来设置音箱。 • 请确保本机与低音炮关闭。 • 准备音箱缆线时请远离本机,以防意外将钢丝索跌落到本机内部, 导致其短路或故障。 0.5 ~ 1 m 0.5 ~ 1 m • 音箱缆线连接不当可能会导致短路,损坏设备或音箱。 – 从音箱缆线端部小心地剥去大约 10 mm 10mm 的绝缘皮,然后将缆线的线芯 紧紧捻在一起。 1.8 m 1.8 m – 不要让音箱缆线的线芯相互接触。 10°~30° 10°~30° – 不要让音箱缆线的线芯接触本机的金属部件 (后面板和螺丝) 0.3 m 或以上 1 / 2 前置音箱...
- Page 40 • 使用配有内置放 环绕声音箱 (右) 环绕声音箱 (左) 低音炮 大器的低音炮。 • 最多可以连接两 个低音炮。 INPUT 10 mm 音频针口线 后环绕声音箱 (左) 后环绕声音箱 (右) PRE OUT (FRONT) (REAR) FRONT SURROUND SUR. BACK SUBWOOFER SPEAKERS EXTRA SP2 EXTRA SP1 SURROUND SURROUND BACK CENTER FRONT R.PRESENCE F.PRESENCE ZONE 2/ZONE 3/F.PRESENCE ZONE 2/ZONE 3/BI-AMP 中置音箱...
- Page 41 连接外部装置 HDMI (HDCP2.2) HDMI OUT HDMI OUT (HDCP2.2) AV 1 AV 2 AV 3 AV 4 AV 5 AV 6 AV 7 (HDCP2.2) (1 MOVIE) (5 STB) (6 GAME) (ZONE OUT) 播放装置最好连接到带有标签的输入插孔,该标签最清 HDMI HDMI HDMI 楚地描述了设备的类型。有关详细信息,请参阅 “SCENE 功能 ” (第 53 页) 。 HDMI HDMI HDMI...
- Page 42 连接无线电天线 连接 FM/AM 天线 (澳大利亚型号除外) 装配 AM 天线 FM 天线 (附带) 将 FM 天线端部固 将 AM 天线置于 定到墙上。 平坦的表面。 AM 天线 (附带) FM 天线连接注意事项 按住 插入 松开 • 安装以下配件时请注意规格 的变化: 有线网络天线 – 天线隔离器 • 当您将 FM 天线 (随机附带 的 FM 天线除外)连接至本 本机的...
- Page 43 DAB/FM 天线 (澳大利亚型号) DAB/FM 天线 将天线端部固定 到墙上。 Zh-cn...
- Page 44 准备网络连接 根据您的网络环境准备有线或无线网络连接。 注 本机与 Bluetooth 装置连接时,请务必抬高无线天线。 无线网络连接 有线网络连接 NETWORK (4 NET) (8 SERVER) 网络缆线 网络 抬高无线天线使其能够直立。 (将设备连接至无线路由器的流程如步骤 所示。 ) 须知 请勿在天线上施加过大的力。否则会将其损坏。 路由器 调制解调器 Zh-cn...
- Page 45 将电源线连接至交流墙壁电源插座,然后开启设备 将电源线插入到交流墙壁电源 按 z (接收器电源)打开本 在购买后第一次开启设备时,电视上会显示 如下的网络设置屏幕。可能需要几十秒钟时 插座。 机。 间可以显示屏幕 (WAC: Wireless Accessory Configuration) 。 MAIN 2 3 4 MAIN 2 3 4 SLEEP SLEEP SLEEP SLEEP ZONE ZONE PARTY PARTY PARTY P P P P A A A A P P P P P P R R R R T T T T Y Y Y Y T T T T T T T T T PURE DIRECT PURE DIRECT PURE DIRECT...
- Page 46 自动优化音箱设置 (YPAO) Yamaha Parametric room Acoustic Optimizer (YPAO)功能将检测音箱连接,测量音箱与收听位置之间的距离,然后自动优化音箱设置 (如音量 平衡和音响参数)以适应您的房间。 R R R R R E E D D GREEN GREEN GREEN G G G R R E E E E N N YELLOW YELLOW YELLOW Y Y Y E E L L L L O O O O W W W W W...
- Page 47 打开低音炮,然后将其音量设为原始音量的一半。 使用光标键选择 “ 开始 ” 然后按 ENTER。 10 秒钟后将开始测量。 如果穿越频率可调节,则将其设为最大。 测量大约需要 5 分钟时间。 CROSSOVER/ 完成测量时,电视上将出现以下屏幕。 VOLUME HIGH CUT 将 YPAO 麦克风放置在收听位置,然后将它连接至 前面板上的 YPAO MIC 插孔。 电视上会出现下面的屏幕。 注 如果出现错误信息 (例如 ERROR 1)或警告信息 (例如 WARNING 2) ,请参阅使用说明书中的 “ 自动优化音箱设置 (YPAO)”。 选择 “ 测定结果 ” 并按 ENTER 显示结果。 确认结果后,按...
- Page 48 MusicCast 是雅马哈全新的无线音乐解决方案,可以让您通过各种设 “MusicCast CONTROLLER” 进行操作。在 App Store 上搜索免费的应 备在您所有房间之间共享音乐。在您家中的任何地方,您都可以通过 用程序 “MusicCast CONTROLLER”,并将其安装到您的设备上。 一款简单易用的应用程序从您的智能手机、PC、NAS 驱动器和音乐流 媒体服务中享受音乐。有关 MusicCast 兼容产品的更多详细信息,请 参阅以下网址: 将本机添加到 MusicCast 网络 http://www.yamaha.com/musiccast/ • 通过专用应用程序 “MusicCast CONTROLLER”,不间断控制所有的 执行以下步骤,将本机添加到 MusicCast 网络。您还可以立即配置本 MusicCast 兼容设备。 机的无线网络设置。 • 通过音乐流媒体服务播放音乐。 (兼容的音乐流媒体服务可能因您所 注 在的地区和产品而有所差异。 ) 将需要网络 SSID 和安全密钥。...
- Page 49 按照应用程序的说明按住设备前面板上的 CONNECT 按钮超过 5 秒钟。 VOLUME SCENE INFO (WPS) MEMORY PRESET (CONNECT) MULTI ZONE PROGRAM TUNING ZONE 2 ZONE 3 ZONE 4 ZONE CONTROL PHONES SILENT CINEMA AUDIO 按照应用程序的屏幕菜单说明配置网络设置。 当已经建立连接时,会在本机前面板显示屏上显示 “Completed”。 已建立与 MusicCast CONTROLLER 应用程序的网络连接,且本机注 册为 MusicCast 启用装置。 Zh-cn...
- Page 50 播放 本节介绍了播放蓝光碟片和 DVD 以及调谐至无线电电台等时的基本操作。使用遥控器可进行大部分操作。 基本播放功能 MAIN 2 3 4 MAIN 2 3 4 SLEEP SLEEP SLEEP SLEEP ZONE ZONE 打开/关闭本机 (待机) PARTY PARTY PARTY P P P P P A A A A A P P P P P P R R R R R T T T T T Y Y Y Y Y T T T T T T T T T T T T T T T T PURE DIRECT PURE DIRECT PURE DIRECT...
- Page 51 播放 BD/DVD 收听 FM/AM 广播 MAIN 2 3 4 MAIN 2 3 4 SLEEP SLEEP SLEEP SLEEP ZONE ZONE (澳大利亚型号除外) PARTY PARTY PARTY P P P P A A A A P P P P P P R R R R T T T T Y Y Y Y T T T T T T T T T PURE DIRECT PURE DIRECT PURE DIRECT...
- Page 52 收听 DAB 广播 收听 Internet 电台 (澳大利亚型号) MAIN 2 3 4 MAIN 2 3 4 SLEEP SLEEP SLEEP SLEEP ZONE ZONE PARTY PARTY PARTY P P P P A A A A P P P P P P R R R R T T T T Y Y Y Y T T T T T T T T T PURE DIRECT PURE DIRECT PURE DIRECT...
- Page 53 ® SCENE 功能 播放存储在 Bluetooth 装置 MAIN 2 3 4 MAIN 2 3 4 SLEEP SLEEP SLEEP SLEEP ZONE ZONE 上的音乐 可单击按钮 (SCENE 功能) ,选择为 SCENE(1– PARTY PARTY PARTY P P P P A A A A P P P P P P R R R R T T T T Y Y Y Y T T T T T T T T T PURE DIRECT PURE DIRECT PURE DIRECT...
- Page 54 播放存储在 USB 闪存盘上的 选项菜单的基本操作 MAIN 2 3 4 MAIN 2 3 4 SLEEP SLEEP SLEEP SLEEP ZONE ZONE 音乐 本节介绍选项菜单的基本操作。选项菜单用于根据 PARTY PARTY PARTY P P P P A A A A P P P P P P R R R R T T T T Y Y Y Y T T T T T T T T T PURE DIRECT PURE DIRECT PURE DIRECT...
- Page 55 设置菜单的基本操作 MAIN 2 3 4 MAIN 2 3 4 SLEEP SLEEP SLEEP SLEEP ZONE ZONE 本节介绍设置菜单的基本操作。设置菜单用于详细 PARTY PARTY PARTY P P P P A A A A P P P P P P R R R R T T T T Y Y Y Y T T T T T T T T T PURE DIRECT PURE DIRECT PURE DIRECT...
- Page 56 • 是否已打开本机、低音炮、电视和播放装置 (如 BD/DVD 播放机) 。 • 每条缆线的接头是否已牢固地插入每台装置的插孔中。 如果电源和缆线没有问题,请参阅下表中所示的说明。 如果您遇到的问题未列出,或者指导不起作用,关闭本机,断开电源线的连接,并联系距您最近的雅马哈经销商或服务中心。 问题 原因 解决措施 无法接通电源。 保护电路已连续激活三次。 作为一项安全预防措施,接通电源的功能已被禁用。请联系距离您最 如果本机处于此状态,则本机前面板上的待机指示 近的 Yamaha 经销商或服务中心申请维修。 灯将在您尝试打开电源时闪烁。 电源在打开后立即关闭 (待机模 在音箱缆线短路时打开了本机。 将每条音箱缆线的裸线捻在一起,然后重新连接至本机和音箱 (第 39 式) 。 页) 。 本机没有反应。 由于外部电击 (例如雷电或过大的静电)或电压降 长按前面板上的 MAIN ZONE z15 秒以上以初始化并重新启动本机。 至电源电压而导致内部微电脑已冻结。...
- Page 57 问题 原因 解决措施 没有视频。 在本机上选择了其他输入源。 用输入选择键选择合适的输入源。 在电视上选择了其他输入源。 将电视的输入切换为显示来自本机的视频。 播放装置 (使用 HDMI 连接至本 输入视频信号 (分辨率)不受本机支持。 要查看有关当前视频信号 (分辨率)的信息,请参阅 “ 设置 ” 菜单中 “ 机)没有视频。 视频 /HDMI” 下的 “ 信息 ” (第 55 页) 。有关本机支持的视频信号信 息,请参阅使用说明书中的 “HDMI 信号兼容 ”。 电视不支持 HDCP (High-bandwidth Digital Content 参考电视使用说明书,然后检查电视规格。...
- Page 58 参考尺寸 (无线天线竖直) 435 x 269 x 474 mm [AM] 530 kHz ~ 1710 kHz * 包括支柱和突起 中国型号 [FM] 87.50 MHz ~ 108.00 MHz 重量 RX-V3085 中国型号 19.6 kg [AM] 531 kHz ~ 1611 kHz 其他型号 18.1 kg DAB/FM 调谐范围 澳大利亚型号...
- Page 59 Zh-cn...
- Page 60 Yamaha Global Site http://www.yamaha.com/ Yamaha Downloads http://download.yamaha.com/ Manual Development Group © 2018 Yamaha Corporation Published 05/2018 发行 KS-A0 ZZ99520 10-1 Nakazawa-cho, Naka-ku, Hamamatsu, 430-8650 Japan...
Need help?
Do you have a question about the RX-V3085 and is the answer not in the manual?
Questions and answers