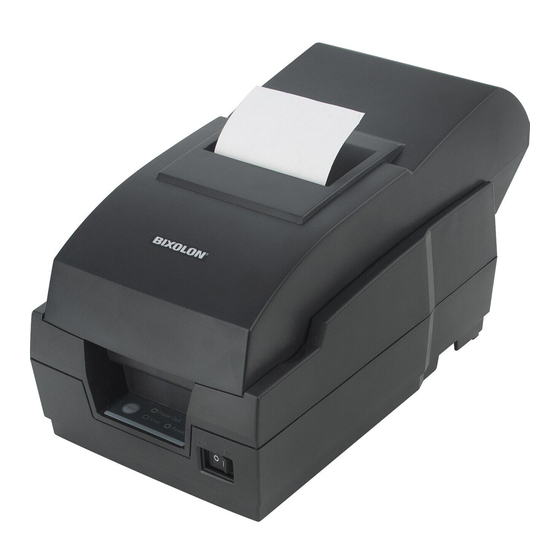
BIXOLON SRP-270 Manual
Impact printer windows driver manual
Hide thumbs
Also See for SRP-270:
- Service manual (85 pages) ,
- Reference manual (50 pages) ,
- User manual (35 pages)

Subscribe to Our Youtube Channel
Related Manuals for BIXOLON SRP-270


Summary of Contents for BIXOLON SRP-270
- Page 1 Windows Driver Manual SRP-270 Impact Printer Rev. 2.03 http://www.samsungminiprinters.com...
-
Page 2: Table Of Contents
SRP-270 ■ Table of Contents 1. Manual Information......................3 2. Operating System (OS) Environment................3 3. Windows Driver Preparation ..................3 4. Windows Driver Installation ..................4 4-1 Installing on Windows 98/ME..................4 4-1-1 Via Serial Port or Parallel..................4 4-1-2 Via USB Port ......................7 4-2 Installing on Windows 2000 ..................13 4-2-1 Via Serial Port or Bluetooth ................13... -
Page 3: Manual Information
The Windows Driver is included in the enclosed CD, and can also be downloaded from the BIXOLON website. (www.samsungminiprinters.com) If downloading from the BIXOLON website, first download the SRP-270_Vx.x.xx.zip file, then unzip the file, and run the SRP-270_Vx.x.xx.exe file. If using the enclosed CD, click the “Windows Driver” button to find and run the Windows Driver installation file (SRP-270_Vx.x.xx.exe). -
Page 4: Windows Driver Installation
SRP-270 4. Windows Driver Installation 4-1 Installing on Windows 98/ME 4-1-1 Via Serial Port or Parallel 1) Double-click the Windows Driver installation file (SRP-270_Vx.x.xx.exe). 2) Click the “Next” button. 3) Click the “Install” button. - 4 - Rev. 2.03... - Page 5 SRP-270 4) Select the COM or Parallel port to be used and click the “Next” button. 5) Clicking the ”Yes” button will reboot the PC. 6) Open the printer properties window in the Windows OS. 7) Click the “Port Settings…” button in the ”Details” tab.
- Page 6 SRP-270 8) Match the communication settings to those of the printer. (The communication settings of the printer can be performed by conducting a self-test.) 9) Click the “Print Test Page” button and check printing status. - 6 - Rev. 2.03...
-
Page 7: Via Usb Port
SRP-270 4-1-2 Via USB Port 1) Double-click the Windows Driver installation file (SRP-270_Vx.x.xx.exe). 2) Click the “Next” button. 3) Click the “Install” button. - 7 - Rev. 2.03... - Page 8 SRP-270 4) Select USB and click the ”Next” button. 5) Clicking the ”OK” button will reboot the PC. 6) Turn on the printer. 7) When the New Hardware Wizard appears for the installation of the “USB Printing Support” Driver, click the “Next” button.
- Page 9 SRP-270 8) Continue to click the “Next” button. 9) Continue to click the “Next” button. - 9 - Rev. 2.03...
- Page 10 SRP-270 10) Continue to click the “Next” button. 11) When the “USB Printing Support” Driver installation is complete, the system automatically reboots. - 10 - Rev. 2.03...
- Page 11 SRP-270 12) After system rebooting, the Windows Driver is automatically installed. * If an error occurs during software installation, save the location. (Location: ”C:\WINDOWS\SRP-270\usb”) 13) Confirm the USB Port setting in the Windows Driver properties. - 11 - Rev. 2.03...
- Page 12 SRP-270 14) Click the “Print Test Page” button and check printing status. - 12 - Rev. 2.03...
-
Page 13: Installing On Windows 2000
SRP-270 4-2 Installing on Windows 2000 4-2-1 Via Serial Port or Bluetooth 1) Double-click the Windows Driver installation file (SRP-270_Vx.x.xx.exe). 2) Click the “Next” button. 3) Click the “Install” button. - 13 - Rev. 2.03... - Page 14 SRP-270 4) Select the COM or Parallel port to be used and click the “Next” button. 5) When the following message box appears, click the “Yes” button. - 14 - Rev. 2.03...
- Page 15 SRP-270 6) Clicking the ”Yes” button will reboot the PC. 7) Open the printer properties window in the Windows OS. 8) Click the “Port Settings” button in the ”Ports” tab. - 15 - Rev. 2.03...
- Page 16 SRP-270 9) Match the communication settings to those of the printer. (The communication settings of the printer can be performed by conducting a self-test.) 10) Click the “Print Test Page” button and check printing status. - 16 - Rev. 2.03...
-
Page 17: Via Usb Port
SRP-270 4-2-2 Via USB Port 1) Double-click the Windows Driver installation file (SRP-270_Vx.x.xx.exe). 2) Click the “Next” button. 3) Click the “Install” button. - 17 - Rev. 2.03... - Page 18 SRP-270 4) Select USB and click the ”Next” button. 5) When the following message box appears, click the “Yes” button. - 18 - Rev. 2.03...
- Page 19 SRP-270 6) Click the ”OK” button. 7) Turn on the printer. 8) The Windows Driver is automatically installed. 9) The USB Port setting can be confirmed in the Windows Driver properties. - 19 - Rev. 2.03...
- Page 20 SRP-270 10) Click the “Print Test Page” button and check printing status. - 20 - Rev. 2.03...
-
Page 21: Installing On Windows Xp/2003 Server
SRP-270 4-3 Installing on Windows XP/2003 Server 4-3-1 Via Serial Port or Parallel 1) Double-click the Windows Driver installation file (SRP-270_Vx.x.xx.exe). 2) Click the “Next” button. 3) Click the “Install” button. - 21 - Rev. 2.03... - Page 22 SRP-270 4) Select the COM or Parallel port to be used and click the “Next” button. 5) When the following message box appears, click the “Continue Anyway” button. - 22 - Rev. 2.03...
- Page 23 SRP-270 6) Clicking the ”Yes” button will reboot the PC. 7) Open the printer properties window in the Windows OS. 8) Click the “Port Settings” button in the ”Ports” tab. - 23 - Rev. 2.03...
- Page 24 SRP-270 9) Match the communication settings to those of the printer. (The communication settings of the printer can be performed by conducting a self-test.) 10) Click the “Print Test Page” button and check printing status. - 24 - Rev. 2.03...
-
Page 25: Via Usb Port
SRP-270 4-3-2 Via USB Port 1) Double-click the Windows Driver installation file (SRP-270_Vx.x.xx.exe). 2) Click the “Next” button. 3) Click the “Install” button. - 25 - Rev. 2.03... - Page 26 SRP-270 4) Select USB and click the ”Next” button. 5) Click the ”OK” button. 6) Turn on the printer. - 26 - Rev. 2.03...
- Page 27 SRP-270 7) When the New Hardware Wizard appears for the installation of the Windows Driver, select the option as shown below and click the “Next” button. 8) Click the “Next” button. - 27 - Rev. 2.03...
- Page 28 SRP-270 9) Click the “Next” button. 10) Click the “Next” button. - 28 - Rev. 2.03...
- Page 29 SRP-270 11) Click the “Continue Anyway” button. - 29 - Rev. 2.03...
- Page 30 SRP-270 12) Click the “Finish” button. 13) The USB Port setting can be confirmed in the Windows Driver properties. - 30 - Rev. 2.03...
- Page 31 SRP-270 14) Click the “Print Test Page” button and check printing status. - 31 - Rev. 2.03...
-
Page 32: Installing On Windows Vista
SRP-270 4-4 Installing on Windows VISTA 4-4-1 Via Serial Port or Parallel 1) Double-click the Windows Driver installation file (SRP-270_Vx.x.xx.exe). 2) Click the “Next” button. 3) Click the “Install” button. - 32 - Rev. 2.03... - Page 33 SRP-270 4) Select the COM or Parallel port to be used and click the “Next” button. 5) When the following message box appears, click the “Continue Anyway” button. - 33 - Rev. 2.03...
- Page 34 SRP-270 6) Clicking the ”Yes” button will reboot the PC. 7) Open the printer properties window in the Windows OS. 8) Click the “Port Settings” button in the ”Ports” tab. - 34 - Rev. 2.03...
- Page 35 SRP-270 9) Match the communication settings to those of the printer. (The communication settings of the printer can be performed by conducting a self-test.) 10) Click the “Print Test Page” button and check printing status. - 35 - Rev. 2.03...
-
Page 36: Via Usb Port
SRP-270 4-4-2 Via USB Port 1) Double-click the Windows Driver installation file (SRP-270_Vx.x.xx.exe). 2) Click the “Next” button. 3) Click the “Install” button. - 36 - Rev. 2.03... - Page 37 SRP-270 4) Select USB and click the ”Next” button. 5) Click the ”OK” button. 6) Turn on the printer. - 37 - Rev. 2.03...
- Page 38 SRP-270 7) Click the “Continue Anyway” button. - 38 - Rev. 2.03...
- Page 39 SRP-270 8) The USB Port setting can be confirmed in the Windows Driver properties. 9) Click the “Print Test Page” button and check printing status. - 39 - Rev. 2.03...
-
Page 40: Detailed Windows Driver Settings
SRP-270 5. Detailed Windows Driver Settings The following functions can be set in detail after the Windows Driver installation is complete. 5-1 Paper Supply Method The printer structure is such that the print head, which carries out printing, and the cutter, which cuts the printing paper, are separated. - Page 41 SRP-270 2) Click the “Printing Preferences” button in the ”General” tab. The button name varies by Windows OS. Refer to the following. - Windows 95/98/ME: “Properties” - Windows NT4.0: “Document Defaults” - Windows 2000/XP/2003 Server: “Printing Preferences” - Windows WEPOS/VISTA: “Printing Preferences”...
-
Page 42: Paper Size
SRP-270 5-2 Paper Size The paper sizes available in the Windows Driver are as follows. - 58 × 297 mm [270] - 58 × 3276 mm [270] - 76 × 297 mm [270] - 76 × 3276 mm [270] Detailed setting can be done as follows. -
Page 43: Additional Commands
SRP-270 5-3 Additional Commands The Windows Driver serves to receive the content for print from an application and send it to the printer. The Additional Commands function allows for the addition of desired commands at the beginning or end of the print content sent to the printer. - Page 44 SRP-270 3) If the user wishes to open Cash Drawer 1 prior to printing, enter “\x1B\x70\x00\x19\xff” in the ”BeginDoc” space and click the “OK” button. 4) If the user wishes to open Cash Drawer 1 at the end of printing, enter “\x1B\x70\x00\x19\xff”...
-
Page 45: Windows Driver Specifications
SRP-270 6. Windows Driver Specifications 6-1 Fonts The Windows Driver of the printer supports the fonts listed below. Printing is done at faster speed when using the fonts below as opposed to the Windows fonts of the OS. Printer Fonts... -
Page 46: Special Functions
SRP-270 6-2 Special Functions The Windows Driver supports the special functions indicated below. These special functions are available when using the characters after the “FontControl” font is selected. This function is not an ordinary character printing function. Take special care. -
Page 47: Use Of Windows Driver
(SRP-270). Sample programs are saved together if the Windows Driver is installed. Take note. 7-1-1 Windows Driver Selection The following code is an example of the selection of the “BIXOLON SRP-270” Windows Driver. For Each prnPrinter In Printers If prnPrinter.DeviceName = “BIXOLON SRP-270” Then... -
Page 48: Test Printing
SRP-270 7-1-2 Test Printing The following code is an example of the printing of Arial Test via the Windows font, and FontA1x1Test via the printer font. ‘Print in Windows font Printer.FontSize = 9 Printer.FontName = “Arial” Printer.Print “Arial Test” ‘Print in printer font Printer.FontSize = 9... -
Page 49: Use Of Wordpad
After running Wordpad and setting the following conditions, conduct a test. - Select Printer After selecting “Print” from the “File” tab, select the printer (BIXOLON SRP-270). - Select Paper Size, Orientation, and Margins After selecting “Page Settings” from the “File” tab, select the paper size, orientation, and margins.
Need help?
Do you have a question about the SRP-270 and is the answer not in the manual?
Questions and answers