Table of Contents
Advertisement
Quick Links
Advertisement
Table of Contents

Subscribe to Our Youtube Channel
Related Manuals for Whistler D26RS

Summary of Contents for Whistler D26RS
- Page 1 D26RS User Guide DASH CAM AUTOMOTIVE DIGITAL VIDEO RECORDER...
-
Page 2: Table Of Contents
TABLE OF CONTENT What's Included ............3 Welcome ..............3 Product Introduction ..........4 Feature Descriptions ...........5-6 Dash Cam Installation .........7-8 Operations ............9-14 Device Functions ..........15-20 Troubleshooting ............ 21 Specifications ...........22-23 Precautions ............24 Menu Options ..........25-26 Warranty ............27-30... -
Page 3: What's Included
USER ADHESIVE GUIDE WELCOME Thank you for choosing a Whistler product. We are dedicated to providing products that represent both quality and value. Please read the user guide carefully before using this product. If you have additional questions, please visit the FAQ page on our website at www.whistlergroup.com... -
Page 4: Product Introduction
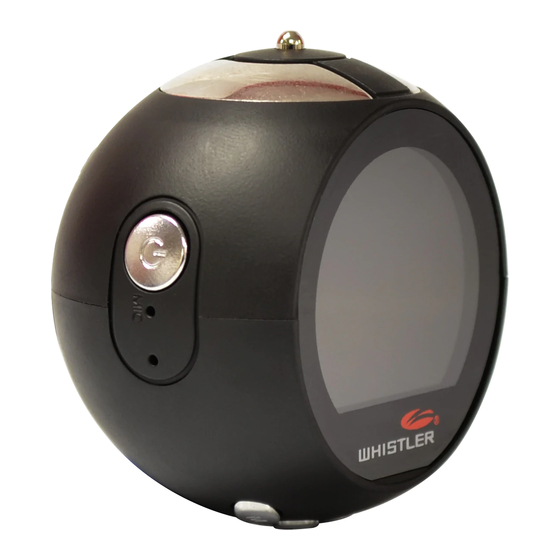
PRODUCT INTRODUCTION 4 5 6 7 Power Mount connector Microphone Monitor LED indicator Reset Menu MicroSD slot USB port Down USB for charging Magnetic mount... -
Page 5: Feature Descriptions
FEATURE DESCRIPTIONS 1. Power – Press and release to turn on, Press and Hold for 2 seconds to turn off. When not recording, press to switch between Video Record, Capture, and Playback modes. When recording, a quick press locks the current file. Press to exit any selected menu. - Page 6 FEATURE DESCRIPTIONS 7. OK – In Video Record mode, press to start recording; press again to stop. In Capture mode, press to take a picture. In Playback mode, press to select a file, or pause/ un-pause a video. In STBY or REC mode press and hold to capture picture.
-
Page 7: Dash Cam Installation
DASH CAM INSTALLATION 1. Insert microSD card into the DVR. Use a high speed SD card (Class10 or above); capacity should be within 8-64 GB. 2. Peel off the 3M film to expose adhesive and secure magnetic mount on the windshield in a location that does not obstruct your view. - Page 8 DASH CAM INSTALLATION Facing Outward Facing Inward 45º 45º 45º 45º 5º 5º 5º 5º Tilt the unit slightly forward, backwards, clockwise or counterclockwise on its axis up to 5º to center the horizon as viewed on the display. In addition, you can face the camera forward or backward on the mount and rotate up to 45º...
-
Page 9: Operations
OPERATIONS Date & Time Setting 1. Once connected with car charger, the device will power ON and start recording. Press OK button to enter STBY mode. 2. Press the MENU button twice to get to Settings menu. Press down button until you reach Clock Settings. - Page 10 OPERATIONS Video, Capture, Playback Quick Instruction When the unit is placed in STBY, there are 4 modes accessible with a brief press and release of the power button. Movie, Still Capture Video Playback , Still Capture Playback NOTE: REC and Still Capture offer different menu options.
- Page 11 OPERATIONS Movie Mode In this menu you can choose the quality of the video and additional features such as Clip Time, Sound, Exposure, etc. Photo In Video Record mode, press and hold the OK button to take a photo (it will be saved automatically).
- Page 12 OPERATIONS Lock File In REC mode, press Power to protect the current recording. “Lock current file” will appear on screen and a symbol will appear to indicate this file is protected. In Playback mode, select a file, press Menu and select Protect, then Lock Current or Lock All.
- Page 13 OPERATIONS PC Player You can playback recordings on your PC or MAC using any Video Player program that supports MP4.
- Page 14 OPERATIONS Understanding the Display STBY or REC Mode File Time Exposure setting -2 thru +2 Movie resolution FHD or HD SD card installed Motion Detect ON Parking Mode ON Frames per Second Battery Gauge / Charging Status indicator 10. Microphone Status 11.
-
Page 15: Device Functions
DEVICE FUNCTIONS In this menu section you can Movie choose the quality of the video Mode 1920 x 1080 30fps 1080 x 720 30fps Also known as Loop recording, allows saving the recording in separate files every few minutes. For example, if set to 1 minute, 10 minutes of footage will be saved as 10 one-minute Movie Clip... - Page 16 DEVICE FUNCTIONS When an object is moving in front of the camera, REC will start automatically. Recording will stop at end of event (the time selected in event time) or when the object in front of the camera does not move for Motion more than 10 seconds.
- Page 17 DEVICE FUNCTIONS Sound Provides option to record video Record with or without sound. Set exposure of sensor Exposure -2 / -1 / 0 / +1 / +2...
- Page 18 DEVICE FUNCTIONS Configure unit to give Beep Beep confirmation when any button is pressed Select auto shut off period Power Off Never, 1 Min, 5 Min Clock Set Date and Time Settings Select preferred format None Date YYYY MM DD Format MM DD YYYY DD MM YYYY...
- Page 19 DEVICE FUNCTIONS Language See list in Specifications Set refresh rate of Display Flicker 50 Hz / 60 Hz Automatically shut off the screen LCD Power to reduce power consumption. Save Off / 1 Min / 3 Min...
- Page 20 DEVICE FUNCTIONS The DVR will automatically lock the current video if shock G-Sensor exceeds G-Sensor setting. EXAMPLE: (if vehicle is hit.) Off / Low / Medium / High When enabled and camera is turned OFF, unit will monitor vibration Parking and automatically wake to record Monitor a protected file when vibration...
-
Page 21: Troubleshooting
TROUBLESHOOTING Can’t record or Confirm that the micro SD card is of proper class take photo (C10 min.) and has available capacity. If the unit does not recognize the card, remove the SD card and insert it again. If still not recog- Unit doesn’t work nized, the SD card may be damaged or device with my SD Card... -
Page 22: Specifications
SPECIFICATIONS Specifications are subject to change without notice. Processor MSTAR MSC8328 Display 1.2” Movie Format 1920 x 1080 30fps Resolution 1280 x 720 30fps Photo Format Photo 2 Mega Pixels Resolution Lens 120º High Definition 6 Glass Storage MicroSD - C10 Min / 64GB Max Mass Storage Device (MSDC) Function Power... - Page 23 SPECIFICATIONS Frequency 50 Hz / 60 Hz 180 mAh 3.7 V Battery Rechargeable battery Power 700 mA Consumption Microphone/ Built-in Speaker English,Spanish, Chinese simplified Chinese traditional French, German, Italian Language Japanese, Korean Polish, Romanian Russian, Slovak Czech, Ukrainian 1.9 oz (53.8 g) DVR only Weight 2"...
-
Page 24: Precautions
PRECAUTIONS 1. Strictly follow the laws and regulatory acts of the region where the device is used. 2. Do not use the device for illegal purposes. 3. Unit does not use a Touch Screen to control its functions! Do not touch screen with any objects as damage to screen may occur. -
Page 25: Menu Options
MENU OPTIONS Movie Mode: 1920x1080 30fps, 1280x720 30fps Movie Clip Time: Off, 1 Min, 2 Min, 3 Min, 5 Min, 10 Min Movie Off Time: 5 Sec, 30 Sec, 1 Min, 3 Min Motion Detection: Off, On Motion event REC: 5 Sec, 10 Sec, 30 Sec, 1 Min Sound Record: On, Off Exposure: -2, -1, 0, +1, +2 System Settings... - Page 26 MENU OPTIONS G-Sensor: Off, Low, Medium, High Parking Monitor: Off, High, Medium, Low Reset Setup: YES, NO Format SD-Card: YES, NO FW Version: Version: FW Version: Branch: Still Capture Settings Still Image Size: 2M, 1.2M, VGA Still Quality: Super Fine, Fine Exposure: -2, -1, 0, +1, +2 Contrast: -100 thru 0 thru 100 (steps of 10) Playback Options...
-
Page 27: Warranty
All express or implied warranties for this product are limited to one (1) year. Whistler is not liable for damages arising from the use, misuse, or operation of this product including but not limited... - Page 28 Service Under Warranty During the warranty period, defective units will be repaired or replaced (with the same or a comparable model), at Whistler’s option, without charge to the purchaser when returned prepaid, with dated proof of purchase to the address below. Units...
- Page 29 IMPORTANT: To validate that your unit is within the warranty period, make sure you keep a copy of your dated proof of purchase. For warranty verification purposes, a copy of your dated store receipt must accompany any Whistler product sent in for warranty work. Service Out-Of-Warranty Units will be repaired at “out-of-warranty”...
- Page 30 VISA or American Express. Personal checks are not accepted. In the event repairs cannot be covered by the minimum service fee, you will be contacted by a Whistler technical service specialist who will outline options available to you. IMPORTANT: When returning your unit for service, be certain to include a daytime telephone number and an email address (if applicable).
- Page 32 CORPORATE HEADQUARTERS 1716 SW Commerce Dr. Ste. 8 Bentonville, AR 72712 Toll Free (800) 531-0004 TEL (479) 273-6012 www.whistlergroup.com CUSTOMER RETURN CENTER 1412 South 1st St. Rogers, AR 72756 Email: support@whistlergroup.com 01F18 © 2018 The Whistler Group, Inc.
Need help?
Do you have a question about the D26RS and is the answer not in the manual?
Questions and answers